Sarah Cavanagh, Author at QC Makeup Academy - Page 18 of 21 Skip to main content
All Posts By

Sarah Cavanagh

Sarah Cavanagh is a seasoned writer with more than 20 years of experience and a background in English Literature. She has been part of the QC team since 2019, where she manages social media and crafts blog content across multiple schools. When she’s not working, you can find her writing her debut horror/romance novel, Hollowed Ground.

How to Get the Most of Your Online Makeup Training While Socially Distancing

By Education, Your Makeup Career No Comments

Over the past week, the hashtag #FlattenTheCurve has gone viral. In an effort to contain the novel coronavirus COVID-19, people everywhere are being urged to stay at home and limit contact with others.

For those of you studying makeup artistry with an online school, your first thought might be: If I can’t be around other people, how can I get the most out of my education? Don’t I NEED to demonstrate my skills on models for my video assignments?

We have great news, though: just because you’re socially distancing right now, doesn’t mean you can’t still get the most out of your online makeup training and learn how to do makeup properly!

Tips for Maximizing Your Studies While Stuck at Home

1. Review Your Course Materials

For starters, once you’ve received your online makeup course materials, take the time to go through everything. See what awesome makeup products you’ve been given in your kit. Browse through each Unit and its corresponding materials to see how much information each Unit will be teaching.

We’re not saying you need to devote hours to this. After all, you’ll get way more thorough when the time comes that you’re actually working through the course. The goal with this step is for you to get an idea of how much work you can expect to be involved with each Unit, and the course as a whole.

2. Make a Schedule

Maybe recent events have left you at home with a LOT of free time on your hands. Maybe you’re still able to work remotely, have children to take care of, or are otherwise still pretty busy. Either way, you’ll have the best chance to excel at your coursework if you ensure to schedule specific times where you can give it your full attention.

If you’ve already taken the time to go over your course materials, as suggested in Tip #1, then you should already have a good idea of the amount of time you’ll need to devote to each Unit. You can then build on this by asking yourself the following questions:

  • Do you have a goal date for when you’d like to have the entire program completed?
  • With your current schedule and daily responsibilities, how much time do you realistically think you can spend on your schoolwork each week?
  • From there, are you able to reserve a certain amount of time each day for your schoolwork? If not, how many days per week could you devote to your studies?

Once you’ve figured out the answers to these questions, you can create your school schedule. Determine when and how often you can realistically focus on your course. Give yourself deadlines for quizzes and assignments. Set due dates for when you’d like to have a given Unit finished and submitted.

The nice thing about online makeup school is that you can learn how to do makeup entirely at your OWN pace. You can put together a regular routine that allows you to healthily balance your course with the rest of your life and responsibilities.

Remember! You don’t have to spend tons of time on your course!  If you devote only 1-2 hours per week to your studies, you can graduate from most QC courses within 3-6 months. That’s totally doable for most lifestyles!

3. Stick to Your Schedule

One fatal flaw that so many of us are guilty of is having all the right intentions and drive to get something done… only to lose that willpower and start slacking once our game plan has been put into place.

The downside to having so much freedom with online makeup school is that it becomes all too easy to procrastinate and push everything off to the last minute. As a makeup artist, you need to be self-disciplined and organized. This is especially the case if you have dreams of running your own MUA business.

The habits you establish now, as you work on your training and education, will formulate the makeup artist you’ll eventually be in the working world. You don’t want to give yourself any disadvantages by creating bad habits from the get-go!

Let us be clear: we totally understand that life doesn’t always go as planned. Things can get crazy and unpredictable sometimes. There may be instances where you aren’t able to abide by your schedule. Maybe sometimes, you’ll do more schoolwork in a given week. Maybe other times, you’ll do less.

That’s okay! So long as you keep yourself focused and start fresh the next day, we know you’ll be just fine!

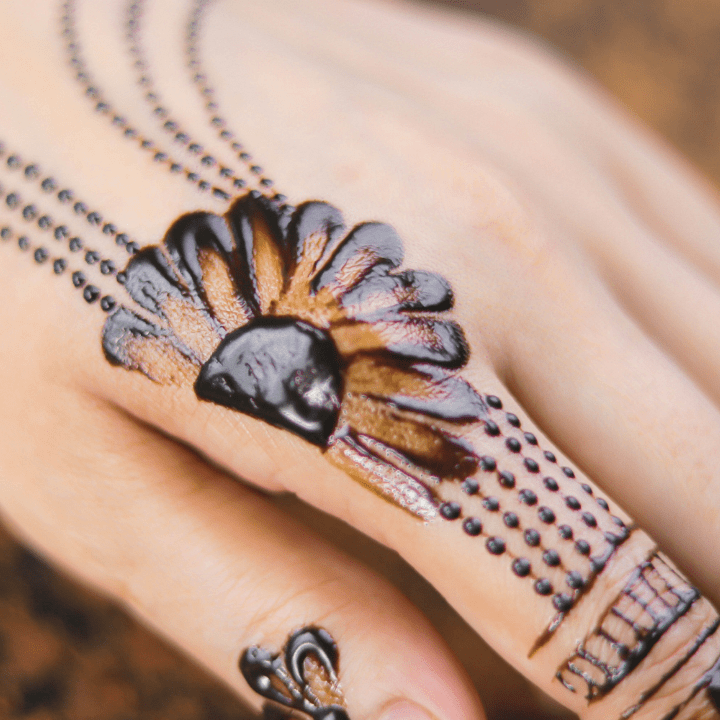
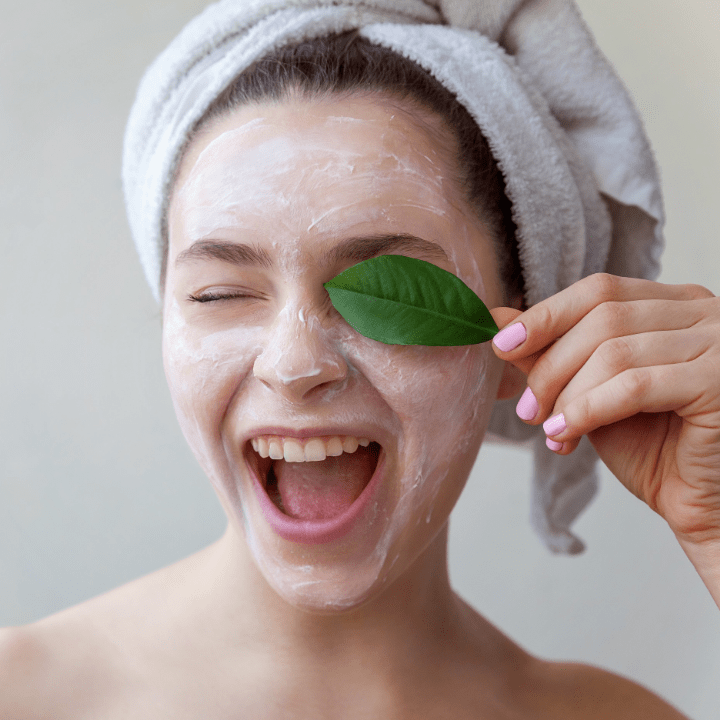
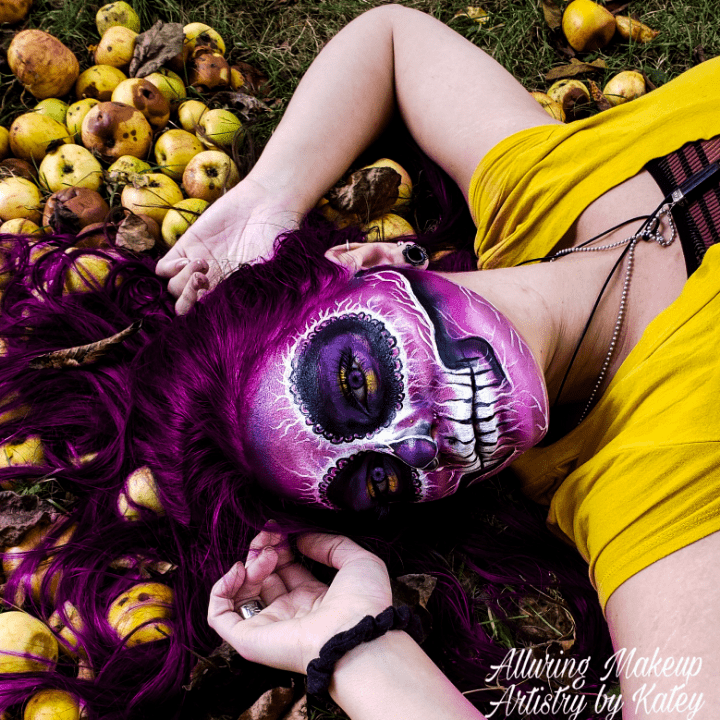
4. Practice on Yourself

Yes, it’s normally encouraged that you practice your makeup skills as much as possible on someone else. This is because, as a professional makeup artist, you need to learn how to do makeup on different skin types, tones, ages, etc.

You need to gain experience working with different gender, skin conditions, and the like. If you only ever practice on yourself, you’re only getting good at putting makeup on ONE face.

Here’s the thing: right now, it isn’t exactly safe to be coming into close contact with others. For their safety, as well as your own, you definitely don’t want to be putting your hands all over other peoples’ faces.

But that doesn’t have to be as damning to your makeup education as you may think it is! It’s important to remember that while things are a little upside down in the world right now, we’re going to make it through this.

These hard times are temporary, and the time will eventually come where you’ll be able to practice as much as you want on other people.

In the meantime, you still CAN learn how to do makeup by practising solely on yourself. On top of practicing the looks and techniques being taught in your course, don’t be afraid to get creative! Play around with your products and try out as many looks as you can think of on your face.

Hey, you’re in the comfort of your own home – use it to your advantage!

5. Find Additional Ways to Get Inspired

Don’t forget either: in addition to practicing your application skills on yourself, you’re also learning a lot of other makeup essentials from your tutor. Your textbooks and course videos will educate you in things such as makeup theory and various techniques. Not only will you be reading about them; you’ll also get to also see them in action.

This lays down the fundamental groundwork that ALL makeup artists need to know if they want to not only learn how to do makeup, but do so at a professional level.

On top of this, you can soak up all sorts of wonderful, educational information through social media and other media content! Watch YouTube tutorials, browse Pinterest and Instagram. Curl up on the couch and check out the show, “Glow Up”, on Netflix. The Internet opens up a whole other world of possibilities for you to learn and get inspired!

Something else you can do is take a notebook and a pen, and brainstorm all the things you want to accomplish in your makeup career. Here are just a few questions you can consider:

  • Do I want to start my own freelance makeup business, or work in a salon?
  • If I want to start my own business, what could I potentially name it?
  • What types of makeup artistry do I want to learn (either currently, or down the road)?
  • What sort of marketing could I do?
  • Do I want to have a unique niche? If so, what could that be?
  • Do I gravitate more towards certain areas of makeup artistry (e.g. bridal makeup, editorial makeup, SFX makeup, airbrush makeup, etc.), or do I want to focus equally on as many areas as I can?
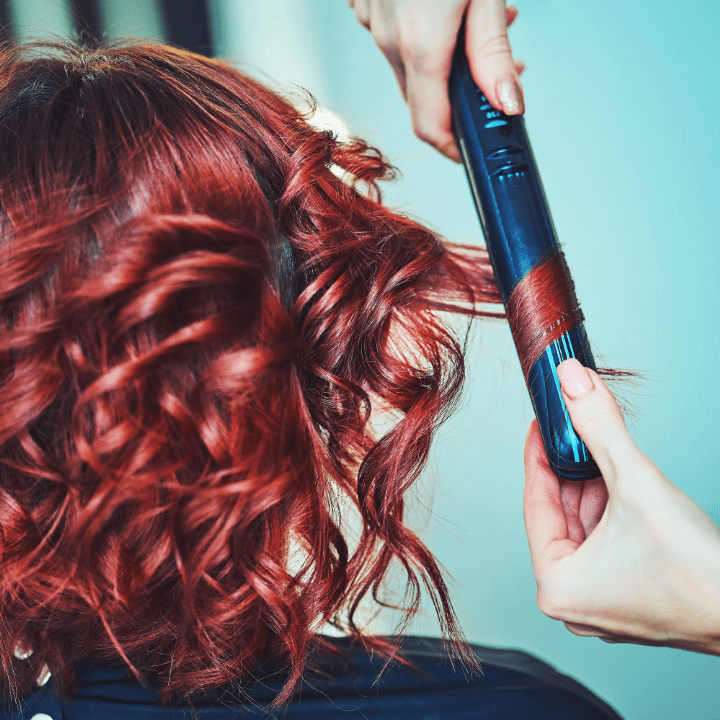
  • Are there any other services – such as hair styling, skincare consulting, or fashion consulting – that I’d want to add to my business, in addition to makeup?

Trust us: even just ONE of these questions alone could give you hours of ideas!

More than anything, what we want you to take away from this is that just because you’re being advised to socially distance yourself and stay home for the time being, it doesn’t mean that your makeup studies have to suffer in any way! By knowing where and how to focus your energy and thirst for knowledge, you can still learn how to do makeup AND make the most out of your course!

Want to make the most of your time at home? Enroll today in QC’s leading Master Makeup Artistry Course, and earn your certification as a professional MUA!

Why a Business Class is Essential to Your Makeup Career [video]

By Education, From the Experts, Your Makeup Career No Comments

Devyn Gregorio is a QC Makeup Academy Student Ambassador. You can find her on her YouTube Channel, DevDevGregs, where she makes beauty videos. Today, Devyn draws on her personal experience as a QC Graduate to share why taking the optional Business Unit is something all aspiring makeup artists REALLY need to do, as part of their makeup artist certification!

Watch her video below!

Let’s Recap

Devyn is a graduate of QC’s leading Master Makeup Artistry course, taught by professional celebrity MUA, Nathan Johnson. Within the program, there’s an optional unit at the end (Unit G) devoted entirely to the business side of the industry.

While students aren’t required to complete this business unit as part of their makeup artist certification, it IS strongly recommended. Business knowledge is particularly critical if you have dreams of starting your own freelance career and makeup business in the future!

Let’s take a look at what Devyn’s experience was with QC’s business unit, and why she – as a professional makeup artist – urges you to take full advantage of it!

Breaking Down the Master Makeup Artistry Course

Devyn begins by giving an overview of how QC’s Master Makeup Artistry Course works. There are 6 units within the course (A through F). Not only do these units break down the fundamental basics of makeup artistry, they also teach you makeup theory, core practices, various techniques, and the different types of careers you can get with your makeup artist certification.

There are also business components included within the course. While it’s technically optional (students can choose to skip past it), the materials and insight they provide you will only better prepare you for a career as a professional MUA. You can never go wrong with learning more areas of the industry!

Breaking Down the Business Units

Next, Devyn takes a look at each individual business unit offered in the Master Makeup Artistry Course. She also shares her expertise on why each one is useful to those wanting to become a professional makeup artist.

Business Unit #1

This unit is called “Starting Your Own Business”. Devyn describes it as a “crash course” of all the general information you need when wanting to start your own business – whether that’s in the makeup field, or ANY field!

Here, you learn all the different types of businesses you can start, such as:

  • A corporation
  • An LLC
  • Becoming a sole proprietor
  • Starting a partnership
  • And much more!

Even if you don’t want to start your own business, and are aiming to contract yourself out as a freelance MUA, Devyn explains how it’s still just as beneficial to understand the business side of things. After all, there’s more than likely going to be some sort of contract or negotiation involved when conducting business! Otherwise, for example, how can you ensure that you’ll get paid correctly or as agreed upon?

How Devyn Benefited From This Business Unit

She reflects on her experience with this unit as being very helpful in arming her with a general understanding of becoming an entrepreneur. In addition, this unit also delves into important topics such as:

  • Taxes
  • Whether or not your business needs insurance
  • If you’ll need an accountant, a bookkeeper, etc.
  • How to write and structure a business plan
  • How to write a cover letter
  • Creating a balance sheet and managing your finances
  • And more!

These are all good, basic principles of general business practice. As an aspiring MUA, having this level of understanding before going out into the working world will increase your chances of success. While this may not always be the most fun part of the job, the rewards it will bring you will definitely be something to smile about!

“This is the kind of stuff that nobody teaches to you!” Devyn says. We couldn’t agree more! While good makeup schools will ensure to provide this type of education, unfortunately, there are also many schools that don’t.

The result is that while students may walk away a better makeup artist, they lack the necessary tools and skills needed to start up their own business. Not knowing this can really hurt your career opportunities in the future!

Business Unit #2

The second business unit is called, “Marketing and Promotion”. For Devyn, this unit was particularly fun! It takes you through the 4 P’s of Marketing, which are:

  1. Product – what the product or service is that you want to sell to clients.
  2. Pricing – figuring out what to charge for your services.
  3. Place – where and how you intend to sell your services.
  4. Promotion – how you plan to get your name out there to clients.

As you’re marketing a service or product, these four areas will serve as your to-do checklist! Each step will help walk you through the process of properly and effectively marketing your product/services.

Next, Devyn examines each of the 4 P’s in more detail: what they all mean, how they directly relate to being a makeup artist, and how utilizing each one will help you successfully establish your makeup business!

Business Unit #3

Devyn then moves onto the third business section in the course, which is “Working with Clients”.  However, this unit doesn’t just focus on clients! You are also taught how to work with other partners, suppliers, and business associates within the industry!

Here, Devyn brings up a really excellent point: in order for your makeup business to be successful, you’re going to need to interact with people… and know how to do that well!

Indeed, as an MUA, you’re going to require some pretty strong people skills. Your job, after all, is an industry service profession. You need to be someone who’s easy to work with. More importantly, no client is going to want to book someone who makes them feel uncomfortable!

This is why knowing how to present yourself in a professional manner is so important. This business unit not only covers this topic, but also:

  • How to stay organized
  • How to manage your book of business

Devyn also touches on the sales training offered in this unit! For those with little to no business knowledge, this section is going to be critical. Some of the different areas of sales training you receive in this Unit involves:

  • How to overcome objections
  • How to tell the difference between a warm and cold lead
  • How to warm up a cold lead

Some of you may read the above and have NO idea what these terms mean. That’s okay! But it also goes to show the type of crucial knowledge this business unit will teach you. Having any type of sales training is going to do leaps and bounds for your MUA career – so why not take advantage of it when it’s being offered to you?

How Devyn benefitted from this Business Unit

Not only did she benefit from all the great information already mentioned above, but the various templates offered in this unit particularly helped her. In fact, she admits that she still uses many of them in her business practices to this day (particularly with bridal clients)!

Some of the templates you can expect to see are:

  • Sample invoices
  • Sample contracts
  • Sample e-mail templates
  • And so much more!

Having these templates at your disposal will not only help you learn – it also guarantees that you will look more professional to your clients and associates! The great thing about these templates that are a part of your course is that you can save them forever, and refer back to them whenever needed.

Business Unit #4

The final section is called “Special Topics”. It focuses primarily on the different things you should think about and consider when starting your own business and breaking into the makeup artistry industry. One example of this is the importance of networking!

How will you go about meeting other MUAs in the industry? What about models, photographer, hair stylists, and other vendors/suppliers? What if you want to be represented by an agency? More importantly, how do you plan to connect with clients?

With limited business knowledge, this challenge can be a daunting one. But with the proper training and understanding of the business side of the industry, it doesn’t have to be!

Devyn also points out how, when first starting out, you may need to get creative about where and how you find work, in order to build your portfolio. This final business unit also covers this, and provides really awesome tips!

Devyn’s final thoughts

Like many of you, Devyn admits that she, too, is still working on building her business each and every day. Whether that’s furthering her education, making more connections in the industry, growing her YouTube channel, or doing whatever she possibly can to improve herself as an MUA… Devyn knows the time and hard work it takes to be successful in the world of makeup artistry!

Like you, she intends to give it her all! The important thing is that you put in the effort to do everything you possibly can to be the best you can be. As a makeup artist, having a solid understanding of the business side of things is one of the greatest ways you can do that.

Unsure which online makeup school will give you the best chance at being successful in the industry? Find out why QC Makeup Academy can best help you earn your makeup artist certification and find work in the real world!

Get Festive with These 4 Wearable St. Patrick’s Day Looks

By Makeup Tips and Tricks No Comments

Interested in some fun St. Patrick’s Day makeup looks that are still wearable AND glamorous? We’ve got you covered! Put your makeup artist training to use on more than just your clients – give yourself a well-deserved, festive makeover.

Don’t have professional makeup artist training? Don’t worry, this article is just as much for you, too! While the best way to become an expert MUA is to take courses offered by accredited makeup schools, you can still have some serious fun with these looks!

Who knows? Maybe you’ll get inspired to take the next step and make a career out of your passion!

1. Smoky green eyeshadow

The best thing about this option is that there are SO many ways you can play with it. You could go for a a nice, emerald hue over your lid, blended out from the crease with a dark black. In fact, the color(s) you choose to add with this green smoky eye are endless! Violets, grays, and browns are also killer accent colors. But there’s plenty of room to get creative, so feel free to play with other colors, too!

Pro tip: If you’re trying to go for a more St. Patrick’s Day-inspired look, a great color you can pair with the green is gold. Gold liquid eyeliner would look absolutely fierce on a green smoky eye!

But maybe you want green to be front and center; the star of the show. This can also be just as wearable, if you’re wanting an everyday look. Playing with different green pigments can create a beautiful, harmonious look – without being too much.

If you want to be a little extra with it? Add some glitter to your lids, and finish off the look with a killer set of falsies! Smoky green eye makeup can be as drastic or as subtle as you want it to be. That’s what’s so awesome about it! It’s flexible; able to match whatever vibe you’re trying to achieve.

For a more wearable look, a seriously gorgeous tutorial that we recommend is Manny Mua’s olive green smoky eye. If you want something that focuses more heavily on an all-green result, this tutorial by cflowermakeup may be more up your alley!

2. Green eyeliner

You can incorporate green into your eye makeup without going crazy with the eyeshadow. Green eyeliner is another, more subtle way to have a festive, wearable St. Patrick’s Day look that still offers some POP!

There’s also plenty of room to play around with the look you want. If that’s something simple, it can be as easy as a liquid green cat eye with a natural set of falsies (or even just mascara). If you want to be a little more dramatic, you can also first use black liner and then outline the liner on the upper eyelids with a green liner.

Another possibility is working the green into your lower lash line. A nice, natural lid on top (with a subtle peach or light brown eyeshadow blended into the crease), topped with dark lashes and a soft, shimmery green along the bottom lash line can make for a killer look!

A great tutorial that demonstrates this type of look can be found here, on Indigo Moon Artists’s YouTube channel.

3. Green mascara

Most of us tend to stick with the classic brown and black mascaras. But a whole new world can be opened up to you once you start playing around with different colors! Shiseido, for example, offers an emerald green mascara that will leave you absolutely shook.

Of course, adding a green mascara to green eye makeup will take your St. Patrick’s Day look to the next level. But you can even just frame your eyes by applying green mascara to your lashes, and then call it a day! It wouldn’t be competing with any other makeup, so it’d still be the focus. But it would also be subtle enough to not be overpowering.

Green mascara can be a quick and effortless way to have a wearable look that still gives a nod the spirit of St. Patrick’s Day.

4. Green lips

If you REALLY want to embody the spirit of St. Patrick’s Day, try pairing a bold green lip with a golden-based eye look. The eye makeup here can be as simple as a gold eyeliner or cat-eye. It can also become bolder with a regal, golden smoky eye.

But green lips can also be the focus of the whole look, too! You can strike a quirky balance of natural-meets-festive if you keep your eye makeup simple. Even just going over your lashes with a few coats of mascara and leaving it at that can look very pretty in contrast to a bold green lip.

You can make the look as drastic as you want, though. When in doubt, adding glitter is always a sure-fire solution!

Here is a stunning every-day green lip look by Evelina Forsell. If you’re planning to hit up a St. Patrick’s Day party and your motto is “go big or go home”, then maybe Terrika Jahniece’s tutorial will be more to your liking!

The best way to hone your makeup skills is…

Like we said before: proper makeup artist training from legit makeup schools! There may be some of you reading this who love the ideas these recommendations are giving you, but have no idea how to actually execute them.

Yes, practicing regularly is definitely going to help you improve. There’s no reason why you can’t get started on that right away!

But if you love makeup and are considering making a career out of it, your single greatest option is to learn the foundation of makeup from a trained, working professional. They’ll be able to teach you not just how to apply makeup, but also makeup theory, which equally as important.

Then you’ll be able to look at tips like the ones above, and know exactly how to flawlessly bring them to life on both yourself and clients. There’s no better time to start than now!

Use the luck of the Irish to your full advantage, and start your path to become a certified MUA today!

Get the most out of your makeup training by enrolling in QC’s leading Master Makeup Artistry course, taught by experienced celebrity MUA, Nathan Johnson!

woman sick in bed

How to Keep Yourself and Your Clients Safe During the Coronavirus Outbreak

By Your Makeup Career No Comments

It seems like everywhere we turn these days, there’s talk of the novel coronavirus COVID-19. While, of course, it is a very serious matter, there are some positives as of late. For starters, it’s been confirmed that over half of those diagnosed globally have since recovered. This is great news!

Moreover, while the coronavirus is still running rampant, it doesn’t have to be the end of service industry professions, such as that of a makeup artist. “But wait,” you might be thinking, “doesn’t my whole job involve having to touch someone else’s face? In a time where people are being warned not to even touch their own faces, how can that NOT hurt my business?”

Yes, there’s a heightened risk factor that comes with your particular career. A big part of your job is to touch your client’s face. That can’t exactly be avoided. Nor is it realistic for her to wear a face mask while you’re trying to do your job.

But you still CAN do your job! The important thing to understand is that there are still lots of safety precautions that can be taken. These precautions will not only allow you to keep doing your job, but also help keep both yourself and your clients safe from catching any unwanted germs!

So what are these safety measures? Let’s take a look!

1. Wash your hands.

As a professional MUA (and even just a regular, clean person), we hope this is something you’ve already been doing up until this point! But in the midst of the coronavirus outbreak, it’s more important than ever. In general, you should make a point to wash your hands at any of the following times:

  • Before and after you eat, or simply handle food
  • After using the bathroom
  • After handling an animal
  • After holding or shaking someone’s hand
  • After touching any heavily used surface like doorknobs, railings, elevator buttons, etc.

There are plenty more instances where you should ensure to wash your hands, and a more complete list can be found here. But you’re a makeup artist, so there are also specific times when washing your hands is also critical. Some examples would be:

  • Before and after setting up your equipment at a given job (especially if you’re working on location)
  • Before and after handling makeup products
  • Before and after working with a client and touching her face

When washing your hands, ensure to use soap and warm water. If you’re unsure how long you should be washing your hands, an easy trick is to hum (or sing, if you’d prefer) the Happy Birthday song from start to finish, twice. If you want some catchier tunes to help time you, here are some other suggestions!

If you’re in a place that doesn’t have easy access to soap and water, try to always keep some hand sanitizer on you. That can at least help sterilize things until you are able to wash them properly.

Lastly, but just as importantly: make sure that as much as possible, you don’t touch your own face!

2. Always keep your makeup products clean.

This is a big one, and again, something you should already make a habit of doing. Dirty makeup products are a big carrier of germs and other unwanted bacteria. Using contaminated products on a client would make it only too easy for them to catch some nasty bug and wind up sick.

If you want to know the horrifying truth about how easily makeup products can be bathing in bacteria, check out this previous article on the topic. (Just be warned: while informative, it’s also a bit graphic.)

Plus, you’re the professional! Your clients are counting on you to always use sanitized products on their skin. You always need to ensure that you properly and regularly clean your products. Never let anyone else use your makeup products, and when working on a client, never double dip any disposable applicators.

3. Reschedule if you’re sick.

Even if you just have a small cough or slightly runny nose, contact your client and ask to postpone the appointment to another date. It’s not worth the risk! While it very well may be nothing, you also can’t guarantee that. The coronavirus is extremely contagious even if you have very mild symptoms.

The last thing you want to do is show up anyways, put your hands all over your client’s face, and then pass along a potentially serious disease. From a business perspective, that’s a bad move. From a human perspective, that’s just inconsiderate.

Chances are, your clients will be more than understanding, given the circumstances. Yes, there may be cases where rescheduling isn’t possible, and the only option may be the cancel altogether. We know you and your client don’t want that. But at the end of the day, your health and the safety of your client comes first!

4. Encourage your clients to reschedule if they’re sick.

Granted, they’re not the ones touching your face or makeup products. But you can catch a lot of nasty bugs just by being within 6 feet of infected individuals. If you catch something from a client, you could then become potentially contagious yourself before you even show symptoms, and wind up getting other clients sick. Not to mention that your own health would be at risk!

Check your availability and offer sick clients a couple slots where you’d be free to reschedule. Chances are, she’ll be willing to do so.

That being said, some clients may not be able to reschedule. They may push to keep the appointment. Know that you do have the right to refuse service. You’re not obligated to work with a sick client. But should you choose to keep the appointment, make sure you take the proper precautions for your OWN health.

For starters, wear a face mask. While it can’t completely protect you from catching someone else’s germs, it could at least help your chances. Also, like we discussed above, wash your hands frequently. If the client came to you, make sure to disinfect the studio once she’s left.

Want to read a working MUA’s experience with how the coronavirus has affected her business? Check that out here!

What else can you do if business slows down?

Realistically, there is a chance that while the coronavirus is a hot topic, many people may not want to book makeup appointments for the time being. So what other things can you do with your business, or even just the down time, to keep yourself afloat?

There are a lot more options than you may realize! If you offer other types of beauty services as part of your business, you can use this time to focus more on those.

Consulting services, such as for skincare, fashion, and even hair styling, won’t necessarily require you to touch your client’s face. Makeup lessons would also be a great alternative for those wanting to hone their own skills, at the guidance of a professional.

For clients wanting to avoid contact with others, these are all services they could still be open to.

Start your own beauty blog!

If you have extra time on your hands, why not build on your online presence? Many MUAs also run their own beauty blogs (or vlogs), to get their name out to a wider, global audience. This could be a perfect project for you to take on!

If you’re unsure how to go about starting your own beauty blog, we’ve got an excellent How-To article for you to check out here!

Educate yourself!

If business is a little slow, another excellent idea is to use this time to get some additional training and build on your current certifications! As a makeup artist, you can never be too educated. There’s always more for you to learn! So research into different makeup schools and sign up for a class or two.

Sign up for free webinars online, and watch tutorials to keep your skills up. You can expand on the skill set you already have, and even branch out into new areas you don’t know already.

When your business starts picking back up, you’ll be armed with an even better resume to impress clients and get even more bookings!

Just because the coronavirus is a thing, doesn’t mean your makeup business or livelihood needs to suffer. Just make sure you take all the necessary safety measures, and you AND your clients will have the best chances possible at staying safe!

And should your bookings take a bit of a temporary hit, there are plenty of other ways for you to still advance your talents and your business. You’ve got this!

If you aren’t already a certified makeup artist, why not use this time to check this off your bucket list? Enroll in QC’s leading Master Makeup Artistry course, and take your resume to the next level!

3 Amazing Makeup Portfolios and Websites To Look Up To

By Your Makeup Career No Comments

As an up-and-coming MUA, your makeup portfolio and overall business website will be two of the most important aspects of your business. Together, they make your online resume! They will publicly showcase your work, your services, your overall business, and most importantly: YOU!

Your makeup portfolio should live on your business website. Importantly, this website can’t be hastily thrown together! It will require lots of time and effort. You’ll need to build everything from the ground up, make it the best it can look, and then regularly fine-tune up whenever possible. It’s not a one-and-done process, but an ongoing one. So we hope you’re willing to put in the work!

Your website and makeup portfolio can be the deciding factors in whether a potential client chooses to work with you or not. After all, they set the standard and make the first impression.

So if you’re unsure about what to do, don’t worry, we’ve got you covered. Keep reading to see 3 awesome examples of makeup portfolios, and the awesome websites they live on!

Pin-up retro girl with curly hair winking, smiling and showing OK sign . Presenting your product. Expressive facial expressions

What should a good makeup website include?

You not only want your website to look good and showcase your brand, you want it to also include as much business information as possible for any interested customer. If you think the common client will want to know it, put it in there! It’ll look better if the information is already available to her, without her having to ask for it first.

Things you should include on your business’s website are:

  • Some info about you and your company. You want your clients to get to know you a bit, so a rapport can be established from the get-go.
  • List of your services.
  • Your current prices for your services. This information can be combined with the list of services, if desired.
  • Contact information. At the very least, include a phone number and email address for clients to reach you. If you have a physical address for your business, include that as well.
  • Reviews. In the beginning, you may not have any – and that’s okay. But as they start coming in (even from family and friends), include them on your site. Potential clients want some sort of proof that you’ve not only done legitimate work before, but that there’s tangible evidence your work is of good quality.
  • An image portfolio. Most importantly, you NEED high quality images in a well-rounded portfolio that show off your makeup skills. Whenever possible, have the photos professionally done. The floor is yours here to showcase your wide range of talents! Be as diverse as possible; display different skin colors, textures, etc. Show clients of different ages, sexes, and ethnicities.
    • It’s always a good idea to show clients that you can do an abundance of different makeup looks and styles. Here are 5 looks every MUA should try to have in their makeup portfolio! If you have a specific, preferred niche (such as bridal makeup), then try to spice up the different kinds of looks you do within this category. Throw in some focused application shots, like of the eyes or lips!

Now that we have the basics covered, let’s check out some examples that demonstrate the above flawlessly!

QC graduate and professional MUA, Katey Stevens, is an absolutely rock-star! Not only are her makeup skills killer, and her freelance business successful – her online presence is something that every aspiring makeup artist should look up to.

On top of posting great content regularly on her social media pages, Katey’s business website and makeup portfolio are totally solid. The homepage of her site checks off all of the boxes we’ve listed above, but there’s also a navigation menu that allows you to go directly to each specific section, as desired.

Her Contact Us page not only includes all necessary details to reach her, but even embeds a map to her business location. She couldn’t possibly be making things any more convenient for her clients if she tried!

Two highlights of her makeup website are her Services pages, and her FAQs section. Firstly, Katey has worked hard to build on her skill set and offer MANY different services for her clients. In addition to her partial and full makeup services, she also offers (for example) tattoo coverage, groom touch-ups, Special FX makeup, photo shoots, makeup lessons, etc. Each and every service is listed all on one neat page, with rates clearly displayed, too.

Katey’s also clearly taken the time to research frequently asked questions, as well as take into account inquiries she personally receives often from her clients. She’s added an FAQs page to her makeup site so that potential clients can have these questions answered – before they even think to ask them! This is an awesome business decision, and make for a really strong online presence!

Created by QC Student Ambassador and certified makeup artist, Gabrielle Rivera, this makeup website and portfolio is another exceptional example we recommend taking a look at. Notice how Gabrielle’s business site maintains the same header image, regardless of which page you go to. Similarly, there’s a footer image throughout her whole website, displaying her contact info and links to social media.

There’s also a consistency in her font choices and color schemes. It all adds together to form a brand image, and give you a vibe of what Gabrielle’s about. This is an awesome example of incorporating your brand into your portfolio!

Like with Katey’s makeup site, Gabrielle’s website also ensures that all relevant and needed information about herself, her business, her services, her rates, and her reviews are all included in a clear and concise way.

Gabrielle also has a broad portfolio to showcase her past (and best) work, which is neatly categorized into 4 different areas:

  1. Bridal
  2. Special Occasion
  3. Modern Art & Photography, and
  4. Special FX & Body Painting

If I were a client looking for a skilled makeup artist, I’d be instantly impressed at how flexible her skills are. It’s clear that Gabrielle knows many different makeup techniques and applications. The professional quality of her photos lets me see all sorts of sides to her.

If I were a potential customer, Gabrielle’s portfolio would definitely assure me that she would be a reliable and professional MUA to book with!

Two awesome things stand out to me when looking at Gabrielle’s website. Firstly, she has a Book Online feature that allows clients to view Gabrielle’s availability. From there, they can schedule an appointment without needing to deal with any phone calls or emails.

Eliminating this back and forth hassle not only saves all parties time, it caters in favor of the client. This sort of thing doesn’t go unnoticed, trust me!

The other fun thing that Gabrielle’s worked into her makeup site is a live chat option. Should there be clients who can’t find something, or they simply wish to speak to a real person, they’ll benefit from having this option available to them. Gabrielle has really covered all the important aspects in her website!

This Ottawa-based makeup artist stands out to us for many reasons, but the biggest one has to be that she is the PERFECT example of what it means to find your own unique niche and then completely corner that market in the industry.

How does Jacquie do this? No, it’s not because all of her products are cruelty-free (although that’s a bonus for sure). It’s because she’s known for her converted school-bus-turned-beauty-bar.

brand new interior of european beauty salon

Yeah, you heard us. Go to her website and see what we’re talking about. Pretty gorgeous, right?

This definitely makes her stand out from the competition. In a city as big as Ottawa, that’s an impressive thing to accomplish! Not only is the bus a unique factor on its own, it also allows Jacquie and her team to travel directly to clients and rent out their services. Can you think of a more convenient freelance makeup business?

In terms of the way Jacquie’s makeup website looks, it’s hands-down one of the most beautiful examples. It works in all the needed information effortlessly, has a smooth flow from page to page, and showcases her brand to perfection.

Her portfolio is also jam-packed with quality content. It ranges from various images of makeup looks to hair styling. Jacquie’s even branched out into creating her very own makeup, which customers can choose to buy online from her website. Cool!

Note: It’s worth noting that another fantastic thing all 3 examples have in common is that they all outline reservation and cancellation policies directly on their websites. This detail can sometimes be forgotten, but it’s important that you remember to include it when outlining your services on your website!

Want to become even more of an expert at creating and building your portfolio? Enroll in QC’s Portfolio Development workshop today, and WOW your clients with images that clients won’t be able to ignore!

One of the best ways to impress clients is by being professionally certified. Enroll today in QC’s leading Master Makeup Artistry course and earn your certification in as little as 6 months!

The Do’s and Don’ts of Henna – Part 1

By Education, Makeup Tips and Tricks No Comments

Online makeup classes can teach you a LOT more than just your standard makeup practices! As part of QC’s Global Beauty makeup workshop, you’ll explore other cultures and international makeup techniques to expand your skill set. One such practice you’ll become an expert at is the art of Henna.

Here, we’ll take a brief look at what Henna is, and where it comes from. Importantly, you’ll learn a handful of good habits you should adopt when doing Henna, as well as bad habits you need to avoid.

What is Henna?

Henna ‘tattoos’ are made from the dye of the natural henna plant, applied in intricate designs on the skin using a small piping bag and cone. It’s typically made by mixing pure henna powder with a liquid component, such as tea, lemon juice, or water.

Once applied, but before the Henna paste has dried, a mixture of lemon and sugar will also need to be added to it. This will keep it from flaking off too soon. After a few hours, the color settles into the top layers of your skin, leaving a “tattoo” once the paste is removed. The result will usually be brown in color at the beginning, before changing to red pigment, which will eventually fade.

While Henna tattoos can be applied anywhere on the skin, it’s most common seen on a person’s arms, hands, and/or fingers.

Where does it come from?

There are a many different cultural ties to the art of Henna tattoos. Originally, historians claim that it first became popular among those living in warmer climates, thanks to its natural cooling properties on the skin. Due to the beautiful stain it would leave behind, it eventually transformed from a cooling aid and topical treatment, to a beauty practice.

Some examples of where Henna’s historical and cultural roots can be found are:

  • The Pharaohs of ancient Egypt
  • Muslim and Hindu weddings
  • Festivals such as the Diwali, Vat Purnima, Karva Chauth, and Teej monsoon celebrations

Henna tattoos rose in popular throughout North America and Western Europe in the 1990s. Today, they are a global and very common beauty practice. In addition to religious and cultural purposes, Henna is also commonly used today for aesthetic expression.

Henna practices: what to do versus what not to do

As a professional makeup artist, if you wish to incorporate Henna into your business services, there are certain things you’ll need to do in order to be a good Henna tattoo artist. Similarly, there are a number of Henna sins you’ll want to make sure you never commit. Let’s take a deeper look at those…

DO: Thorough research

Just like with the art of makeup, you can’t expect to be good at what you do if you don’t take the time to properly learn about it. But we’re willing to bet you love to learn! So research the practice of Henna; read as much as you can, and absorb everything possible.

Look deeper into its different cultural backgrounds and significance. Find out about its different ingredients, and the suppliers involved. Don’t just focus solely on the pros of Henna tattoos – discover any potential cons to the practice as well.

Approach it from a business standpoint, too. What would be required in order to add it to your existing makeup services? What’s the market like in your area for Henna beauty services? What sort of a wage increase could you realistically hope to see by adding this extra service to your business?

While there will ALWAYS be more for you to learn, your goal should always be to strive at becoming an expert in the field. So research and learn everything you can!

DON’T: Neglect proper schooling

A good makeup school will offer online makeup classes that cover Henna, such as in QC’s Global Beauty workshop. Yes, while many Henna artists don’t obtain any actual education, what’s the honest harm in doing so?

You know you’ll be taught properly, by a trained professional who knows what they’re doing. You’ll receive so many incredible resource materials that will help you not only learn Henna inside and out, but start practicing it in a real-world setting.

Plus, actual education from an accredited makeup school and its online makeup classes will equip you with a physical certificate of completion. While certification isn’t required to practice Henna, having this certificate is guaranteed to look better on your resume and seriously impress clients.

On top of expanding your skill set, it signifies your drive, dedication, and hard work. If you’re looking to outshine your competition, this is the sort of thing that WILL do the trick!

DO: Learn (and then practice) various Henna designs

There are many symbolic designs in the world of Henna artistry; many tied to specific cultures. If you wish to be able to provide this sort of Henna art to clients of different cultures, it could prove worthwhile to do your homework and begin learning the different symbols of different geographical locations.

In North America, however, Henna is more abstract and less tied to symbolic meaning. Geometric shapes – such as dots, lines, triangles, etc. – are most commonly used in repetition to create the designs.

FUN FACT: most Henna is free-hand, meaning that there’s no stencilling involved before the application. You’ll need to become knowledgeable and confident do it on the spot. So it’s critical that you first take the time to PRACTICE designs on your own, before ever attempting them on a client. Start by drawing them out on paper.

If it makes things easier, keep a sketchbook entirely devoted to your different Henna practice designs. The more you work at them, the better and more natural you’ll become.

DON’T: Skip practicing with a Henna cone

Drawing your designs on paper alone isn’t enough practice to make you ready to apply actual Henna on a client. This is because using the Henna piping bag and cone is an entirely different process, requiring a deeper level of skill.

Once you’ve become super comfortable with drawing your Henna designs on paper, maybe you can start by tracing over these designs with Henna. Then you can start attempting to free-hand designs with the Henna (but still on paper). After more practice, you can graduate to the next step by finding friends, family, and parts of your own body to work on.

By breaking up the learning process into these steps, it’ll make for a smoother transition from paper to a paying human canvas.

Think the list ends there? Definitely not! There are plenty more useful do’s and don’ts to consider when it comes to which Henna ingredients you use, how to best apply it, and the sort of aftercare practices you need to ensure you take.

Want to learn all about this? Then stay tuned for Part 2 of this Henna crash course, and in the meantime, keep on practicing!

Want to pair your Henna training with a full-scale makeup course? Enroll today in QC’s leading Master Makeup Artistry course, and get your Global Beauty Workshop at 50% off!

Katey Stevens sugar skull makeup look

Graduate Feature: Katey Stevens

By Graduate Feature No Comments

Tell us a little bit about yourself!

I’m a freelance makeup artist that mainly focuses on collaborating with local photographers and wedding venues. I provide my makeup services for a variety of photoshoot types, such as:

  • Editorial
  • Boudoir
  • Bridal
  • Headshots
  • Prom
  • Special events
  • And any other occasion wherein someone might want to be a little “extra” and done up!

I was born and raised in the beautiful Evergreen State of Washington. I found my passion for makeup as a young child, admiring my Mom getting ready in her bathroom mirror. Outside of makeup, I enjoy spending time with my husband, Cameron, and our two boys, Logan and Jameson.

I’m an avid hiker and enjoy exploring the Cascade Mountains. Also, I love spelunking, riding dirt bikes, quads, gardening, and enjoying good food with good people!

Why did you decide to become a professional makeup artist?

Back when I first met my husband, I found he was/is so ambitious and encouraging. He gave me the confidence boost I needed to believe that I could run my own business and follow my dreams. It’s largely due to his support that I decided to become a full-time MUA!

makeup for photoshoot model

How would you describe your makeup style? What is your favorite makeup style?

I would describe my makeup style as diverse. I view makeup as an art form. I have a variety of interests; from soft glam and bridal, to SFX makeup (involving liquid latex and prosthetics). My favorite makeup style, though, would have to be an evening glam look. Nothing beats a smoky eye or a bold lip!

Tell us a little about your makeup business, Alluring Makeup Artistry. What was the process like in starting your own business?

I visualized the start of my business as a checklist of tasks and goals. I knew I had to start the journey with a makeup academy that could provide me with the tools I needed to get started, and a flexible schedule. I was still working full-time back then, as well as raising two young boys. A flexible makeup school was a must!

I began gaining experience by doing makeup for weddings on the weekends throughout summer. I’d get referred through friends and family, which is how I started getting my name out there. Then I created a makeup-related Instagram page, Facebook Business page, and website. I worked hard to build clientele through social media, local networking groups, and referrals.

You specialize in on-location makeup services for your clients. Can you tell us a little about what that means? Do you feel that providing this service gives you any advantages over your competition?

Adaptability is everything in the makeup industry! That includes being able to function well while being on the move, with a strict timeline.

Whether I’m indoors or outdoors, I can show up at any location and adapt. Regardless of the venue, the weather, or any other circumstances, I’ll have my makeup train, my chair and folding table, my lighting and camera, and be prepared for anything!

It’s also really important to understand how to do a bunch of different makeup styles. That way, you can be flexible, and still suit the person and vision for a project.  My artistic diversity and willingness to adapt to my surroundings gives me a HUGE advantage over my competition.

You focus a large part of your business on collaborating with other local vendors and suppliers. Can you elaborate on this (in terms of the types of collaborations you do, and why you find it beneficial to your career)? Would you recommend this practice to other aspiring MUAs, and if so, why?

I focus on collaborating with local vendors because, as vendors, we’re all working toward a common goal: to have the best customer satisfaction by providing our strongest skill-sets.

Katey Stevens crazy eye makeup look

Photographers, wedding planners, venues, event coordinators, salons, bridal boutiques… All these people that we build relationships with will benefit from the experience. Likewise, our customer traffic will grow once we’re all referring clients to one another and supporting each other’s businesses. This is especially helpful in my case, because I live in such a rural area.

What is the proudest moment in your makeup career so far?

EVERY special moment I share with my clients, when they see themselves in a different way, is my proudest moment. Sometimes, I feel I can maybe help them see themselves in a way they’ve never seen themselves before. That’s incredibly rewarding.

Do you have a favorite look that you’ve done, either on yourself or a client?

Yes, it was a purple, sugar skull makeup look. I did for fun on a friend, and it’s definitely my favorite look so far! It was really cool, because I had all the time in the world to be creative and really take my time with it. It turned out exactly how I had imagined it would. I was very happy with my work.

Two hours later, we had some pretty awesome results. We then went outside to my backyard, took pictures with my camera, and had an impromptu photoshoot!

Why did you choose QC Makeup Academy over all the other makeup schools out there? How do you think QC Makeup Academy has prepared you for working in the field?

The reason I chose QC Makeup Academy, over all the other schools out there, was because I felt they were truly one-on-one. But yet, it was still in a format that allowed me to continue working full-time and managing my life at home with my two young boys.

The entire QC staff were all great, too! From the instructors, to the Student Support Specialist team, everyone was very professional, kind, and helpful. I feel that QC Makeup Academy definitely prepared me to work in this field. They gave me the knowledge and the sense of professionalism that allows me to continue to grow, even to this day!

What’s on the horizon for your Alluring Makeup Artistry in 2020?

In 2020, my goals for Alluring Makeup Artistry are to:

  1. Continue filling my appointment book with clients, and
  2. Continue networking with local vendors, so I can build relationships and grow my freelance business.

Long-term, I hope to be the go-to MUA for events around my area. Who knows, maybe I can even become an international business someday!

Finally, if you were trapped on a desert island, what makeup product would you bring and why?

Mascara! I feel eyelashes are the finishing touch to every look! 😉

Want to become a professional makeup artist, just like Katey? Enroll in QC’s internationally leading Master Makeup Artistry course today, and get certified in 2020!

redhead having hair curled with straightener

Hair Styling vs. Hair Dressing: A Breakdown

By Hair Styling No Comments

As a makeup artist, you may have dabbled with the idea of adding hair-related services to your business (or at least, to your resume). There’s definitely incentive to do this, as it could very likely improve your overall success! But in doing your research, we’re willing to bet you’ve come across the following 2 job terms: hair styling, and hair dressing.

But wait, aren’t they the exact same thing? Actually, no! While they do share certain similarities, they also have fundamental differences. So what does each term mean? How are they similar, and where do they differ? Is one better than the other to add to your makeup business? Let’s find out!

What is hair styling?

The answer is in the name itself: it means to style hair! As a hair stylist, you would help shape the client’s hair into an attractive style of her choosing (or as expertly recommended by you). You’d create things in her hair such as waves, curls, volume, and/or braids. You’d have the skills and training to be able to give your clients all sorts of up-dos, down-dos, and everything in-between. Of course, you’d know how to do all this with the aid of:

  • Hot styling tools (tools that specifically use heat), such as a: hair dryer, curling iron, straightener, etc.
  • Hair styling products, such as: hairspray, gel, mouse, etc.
  • Other styling tools, such as bobby pins, elastics, headbands, hair accessories, etc.

As a hair stylist, you would use your knowledge and understanding of face shapes and structures to recommend flattering styles, up-dos, extensions, etc. to your client. When a client has their heart set on a particular style, it’s your job to deliver it (if possible), to the best of your ability.

To be a working hair stylist, you don’t necessarily need any formal certification. This is due to the fact that nothing you’d be doing to a client’s hair would permanently change it. You wouldn’t be using any harsh chemicals, or altering color or length. Everything you’d do would always be temporary!

That being said, while many hair stylists don’t always need certification, having it will definitely make you stand out from the competition and look better to clients. Plus, if you really want to know what you’re doing, there’s no better way than by taking a hair styling class, being educated, and getting properly trained!

What is hair dressing?

Hair dressing involves everything that a hair stylist does, but more. The defining thing that separate a hair dresser from a stylist is that a hair dresser is qualified to make permanent changes to a client’s hair. This means that they’re allowed to do any of the following to their clients’ hair:

  • Cut it
  • Bleach and/or dye it (basically give it some type of chemical treatment)
  • Install permanent hair extensions

To be VERY clear: a hair dresser is qualified to do these things. A hair stylist is NOT!

Much like a hair stylist, a hair dresser needs to rely on her knowledge of the client’s overall appearance, facial structure, etc. to be able to make the final call on what will suit them best. You can provide suggestions, give caution against bad ideas, and then apply your skills to execute the chosen look as flawlessly as possible.

To work as a professional hair dresser, most places will require you to obtain a cosmetology license in your city, state, or country. In addition to this, there may be a requirement that you’ve completed a certain number of hours of education, training, and practice.

In these locations, to work as a hair dresser without these things would quite literally be illegal. The consequences could be anywhere from a fine, to criminal charges (if, for example, a client were to be injured in some way).

If you’re interested in become a hair dresser, make sure you research the legislation in your area. If required, ensure you get yourself certified accordingly!

Other Similarities vs. Differences

Of course, we’ve already touched on some of the major things hair styling and hair dressing have in common. We’ve also laid out some pretty huge differences they also have. But here are a couple more to keep in mind…

Potential Income

Because more education, training, and a more extensive skillset is required to be a hair dresser, your income will likely be greater than it would be as a hair stylist. That being said, it also depends on what sort of setting you’re working in.

If you’re employed within a salon as an MUA, you may be able to increase your overall salary due to your additional hair styling qualifications. That being said, those skills may not be required if it already employs hair dressers.

Alternately, if you’re a freelancer, you get to choose how much you charge for your services. If you’re a popular makeup artist with a devoted client base, you may be able to increase your rates with the addition of hair styling services, and make the equivalent of a hair dresser.

People Skills

Both professions definitely have this in common! Whether you’re a hair stylist or a hair dresser, you absolutely HAVE to be good with people. A lot of clients like to make conversation, so introverts will struggle with this type of job.

Plus, your clients would be trusting you with their appearance – that’s a big thing for them to put in your hands. If you don’t at least try to create a positive connection with them, you’ll probably never see them again.

But hey, if you’re already a makeup artist, you know ALL about this already!

Which would go better with your makeup business?

Hair styling services pair extremely well with makeup services because often times, the client is requiring these services for a specific, important event. She is not as likely to want the full services of a hair dresser (such as needing it cut, colored, etc.) on the day of. Rather, she likely will only need/want it to be styled.

Because of this, the likelihood that she will also like to get her hair styled in addition to getting her makeup done (or vice versa) for this big event is high. Thus, these 2 beauty services have a tendency to go hand-in-hand nicely.

That being said, you can by all means still offer full hair dressing services as part of your makeup business. Though not all of your makeup clients will be as likely to need both services on the same day, that’s not to say it’ll never happen.

One positive is that hair dressing services opens up your clientele to more than just a makeup-related audience. You’ll also become open to clients who may only want hair-related services.

Keep in mind, though, that hair dressing is seen as its own job in-and-of itself. There’s also more equipment involved, so the start-up and maintenance costs will be higher than if you were just hair styling alone.

There’s also the potential issue of time management. It might be hard to balance being a makeup artist and a hair dresser. If you want to first and foremost be an MUA, your hair dressing services may need to take a step (or two, or three) back, in terms of your business priorities.

So while technically, there’s absolutely nothing stopping you from adding both types of services to your makeup business, hair styling services tend to mesh a little better. It’ll cost you less to maintain within your business, and won’t be as big of a timely commitment for you to try and juggle.

It’s ultimately your choice when it comes to picking the career path that’s best suited for you and your goals. Go with your gut, and don’t let anything stop you! As long as you properly prepare yourself, do all the needed research, and then put your all into it, your career ahead will be a long and successful one!

Interested in hair styling class? Enroll in QC’s leading Hair Styling Essentials course today!

airbrush machine and regular makeup on table

Airbrush Makeup vs. Regular Makeup: Which is Better?

By Makeup Tips and Tricks, Your Makeup Career No Comments

In the cosmetic world, there’s a long-standing debate over which is better for your makeup artist kit: airbrush makeup or traditional makeup? The truth is, if you’re looking for a definitive answer, you’re probably not going to find it. This is because one is not better than the other 100% of the time! Instead, you’ll find that for some clients, airbrush makeup is the better option. But for others, regular makeup is the way to go.

So what’s the difference between the two? In which areas does airbrush makeup triumph? Alternately, when is regular makeup the stronger choice? Let’s find out!

What is Airbrush Makeup?

True to its name, airbrush makeup is a type of makeup specifically created for an airbrush gun and air compressor. The makeup itself is most often water-based, alcohol-based, or silicone-based. Airbrush makeup is typically applied in multiple, sheen layers.

These layers build up a flawless finish on the skin that photographs effortlessly, blends beautifully, and is most often times waterproof. Furthermore, airbrush makeup can also be used for other areas of the face, such as eye makeup, blush, contour, and highlighting, etc.

What is Regular Makeup?

More frequently used and convenient for everyday wear, traditional makeup is considered any of the following products that are applied to the skin using makeup brushes, sponges, etc.:

  • Liquid, cream, and powder foundations
  • Primers and eye shadows
  • Blush
  • Contour and highlights, etc.

Which is Better?

Some situations may deem airbrush makeup the leading contender, while in others, traditional makeup is the winner. In some cases, both are equally good. For example, some may argue that airbrush makeup lasts longer than regular makeup since most airbrush makeup is waterproof.

However, plenty of traditional makeup is also waterproof. But even for products that aren’t, so long as the makeup has been properly primed, applied, and finished with a strong setting powder and/or spray, it should hold throughout the day just as well as airbrush makeup would.

Similarly, while airbrush makeup is known for its incredible illusion of flawless skin, that doesn’t mean traditional makeup can’t do the same. If the products are properly prepped, applied, and finished by an expert who knows what they’re doing, both makeup types can create exceptional results on the client and photograph really well.

But we’re here to see the differences between airbrush and regular makeup, not just their similarities. So, here are some circumstances that show when one may be better than the other…

makeup tools, with model having makeup put on her in background

Covering Pimples and Other Blemishes

While both types of makeup can do this, regular makeup is superior. Yes, airbrush makeup – especially when layered – can help reduce the appearance of blemishes, but that’s not what it was designed for. Airbrush makeup is lighter, whereas traditional makeup is created for fuller coverage.

On top of this, airbrush makeup often times can be limited in terms of its color choices. Some clients may have skin tones, acne, or blemishes that airbrush makeup just doesn’t have the right pigments for. But regular makeup offers a much large range of colors to work with and choose from.

Regular makeup also has color correctors, specifically made to help mask imperfections. If your client has something she needs to be covered up, you will be able to find a regular product in your makeup artist kit to do the job.

The winner: Regular makeup.

Withstanding Moisture

Especially for those who’s clients are going to be outside in the hot sun, or taking part in an emotional event (such as a wedding), makeup artists need to arm themselves with the right products that can best combat moisture. If your client sweats or cries, she doesn’t want to have to worry about her makeup cracking, creasing, or running down her face.

Technically, with the right setting products, both airbrush and regular makeup can handle this task. That being said, airbrush makeup is inherently better at this – especially if the airbrush makeup is silicone-based. Most airbrush makeup is already waterproof, but when it’s silicone-based, it adds that extra layer of protection that regular makeup doesn’t have.

The winner: Airbrush makeup.

mua applying makeup on client using airbrush machine

Working with Right Skin Type

But as we discussed, most airbrush makeup is waterproof, giving it a much thinner consistency. It doesn’t create that appealing, flawless finish on dry and oily skin. Rather, it can often appear flaky once applied, especially on drier skin. For these skin types, your clients would benefit more from traditional makeup.

If, however, your client has dry or oily skin, airbrush makeup might be unflattering. Regular makeup has a thicker, creamier texture. It can help add moisture or properly mask oiliness, depending on what the skin requires.

Neither makeup is a one-fits-all when it comes to the various different skin types. Airbrush makeup is best for those with well-hydrated skin. As a rule of thumb, if your client has normal to combination skin, airbrush makeup is going to look jaw-droppingly stunning on her (so long as the makeup is applied by an MUA who’s trained in using an airbrush machine, of course). Between airbrush makeup and regular makeup, a client with either of these skin types would likely best benefit from airbrush makeup.

The winner: Draw. It depends on the client’s skin type.

Cost

But you also need to keep in mind that if you have clients on a budget, they may not want to shell out more money for airbrush services.

In general, airbrush makeup can actually prove to be a bit pricier. You have to factor in the cost of a good quality machine, and then the makeup products themselves (which aren’t exactly cheap). Sure, you can make up for that by charging clients more for your airbrush services than you would your regular makeup services.

But don’t forget: with regular makeup, there are plenty of products you can swap for their drugstore counterparts. You have the option to save money, without sacrificing quality. That leftover cash can then be put towards buying even more products!

Because there appear to be more products you’d need to purchase for traditional makeup, you may think that it would be more expensive than airbrush makeup.

As a professional MUA, building up and then maintaining your makeup artist kit will be an investment. Whether it’s regular makeup or airbrush equipment/makeup, it’s going to cost money, and it won’t always be cheap. This is a reality every makeup artist faces, and while we know it may suck sometimes, it’s also worth it.

How it Looks on Your Resume

Here are the facts: so long as you have formal makeup training and certification under your belt, regardless of whether it’s in airbrush makeup or regular makeup, your resume will impress clients. Any education and professional training are going to help you stand out from the competition.

That being said, an MUA with experience in both regular makeup and airbrush makeup might look more proficient overall than an MUA without the additional airbrush training. It not only tells this client that you’re an even more well-rounded makeup artist, capable of different methods and applications. It also demonstrates that you have the passion, dedication, and drive to acquire even more schooling and certifications to your name.

The winner: Airbrush makeup – though schooling and certification in BOTH are strongly recommended.

At the end of the day, there are pros and cons to airbrush makeup AND traditional makeup. It really depends on your level of training, your comfort level with the products, your client’s skin type, what she wants, etc. There are tons of factors to be considered, and as you can see, no singular situation in which airbrush makeup or regular makeup is 100% the best option.

That being said, which do YOU prefer more? Let us know in the comments!

Want to learn 3 different airbrush looks from the ‘King of Airbrush’, Marc Harvey? Check out his webinar with Nathan Johnson here!