Sarah Cavanagh, Author at QC Makeup Academy - Page 19 of 21 Skip to main content
All Posts By

Sarah Cavanagh

Sarah Cavanagh is a seasoned writer with more than 20 years of experience and a background in English Literature. She has been part of the QC team since 2019, where she manages social media and crafts blog content across multiple schools. When she’s not working, you can find her writing her debut horror/romance novel, Hollowed Ground.

Special Effects Makeup for Beginners: 5 Best Ways to Start Learning

By From the Experts, Makeup Tips and Tricks, Your Makeup Career 4 Comments

Gabrielle Rivera is a QC Makeup Academy graduate and professional makeup artist. To see more of her work, visit her Instagram here. Today, she draws on her professional expertise to share 5 of the best ways that one can break into the world of Special Effects makeup and begin learning how to do it.

1. Education

One of the most important things I learned when beginning my journey into the world of SFX makeup is how vital the right makeup education is!

I fully understand that the era we live in is one driven by social media and YouTube. However, when working with Special FX makeup, you have to know how to properly apply, mix, create, and work with these specialized products. To be able to do this correctly is a game changer for your business – and such techniques can only be taught in proper online makeup classes.

Unlike regular, everyday makeup tools and products, SFX makeup products can contain chemicals that are potentially harmful to the skin. This is why proper training is required, in order to know how to safely use and apply such products.

For example: when working with various types of paints, you would need to know which items are safe to put around your client’s eyes and/or mouth, and which ones are NOT. To not know your stuff can quite literally mean that you’re putting your client’s health and safety at risk, which we know if something you’d never want!

Similarly, it’s also critical to know what specific ingredients are in the SFX makeup products you’re using. This way, you can avoid your clients experiencing negative reactions, such as skin allergies.

If you want to become serious about growing your skills in Special FX makeup, one of the most beneficial things you can do for both yourself and your craft is to enroll in a makeup school that provides specialty classes. QC Makeup Academy is a great example, as they specifically offer a Special FX online makeup class! Not only does this course teach you the proper care and handling of SFX products, it also shows you first-hand how to apply these products and use the tools professionally!

2. Tutorials

Aside from taking online makeup classes and obtaining a professional certification, tutorials can be a simple way for you to start learning about the Special FX world.

There’s so much information available to you online, and countless artists that you can learn from. When I first got into SFX makeup, two of my personal favorite YouTube accounts to watch were (and still are, to this day):

  1. GlamandGore (Mykie) and
  2. Ellimacs Sfx Makeup

What I love most about these two makeup vloggers is that they’re both professionally trained! They teach viewers how to properly use, apply, and safely remove Special FX makeup products. Through watching their videos, you can also learn how to create certain SFX products from scratch! There are even tutorials teaching you how to use simple, everyday products in order to create gory and whimsical SFX looks. Pretty cool!

Keep in mind that watching online tutorials can’t replace the education you’d receive from real online makeup classes. But that being said, it’s definitely a start!

3. Practice, practice, and even more practice!

No amount of education and tutorials are going to help you improve your skills in SFX makeup if you aren’t actually practicing and obtaining real-world experience. The whole point of the education you gain from online makeup classes, or through watching YouTube tutorials, is to help you hone your skills through practice.

Pro tip: Doing makeup on just yourself won’t cut it, either. You need to also practice on as many models as you can, too! This is the only way you can get used to different skin textures, shades, types, etc.

MUA pouring airbrush paint into airbrush machine

My professional advice is to practice on models of all types. Here are some ways you can practice your Special FX makeup on as many different faces as possible:

  • Work with both male and female models
  • Work with clients who have facial hair, as well as those who don’t
  • Actively trying to work with clients that have differing skin types

Pushing yourself to practice on as wide of a clientele as possible will help you see just how versatile the makeup products are. Likewise, this real-world experience will help you learn how to use the products and tools – not just properly, but professionally as well!

4. Purchasing the right tools and makeup products

A question that I get frequently asked is, “What are the best products to buy to create Special FX looks?”

For beginners, my advice is always: learn how to do SFX makeup by first using the basics. It’s the best foundation to build off of. The more experience you get, the more prepared you’ll be to move onto more advanced makeup products and tools.

Often times, up-and-coming SFX makeup artists or enthusiasts want to purchase the most expensive products and tools right from the get-go. The problem is, they don’t know how to actually use them properly or safely! Making this error can result in you not only wasting a LOT of product and money, you can once again be putting the client (and her skin) at risk by your lack of knowledge.

Special FX makeup takes a lot of practice to get it right. Sometimes, trial and error is required in order to figure out the best products and tools needed to create a look. (Which, again, is why an education and online makeup classes are so important!)

At first, many people who want to get into SFX makeup may feel overwhelmed or intimidated by all of the types of products and tools available. However, many Special FX techniques – even the more complicated ones – can be created using simple cosmetics!

makeup special effect with brush

If you’re ready to begin working with Special FX makeup, you can start by using basic SFX products such as:

  • Paints
  • Liquid latex
  • Scar wax
  • Spirit gum and other adhesives

Something that can easily help you gather your tools and build your kit is to purchase a Special FX makeup kit! QC Makeup Academy offers a Special FX Essentials kit that comes with all of the basics, plus so much more!

5. Networking

The last – but JUST as critical – thing you can do to prepare yourself for the professional world of SFX makeup artistry is to network yourself! Not only does it help you get to know other important people within the industry, networking is yet another irreplaceable way to gain knowledge about the craft!

Networking provides you with opportunities to connect with other artists. It’s a fantastic way to improve your skills, because you’re constantly being shown new tips and tricks of the trade. There’s nothing like learning hands-on from others!

Networking is also a great business move, too, as it can potentially advance your career. By meeting others within the industry, you open yourself up to possibilities you may not have had available to you before. For example, meeting the right people could possibly lead to you getting the chance to learn what it’s like to work on or behind the scenes of a movie set!

There are many ways that you can enter the world of Special FX makeup, and learn the ropes. But again, the single most effective way to become a pro is to enroll in online makeup classes and be taught by experts in the field. If you’re looking to dive into the world of SFX, but aren’t sure how or where to start, check out QC Makeup Academy today!

Serious about being a professional SFX artist? Don’t weigh down your SFX makeup kit with these 5 awful products!

The 5 Best Vegan and Cruelty-Free Makeup Products

By Makeup Reviews, Your Makeup Career No Comments

As an MUA, your clients expect the products in your professional makeup kit to be top quality. Importantly, your kit should also possess enough diversity that you can adjust to your client based on their skin’s needs. Common examples of this would be working with a client who has particular skin conditions, issues, allergies, etc. The most efficient way to ensure that your makeup won’t cause harm to your client’s skin is to invest in vegan, cruelty-free products.

What are vegan, cruelty-free makeup products?

A makeup product is vegan if it does not contain any animal products or by-products. This includes ingredients such as beeswax, collagen, gelatin and many more. A product is considered cruelty-free when it has not been tested on animals. While not always the case, a “vegan” product tends to also be “cruelty free” the majority of the time.

For an in-depth look at what vegan makeup is made of and what ingredients it tends to avoid, please refer to our article, Vegan Makeup 101.

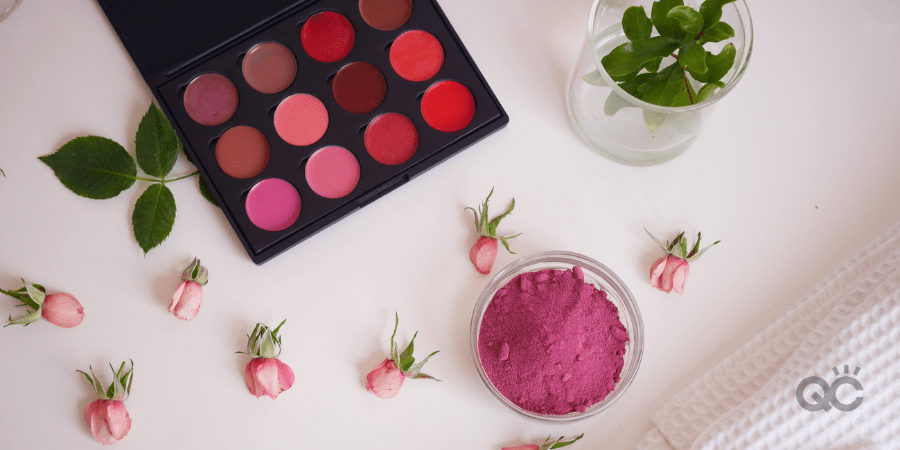
pink powder from rose to made organic lipstick and skincare product on white background. homemade remedy . top view.

Why go vegan?

For starters, using vegan, cruelty-free products in your professional makeup kit adds an ethical component to your business that’s very beneficial. Morally, there are very few disadvantages to offering clients vegan, cruelty-free products. In today’s day and age, mistreatment of animals is highly frowned upon (for good reason!), and vegan lifestyles are only becoming more and more popular. Vegan products are also proven to have less of a carbon footprint, thereby being better for the environment!

From a business perspective, it can be argued to be a very smart move, capable of bringing in more clientele. Providing products that align with these modern (and popular) beliefs and lifestyles increases the chances of your MUA business being favorably received by Millennials and Gen X’ers alike.

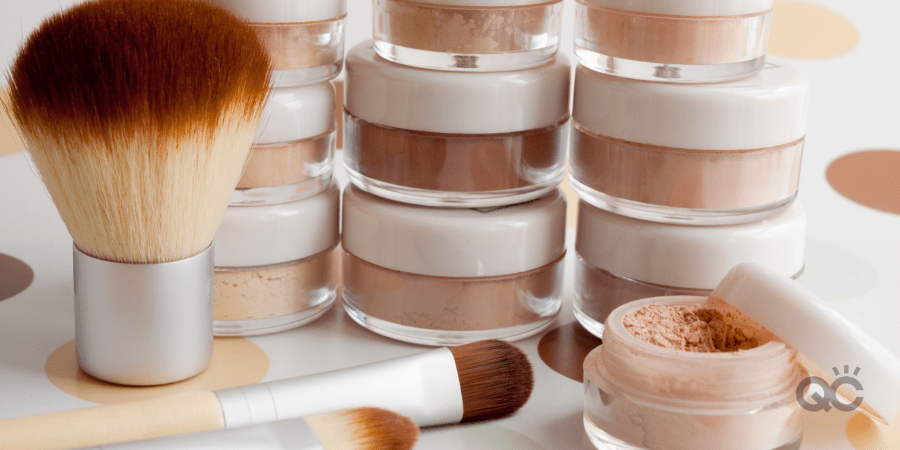
cosmetic brushes, make-up powder, blush, foundation, eyeshadow in plastic jars

Vegan, cruelty-free makeup products we recommend for your professional makeup kit…

It’s tough to choose between the eyeshadows and the lip products when it comes to iconic vegan line, Charlotte Tilbury, but ‘The Icon Palette’ deserves all the praise it can get. With a nice range of pigments – ranging from cream all the way to jet black – this 12-shade palette of glittery hues offers eyeshadow options for every occasion. Day, night, diva, and even disco – there’s something for everybody!

Personally, my favorite shade in the palette is the bold royal blue. Which shade do YOU like best?

In addition to being vegan and cruelty-free, Milk Makeup also prides themselves on being paraben-free in all their products. As if that weren’t enough, this cleanser is also microbead-free – an ingredient known for:

  1. Being impossible to recycle, and
  2. Being ridiculously toxic for marine creatures

We strongly maintain that a strong skincare routine is just as – if not more – important than the makeup routine itself. Healthy skin means a clean and healthy canvas for the makeup to go on in the first place. So finding a cleanser that not only works, but is as safe for the skin as can be? How can you go wrong!

Pro tip: Milk Makeup recommends pairing this product with their ‘Vegan Milk Moisturizer’ in order to best lock in your skin’s moisture.

Japanese woman, face wash with cleanser

Like Milk Makeup, E.l.f. Cosmetics is a cosmetic company proudly vegan, cruelty-free, and paraben-free. Let’s be real here: most of us are already familiar with E.l.f.’s makeup, and we know it seriously rocks. Their variety of different products and their amazing pigments are to die for, on top of being environmentally-friendly and good for your client’s skin!

But in particular, their lip products are our favorite. Specifically, we feel the Day to Night Lipstick Duo deserves a shout-out. Firstly, it’s insanely cheap, and you get TWO lipsticks and colors for the price of one! We don’t think we need to explain why this is seriously awesome for any MUA and her professional makeup kit.

This lipstick comes with 4 different duo shade options:

  1. The Best Berries’
  2. Need It Nudes’
  3. Red Hots Reds’
  4. I Love Pink’

No matter which color set you pick, you’re guaranteed a sleek and sexy shade not just for your everyday wear, but for when you’re ready to have a night on the town!

With all makeup products known for being 100% vegan and cruelty-free, Cover FX is one of the leading competitors for tattoo-concealing products. While they have many other items that are worth looking into, what we’re interested in is its ability to build enough coverage to successfully cover any tattoo your client may want to hide on their big day.

As someone with their fair share of tattoos, I’ve tried many different products, and never found any that worked as well as Cover FX! Here, we’re specifically recommending their ‘Total Cream Cover Foundation’, because it’s awesome and provides great coverage – specifically for normal to dry skin types.

But it’s worth noting that alongside this product, you can use Cover FX’s Cream Concealer’ and Matte Setting Powder to magically hide tattoos. Very handy for SFX makeup, brides who wish to conceal their tattoo(s) on their wedding day, etc.!

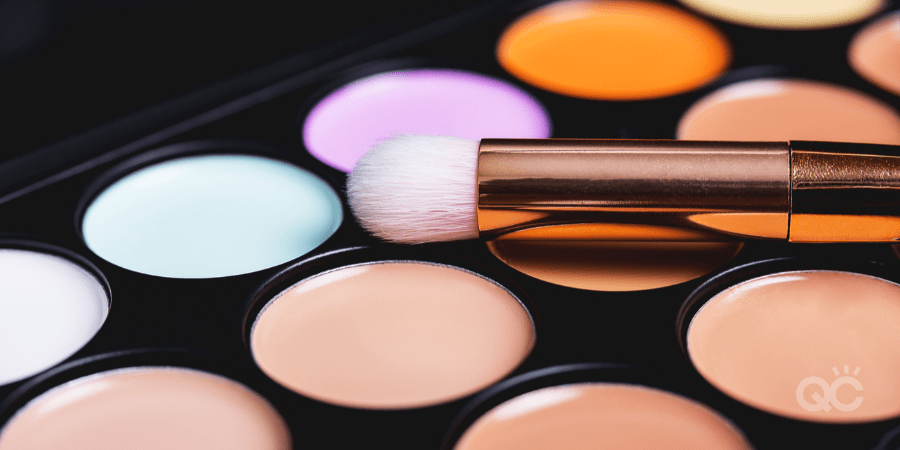
Palette concealer and correctors. Make-up base. Isolated on black background

If you aren’t familiar with what color correcting is and why it’s so fundamental that you incorporate this practice into technique, we strongly suggest checking out the Color Correcting webinar hosted by QC’s executive MUA and instructor, Nathan Johnson.

Trust us: as you’ll quickly understand by checking out Nathan’s webinar, you should definitely carry some sort of color correcting products in your professional makeup kit. The odds are higher of working with a client who has some sort of skin blemish, condition, discoloration, etc. If you aren’t prepared, you won’t be able to do the best job for her as you possibly can – which is not only limiting you, but your business’s reputation!

Everyday Minerals is globally known for strictly using all-natural ingredients in their products. When it comes to their color correctors, you can’t go wrong. For starters, Jojoba is a wonderful ingredient in general for cosmetic products, namely due to:

  1. Its organic ability to mimic the skin’s natural oils, and
  2. Its ability to help prevent acne breakouts, thanks to how it absorbs into the skin (rather than sitting directly on the surface and clogging your client’s pores)
  3. Its “softening, moisturizing, and conditioning properties” for the skin
Pouring with jojoba oil from jug into bowl on white marble table

There are for Color Correcting colors you can choose from:

Personally, we recommend arming your professional makeup kit with each and every one of these all-natural correctors! In fact, while you absolutely do not need any of the above recommendation, we DO strongly suggest doing research of your own, and trying out some vegan, cruelty-free makeup products. There may be a ton of incredible products you haven’t discovered yet!

Want to add more zero-waste beauty products to your professional makeup kit, too? Keep reading!

Re-Purposing Your Makeup with These 5 Easy DIY Hacks

By Education, Makeup Tips and Tricks, Makeup Trends No Comments

As a certified makeup artist, if anyone’s going to be constantly branching out and trying new products on the regular, it’s going to be you. Sometimes, you’ll find brands and products you love, and use them up in the blink of an eye. Other times, you’ll try out things that won’t necessarily be your cup of tea.

Either way, it can result in a lot of leftover and/or unused product that winds up going to waste. We live in an age where reducing our waste and thinking green is crucial. So if provided with options to be able to save and use all those old or unwanted products, it’s in our best interest to jump on them! Besides, repurposing makeup means you get to save money on replacement products. Double win!

Note: The following tips are NOT applicable to any makeup products that have expired. If the product is past its expiration date, throw it away and do NOT use it. Expired makeup is unsanitary makeup.

Here are 5 easy do-it-yourself hacks for repurposing your makeup!

1. 2+ Broken Lipsticks 1 New Lipstick Shade

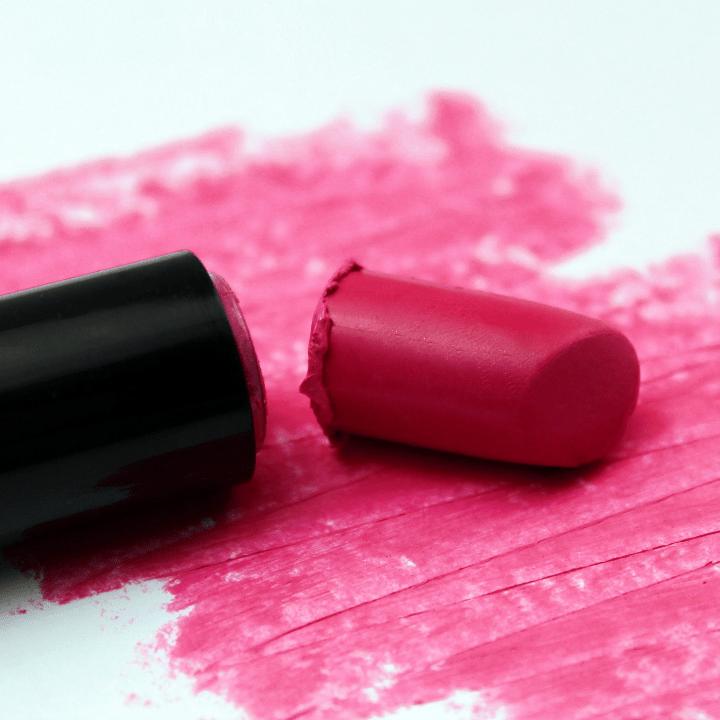
We all know the heart break of wearing your favorite lipstick down to a nub. There’s still the tiniest bit left, but not enough for a nice, full application. What a tease! Here’s a tip, though: instead of throwing it away, start saving your lipstick tubes when they’ve hit this stage. You can then combine them all to create a brand NEW lip shade!

Simply buy yourself a small container – nothing fancy, anything from your local dollar store will do. Very carefully, use a small knife to scoop out the remaining product from each lipstick tube. You can then melt all of the waxy remnants together in a big spoon. Once fully liquefied, pour the new color into the container, and then let harden in the fridge.

The coolest part is that this brand new lip shade will be 100% unique: you’ll be the only one who has it!

2. Liquid Lipstick Eye Makeup

One time, I purchased a royal blue liquid lipstick and was totally stoked to try it on. It took all of one application for me to realize that unless I was going to a night club, there was no way I could pull that shade off. I stopped using it and eventually lost it altogether. Not only was this a complete waste of money and unnecessary eco-waste, it was a missed opportunity!

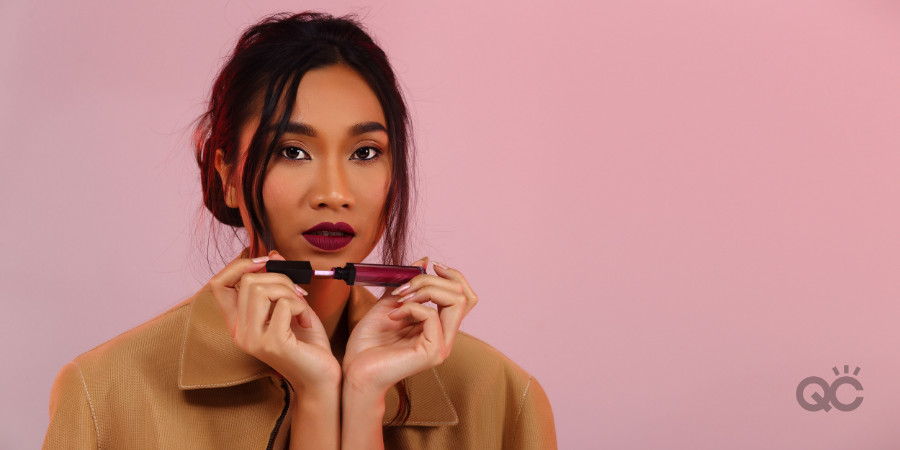
Believe it or not, liquid lipstick can also be used as eye makeup – with GREAT results. Two examples we recommend trying out are:

  1. Using liquid lipstick as liquid eyeshadowLike liquid eyeshadow, not only is it simple to apply liquid lipstick to your upper lids, it also tends to be long-lasting and crease-free. If it’s a light enough shade, you can also treat it as a base for a nice, powdered shadow. With most liquid lipsticks, though, it doesn’t take much to apply a LOT of heavily pigmented product. So as QC executive MUA and tutor, Nathan Johnson, always recommends: start light, and build thin layers to increase the strength of the product.
  2. Using liquid lipstick as eyeliner – All you need is a clean eyeliner brush, and you can simply dip it into the liquid lipstick to extract the product, and voila! Draw it along your upper lid to create a stunning matte eyeliner look that’s both fierce and full of personality.

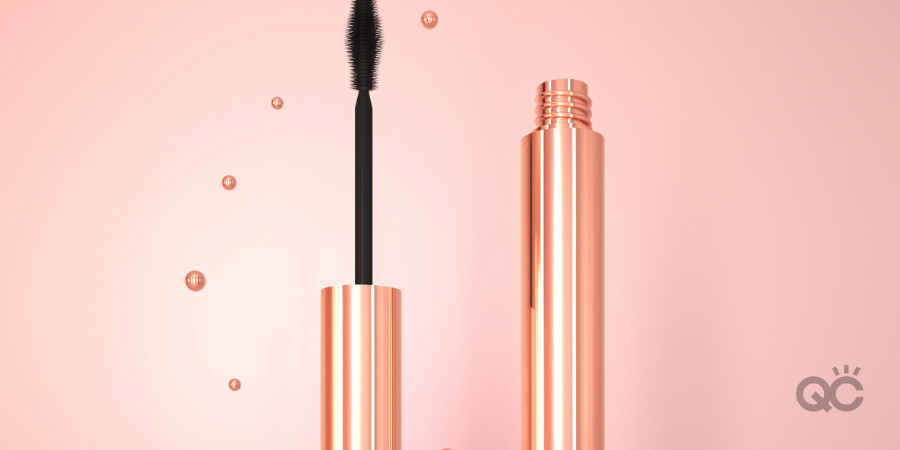
3. Mascara Wand Eyebrow Brush

Save yourself the unnecessary dollars spent on an eyebrow brush by simply making use of any mascara you’re intending to throw out. Even if the mascara itself is no longer good, the wand can still be utilized! All you need to do is clean it thoroughly, ensuring that any old makeup previously on it is removed, and the product is now sanitary. That’s all there is to it! Now you can tame your brows whenever necessary, without having to open your wallet.

If you’re unsure how to properly clean your mascara wand, don’t worry! There are plenty of tutorials you can read or watch online. Here’s one, in case you’re interested.

Mascara wand

4. Crumpled Up Eyeshadow Lip Tint

It’s a sad day when one of our favorite eyeshadows breaks apart. But that doesn’t mean it’s no good to you anymore! One obvious option is to repair it as best you can. But as long as the product hasn’t expired, you can also repurpose it into a really boss lip tint! This is especially the case for lighter colored and/or glittery eyeshadows. Quite literally all you need to do is gather the broken shadow into a small container, and that’s it!

5. Lip Balm Eyebrow Wax

I’ll admit that I’m 100% responsible for buying way more lip balms than necessary, using them a handful of times, and then losing them in my purse, jacket pocket, bedroom, etc. Typically, once I have found it, my natural inclination is to throw it away, regardless of whether it’s still good or not.

Instead, when you find yourself in this situation, there’s another purpose it can fulfill for you: eyebrow wax! When I’m having a bad brow day, they tend to look like startled caterpillars. If I can’t get them threaded anytime soon, I need a miracle to keep them tamed. Lip balm is a wonderful little miracle that can do the trick, for a fraction of the price eyebrow wax would cost!

The best part about these DIY makeup hacks is that not only can you use them for yourself, you can incorporate them into your professional kit and use them as part of your makeup artist business! There are countless ways to repurpose makeup and other beauty products, and find new and creative ways to put them to use. Who knows… Maybe YOU’LL come up with the next biggest trend!

Lip Balms

Looking for more ways to save money on your professional makeup artist kit? Here are 5 items you surprisingly DON’T need!

Spectacular long-haired woman laughing while posing on snow background. Outdoor close-up photo of caucasian female model with romantic smile chilling in park in winter day.

How to Keep Your Winter Skin Happy and Healthy

By Education, Tutorials & Tips No Comments

Winter can be a truly beautiful time. Unfortunately, depending on where you live, it can also be downright awful. All those cold winds, freezing temperatures, and snowy days are just the worst sometimes. If you live somewhere where the air hurts your face, you have to work extra hard to make sure your skin doesn’t suffer due to the weather!

Winter skin is often times unhappy skin: dry, irritated, raw, and itchy. But it doesn’t have to be! Here are 6 tips you can follow to bring the summer back to your skin, even in February!

1. Get rid of fragrance-filled beauty products

Whether it’s your soap, moisturizer, etc. if the product has a scent, it could be packed with irritating chemicals and ingredients. Fragrance ingredients in skincare and makeup products are one of the biggest reasons why people’s skin reacts negatively, such as with allergic reactions, redness, itchiness, rashes, etc. These are already problems that your skin has to face from the winter season alone… Your skincare products shouldn’t make it worse!

Instead, you should opt for natural, fragrance-free products – especially for whatever cleansers/soaps you use to wash your face. The ingredients are way safer for your skin, with far gentler cleansing effects. Just be careful that you read the label of your products carefully, and specifically choose “Fragrance-Free” instead of “Unscented”.

Remember:

  • Fragrance-Free = no fragrance materials or scent chemicals are in the product, while
  • Unscented = it doesn’t have a scent, but it still contains specific chemicals that are meant to neutralize odors
Smiling glad dark skinned young woman puts soap on face for cleansing, washes with cold water, wants to have healthy fresh skin., wears headband, looks positively at camera, stands naked indoor

2. Don’t neglect your sunscreen

Wait, sunscreen in winter? You betcha! Even though it’s overcast most of the time in winter, the sun still exists behind those clouds. While that could be used as some sort of inspirational, motivating catchphrase, when it comes to your skin, this spells danger. You see, there are 2 culprits behind those dreaded UV rays: UVB and UVA.

Girl blowing on the snow in the park in winter.

While it’s true that UVB is weaker during the winter (thanks to cloudy weather), UVA is just as prevalent in the winter as it is during the summer. UV rays are at their strongest in the summer, but they’re only just a little less strong during the colder months. Basically: we always should wear sunscreen.

Always use sunscreen with an SPF of 15 or higher. If you’re worried about it making your face extra chilly when you step outside, simply remember to put it on a few minutes before you leave the comfort of whatever warm room you’re in. Give it a few minutes to soak into your skin, and you should be fine!

3. Use the right moisturizing products

Remember: you live in an area where the wind hurts your face. Anytime you expose your skin to the winter weather, it’s getting dried out unless properly protected. Not to mention, we often combat the outside cold by keeping our homes super warm. The startling contrast between the two is going to cause your skin some confusion.

So don’t forget to moisturize! Doing so morning and night will help lock in your skin’s natural moisture, and keep it better shielded from the seasonal ailments. For your day moisturizer, it never hurts to use a product that – like your sunscreen – contains SPF. In the evening, apply a richer night cream. It’s thicker, will provide better coverage throughout the night.

Smiling pretty woman applying cream on her face in bathroom

4. Create the right environment at home

As the song goes, the weather outside if frightful… But is the fire at home so delightful? Sure, but what about when the heat is also cranked all winter long? In our attempts to stay warm, it’s easy to inadvertently turn the inside of our home into the Sahara desert for our skin. While you can use the right beauty products, as we discuss above, what about measures you can take in the home itself?

For starters, you can help keep your skin healthy and happy during the winter by increasing the moisture in the air. This can be done by using devices such as a humidifier. While you don’t need a humidifier in every part of your house, it would be worth it to at least place one in a room or two where you tend to spend the most time (such as your bedroom).

Bonus: Keeping a humidifier in your room during the winter will also help reduce your likelihood of getting a dry, sore, and scratchy throat. Double the win!

Other than that, the biggest piece of advice we can give is simple: turn down the heat in your home. No, we aren’t suggesting you shiver and suffer, just so your skin can be a little less dry. We’re saying that realistically, you’ll probably be okay if you lower your thermostat by just a few degrees, and supplement the heat by wearing layers, using blankets, etc.

5. Stay hydrated

As always, your overall health is always what comes first! So here’s a fun little fact: water is practically a superfood for your skin.

When you don’t drink enough water, your skin struggles to retain its natural moisture because you start to become dehydrated. The more dehydrated you are, the less elasticity your skin has. This can lead to things like wrinkles.

Young woman drinking pure glass of water

If you’re prone to oily skin, water is one of your best friends. Dehydration can also lead to even oilier skin than usual, because you don’t have the water needed in the body to flush out all those unwanted toxins. It’s also the culprit of pimples and breakouts! Water is essential for our body’s ability to generate new skin cells, which is part of how we heal. Without water to keep our skin hydrated, how can it fight off the bacteria that causes acne?

While the amount of water you should drink varies from person to person, medical professionals state that we should drink at least 8 glasses a day. If you’re not used to drinking that much water, it might be a little tricky at first. If you need help remembering, you can always set yourself an alarm to remind you to drink some water, because remember: hydrated skin is happy skin!

6. Become a skincare professional

What better way to learn the ins and outs of skincare than to study it and become a certified skincare expert? You don’t need to pay an arm and a leg to go to an Esthetics school, either. Some of the best makeup schools (both online and brick-and-mortar) offer outstanding skincare courses that can earn you accredited certification upon graduation.

Keep in mind that whatever career you’d want to pursue in the skincare industry might affect the type of certifications you’ll need. But for example, QC Makeup Academy offers a comprehensive Skincare Consultant course that can prepare you to be:

  • A freelanced, independent Skincare Consultant
  • A Consultant for companies like Sephora, and other makeup beauty counters
  • Bridal Beauty services
  • And much more!

It can also open the door to continued learning in makeup artistry and a professional career as an MUA, if such a thing interests you!

happy MUA doing makeup for young girl

The best part is, you can earn your Skincare Consultant certification in as little as 3 months. You could quite literally start your skincare course, work as hard as possible, and become a certified professional before 2020 is even over!

Then you could earn a living making sure everyone’s skin is happy and healthy – not just during the winter, but ALL year round!

Are YOU guilty of committing any of these 5 skincare sins? Keep reading to find out!

Industry Spotlight: Kevin James Bennett

By Featured No Comments

As a makeup artist, your love of learning is essential. You should have a desire to master the proper techniques, to watch others, learn from their expertise, and soak up as much information about the craft as you possibly can!

One excellent way of doing that is by continuing your education through makeup training and classes. But as QC executive MUA and instructor, Nathan Johnson, says, there’s also a certain level of “real world” learning required, too! And studying industry professionals is one of the easiest and fastest ways anyone can access that education.

When studying influential makeup artists, you’re learning an abundance of useful information, such as:

  • How they paved and shaped the cosmetic world
  • Different makeup trends, techniques, applications, and styles
  • Makeup theories and philosophies you may not have ever heard or considered before
  • Newfound knowledge on beauty and skincare products
  • Business and networking advice from legitimate experts

Part One of our Industry Spotlight series can be found here. Now, let’s continue with the second ‘cosmetic pioneer’ that should be on every makeup artist’s radar: Kevin James Bennett.

Kevin James Bennett Headshot

Meet Kevin James Bennett

With over 30 years in the makeup industry, Kevin James Bennett (a.k.a. KJB) is one of those names you just know. A winner and nominee of multiple Emmy Awards for his contributions to the makeup department, Bennett is best known for his thorough beauty knowledge, his straightforward and educational online presence, and his business-focused approach to his craft. Above all this, his expertise when it comes to makeup and skincare products is unrivaled.

Interestingly, being a makeup artist wasn’t Bennett’s original life plan. At first, he was a stage actor. As is the case with most theater performers, Bennett had to learn how to apply his own makeup – but he admits that it never particularly interested him! It wasn’t until years later, while working in display design at Bloomingdale’s NYC, that Bennett’s destiny became clear. After painting mannequins with real makeup, that “art and cosmetics became entwined”, and Bennett’s love of makeup began to blossom.

This just goes to show you that you never know where life will take you, and it’s NEVER too late to make your dreams a reality! In fact, Bennett himself says that the most important piece of advice he can offer aspiring makeup artists is to “never be afraid to fail”! You can’t learn from your mistakes otherwise, which means you won’t be able to progress. As the old saying goes: you miss 100% of the shots you don’t take!

Contributions to the Makeup Industry

In addition to the aforementioned makeup work for TV (for which Bennett was nominated for 5 Emmys and won 2), he has contributed to countless brands, businesses, and product lines over the years, including (but not limited to):

  • Allure
  • Marie Claire
  • Cosmopolitan
  • Behind the Chair
  • Access Hollywood
  • Entertainment Tonight
  • L’Oréal
  • Johnson & Johnson

But Bennett isn’t just a man of the corporations. On the contrary, he offers his impressive skills and consulting services to independent companies, freelance artists, and entrepreneurs as well! “My mission,” Bennett states, “is to deliver intelligent, innovative concepts and solutions to clients.”

From his website alone, you can see the 3 major areas that Bennett focuses on with clients:

  1. Cosmetic Development
  2. Makeup Artistry
  3. Appearances & Education

Cosmetic Development

This is the process of taking an idea for a new makeup or skincare product or line, and developing this from concept to the production line and beyond. Brand and product development, marketing, eCommerce, and social media integration are just some of the many services Bennett offers and advises on here. Most important, he makes sure the products are cutting edge and necessary in the industry; from an ingredient, to formulation, and even to color perspective.

Makeup Artistry

Bennett’s makeup skills are so diverse, he has had a long career working in fashion, advertising, production, red carpet events and galas, television, and so much more!

Appearances & Education

Wanting to share his expertise with others who love the craft, Bennett often appears as a featured speaker/industry expert at trade shows, conferences, classes, etc.  Here, he offers his expertise as an industry expert and educator.

He also utilizes his social media presence to help make others aware of various cosmetic and skincare product information – the good and the bad.

Whether you are new to the industry, or is an industry pro, you’ll be able to learn a lot from his social media pages! He often shares honest reviews about makeup brands, his take on makeup techniques, and opens up education debates on industry news.

Lifelong learning is not optional; it’s mandatory for success in the 21st Century. My daily routine includes reviewing industry news, innovation, and trends, because my clients deserve the most relevant services.

Kevin James Bennett

An Expert’s Opinion…

Here are some really interesting fun facts about KJ Bennett that should be of interest any makeup artist looking to make a long-term career out of their passion.

The importance of complexion

Admittedly “obsessed” with creating flawless skin on his clients, Bennett is a firm believer that no matter how polished the rest of the makeup look is, if the complexion isn’t 100% to your liking, the whole thing will still wind up looking incomplete. Definitely something worth keeping in mind for your own work!

The importance of SFX makeup

Even if you’re not an SFX makeup artist, and even if you have no interest in doing SFX makeup in your career, Bennett insists that there are still some SFX products you should consider keeping in your professional makeup kit! For example, he finds that the basics – such as adhesives and molding materials – as well as alcohol activated palettes are way more useful than you think. “The line between makeup and SFX can be blurred very effectively, if you know how to manipulate your products,” Bennett says. Hmm…Perhaps taking an SFX Makeup course could only help your skills further!

The importance of education

For those who are new to the industry and trying to make sure they take the right steps for both themselves and their makeup business, Bennett believes that to be successful, you must be passionate, yet humble. Strive to always do your best, and as part of that, never stop in your quest to learn more about makeup, skincare, and the industry as a whole. No matter how much you know, you’ll never know everything – there’s always more you haven’t discovered yet!

Are there any makeup pioneers that you’d like to see featured? Let us know in the comments, and stay tuned for future installments of our Industry Spotlight!

Want to rock the makeup world and leave your mark like KJ Bennett? Start by enrolling today in QC’s leading Master Makeup Artistry course, and become a certified makeup artist!

hair styist blow drying client's hair

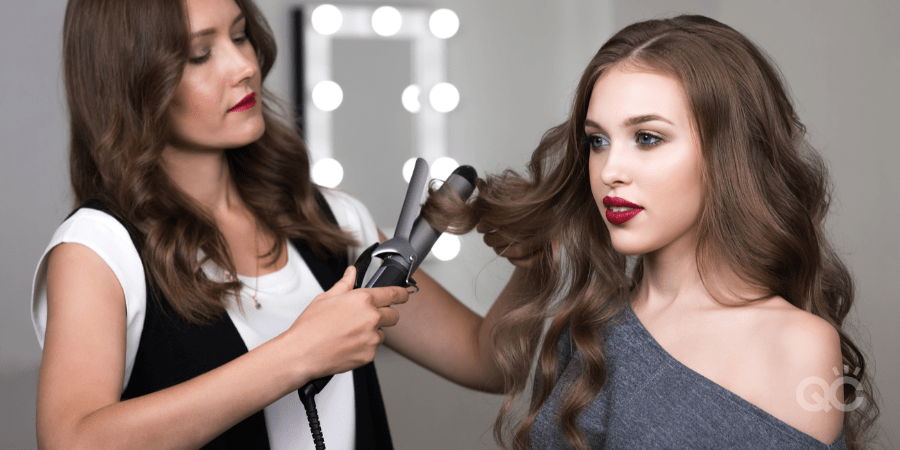
4 Reasons Why You SHOULDN’T Add Hair Styling to Your Makeup Business

By Hair Styling, Your Makeup Career No Comments

Many MUAs see hair styling as a separate field entirely, but play your cards right and hair styling can be your secret weapon. The makeup industry is a tough market with plenty of competition. Without upping your game and adding to your qualifications and skillset, how can you hope to stand out from the crowd? Hair styling classes are one of your best assets to do this!

That being said, watching YouTube videos and possessing a natural ability to do a French braid aren’t going to be enough to add this additional service to your business. That alone won’t make you a pro. Like makeup artistry, hair styling doesn’t necessarily require schooling or certification – but having it not only makes YOU better, it better qualifies you when compared to others who don’t have it themselves.

But we get it: you have your hesitations. In fact, you’re probably thinking, is it really worth shelling out more money to take a hair styling class? It can’t benefit my makeup business that much, can it?

Well, let’s see about that. First, it’s important to quickly understand what exactly a hair stylist is, and what they do.

What is a Hair Stylist?

Is “hair stylist” just another term for a hair dresser?

NO! (We seriously can’t stress this enough.)

The two are completely different, and require entirely separate training, qualifications, and certification. In addition to styling, hair dressers are qualified to cut, color, bleach, and apply extensions to hair. A cosmetology license is usually required to be a hair dresser, which takes anywhere from 1 to 2 years to obtain.

As a hair stylist, you are NOT allowed to do anything but wash, dry, and/or style your client’s hair. You’ll learn how to use various heat tools, and master a number of different brush and styling techniques.

Here are 4 reasons why it would NOT be in your best interest to add hair styling services to your MUA business…

1. You don’t want to book more clients

In today’s age, Millennials and Gen Xers have enough money problems thanks to the economy, so they’re always more than happy to save their pennies whenever possible. This is just a fact: your clients are always going to be looking for ways to combine or decrease their expenses. Who wouldn’t jump at the chance to save some cash?

Chances are, in addition to your makeup services, you client is also in need of a hairstylist for her big event. This means an extra expense she has to pay for, more time she has to put aside for a separate appointment, etc. But if you were able to offer her BOTH makeup and hair styling services, she’d probably book you for that additional service in a heartbeat. It’s just a much more convenient and cost-effective option for her.

This is especially true with brides. The day of the wedding is hectic and stressful enough as it is for her! When researching her options for MUAs and hair stylists, who do you think she’ll be more inclined to want to book with: one makeup artist and another hair stylist, or an amazing makeup artist who’s also a hair stylist?

Point is, being able to offer both makeup and hair styling services would open doors to so many more potential clients. It would provide you with a niche that’s GUARANTEED to make you stand out from your competition in the area, in all the best ways. We think you’d find that it wouldn’t take long before you’d be so busy, you’d have to start booking clients in advance!

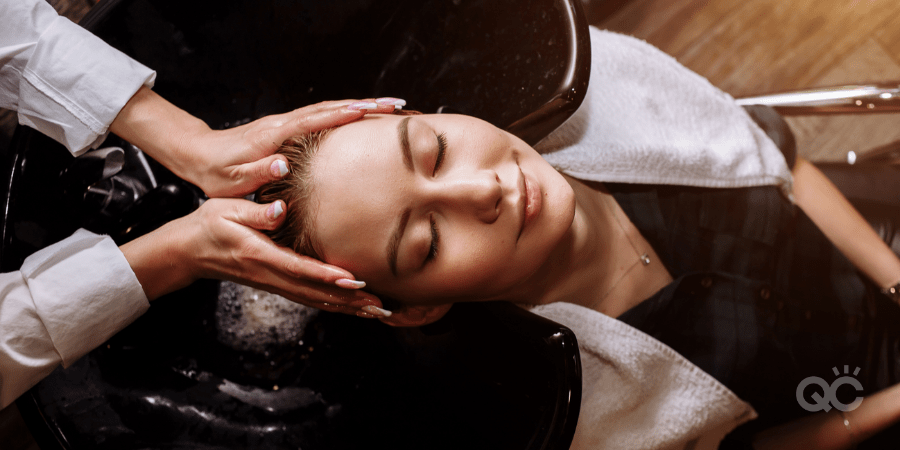
hair stylist washing client's hair

2. You don’t want to make more money

When you can offer more services to your clients, you’ll naturally be able to increase your income – that’s Business 101. You very well might already be making good money with your makeup services alone, but think of how much more you could bring in every month by adding in hair styling services as well!

One option is that you could offer standalone hair styling prices and services, same as how you set your makeup rates. Simpler hairstyles, such as basic up-dos, will be cheaper. The fancier the hairstyle, the more you can charge. That being said, even just the basic services (like washing and drying your client’s hair) can give you an additional $30+ from that one job.

Or, if your client wished to have both her hair and makeup done by you, you could also offer packaged deals. These sorts of options would further entice potential clients to want to work with you. Everyone loves bundles! For instance, Brinelley Hair and Makeup in Baltimore, Maryland, charges $250 for bridal hair and makeup as a packaged service.

When it comes to the various ways you can package these additional services, the sky’s the limit! But one thing’s for certain: it WILL increase your total income and bring you in more money.

3. You don’t like having options

We’ve touched on quite a few ways that adding hair styling to your makeup business benefits your career as a freelance MUA. But what about those interested in working in a salon?

back shot of curled and styled up-do on client

The good news is that such a skill is just as much of an asset to salon managers, too! If their establishment is in need of hair stylists as well as makeup artists, hiring someone who can do both is one less body they need to staff and provide salary to. Plus, you have wiggle room to negotiate your pay and perhaps ask for a higher salary than you would’ve gotten just as an MUA. For the level of services you’d be capable of providing, it’d be more than fair, and many salon managers will recognize that!

Even if you don’t have any goals to work in a salon, the fact that it would at least be an option available to you is a more than a many other makeup artists out there could say. If nothing else, it strengthens your portfolio and equips you with a pretty solid resume.

4. You hate school

That’s not to say that you don’t love your craft, or even that you don’t like learning new things. But when it comes to an actual school environment, with assignments, and reading, and lessons? No thanks. You’re of the opinion that anything you can learn in a class, you can learn all by yourself on the internet for free.

We’re sorry to say it, but if that’s how you feel, you’re really limiting yourself in terms of your abilities. You’ll never be able to learn from an article or video tutorial the skills, techniques, and theories you’d be taught in school. For starters, there will be things you don’t know until they’re taught to you – so how would you know to research them on your own? You wouldn’t. Your self-taught education would be filled with a lot of self-imposed blind spots.

Schooling is the best method of acquiring information because its entire purpose is to take an expert who knows the ins and outs of the profession, and use their knowledge to help YOU learn and grow. So sure, school may not be your thing… But if this is truly the industry you want to work in, the results are worth it and second to none.

makeup artist styling bride's hair

Ready to take your MUA business to the next level by offering hair styling services as well? Enroll in QC’s leading Hair Styling Essentials class, and become certified!

female celebrity smiling for the cameras while paparazzi take pictures

Our 10 Favorite Makeup Looks at the Oscars

By Makeup Reviews No Comments

“And the Oscar goes to…”

The 92nd Academy Awards is fast approaching! On Sunday, February 9th, 2020, Hollywood’s elite will gather together at The Dolby Theatre for a night of celebration, commemoration, and of course, the Oscars. Those who attend are always dressed to kill, with some of the best hair, fashion, and makeup ever seen on the red carpet.

In honor of the first Oscars event of the new decade, we thought we’d look back and pay tribute to some of our favorite makeup looks over the last decade!

While this may seem like a bit of a bizarre start to the list, SFX makeup fans will know exactly what we’re talking about. When presenting the award for Best Makeup, actor Ben Stiller shocked the crowd when he waltzed on stage adorning special effects hair and makeup inspired by the movie, Avatar. Although Avatar wasn’t even a nominee in this category, Stiller’s blue skin, yellow eyes, large ears, and long, braided hair, were both comedic and well-executed. Combined with the seriousness with which Stiller presented the award, and this quickly became an Oscars moment that would not soon be forgotten.

Let’s address the elephant in the room: most of the talk that came from the 2011 Academy Awards was regarding the cringe-worthy job that Anne Hathaway and James Franco did hosting the show. But in terms of how she looked, Hatheway was an absolute bombshell over the course of the night. Though she worked her way through a variety different dresses and makeup looks, it’s the one she rocked when first appearing on the red carpet that stunned us most.

Wearing a cherry red dress, Hathaway’s makeup accented her gown perfectly: a simple (yet elegant) beauty look, topped over with a classic red lip. Nothing about her look was overpowering; in fact, everything was modest and subtle, building up to a gorgeous final look that screamed: ‘Classic Hollywood’.

Jenny from the Block was the talk of the town at the 2012 Oscars, and it’s no secret as to why: she was absolutely glowing! Inspired by the late 1960s, Lopez’s makeup – done by celebrity MUA, Mary Phillips – caught everyone’s attention for two reasons:

  1. Her radiant, bronzed skin
  2. Her eye makeup, complete with a duo-toned wing

When combined with her high-bun, modest diamond jewelry, and pearl-colored gown, Lopez truly looked like royalty!

red carpet

The 2013 Oscars were HUGE for Lawrence, who walked away with her first Academy Award for Best Actress, for the movie, Silver Linings Playbook. But even before her big win, Lawrence arrived on the red carpet that night looking like the star of the evening. Everything about the look as a whole was elegance incarnate: from her textured up-do, to her Dior Haute Couture ball gown, down to her back necklace.

Thing that that brought it all together, though? Her makeup. Wearing a smoky eye, a dusty rose lip, and a soft blush to complement her flawless complexion, Lawrence showed the world why she is a true star.

Not to sound dramatic or anything, but we’re pretty sure that Lupita Nyong’o is a real life angel. If she isn’t, she certainly looked the part at the 2014 Oscars! We could go on for days about how perfect her dress choice was (seriously, that baby blue gown against her skin tone was magical), but let’s look specifically at her makeup look that night.

Nyong’o’s makeup artist, Nick Barose, reveals how he achieved this iconic look: a bright orange hue on both Nyong’o’s lips and cheeks, a defined yet simple eye look, and eye-catching brows. The final product is an amazing optical illusion: on paper, the look sounds like it should be bold and dramatic, yet on Nyong’o, it perfectly embodies a modest gracefulness, too.

This is a perfect example of a makeup look that embodies classic and natural (but with a tiny twist). The three main focal points of the face are addressed, thereby framing her face: her brows, her lashes, and her lips. Wearing Hourglass Opaque Rouge Liquid Lipstick, Robbie’s makeup is striking, yet straightforward. In contrast to this bright orange-red lip, Robbie’s eyebrows are bold and dark. In terms of eye makeup, her lids were left bare, framed only by a dark mascara on the upper and lower lashes. We’re still in love with the final result!

projector playing a film

Irish beauty, Saoirse Ronan (first name pronounced ‘Ser-sha’), was simply dazzling at the 2016 Oscars, and we doubt anyone would argue differently. Rocking an emerald green Calvin Klein dress, Ronan’s MUA, Mai Quynh, used a palate of grey and charcoal to harmonize Ronan’s makeup to her gown with a smoky eye. To add to this, Ronan’s fair skin and soft blonde hair really made the eyes pop even more. To ensure that focus wasn’t pulled elsewhere, Quynh completed the makeup look with a warm pink-brown blush for her cheeks, and a peach nude for her lips. Genius!

Known for her distinctive sense of style, Monáe made a statement at the 2017 Academy Awards with her metallic, sparkly, black and gold-themed getup, and that statement was: “I am a fashion force to be reckoned with”. Seriously, go check out her dress and accessories; it’s been 3 years and we’re still shook!

Amazingly, Monáe’s makeup was the most toned down aspect of her ensemble that night. That being said, it’s best described as sleek meeting mystic. Her skin is bronzed and flawless, and her lips, coated in a peachy nude tone. The real focus is on her eyes and brows. Her eyes showcase a golden shimmer in the middle of her upper lids, as well as a set of full, lush falsies. The ultimate star of the show, Monáe’s thick eyebrows, apparently took 20 minutes to fill in and perfect!

With a tight, shiny topknot and a glossy nude lip, Zendaya basically embodied the most prominent fashion and makeup trend of 2018 at the 90th Academy Awards. To be fair, Zendaya could wear a garbage bag and smear her face with dirt and she’d still look like fire. But this makeup look really was sensational!

Completing the nude lip, makeup artist Sheika Daley executed a perfect smoky eye, with just the faintest hint of white shadow on the inner corners of Zendaya’s rich brown eyes. Her brows are full and filled in, while still maintaining a natural appearance, and her skin is expertly contoured and glowing with dewy highlights.  It’s no wonder that this woman has quickly become a superstar over the past several years!

top view of makeup products

Can we just say that when Victoria’s Secret Angel, Taylor Hill, donned a tuxedo to last year’s Oscars, we all fell head over heels in love? To add to this unconventional choice or wardrobe, Hill chose a retro hairstyle reminiscent of the days of Old Hollywood – and then paired it with one of the boldest eye makeup looks we’ve seen at the Academy Awards in a LONG time.

What do we mean by that? Well, for starters, Hill’s peachy nude lip and brushed out, full brows were natural-looking enough. Her green eyes, on the other hand, were framed by a dark, metallic blue smoky eye look. With a brighter, glittery hue on the inner corners of her eyes, Hill’s makeup then grows increasingly darker, until it stretches out into a long, thick, and very pointed wing. ‘Stunning’ would be the understatement of the century for Hill’s makeup game here!

Do YOU want to be able to learn how to do makeup professionally, and create breathtaking looks such as the ones on this list? Getting your education and your makeup artist certification is the single greatest way to not only make your dreams a reality, but ensuring that you’re the best makeup artist you can be. Who knows…Maybe one day you’ll be doing makeup for the stars attending the Oscars!

Start your MUA journey and enroll today in QC’s leading Master Makeup Artistry course!

model outside in the snow, with beautiful brows, lashes, and red lip makeup

Brows, Lashes, and Lips: Getting Started with the Basics

By Makeup Tips and Tricks No Comments

In early 2010, movie star Jeremy Renner surprised the world when he revealed on The Ellen Degeneres Show that he’d once been a professional makeup artist. Back before he was the action hero we know him as today, Renner discovered a natural, artistic knack for doing makeup during his days in the theater. Instead of waiting tables between auditions, he earned his income by doing women’s makeup.

When asked what his tips are for women’s makeup, he had three simple words: “Frame the face.”

How best can you do that? According to Renner, it’s all in the brows, lashes, and lips! “It’s simple; it’s 5 minutes,” he added. Framing the face by highlighting these 3 areas can be done by anyone, even beginners. So let’s take a look at this, shall we?

beautiful woman with natural makeup

Let’s start by saying: if you’re a makeup lover and have been playing with the idea of turning this into your career, keep in mind that this tip isn’t going to be enough to make you a professional. The concept of framing the face, and learning how to do it, is more like the basic foundation of makeup artistry. In order to build off this starting point and truly hone the craft, you’ll need years of practice, a solid understanding of makeup theory, and lots of education/makeup training under your belt.

That being said, we believe that ANYONE with a passion for cosmetics and an eagerness to soak up new information can learn how to do makeup! Even if you have absolutely no background, at least by starting with these basics, you can get the ball rolling for yourself.

Step 1: Brows

How you choose to approach each step is dependent on your own taste. This can be said about the lashes and lips, too!

Tending to your brows can be as simple as using an eyebrow brush (a.k.a. a ‘spoolie’) to brush out and tame the hairs. If this is good enough for you, you can go the extra mile by lightly spraying a tiny amount of hairspray on your fingers, and then passing them over your eyebrows afterwards. When the hairspray dries, it’ll keep the hairs in place. Just make sure your hands are always clean first before you touch your face!

If you want to fill your eyebrows in but have no clue what you’re doing, never fear. There are plenty of easy options of what to buy to get the job done:

  • Pencils (which come in a variety of thickness)
  • Powders
  • Pomades
woman brushing eyebrows with a spoolie

Personally, I’ve tried all of the above, and found an equal preference for either a thin, pointed pencil, or an eyebrow powder. Powder can often be the quickest option, and many argue it gives the most natural result.

To better learn how to properly fill in your eyebrows, you can always look around and check out a makeup tutorial that speaks to you. Here’s just one example!

Of course, shaping the eyebrow can become more and more complex, depending on how much time and product you’re willing to put into it. But even just brushing them out (and lightly filling them in, if you want) can make all the difference!

Step 2: Lashes

If you’re not used to putting on makeup, putting anything close to your eyes might be a little nerve-wracking for you. But don’t worry! You just have to take it slow, and once you get the hang of it, it very quickly becomes second-nature.

When it comes to accentuating your eyes, lashes are one of the best ways to go. There are two primary ways you can do your eyelashes:

  1. Keeping things au naturel, and simply putting on mascara
  2. Combining mascara and fake lashes

Pro Tip: Fake lashes aren’t mandatory. It’s a personal preference; for as many people out there who love to wear them, just as many don’t. Falsies require a little bit more makeup experience, since they require more precision, and can be a hassle otherwise. If you’d like to challenge yourself, feel free to research further into fake lashes and how to properly apply them.

upclose of long lashes and mascara wand

Since we’re aiming for ‘quick and easy’, let’s just focus on emphasizing your lashes by using mascara alone. The first step is finding a color/shade that works best for you. You can always go to your local drugstore or makeup shop and ask a professional MUA there to help you. For example, some people like to go with the traditional black mascara. Others prefer a softer, more natural shade, and opt for brown. You’ll know your preference when you try some options out and see the results!

Another take-it-or-leave-it option is an eyelash curler. I know some people who swear by it, though I personally have never used one. Again, if you’re comfortable giving it a try, online tutorials or an in-person consultation can walk you through the steps of using an eyelash curler. But if you’re not comfortable with the idea of one, that doesn’t mean your lashes will look any less luscious! You can just keep going without one.

If you’ve never, ever tried to put mascara on your own lashes before, we recommend watching a few tutorial videos. This way, you can see how easy it is, as well as how many different ways you can apply it. Find whatever feels most natural for you, and remember – breathe! It helps to keep your hand from shaking!

Step 3: Lips

Again, this step can be kept super simple! It can be anything from a quick coating of lip gloss, to a full, dark lipstick, etc. When it comes to your lips, there’s a lot of wiggle room. Also, the nice thing is that, shy of replicating the shudder-inducing lip liner trend of the 90s, it’s really hard to go wrong.

If you want to wear more than just a transparent gloss, the key in finding the best shade for you is to know what’s right for your skin tone. This applies to not just lipsticks, but stains and glosses, too. There are plenty of Beginner’s Guides out there to break down the basics of which colors go well with which skin tones. But if speaking with an actual person works best for you, it’d be worth it to go back to the store and chat with one of the reps there.

woman making kissing face, while holding up pink lipstick

As with your brows and lashes, if your preference is to learn by watching others online, there are also plenty of online video tutorials to show you different ways for beginners to learn how to apply their lip product. You can customize the tutorials based on the type of product being used, etc.

This ‘Back to Basics’ lipstick tutorial, for example, looks pretty promising!

Keep in Mind…

Many of the beauty vloggers you see online aren’t actually trained professionals. While their work looks impressive, lots of the tutorials found online are guilty of teaching the wrong techniques, without anyone even realizing it. That’s not to say that EVERYTHING you learn from online tutorials is wrong – but rather, that if you truly want to ensure you’re learning how to do things the best way possible, the only answer is through makeup training/education and continued learning.

This way, you know you’re being taught by a true professional: someone who works in the industry and has the accredited background required in assuring the information you’re learning is accurate.

At the end of the day, everyone has the time and ability to frame the face, and anyone can learn how.  But to grow from there and truly become a makeup pro, you’re going to need so much more. Are you open to the challenge?

Become a certified makeup artist in 2020 by enrolling today in QC’s leading Master Makeup Artistry course!

frustrated woman shrugging one arm, unsure what she's supposed to do

5 Common Complaints You’ll Hear as a Makeup Artist

By Your Makeup Career No Comments

Most makeup clients you encounter will be totally awesome, and very easy to work with. Once in a blue moon, though, there will be the odd person whose sole purpose seems to be to critique and question your every move. Regardless, it’s your job to always remain a professional, and handle difficult clients with poise and class – despite how frustrating it might be in the moment.

To make life a little easier for you, here are 5 common complaints that nearly every MUA will hear in their career. At least by knowing what you can expect, you can best handle the situation!

professional female mua applying client's makeup

1. “Why do I need to book in advance?”

On that note, why can’t she simply pay the fee on the day of the appointment?

Yes, we can understand where this client is coming from. Let’s be real: no one’s ever going to say that one of their favorite things to do is ‘pay a deposit’ on something.

But that’s how business works. You need to protect yourself, too, and that’s exactly what getting a deposit and/or having a client book in advance does! Show her that you understand her side of the matter, but gently remind her that by reserving your time for her appointment, you’re closing off your schedule to any other potential work.

This can be problematic if she were to cancel last minute. You’d be left stranded, and without any jobs to fill that gap!

2. “You charge too much for your services!”

Unfortunately, having people trying to swindle you for cheap or free makeup services is just something you’re going to have to get used to as an MUA. Your rates are based on your education, experience, years of practice, business and marketing costs, and the fees to keep your professional makeup kit stocked with products.

But a client doesn’t see all that stuff behind the scenes. To her, you’re just overcharging. You can totally see why she might believe that, but don’t let that persuade you into underselling yourself or your worth! Sure, offering a discounted rate – even free services – once in a while is entirely up to you. If done sparingly, it won’t hurt your business.

But remember: you’ve earned the right to charge the prices you do, so be prepared to stand by your principles if a client tries to challenge you.

young woman pouting, standing in front of yellow background

 3. “That’s not how it looks in the picture!”

You’re going to get this one a lot. Sometimes, people will think that you can magically change them into a completely different person. A client might come get her makeup done her prom, hand you a photo of Kylie Jenner, and say, “I want to look like her.”

So, you flawlessly replicate the makeup you see in the photo. But when your client sees the end results, she’s disappointed because she still doesn’t look like Kylie. Well, yeah… because despite how badly she may want it, she is not in fact that person.

Their features aren’t identical. Their bone structures and appearances may be nothing alike. You’re a makeup artist, not a wizard!

That being said, remember to remain sensitive to her feelings. Her expectations may have been unrealistic, but she had them nonetheless. Now she’s discouraged. Try to shift the focus back to the actual makeup itself. You can point out the reasons why you can’t completely replicate what’s in the picture. But the makeup looks the same, and that’s the important part!

Above all else, keep reiterating how beautiful your client looks. You don’t want her feeling disappointed that she can’t be someone else – you want her leaving the appointment feeling confident and fierce in her own skin.

4. “My skin still doesn’t look good!”

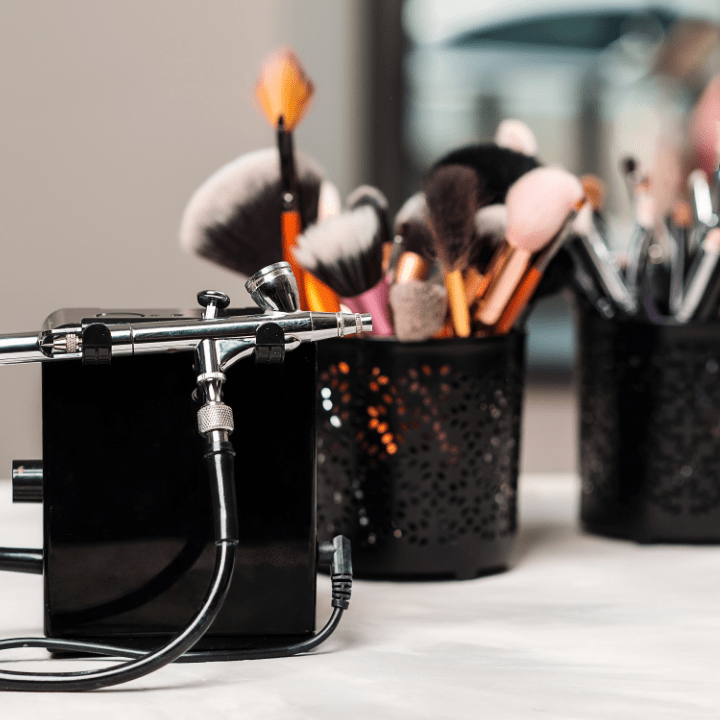
There’s this other misconception that no matter how bad your skin is, a makeup artist can make it appear flawless. Sure, proper technique helps. Certain tools, like airbrush machines, can contribute to a ‘photoshopped’ finish.

If all else fails, anyone can look good if they stand far back enough! (Don’t make that last joke to your client, they won’t find it funny.)

The truth is, makeup isn’t some quick-fix solution for bad skin. You can do everything right, but if a client isn’t taking proper care of themselves and their skin is in rough shape, you might not be able to perfectly cover that up.

If your client gets upset, it’s likely because she feels self-conscious. Yes, it can be frustrating for you to do the best job possible and still have it criticized, but remember your professional objective: to make your client feel beautiful.

If there’s little else you can do makeup-wise to give her the results she wanted, at least you can rely on your skincare knowledge. Help her better understand her skin type, and recommend some products and techniques that might be able to help her skin improve going forward!

upclose of model's face, with MUA applying powder to cheek with brush

5. “I hate it.”

Hands down, this is the worst feedback you can get from a client. You put your heart and soul into each job. It’s crushing to get such a brutal response! Even more awful is when you haven’t even finished and the client can’t stop commenting on how much she doesn’t like what you’re doing.

As hard as it can be, you have to try and look at each job as an opportunity to learn and get better. Ask her to show you what it is she doesn’t like, and have her articulate what it is she wants instead. Then you can try to actively correct whatever she’s unhappy with, and proceed accordingly. Do whatever you can, and if she still isn’t satisfied by the end of the appointment, use your best judgment for what happens next.

Depending on how she treated you, it may just be best to call it a day and put this experience behind you. If you feel it’s warranted, though, you can always try to remedy the situation by offering her some sort of refund (full or partial), a complimentary service in the future, etc.

She may not be happy with the makeup job you did for her, but she will appreciate the way you handled it. Her final impression of you and your business won’t be what you didn’t do for her, but what you DID.

You can’t control what complaints you’ll receive from customers, but you can control how you choose to react to it. Always be respectful and professional, and you’ll come out on top, one way or another!

Do you have anything else to add to this list? Let us know in the comments!
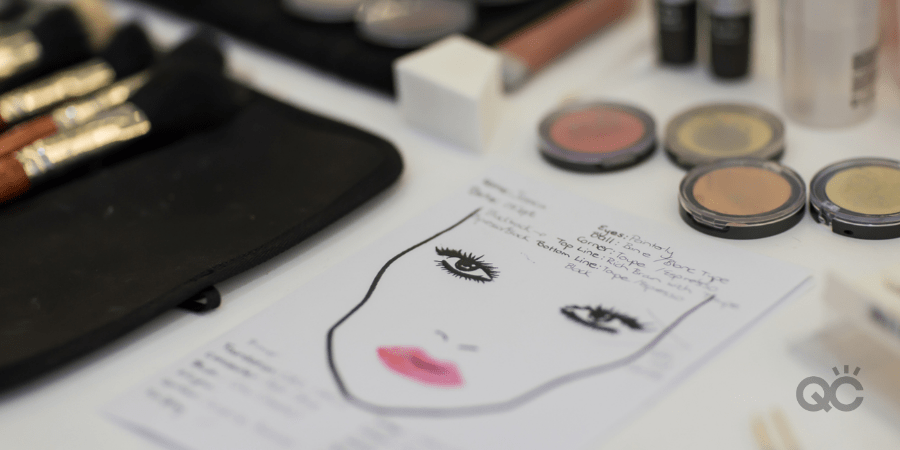
What if someone leaves your makeup business a terrible review online? Just follow these 3 steps!