Makeup Tips and Tricks Archives - Page 3 of 27 - QC Makeup Academy
Category

Makeup Tips and Tricks

How COVID-19 is Changing the Game: The ‘Maskne’ Crisis

By Makeup Tips and Tricks No Comments

At this point, it’s a bit redundant to point out that COVID-19 has changed life as we know it this year. I mean, that much is obvious. What may not be quite as obvious, however, is the impact the pandemic has had on our overall skincare and makeup routine.

I’ll just say upfront: if you’re an anti-masker, this article is probably not for you. (But while you’re here, it’d be cool if you got it together and started wearing a mask. But hey, that’s an entirely different topic.)

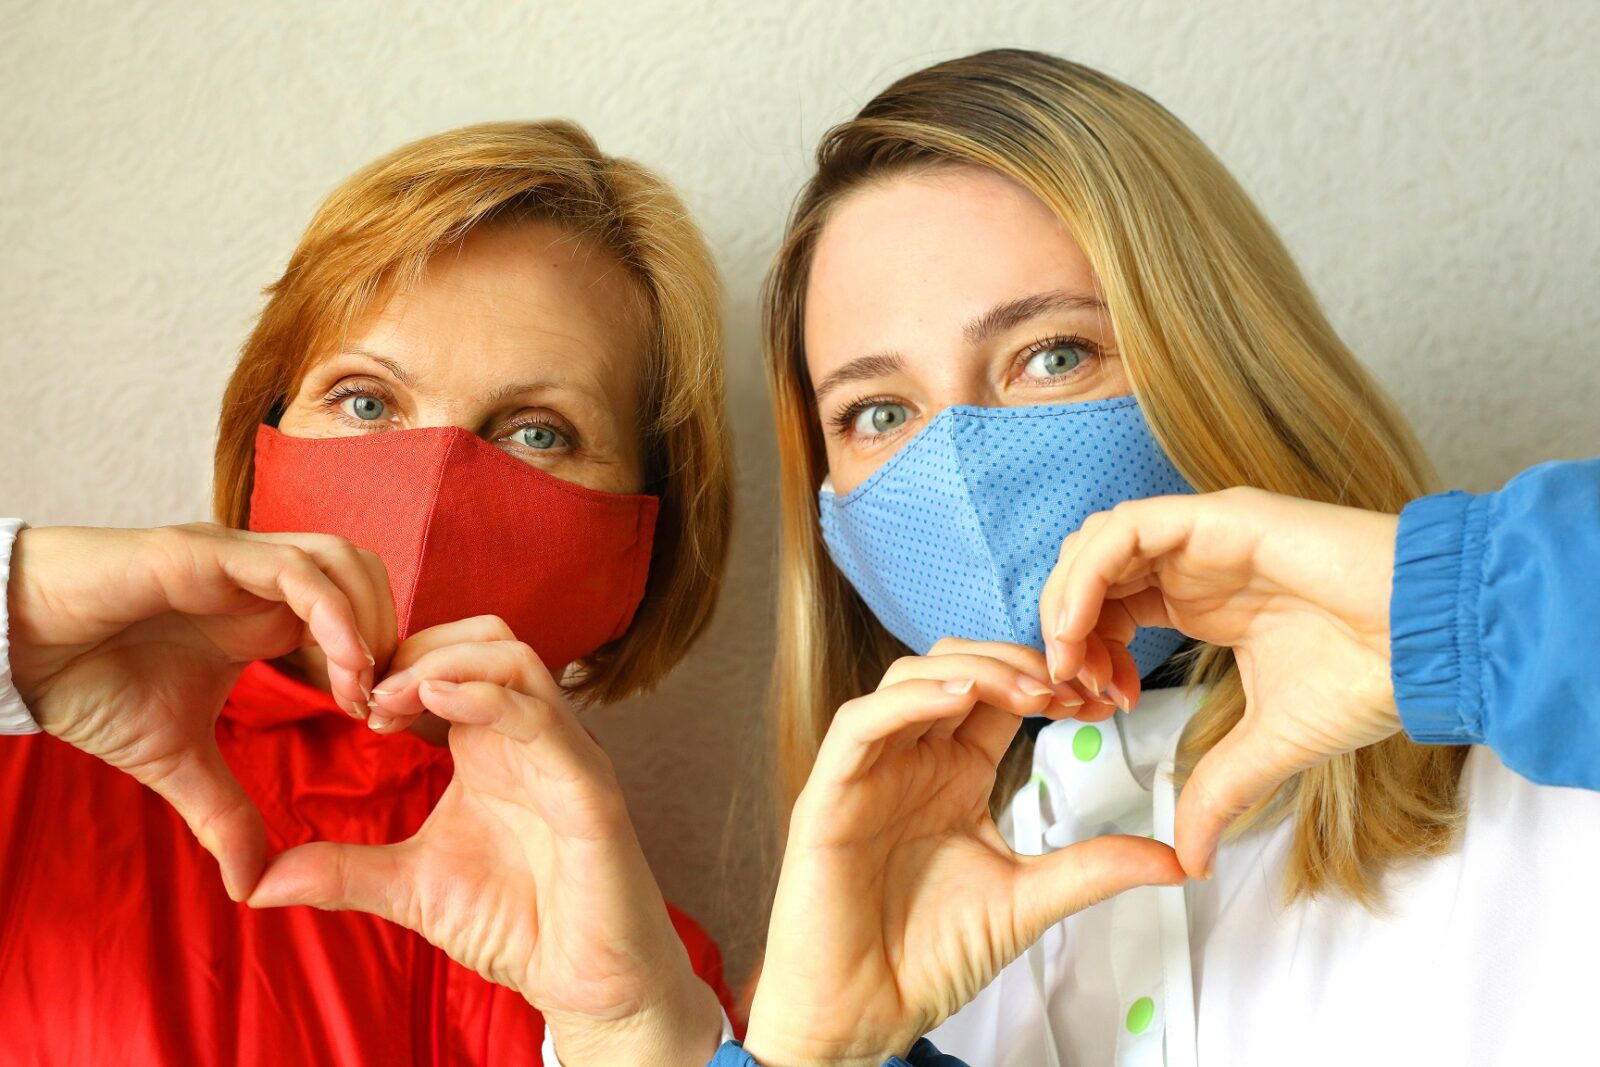
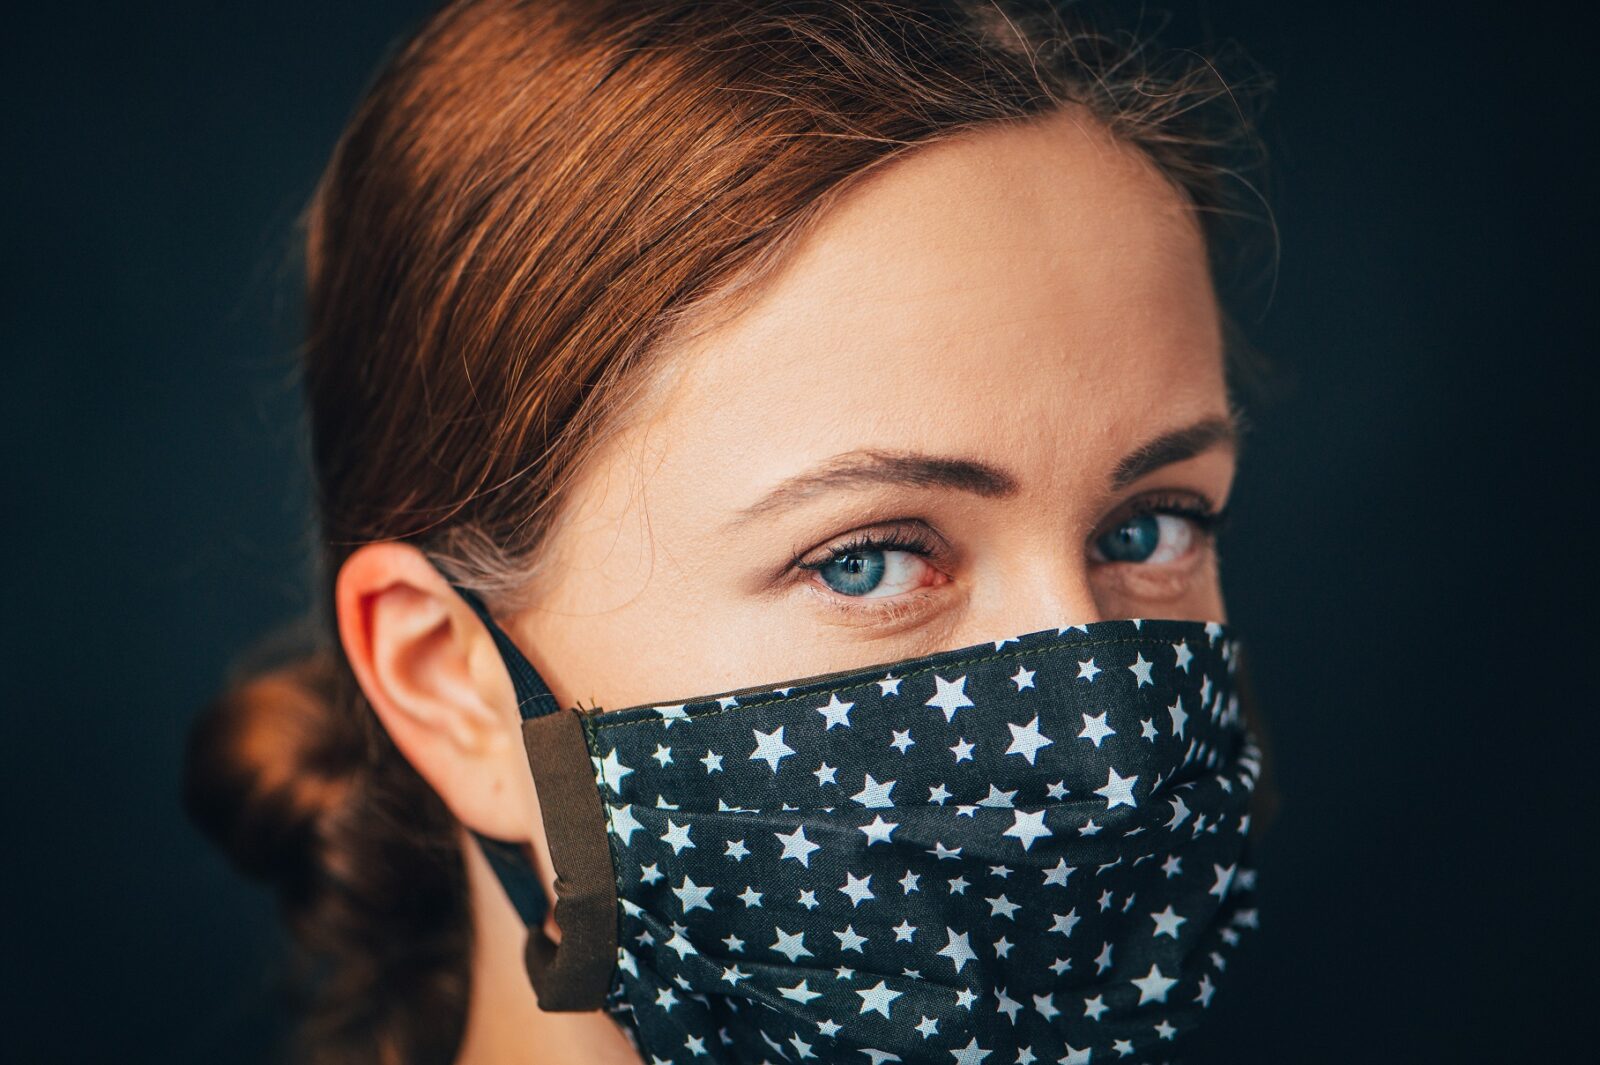
For those of us who’ve been abiding by recommended safety precautions, though, face masks have become a daily part of our fashion style. Some of us prefer the standard masks; others have been purchasing them hand-made. Heck – they even come in a variety of colors, patterns, and designs. It’s now considered “trendy” to match your mask with your outfit!

As beneficial as they are, there are admittedly downsides. Two in particular are:

  • The ‘maskne’ crisis, and
  • The fact that half of our hard-earned makeup routine is now pretty much useless

That being said, there’s a simple solution to BOTH of these dilemmas. In this two-part series, we’ll take a look at both issues, as well as how to work around them. Today, in Part 1, let’s start by talking about the dreaded ‘maskne’!
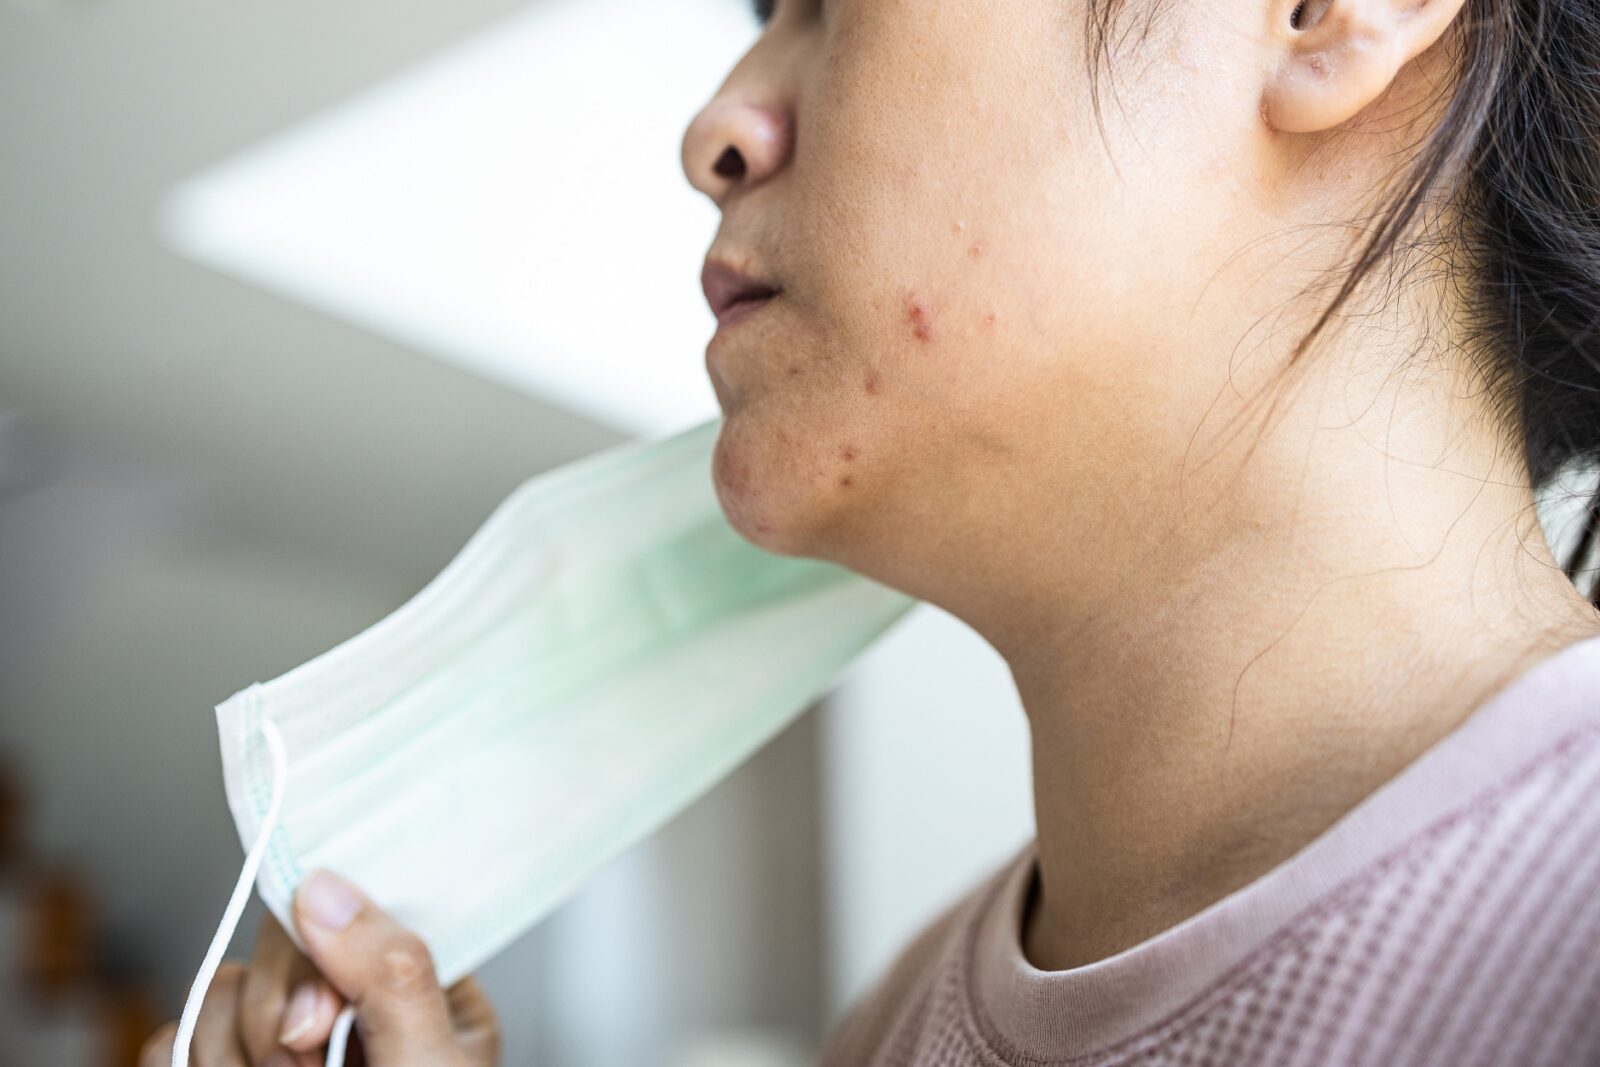
Maskne

What is ‘Maskne’?

Basically, it’s the acne breakout that many of us have been experiencing since we started wearing our masks. Thanks to the fabric of the mask constantly rubbing against our face, we’re getting micro-tears on our skin’s surface. These tiny little tears allow for dirt and bacteria to enter and clog up our pores.

Plus, consider the fact that it’s already a billion degrees outside in a lot of places right now – and then we’re going and adding more heat and moisture when we breathe. The lower half of our face is essentially living in a sauna. The result is that our skin is being bombarded with an excessive amount of oil, sweat, and potential germs – with no place to run and hide!

Note: I should probably point out that I am 100% pro-mask, and am in no way trying to knock it or dissuade anyone from following PPE protocols. I’m merely a little birdy pointing out the facts. Now that we’ve cleared that up, let’s move on.

How Can We Prevent Maskne?

A few months back, we discussed why the importance of your skincare routine is of utmost importance during the pandemic. So, that’s a good place to start! In general, you can’t expect to have happy, healthy skin if you aren’t properly taking care of it.

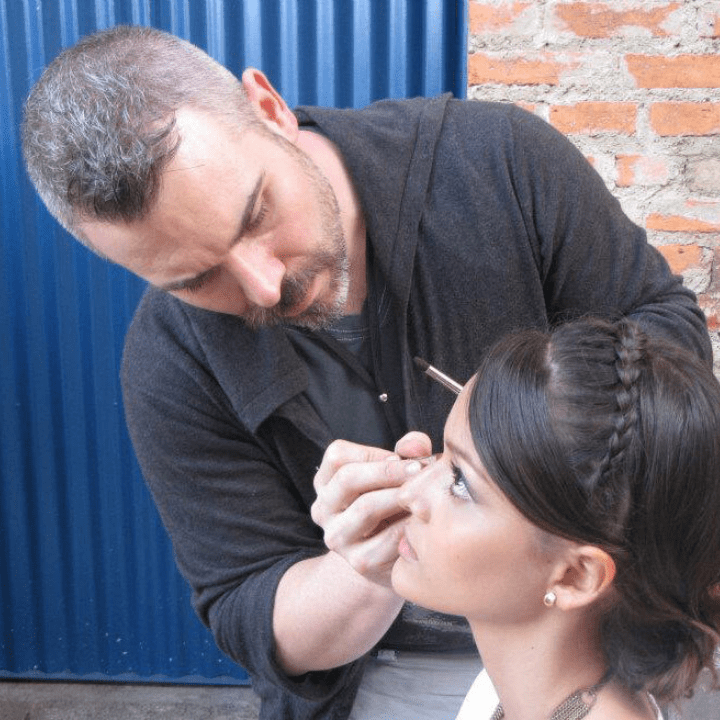
Skincare knowledge is critical for makeup artists – but as a human being, it’s also just as valuable. Do some research online, look into different products, and learn about safe ingredients. If you’re feeling extra ambitious and really want to become a skincare expert, you have everything to gain by taking a course!

All I’m saying is, knowledge is power.

Once you’ve got the basics down, you’ll then be ready to take it a step further. The specific issues that cause maskne need to be combatted in equally specific ways. For example, I just mentioned that clogged pores are a major cause of the problem. So, should you opt for thick, heavy skincare products?

Probably not.

covid makeup

Rather, you should adapt your skincare routine and approach it with the following in mind:

  • Try to use lightweight, water-based products as much as possible. Your skin will be able to breathe easier!
  • Don’t get stingy with your moisturizer! If you go with a lighter-weight product, you can pack on a bit more onto your skin, in order to give it extra protection!
  • Give your skin some extra love on a regular basis. Exfoliate your skin once in a while, deep-cleanse the crap out of it here and there – you get it. A little extra love never hurt anyone.

While you’re at it, it wouldn’t hurt to do a bit of research and learn more about your specific skin type. That can have a big impact on the types of skincare products you should be using on your face, as well as how you should be approaching your personalized skincare regimen.

For instance, if you have oily skin and/or already deal with acne (like myself), you may need a stronger game plan than someone with dry skin and the complexion of a newborn baby.

I’m not saying that professional skincare training is the best way to learn this info – but I’m also not not saying that. 😉

The Benefits of a Skincare Course

You mean, aside from becoming a skincare wizard (which would be downright awesome)?

Well, for starters, it’s a great addition to your makeup business! Incorporating skincare services can attract more clients, increase your profits, and transform you into an even stronger MUA. It’s always important to find ways to stand out from the competition, and this is definitely one of the best!

Then you can add in the fact that, as a makeup artist, you’re always on the hunt for new and exciting knowledge. You’ll get a better understanding of the beauty industry as a whole, as well as an even better mastery of makeup. After all, if you don’t understand skin, how can you possibly hope to apply makeup to it properly?

(If you want an idea of the type of information you’d learn from expert training, check out the course breakdown of QC Makeup Academy’s accredited Skincare Course!)

Now, I know that some of you out there may not be makeup artists, or have no interested in becoming one. I respect that. But what about becoming a certified skincare consultant and starting up your very own business? Or building your reputation through a stellar skincare blog? Or using your expertise to represent a major cosmetics brand?

There are tons of potential career paths out there, and the right Skincare Course can make all of this possible for you!

See? I told you that proper training is the best way to become a pro!

Masks aren’t the only thing wreaking havoc on our skin. The sun is a culprit, too! Keep your skin looking and feeling its best this summer with these 8 handy tips!

Nathan Johnson’s Top 10 Blog Posts of All Time!

By Education, From the Experts, Makeup Tips and Tricks, Your Makeup Career No Comments

Over the years, QC executive instructor and celebrity makeup artist, Nathan Johnson, has had many pearls of wisdom to share! From his informative webinars, to his support for students and grads in the QC Virtual Classroom, to the expertise shared in the makeup artistry classes he teaches – Nathan has made it his mission to help others prosper in their dreams of becoming professional MUAs!

Did you also know that he’s one heck of a writer?

It’s true! (Jack of all trades, or what?) Through his blogs with QC, others have learned, grown, and become even better artists through Nathan’s many makeup tips, industry insights, and secrets for success.

Let’s all put our feet up, with a tall glass of water in hand (stay hydrated – there’s our PSA), and look back on the 10 most popular blog articles Nathan’s written for us!

There’s a common misconception that in order to be the best makeup artist, you should only use the fanciest, most expensive products. The fact is, this just isn’t correct. In reality, there are plenty of cases where drugstore brands can work just as well for your professional makeup kit!

From foundations, to powders, to other types of makeup products – Nathan breaks down where you can afford to save a few bucks, versus where the price is worth paying!

As a professional makeup artist, there’s no way around it: you’re going to NEED to have a strong portfolio of your past work. Not having one can sink your business before it’s even had a chance to get off the ground.

But never fear, because Nathan is here! In this awesome article, he breaks down his 6 top tips for putting together a portfolio that’s sure to WOW your clients!

What better way to get a leg up on the competition than to get insider secrets from a notable MUA in the industry? Here, Nathan reveals 2 key things that he wants YOU to know as you journey towards your dream career.

Trust us: these 2 tips will take you to the next level!

Speaking of taking your MUA journey to the next level, Nathan’s got 6 more tips to help you prosper in the beauty industry! Who you should be stalking on social media, why practice matters – all of these (and MORE) are covered in this article.

Want to set yourself up for success? The answers are here!

If your dream is to work with Hollywood’s elite, you’ll need to know how to present yourself professionally. After all, celebrities are people, just like us. This means, treating them like any other client.

As a professional celebrity MUA himself, Nathan draws on his experience and insider knowledge to provide you with 5 secrets to working with the A-listers – and how to refrain from acting starstruck!

Travelling is a regular part of every makeup artist’s life. But having to lug along ALL of your products wherever you go? Talk about a nightmare!

Don’t let your makeup kit turn you into a stress case. With these 6 tips, Nathan will help you minimize your baggage, know how to choose only the best products, and ensure you never have any makeup mishaps along the way!

As a makeup artist, do you really need to worry about getting insurance? What is it anyway, and how can it benefit you?

Whether you want to know the difference types of insurance available to you, how much it costs, or the pros (and cons) of getting it – Nathan’s here to guide the way!

Let’s circle back around to working with celebrities, shall we? This is the dream for many of us, isn’t it? Working with stars, ascending the ranks, and become a well-known name in the world of makeup artistry. But that kind of dream is not realistic… right?

Wrong!

In this wildly popular article, Nathan reflects upon his own journey, and reveals some of the steps he took to become a celebrity makeup artist. You’re definitely not going to want to miss this!

(How else will you learn Nathan’s top 2 tips for breaking into this industry?)

Excitement, new friends, travel, money… These are just a small handful of the wicked perks you’ll get by becoming a makeup artist!

With 26 years and counting in the beauty industry, Nathan lists 10 of the GREATEST reasons why he absolutely loves being a professional MUA… and why YOU will, too!

DING, DING, DING – WE HAVE A WINNER! In Nathan’s most popular blog of all time, he explores 14 exciting career paths that your makeup training and certification(s) can lead you to!

Want to be start your very own business? Do makeup for film and television? Work in a spa? Develop a brand-new cosmetics line?

All of these opportunities (and MUCH more) are at your feet, waiting for you to discover them! So, what are you waiting for? Keep reading, get motivated, and make today the day you turn your dreams into a reality!

Which makeup artistry classes are right for you? Check out all that QC Makeup Academy has to offer, and earn your professional certification in as little as 3-6 months!

Airbrush Makeup: Safety and Etiquette 101

By Makeup Tips and Tricks, Your Makeup Career No Comments

Over the years, airbrush makeup has established itself as a popular makeup practice within the beauty industry. Used for SFX makeup, editorial shoots, and bridal looks, it’s an art that takes ample amounts of patience and time to properly master. But once you do, it can skyrocket your professional career to a whole new level!

While it can be tempting to simply purchase an airbrush machine and get going right away, don’t be too quick to jump the gun! (Like what we just did there?) The fact is, if you’re unfamiliar with airbrush makeup, there are things you NEED to learn first.

Proper training is a must! Before you begin offering airbrush makeup services to your clients, you must first ensure that you fully understand:

  • The safety precautions required, and
  • The professional etiquette expected of you

So, let’s break these down and look at the basic rules of airbrush makeup safety and etiquette!

Airbrush Makeup: Safety & Etiquette Tips

Different types of makeup call for different best practices when it comes to hygiene. Airbrush makeup is of no exception. If you don’t know what you’re doing, there’s room for a lot to go wrong. It can put your client at risk and potentially damage your reputation in the industry.

Your best bet is to put in the time, acquire proper training, and adequately prepare yourself. Here are some of the best ways to do that…

1. Take an airbrush makeup class

The single most effective way to learn ANY aspect of makeup is to get reputable training from an accredited school. Do thorough research, and find an esteemed makeup school that offers a class or workshop specifically for airbrush makeup.

In most cases, you’ll not only be provided with high-quality equipment (as part of your tuition fee); you’ll be trained by actual, working MUAs who know exactly what they’re doing. Any makeup school worth its salt will also ensure that in addition to basic theory, technique, and application, you’re taught safety, etiquette, and even business components.

Plus, once you graduate from the program, you’ll have an extra certificate to add to your resume!

2. Be public about your personal hygiene

I’m not saying you need to divulge to your clients whether you had a shower that day or not. (I mean, you could. Might be weird, though.)

What I mean is, your clients want to know that they’re dealing with a professional. If they have ANY suspicion that you’re unsanitary, they’re not going to want you touching their face. Full stop.

This is especially the case in light of everything that’s been going on in the world these past few months. Once you and your client are able to safely work in close proximity to each other again, you’ll need to go above and beyond to reassure your customers that you’re always making their health a priority.

It can be something as simple as washing or sanitizing your hands in front of them, before the appointment begins. That, combined with only using clean makeup products/tools, and your clients will never second-guess that they can trust you to take proper care of them.

3. Avoid contaminating your tools/products

As you already know, it’s only too easy for bacteria to fester on your makeup products if you’re not careful. Similarly, strict measures need to be taken when handling your airbrush makeup and machine. Straying from these practices can result in your products and tools becoming tainted.

No, your airbrush machine won’t ever actually touch your client’s face. But it will be touching your hands. As such, cleaning the outside of your machine after every use is mandatory.

Another major area where MUAs unknowingly contaminate their airbrush makeup is by re-using the makeup itself. If you have leftover product in the jar or tray of your airbrush gun, it might seem harmless to simply pour it back into its original bottle with the rest of the product.

However, the moment you squeeze product out of the bottle, you’re exposing it to airborne germs and other unwanted bacteria. By putting it back into the bottle afterwards, you’re tainting all of that precious makeup still within that bottle by introducing to so many potential contaminants.

Worst case scenario, it spoils the makeup beyond repair. Best case scenario, it severely reduces its overall shelf-life. Given that airbrush makeup isn’t always cheap, there’s no real outcome to this that doesn’t suck for you.

4. Facilitate proper ventilation

You know that dizzying smell that lingers in the air after you use nail polish or hairspray? These same types of fumes can occur when using an airbrush makeup machine for an extended period of time. While you may grow “nose blind” to them over time, it can be a jarring, unpleasant experience for your clients.

Without proper airflow in your work space, prolonged exposure to airbrush makeup can put your client at risk of developing a headache, an allergic reaction, respiratory problems, etc.

Combat this risk by making sure the room is properly ventilated. If there are windows and the weather outside is permitting, open them up. Bring a fan with you to the appointment, and keep it running throughout the duration of the application.

Most importantly, if your client needs a break for any reason, give it to them!

5. Do a patch test

A patch test helps to ensure that your client won’t develop any sort of negative and/or allergic reaction when coming into contact with the airbrush makeup product. As a rule of thumb, water-based airbrush makeup is typically the safest type of product for you to use, since its ingredients are most often mineral-based. It has the smallest likelihood of resulting in a rash, breakout, or allergic reaction.

That being said, many makeup artists prefer to work with alcohol or silicone-based airbrush products. Since there’s a slightly higher risk of an allergic reaction, it’s extremely important to always perform a patch test. Ideally, you will do this during the initial consultation.

In a nutshell, this is how you will do a patch test:

  1. Pick the chosen airbrush makeup product, and apply a small amount on either the inside of her forearm or the side of her wrist.
  2. Let it sit for a few minutes.
  3. Remove the product, and check for any signs of redness, swelling, irritation, etc.

If everything looks clear, you’re safe to use that product on your client’s face. If not, you’ll need to switch to a gentler product and try another patch test. Remember: if your client begins to experience any pain or discomfort at any point, remove the makeup immediately!

6. Provide skincare advice

Airbrush makeup can do a pretty good job of sucking all the moisture out of your skin – especially if you already have dry skin, or don’t have a solid skincare routine in place. Before applying any makeup, always ensure to prep the skin first.

Since many editorial clients are already used to working with this makeup medium, they’re more likely to know the drill. Chances are, they understand what skincare practices they need to utilize before and after the airbrush application.

Other clients, such as bridal clients, may not be quite as knowledgeable, though. As the expert, it’s your job to tell them. Explain to her why airbrush makeup is so drying to the skin, and advise her to moisturize prior to the appointment, as well as after the makeup has been completely removed.

Pro Tip: Want to build on this and become an actual Skincare Consultant? Check out QC Makeup Academy’s Skincare Course, and add to your professional certifications in as little as 3-6 months!

7. As always, be friendly

In terms of etiquette, it’s not really any different than the etiquette you’d display during a traditional makeup session with a client. Above all else, always remember to be friendly and professional!

Other standard protocols to keep in mind are:

  • Let your client set the conversational tone
  • Cater to what your clients needs and what will make her feel the most comfortable
  • Go over the look they want one more time, in case there’s anything they wish to change last-minute
  • Keep your touch light
  • Make sure you’ve brushed your teeth that morning, and have some mints or gum on you (just in case). You’re going to be getting a bit up-close and personal, after all!

So long as you keep all of this in mind as you develop your airbrush makeup training and skills, you’ll be well on your way to becoming a true pro! Before you know it, airbrush makeup will quickly become a successful cornerstone of your business!

Do YOU have any other tips for proper airbrush makeup safety and etiquette? Tell us in the comments below!

Ready to add airbrush makeup training to your professional qualifications? Enroll today in QC’s leading online Airbrush Makeup Workshop!

The Do’s and Don’ts of Henna – Part 2

By Education, Makeup Tips and Tricks No Comments

As a professional makeup artist, it’s important to keep expanding your skill-set. The more knowledge you have about makeup, the better (and more inclusive) your services will be!

The best way to broaden your training is with makeup classes. For example, QC Makeup Academy has a program entirely devoted to teaching you about cosmetic and beauty practices from all around the world! As part of this Global Beauty Workshop, you’ll learn all about Henna.

In Part 1 of our look into the art of Henna, we broke down what it is, where it comes from, and its symbolic/historical roots. Importantly, we also took a look at some of the proper (and improper) habits to adopt when incorporating Henna into your makeup business.

Let’s expand on this, and check out a few more ways to properly do Henna – as well as some ‘sins’ you need to avoid!

Do: Make Your Own Henna Products

Unfortunately, it’s very easy to cut corners and purchase the wrong Henna products. The less organic the ingredients are, the worse the quality of the final product will be.

In recent years, it’s become a bit of trend – particularly in Western culture – to buy pre-mixed Henna cones. While this is undoubtedly a bit more convenient, we recommend against doing this. If you buy a pre-made concoction, you’ll have no way of knowing exactly what’s gone into the mixture. Furthermore, you won’t be able to control the ratios, the consistency, or create the ideal cone for application.

Instead, your best bet is to purchase fresh Henna powder, and mix it yourself. Typically, this powder will be mixed with water and oils (such as eucalyptus oil, henna oil, and/or black clove oil). There are also plenty of ways for you to create the Henna cone yourself. This YouTube video, for example, breaks the steps down in an easy-to-follow tutorial.

When researching into where to purchase your Henna powder, make sure to be thorough. There are tons of sellers out there who claim to offer high-quality powder, when in reality, it’s anything but! What you want to look for is a Henna powder that’s marketed as “body art quality”.

This specific type of powder is ground into very fine particles, so that when mixed with water and oils, it turns into a smooth mixture that creates a beautiful finish – without losing its texture and clogging up the opening of your Henna cone.

Pro Tip: If your makeup classes are teaching you how to do Henna tattoos (that is, Henna designs on the skin), make sure to stay away from ‘Neutral Henna’. While good for conditioning hair, it does nothing on the skin and would be a waste of your money!

Don’t: Use Henna Containing Chemical Additives

Much like with other beauty products, when Henna ingredients are all-natural, they’re far less likely to cause any damage to your client’s skin. On the contrary, Henna powder containing harmful chemicals can be a concern.

It’s believed that the greenness of your Henna powder indicates how pure it truly is. If the powder is a strong green hue, it’s supposed to be of higher quality.

The problem is, many scammers have caught onto this fact, and have found a way to create fake (but convincing) alternatives. For instance, they may lace their Henna powder with green dyes in order to replicate the authentic, bright green color.

So, how do you know who to trust when buying your Henna powder?

Do your research! Never purchase any Henna powder whose ingredients aren’t openly listed for you to see. Only buy pure Henna powder that doesn’t contain chemical additives. And when looking into potential sellers, do as thorough of a background check on them as you can!

Read reviews, scour their website, search for them on social media. There are plenty of online chat groups and forums you can look into, where other Henna artists may recommend trusted suppliers.

The bottom line is: never purchase your materials from a supplier unless you’re confident in their product. Using anything less than pure Henna powder can potentially lead to issues down the road with clients, which can seriously damage your professional reputation.

Do: Avoid Black Henna

In order to change Henna from its natural greenness to a dark black color, there are many suppliers who opt to add PPD (para-phenylendiamine) to their powder. Unfortunately, this is a rather powerful chemical sensitizer, and can be seriously dangerous to some people!

Some possible side effects of prolonged exposure of PPD on the skin include:

  • Allergic reactions
  • Redness/swelling
  • General skin irritation
  • Burns
  • Blisters
  • Permanent scarring

Needless to say, you don’t want to risk any of your clients experiencing any of these unwanted reactions! You’re better off avoiding PPD-infused Henna powder altogether. Yes, you may encounter some clients who specifically request black Henna.

However, for the sake of her safety, and the overall safety of your business, we recommend explaining the potential health risks to her, and declining such a service. Worst case scenario, if she refuses to budge, you can always recommend she visit an airbrush tattoo artist instead.

While it may cost you an appointment, it will ensure your client remains safe. Ultimately, this matters more.

Don’t: Prepare at the Last Minute

Your global beauty makeup classes will go into great depth about how to properly mix and create your Henna product. But one thing that’s especially important to stress is that you give yourself enough time to prepare your products before each appointment.

For starters, it may take some trial and error for you to learn what the perfect consistency is for your mixture. On top of that, you need to allow your Henna mixture to sit for at LEAST 6 hours before you can apply it to your client’s skin.

Anything less, and it may not stain the skin properly, have the desired color, or last as long before fading.

To ensure your client gets the best results, let your Henna mixture rest for as long as possible. You can even prepare the mixture for your appointment the day before, and let it sit overnight.

Pro Tip: Want to REALLY be organized? Prepare a large batch of your Henna mixture, and store it in your freezer! It can remain in there for up to six months, without ruining any quality.

Do: A Patch Test

When it comes to Henna tattoos, your makeup classes will ingrain in your head the importance of doing a patch test first. This will help determine whether or not your client’s skin will react well with your Henna mixture.

Could you imagine if you skipped this step, started applying the Henna all over your client’s hand, and she suddenly broke out into a severe allergic reaction? Such negligence could spell the end of your career!

Henna artists find that the inner part of your client’s wrist is the optimal spot to do a patch test. Simply apply a bit of your Henna mixture, and then advise her to keep an eye on it over the days to follow. Specifically, she needs to note if she experiences any irritation, swelling, or redness.

This is also a perfect opportunity for her to get a real feel for what she can expect from a full Henna application! Let her know what to expect in terms of the color changes the Henna will undergo over the next few days. She may find that the final result is exactly what she was expecting! Alternately, she may discover that it’s different than she originally thought it’d be.

All of this is why a patch test is so crucial! Ideally, you’ll want to perform it during the initial consultation. It’s best for you and your client to know as early on as possible whether you can provide the service she’s looking for. Neither of you want any unwanted surprises on the day of the appointment!

Interested in discovering other ways that global beauty makeup classes will help strengthen your career? Check out this article for 3 more awesome reasons!

Ready to diversify your techniques and open up your services to an even larger clientele? Enroll in QC’s leading online Global Beauty Workshop today! 

Products + Tools You Absolutely NEED in Your Professional Makeup Kit!

By From the Experts, Makeup Tips and Tricks One Comment

Australian MUA, Charlotte Ravet, is the proud owner of her very own hair and makeup business. From bridal, to editorial, to film and television, and everything in-between – Charlotte provides a wide variety of services that cater to all types of clientele!

Her extensive resume includes working for Prada, L’Oreal, and even the cast of the hit show, Glee! A developer of educational programs, Charlotte has even been awarded Best Makeup Educator of the Year by the Australian Industry Makeup Awards.

Here, she examines the best (and cheapest) online tools to help you market your makeup artist business!

As an MUA and makeup lover, the one thing we never want to stop buying is… makeup! Of course, if you’re not careful, this can spell trouble for our bank account. This is why, over the years, the main thing I’ve learned is to keep it simple!

There are two reasons for this:

  1. As a professional MUA, makeup is my living. This means that I have to be mindful to manage my spending on beauty products. This is because my budget also needs to be allocated to things like advertising, marketing, space rental, and other business expenses.
  2. The more organised my professional makeup kit is, the easier (and faster) I can provide my services for clients!

As part of my standard practice, I typically have two separate makeup bags. One is for classic beauty makeup; the other, for creative and/or editorial. This helps me better organize my professional products. Plus, it means I don’t need to lug ALL every single product with me to a given job.

Breaking Down My Professional Makeup Kit

When it comes to your professional makeup kit, you need to have an assortment of products. Let’s take a look into mine to illustrate the types of things you’ll need.

To start, the usual essentials within my kit’s beauty bag include:

  • Skincare items
  • Foundations
  • Concealers
  • Powders
  • Eyeshadows
  • And much more!

On the other hand, my creative/editorial makeup bag is reserved for pigments, glitters, and body paint.

Beauty Bag Must-Haves + Tips:

Foundations, Contour, and Concealers

I would recommend having at least 6 liquid foundation shades in your professional makeup kit. They should range from light to dark. This will better help you adjust to different clients’ skin tones.

If the foundation comes in a glass bottle, I recommend buying an empty plastic bottle and switching the packaging. (Muji has some great ones that are pretty cheap!) Glass can be heavy to carry for a mobile makeup artist.

My Personal Favorites

My favourite foundations tend to come from the line, YSL Touche Éclat. I find they create a radiant glow and lightweight finish. Another staple foundation product is M•A•C Studio Face and Body. This line offers 13 different shades to choose from!

For the contour, concealers, and other foundations, I’ve found an all-in-one solution: cream palettes! If there’s one thing I can’t live without, it’s a primary cream colours palette!  My personal favorite brands for this are RCMA and Maqpro.

The awesome thing about cream palettes is that they give you one texture for everything! You can adjust the pigments, depending on how full the coverage needs to be. I frequently alter and/or create shades of contour, foundation, and eyeshadows by mixing the primary colors with the white.

Similarly, you can also sheer it out, using a mixing medium. Here are the mixing mediums I use with wax-based cream pigments:

Maqpro

Maqpro’s Makeup Mixer will help produce a cream foundation that’s ideal for medium coverage. To set it, I use translucent powder.

Kryolan

This is one of my latest finds, and I absolutely LOVE it! Kryolan’s Mixing Medium is silicone-based. It mixes very well with the cream pigments to obtain a fluid texture water that’s also sweat-resistant. I’ve found it perfect for both private clients and brides!

RCMA

RCMA’s Color Process Foundation Thinner is oil-based. It’s optimal for softening harder foundations, restoring dried palettes, and adjusting a foundation’s consistency. I love the dewy finish it produces! I definitely consider this a must-have for my editorial looks!

Honorable Mention

For a great highlight, I always use YSL Touche Éclat’s highlighter pen! I love how effortlessly it brightens darker spots on the skin.

Eye Makeup

For eyeshadow, I have two large magnetic palettes, with a collection of my favorite shades. One is for neutral colors, while the other is more creative. I always keep the black shades separate, as it is a pure pigment (which typically makes it more fragile).

I also carry my eyeliner pencils in a drawing pencils case. These cases have separated spaces for each pencil. This will help keep them organised and well protected!

Lips

A useful tip for your professional makeup kit is to decant your lipsticks into lighter-weight, portable plastic palettes. For me, I tend to go with the clear plastic palette from Vueset. My professional makeup kit also contains clear gloss from M•A•C Cosmetics. Whenever I want to create a lustrous effect on my client’s lips, I simply mix the lipstick with this gloss!

Brows

For editorial eyebrows, I ALWAYS have pear soap and M•A•C Cosmetics Fix+ in my arsenal. For the eyebrow makeup itself, my favorite line is the Inglot eyebrow wax. In case you’re interested, I find that 16 is the best shade for medium-to-dark eyebrows!

Skin

I love skincare! As a makeup artist, you know how vital good skin is the key for great makeup. Let’s breakdown some of my most recommended skincare essentials!

Primers

A silicone, blurry primer is fantastic for for mature skin. It can also be used a base when working with silicone-based foundations. Always match the primer’s texture with the foundation you are using!

For a radiant complexion, I swear by the Brightening CC Serum from BY Terry. If you’re looking for an effective skin cream to add to your kit, Egyptian Magic offers a wonderful, all-natural product that protects lips and repairs dehydrated skin.

I also use it to add a little extra glow to my editorial looks!

Creams and Cleansers

You never know when you’ll work with a client who has sensitive skin, so as a rule of thumb, try to use organic skincare products that are perfume-free. In my professional makeup kit, I always have soothing creams as well.

Creams and serums are the very first products applied before makeup. This is why it’s so important to use all-natural products whenever possible. You want to avoid allergies and adverse reactions with your clients!

Creative/Editorial Bag Must-Haves + Tips:

As much as I love pigments and glitters, I have learned the hard way that it’s best to keep them separated from other products. A lot of glitters are sold in hard plastic jars, which can easily break.

For this reason, I recommend purchasing some softer, plastic jars to hold your glittery products instead. For extra protection, place these products in a separate (plastic) pouch.

My Personal Favorites

For pigments, my go-to products are Maqpro’s Paris Star Powders, and Down Under Cosmetix. I also swear by Kryolan’s Aquacolor line, because the colors are rich and super easy to apply. Plus, these glycerin-based eyeshadows also come in neon shades!

Tools

I must own around 700 makeup brushes! For every client, I always have a fresh and sanitized set, ready to use. Once any job is done, I then place my used brushes in a zipper bag. This way, I’ll know to clean them later, while also ensuring I don’t contaminate any of the clean items.

The one type of brush that serves as the true MVP is the angled brush. I seriously cannot live without angled brushes! On top of using it for makeup, I also sometimes use it with micellar water to remove little mistakes on the client’s lips or liner.

Crown Brushes is my go-to brand, as they are great quality brushes for affordable prices.

Other standard tools to have in your professional makeup kit include little fan brushes (for mascara) and palettes. Personally, I prefer acrylic palettes because they don’t keep the product cold. Metal palettes can sometimes tend to do that.

Remember:

The fabulous part about being a makeup artist is that there will ALWAYS be something new to discover, whether it’s a new product or trend! But before buying each product you have a crush on, try to achieve the result with what you already have.

A makeup artist must know how to mix and adapt textures! The best makeup doesn’t come from the best product – it comes from great technique.

Keep reading to discover which 5 makeup products you surprisingly DON’T need in your professional makeup kit!

5 Steps for Spring Cleaning Your Professional Makeup Kit in 2020

By Makeup Tips and Tricks No Comments

Spring is finally here, which means it’s that time of the year again for a good ole’ spring cleaning! Today, let’s focus on your professional makeup kit. Given that so many of us are hanging out at home anyways, this is the perfect opportunity to do something productive.

After all, when life eventually goes back to normal, you’re not going to want to waste any time! You’ll want to hit the ground running and start booking clients again. Spring cleaning your makeup kit now means you won’t need to do it from the ground up later.

And hey, if nothing else, it’ll give you a good project to work on, and keep you busy for at least an hour or two!

When it comes to decluttering and sanitizing your products, we just so happen to have a handy guide for your reference:

Let’s take a closer look at each individual step, shall we?

Step 1: Ditch the duds

It’s important that you always pay attention to the expiration date on your makeup products. Once it’s expired, it absolutely should NOT be used anymore!

Expired makeup products can become a breeding ground for bacteria and other unwanted germs. The last thing you want to do is give yourself (or your client) an infection. It’s always better to be safe than sorry.

As a general rule of thumb, certain products tend to have a specific shelf-life. For instance:

  • Mascara and liquid eyeliner are typically good for up to 3-6 months
  • Concealer and foundation are typically good for up to 6-12 months
  • Lipstick, lip gloss, and eyeshadow are typically good for up to 1-2 years

That being said, there are always exceptions to every rule. So, make sure to check each of your product’s expiration dates. Once that deadline arrives, toss it out!

Step 2: Quality over quantity

Plenty of us are guilty of going a little over the top sometimes when it comes to makeup. By that I mean, getting overly excited when stocking up, and buying way more products than we realistically need!

Chances are, there’s at least 1 product in your professional makeup kit that you rarely (or never) use. If that’s the case, all it’s doing is taking up unnecessary room. So, go through all of your products, and objectively ask yourself: “Do I need this in my kit?”

If you know the answer is truly no, it’s probably safe for you to remove it. Your professional makeup kit should be orderly, and filled only with products relevant to your job.

This doesn’t mean you need to throw the product out altogether, though! After all, you did pay valuable money for it. But maybe it would be better off in your personal makeup kit. Perhaps you can even refurbish it into a makeup product you’ll be more likely to use in the future!

Step 3: Bye-bye bacteria

Now that you’ve narrowed down which makeup products you want to keep, it’s time to clean them! As a makeup artist, you probably already do this on a regular basis (and if you aren’t, you should be). But since you’re spring cleaning, now’s a great time to do it again.

Sanitary makeup products are absolutely mandatory for your career. It’s never an option to use dirty products on your client’s skin! Doing so can risk infection, allergic reactions, sickness, and all sorts of other bad surprises that can really tank your reputation as an artist.

Here are a few quick tips for cleaning your products:

  • Spray 99% isopropyl alcohol onto your brushes, and then brush them gently until all makeup residue has been removed.
  • Sharpen all eyeliner pencils, lip liners, and other pencil products until the outer layer has been completely removed.
  • Wipe away the top layer of your eye shadow – as well as all other powders / palettes – and then spritz with the 99% isopropyl alcohol

For a more in-depth look at proper cleaning techniques for your makeup tools, you can keep reading here!

Step 4: Re-organize and re-strategize

Sometimes, it can become easy for your professional makeup kit to get a little messy. Especially when working on a client, you’re naturally focused on the job. It’s understandable that keeping your kit neat and orderly can sometimes be a second priority.

However, a clean kit is a happy kit – and it definitely makes your job much easier!

Sort through your makeup products, and group together everything that falls under similar categories (i.e. lip products, eyeshadows, liners, mascaras and lashes, etc.). Alternately, you can group your products together by brand, by size, etc. It’s YOUR kit, so find whichever way works best for you!

Once everything is grouped together the way you want, then you can assign them their proper spots within the kit itself. Keeping things organized like this will save you time during a job, and increase your overall efficiency!

Plus, organization is always aesthetically pleasing, so it’ll definitely impress the client and make you look super professional!

Step 5: Delicate displays

When on the job, you may wish to pull out all the tools you intend to use for the client’s look, rather than grabbing them from the kit one-by-one. Instead of laying them out on a table, why not group them together in something practical and cute?

Mason jars, acrylic containers, and self-made boxes are great ways to not only organize your products, but showcase your high-quality tools for others to see! Not to mention, you can get really creative with decorating these displays by adding your business logo in plain sight. (Hello, branding!)

If you’re not a professional MUA, and are using these tips to spring clean your personal makeup kit, these delicate displays can be used throughout your room, or on your makeup vanity! If you happen to be a beauty vlogger and/or a YouTuber, you can always subtly slip them into your videos, too.

A little positive self-publicity can go a long way!

Pro tip: You can always sprinkle coffee beans into the bottom of your containers. In addition to keeping your makeup products straight and upright, it’ll also emit a deliciously inviting smell! Seriously, who doesn’t love the smell of coffee?

Spread the word!

Now more than ever, it’s important to keep things clean and safe! You may have friends, family, or even clients who might benefit from the knowledge shared QC’s spring cleaning guide.

So why not share it, raise awareness, and motivate others to spring clean their own makeup kits?

Here’s the link you can use to share the image on your own website:

</p>

<p><strong>Please include attribution to htpp://qcmakeupacademy.com with this graphic.</strong></p>

<p><a href=’https://www.qcmakeupacademy.com/2020/04/5-steps-for-spri…keup-kit-in-2020/’><img src=’https://www.qcmakeupacademy.com/wp-content/uploads/2020/04/spring_cleaninginfographic-1.jpg’ alt=’5 Step Makeup Spring Cleaning Routine’ width=’1000px’ border=’0′ /></a></p>

<p>

Got any more useful tips for spring cleaning your professional makeup kit? Let us know in the comments!

Want to turn your passion for makeup into a successful career? Enroll in QC’s leading online Master Makeup Artistry Course, and earn your professional certification in as little as 3-6 months!

Get Festive with These 4 Wearable St. Patrick’s Day Looks

By Makeup Tips and Tricks No Comments

Interested in some fun St. Patrick’s Day makeup looks that are still wearable AND glamorous? We’ve got you covered! Put your makeup artist training to use on more than just your clients – give yourself a well-deserved, festive makeover.

Don’t have professional makeup artist training? Don’t worry, this article is just as much for you, too! While the best way to become an expert MUA is to take courses offered by accredited makeup schools, you can still have some serious fun with these looks!

Who knows? Maybe you’ll get inspired to take the next step and make a career out of your passion!

1. Smoky green eyeshadow

The best thing about this option is that there are SO many ways you can play with it. You could go for a a nice, emerald hue over your lid, blended out from the crease with a dark black. In fact, the color(s) you choose to add with this green smoky eye are endless! Violets, grays, and browns are also killer accent colors. But there’s plenty of room to get creative, so feel free to play with other colors, too!

Pro tip: If you’re trying to go for a more St. Patrick’s Day-inspired look, a great color you can pair with the green is gold. Gold liquid eyeliner would look absolutely fierce on a green smoky eye!

But maybe you want green to be front and center; the star of the show. This can also be just as wearable, if you’re wanting an everyday look. Playing with different green pigments can create a beautiful, harmonious look – without being too much.

If you want to be a little extra with it? Add some glitter to your lids, and finish off the look with a killer set of falsies! Smoky green eye makeup can be as drastic or as subtle as you want it to be. That’s what’s so awesome about it! It’s flexible; able to match whatever vibe you’re trying to achieve.

For a more wearable look, a seriously gorgeous tutorial that we recommend is Manny Mua’s olive green smoky eye. If you want something that focuses more heavily on an all-green result, this tutorial by cflowermakeup may be more up your alley!

2. Green eyeliner

You can incorporate green into your eye makeup without going crazy with the eyeshadow. Green eyeliner is another, more subtle way to have a festive, wearable St. Patrick’s Day look that still offers some POP!

There’s also plenty of room to play around with the look you want. If that’s something simple, it can be as easy as a liquid green cat eye with a natural set of falsies (or even just mascara). If you want to be a little more dramatic, you can also first use black liner and then outline the liner on the upper eyelids with a green liner.

Another possibility is working the green into your lower lash line. A nice, natural lid on top (with a subtle peach or light brown eyeshadow blended into the crease), topped with dark lashes and a soft, shimmery green along the bottom lash line can make for a killer look!

A great tutorial that demonstrates this type of look can be found here, on Indigo Moon Artists’s YouTube channel.

3. Green mascara

Most of us tend to stick with the classic brown and black mascaras. But a whole new world can be opened up to you once you start playing around with different colors! Shiseido, for example, offers an emerald green mascara that will leave you absolutely shook.

Of course, adding a green mascara to green eye makeup will take your St. Patrick’s Day look to the next level. But you can even just frame your eyes by applying green mascara to your lashes, and then call it a day! It wouldn’t be competing with any other makeup, so it’d still be the focus. But it would also be subtle enough to not be overpowering.

Green mascara can be a quick and effortless way to have a wearable look that still gives a nod the spirit of St. Patrick’s Day.

4. Green lips

If you REALLY want to embody the spirit of St. Patrick’s Day, try pairing a bold green lip with a golden-based eye look. The eye makeup here can be as simple as a gold eyeliner or cat-eye. It can also become bolder with a regal, golden smoky eye.

But green lips can also be the focus of the whole look, too! You can strike a quirky balance of natural-meets-festive if you keep your eye makeup simple. Even just going over your lashes with a few coats of mascara and leaving it at that can look very pretty in contrast to a bold green lip.

You can make the look as drastic as you want, though. When in doubt, adding glitter is always a sure-fire solution!

Here is a stunning every-day green lip look by Evelina Forsell. If you’re planning to hit up a St. Patrick’s Day party and your motto is “go big or go home”, then maybe Terrika Jahniece’s tutorial will be more to your liking!

The best way to hone your makeup skills is…

Like we said before: proper makeup artist training from legit makeup schools! There may be some of you reading this who love the ideas these recommendations are giving you, but have no idea how to actually execute them.

Yes, practicing regularly is definitely going to help you improve. There’s no reason why you can’t get started on that right away!

But if you love makeup and are considering making a career out of it, your single greatest option is to learn the foundation of makeup from a trained, working professional. They’ll be able to teach you not just how to apply makeup, but also makeup theory, which equally as important.

Then you’ll be able to look at tips like the ones above, and know exactly how to flawlessly bring them to life on both yourself and clients. There’s no better time to start than now!

Use the luck of the Irish to your full advantage, and start your path to become a certified MUA today!

Get the most out of your makeup training by enrolling in QC’s leading Master Makeup Artistry course, taught by experienced celebrity MUA, Nathan Johnson!

The Do’s and Don’ts of Henna – Part 1

By Education, Makeup Tips and Tricks No Comments

Online makeup classes can teach you a LOT more than just your standard makeup practices! As part of QC’s Global Beauty makeup workshop, you’ll explore other cultures and international makeup techniques to expand your skill set. One such practice you’ll become an expert at is the art of Henna.

Here, we’ll take a brief look at what Henna is, and where it comes from. Importantly, you’ll learn a handful of good habits you should adopt when doing Henna, as well as bad habits you need to avoid.

What is Henna?

Henna ‘tattoos’ are made from the dye of the natural henna plant, applied in intricate designs on the skin using a small piping bag and cone. It’s typically made by mixing pure henna powder with a liquid component, such as tea, lemon juice, or water.

Once applied, but before the Henna paste has dried, a mixture of lemon and sugar will also need to be added to it. This will keep it from flaking off too soon. After a few hours, the color settles into the top layers of your skin, leaving a “tattoo” once the paste is removed. The result will usually be brown in color at the beginning, before changing to red pigment, which will eventually fade.

While Henna tattoos can be applied anywhere on the skin, it’s most common seen on a person’s arms, hands, and/or fingers.

Where does it come from?

There are a many different cultural ties to the art of Henna tattoos. Originally, historians claim that it first became popular among those living in warmer climates, thanks to its natural cooling properties on the skin. Due to the beautiful stain it would leave behind, it eventually transformed from a cooling aid and topical treatment, to a beauty practice.

Some examples of where Henna’s historical and cultural roots can be found are:

  • The Pharaohs of ancient Egypt
  • Muslim and Hindu weddings
  • Festivals such as the Diwali, Vat Purnima, Karva Chauth, and Teej monsoon celebrations

Henna tattoos rose in popular throughout North America and Western Europe in the 1990s. Today, they are a global and very common beauty practice. In addition to religious and cultural purposes, Henna is also commonly used today for aesthetic expression.

Henna practices: what to do versus what not to do

As a professional makeup artist, if you wish to incorporate Henna into your business services, there are certain things you’ll need to do in order to be a good Henna tattoo artist. Similarly, there are a number of Henna sins you’ll want to make sure you never commit. Let’s take a deeper look at those…

DO: Thorough research

Just like with the art of makeup, you can’t expect to be good at what you do if you don’t take the time to properly learn about it. But we’re willing to bet you love to learn! So research the practice of Henna; read as much as you can, and absorb everything possible.

Look deeper into its different cultural backgrounds and significance. Find out about its different ingredients, and the suppliers involved. Don’t just focus solely on the pros of Henna tattoos – discover any potential cons to the practice as well.

Approach it from a business standpoint, too. What would be required in order to add it to your existing makeup services? What’s the market like in your area for Henna beauty services? What sort of a wage increase could you realistically hope to see by adding this extra service to your business?

While there will ALWAYS be more for you to learn, your goal should always be to strive at becoming an expert in the field. So research and learn everything you can!

DON’T: Neglect proper schooling

A good makeup school will offer online makeup classes that cover Henna, such as in QC’s Global Beauty workshop. Yes, while many Henna artists don’t obtain any actual education, what’s the honest harm in doing so?

You know you’ll be taught properly, by a trained professional who knows what they’re doing. You’ll receive so many incredible resource materials that will help you not only learn Henna inside and out, but start practicing it in a real-world setting.

Plus, actual education from an accredited makeup school and its online makeup classes will equip you with a physical certificate of completion. While certification isn’t required to practice Henna, having this certificate is guaranteed to look better on your resume and seriously impress clients.

On top of expanding your skill set, it signifies your drive, dedication, and hard work. If you’re looking to outshine your competition, this is the sort of thing that WILL do the trick!

DO: Learn (and then practice) various Henna designs

There are many symbolic designs in the world of Henna artistry; many tied to specific cultures. If you wish to be able to provide this sort of Henna art to clients of different cultures, it could prove worthwhile to do your homework and begin learning the different symbols of different geographical locations.

In North America, however, Henna is more abstract and less tied to symbolic meaning. Geometric shapes – such as dots, lines, triangles, etc. – are most commonly used in repetition to create the designs.

FUN FACT: most Henna is free-hand, meaning that there’s no stencilling involved before the application. You’ll need to become knowledgeable and confident do it on the spot. So it’s critical that you first take the time to PRACTICE designs on your own, before ever attempting them on a client. Start by drawing them out on paper.

If it makes things easier, keep a sketchbook entirely devoted to your different Henna practice designs. The more you work at them, the better and more natural you’ll become.

DON’T: Skip practicing with a Henna cone

Drawing your designs on paper alone isn’t enough practice to make you ready to apply actual Henna on a client. This is because using the Henna piping bag and cone is an entirely different process, requiring a deeper level of skill.

Once you’ve become super comfortable with drawing your Henna designs on paper, maybe you can start by tracing over these designs with Henna. Then you can start attempting to free-hand designs with the Henna (but still on paper). After more practice, you can graduate to the next step by finding friends, family, and parts of your own body to work on.

By breaking up the learning process into these steps, it’ll make for a smoother transition from paper to a paying human canvas.

Think the list ends there? Definitely not! There are plenty more useful do’s and don’ts to consider when it comes to which Henna ingredients you use, how to best apply it, and the sort of aftercare practices you need to ensure you take.

Want to learn all about this? Then stay tuned for Part 2 of this Henna crash course, and in the meantime, keep on practicing!

Want to pair your Henna training with a full-scale makeup course? Enroll today in QC’s leading Master Makeup Artistry course, and get your Global Beauty Workshop at 50% off!

airbrush machine and regular makeup on table

Airbrush Makeup vs. Regular Makeup: Which is Better?

By Makeup Tips and Tricks, Your Makeup Career No Comments

In the cosmetic world, there’s a long-standing debate over which is better for your makeup artist kit: airbrush makeup or traditional makeup? The truth is, if you’re looking for a definitive answer, you’re probably not going to find it. This is because one is not better than the other 100% of the time! Instead, you’ll find that for some clients, airbrush makeup is the better option. But for others, regular makeup is the way to go.

So what’s the difference between the two? In which areas does airbrush makeup triumph? Alternately, when is regular makeup the stronger choice? Let’s find out!

What is Airbrush Makeup?

True to its name, airbrush makeup is a type of makeup specifically created for an airbrush gun and air compressor. The makeup itself is most often water-based, alcohol-based, or silicone-based. Airbrush makeup is typically applied in multiple, sheen layers.

These layers build up a flawless finish on the skin that photographs effortlessly, blends beautifully, and is most often times waterproof. Furthermore, airbrush makeup can also be used for other areas of the face, such as eye makeup, blush, contour, and highlighting, etc.

What is Regular Makeup?

More frequently used and convenient for everyday wear, traditional makeup is considered any of the following products that are applied to the skin using makeup brushes, sponges, etc.:

  • Liquid, cream, and powder foundations
  • Primers and eye shadows
  • Blush
  • Contour and highlights, etc.

Which is Better?

Some situations may deem airbrush makeup the leading contender, while in others, traditional makeup is the winner. In some cases, both are equally good. For example, some may argue that airbrush makeup lasts longer than regular makeup since most airbrush makeup is waterproof.

However, plenty of traditional makeup is also waterproof. But even for products that aren’t, so long as the makeup has been properly primed, applied, and finished with a strong setting powder and/or spray, it should hold throughout the day just as well as airbrush makeup would.

Similarly, while airbrush makeup is known for its incredible illusion of flawless skin, that doesn’t mean traditional makeup can’t do the same. If the products are properly prepped, applied, and finished by an expert who knows what they’re doing, both makeup types can create exceptional results on the client and photograph really well.

But we’re here to see the differences between airbrush and regular makeup, not just their similarities. So, here are some circumstances that show when one may be better than the other…

makeup tools, with model having makeup put on her in background

Covering Pimples and Other Blemishes

While both types of makeup can do this, regular makeup is superior. Yes, airbrush makeup – especially when layered – can help reduce the appearance of blemishes, but that’s not what it was designed for. Airbrush makeup is lighter, whereas traditional makeup is created for fuller coverage.

On top of this, airbrush makeup often times can be limited in terms of its color choices. Some clients may have skin tones, acne, or blemishes that airbrush makeup just doesn’t have the right pigments for. But regular makeup offers a much large range of colors to work with and choose from.

Regular makeup also has color correctors, specifically made to help mask imperfections. If your client has something she needs to be covered up, you will be able to find a regular product in your makeup artist kit to do the job.

The winner: Regular makeup.

Withstanding Moisture

Especially for those who’s clients are going to be outside in the hot sun, or taking part in an emotional event (such as a wedding), makeup artists need to arm themselves with the right products that can best combat moisture. If your client sweats or cries, she doesn’t want to have to worry about her makeup cracking, creasing, or running down her face.

Technically, with the right setting products, both airbrush and regular makeup can handle this task. That being said, airbrush makeup is inherently better at this – especially if the airbrush makeup is silicone-based. Most airbrush makeup is already waterproof, but when it’s silicone-based, it adds that extra layer of protection that regular makeup doesn’t have.

The winner: Airbrush makeup.

mua applying makeup on client using airbrush machine

Working with Right Skin Type

But as we discussed, most airbrush makeup is waterproof, giving it a much thinner consistency. It doesn’t create that appealing, flawless finish on dry and oily skin. Rather, it can often appear flaky once applied, especially on drier skin. For these skin types, your clients would benefit more from traditional makeup.

If, however, your client has dry or oily skin, airbrush makeup might be unflattering. Regular makeup has a thicker, creamier texture. It can help add moisture or properly mask oiliness, depending on what the skin requires.

Neither makeup is a one-fits-all when it comes to the various different skin types. Airbrush makeup is best for those with well-hydrated skin. As a rule of thumb, if your client has normal to combination skin, airbrush makeup is going to look jaw-droppingly stunning on her (so long as the makeup is applied by an MUA who’s trained in using an airbrush machine, of course). Between airbrush makeup and regular makeup, a client with either of these skin types would likely best benefit from airbrush makeup.

The winner: Draw. It depends on the client’s skin type.

Cost

But you also need to keep in mind that if you have clients on a budget, they may not want to shell out more money for airbrush services.

In general, airbrush makeup can actually prove to be a bit pricier. You have to factor in the cost of a good quality machine, and then the makeup products themselves (which aren’t exactly cheap). Sure, you can make up for that by charging clients more for your airbrush services than you would your regular makeup services.

But don’t forget: with regular makeup, there are plenty of products you can swap for their drugstore counterparts. You have the option to save money, without sacrificing quality. That leftover cash can then be put towards buying even more products!

Because there appear to be more products you’d need to purchase for traditional makeup, you may think that it would be more expensive than airbrush makeup.

As a professional MUA, building up and then maintaining your makeup artist kit will be an investment. Whether it’s regular makeup or airbrush equipment/makeup, it’s going to cost money, and it won’t always be cheap. This is a reality every makeup artist faces, and while we know it may suck sometimes, it’s also worth it.

How it Looks on Your Resume

Here are the facts: so long as you have formal makeup training and certification under your belt, regardless of whether it’s in airbrush makeup or regular makeup, your resume will impress clients. Any education and professional training are going to help you stand out from the competition.

That being said, an MUA with experience in both regular makeup and airbrush makeup might look more proficient overall than an MUA without the additional airbrush training. It not only tells this client that you’re an even more well-rounded makeup artist, capable of different methods and applications. It also demonstrates that you have the passion, dedication, and drive to acquire even more schooling and certifications to your name.

The winner: Airbrush makeup – though schooling and certification in BOTH are strongly recommended.

At the end of the day, there are pros and cons to airbrush makeup AND traditional makeup. It really depends on your level of training, your comfort level with the products, your client’s skin type, what she wants, etc. There are tons of factors to be considered, and as you can see, no singular situation in which airbrush makeup or regular makeup is 100% the best option.

That being said, which do YOU prefer more? Let us know in the comments!

Want to learn 3 different airbrush looks from the ‘King of Airbrush’, Marc Harvey? Check out his webinar with Nathan Johnson here!

Beauty smiling blonde model with natural make up and green leaves. Copy space. Spa and wellness. Close up, selective focus.

8 Eco-Friendly Makeup Swaps That Will Make You and the Earth Happy

By Makeup Tips and Tricks, Your Makeup Career No Comments

I don’t know about you, but I’m always looking for little ways I can be more eco-conscious in my day-to-day life. You don’t have to go full-on hippy in order to make a difference, but there are a ton of small things you can do on a regular basis that really do add up in the long run! If everyone on Earth followed eco-friendly practices, the world would be a much cleaner place.

Today, we’ll look at the different makeup and beauty swaps you can try that will decrease your carbon footprint!

Smiling beautiful young woman standing in the summer sunshine holding a globe at the sea with copyspace

Get refills whenever possible

Think about how many bottles and containers get thrown out, or recycled (PLEASE tell me you recycle!), every trash day. It’s probably a lot. Now think about how many of those containers are for beauty products. Whether it’s shampoo and conditioner bottles, body wash, or moisturizer – that stuff adds up.

The thing is: the bottle itself is perfectly fine, so why not just refill it? More and more stores now offer discounts, if you bring your own container and purchase a product refill. Saving money and helping the planet? Count me in!

Create your own makeup palettes

Especially if you’re a professional MUA, you probably go through a ton of products in your makeup artist kit. Whether it’s corrector/concealer, eyeshadow, lip gloss, etc., those palettes often end up in landfills when you’re done them.

But when you create your own makeup palette, you normally keep the actual palette and simply replace individual makeup pods in it. Those pods are normally metallic, and can be recycled. Even just by making this simple change, you’re now well on your way to becoming a zero-waste makeup artist!

Zero-waste, plastic-free beauty and makeup flatlay overhead with coconut fiber, bamboo and reusable products.

Cut down on plastic products & packaging

This is a big one! Plastic is everywhere, and it’s destroying the planet. Now, we know it’s hard to completely cut plastic out of your life. But there are ways you can drastically cut down on your plastic usage:

  • Buy makeup products with minimal packaging. If you have the option of buying a product packaged in a plastic bag, or a similar product packaged in a box, go with the box. Opt for products in metal or glass bottles, and avoid plastic bottles whenever you can.
  • Look for plastic-free products. Brushes with wood wands (or even better, bamboo) are way more eco-friendly than brushes with plastic wands. Also, metallic and/or cardboard palettes are more eco-friendly than plastic ones.
  • Watch out for microbeads! Microscopic plastic beads are found in many types of scrubs, body washes, toothpastes, bubble baths, and more. Unfortunately, they’re also wreaking havoc on marine life and ecosystems across the globe! Today, microplastics are even found in human food products, too. Gross! If you can, try to avoid them entirely.

Avoid single-use products

No one can argue against the convenience of single-use beauty products. But saving a few seconds of your time comes at the expense of filling up landfills for years. When you think of it that way, it’s pretty terrible for the environment in the long run. Instead, for your own makeup artist kit, try going with multi-use items, such as reusable makeup wipes and silicone swabs. As a bonus, these will save you tons of money in the long run, too.

That having been said, there’s a hygienic reason why makeup artists need to use some disposable tools on clients. Mascara wands, for example, are always one-use items. Otherwise, you’ll contaminate your product, and can potentially give your next client a serious infection!

Zero-waste, plastic-free beauty and makeup reusable and refillable bamboo and natural products for eco-friendly lifestyle, slow panning.

Lucky for you, there are a number of eco-friendly beauty companies out there that specialize in biodegradable beauty products, from wipes, to swabs, to spoolies. These products are usually made with sustainable materials, like organic cotton and bamboo.

Eco-friendly + sanitary = win-win!

Recycle

More and more cosmetic companies now have recycling programs that allow you to return used packaging to the store or manufacturer. For doing so, you can usually get a refund, store credit, or even free swag! The old packaging is then recycled or sanitized, and reused by the company. This makes it cost-effective for them as well. That’s a triple win!

Moreover, if you recycle at home (again, please do), you need to know how to do it properly! Paper should be separated from plastics. This includes paper labels on plastic or glass packaging. Containers should be thoroughly cleaned and rinsed before being put into the recycle bin. That means you should take the time to scrape out the last few drops of your product, and then rinse all containers under hot water until it’s squeaky clean.

A dirty container WON’T be recycled properly. It’s nauseating how many perfectly recyclable products end up in landfills because people didn’t bother to rinse them out first. By the way: the “clean your containers” rule applies to any container you recycle, from peanut butter tubs to laundry detergent bottles.

Use biodegradable sunscreen

When I took a trip to Mexico last year, tour guides kept asking to see our sunscreen before allowing us to scuba dive around coral reefs or swim in cenotes (underground lakes and rivers). I later discovered that they were making sure everyone’s sunscreen was a safe, biodegradable formula that wouldn’t harm corals. They didn’t want our sunscreen to contaminate the fresh water that many residents depend on.

Unfortunately, many sunscreens contain dangerous chemicals that harm the environment. Some can even be potentially harmful to humans as well. This is particularly important with spray-on sunscreens that you can end up inhaling!

Natural cosmetics and leaves on table

So always make sure to check your sunscreen, and try to avoid any of the following ingredients:

  • Oxybenzone
  • Octinoxate
  • Titanium dioxide
  • Zinc oxide
  • PABA / trolamine salicylate PABA

Go with “solid” products

Bar soap is way more environmentally friendly than liquid soap or body wash. You use less product, and it uses much less (and often recyclable/biodegradable) packaging. Today, you can also find shampoo and conditioner bars, moisturizer bars, body lotion bars, etc.

Since they are in a solid form, these products don’t need to be packaged in plastic containers. Most are instead packaged in reusable/recyclable metal tins, or biodegradable paper sleeves. What’s more, you’ll find that they last a LOT longer than their liquid counterparts!

Commit to Cruelty-Free

Let’s get real for a second: it’s 2020 – there’s literally no reason why animal testing should still be a thing in the cosmetics industry. But big corporations don’t tend to make changes until consumers force them to. So while you don’t need to join Greenpeace or go stand in a picket line, you definitely should educate yourself on which products are cruelty-free.

Then boycott the ones that aren’t! Encourage your friends and family to do the same. Sure, it can suck to have to change your favorite brand, but helping to put an end to barbaric practices is well worth that temporary hassle.

Funny girl hold rabbit on green field background. Closeup of winking girl with bunny rabbit. Lovely woman hold white rabbit

If you want to make the switch to eco-friendly beauty products and need some help, here’s a great list of 140+ cruelty-free makeup brands!

As a parting reminder, we can’t stress enough that every little bit helps. If you don’t want to give up your favorite body wash, you don’t have to! But maybe you can switch to reusable makeup removal wipes.

Being environmentally conscious is not an all-or-nothing game. You can absolutely take baby steps and start with just one thing on this list. Then, with time, you can do two. You’ll quickly be surprised at how easy it is to make changes that benefit both the planet and your wallet!

Want to save some money? Here are 5 useless items you DON’T need in your makeup artist kit!