Makeup Tips and Tricks Archives - Page 4 of 27 - QC Makeup Academy
Category

Makeup Tips and Tricks

Special Effects Makeup for Beginners: 5 Best Ways to Start Learning

By From the Experts, Makeup Tips and Tricks, Your Makeup Career 4 Comments

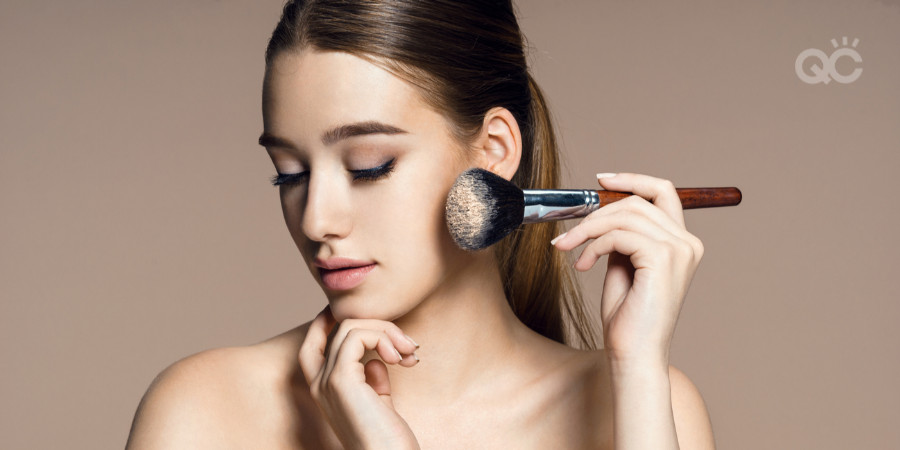
Gabrielle Rivera is a QC Makeup Academy graduate and professional makeup artist. To see more of her work, visit her Instagram here. Today, she draws on her professional expertise to share 5 of the best ways that one can break into the world of Special Effects makeup and begin learning how to do it.
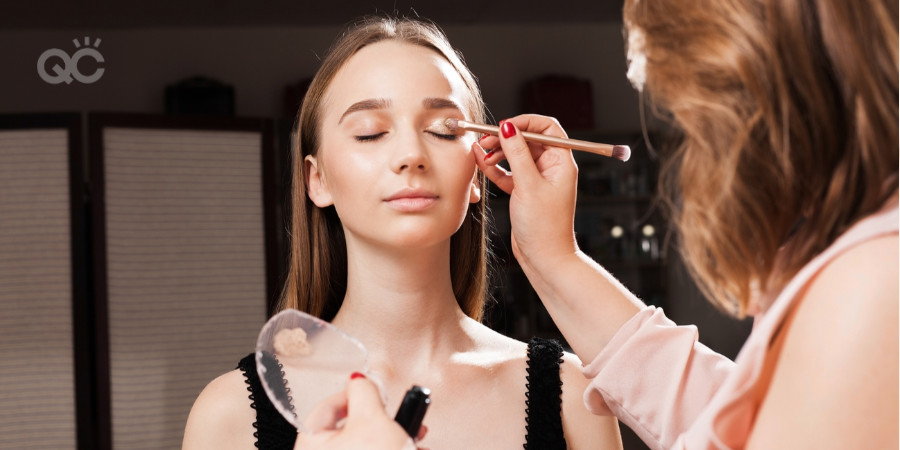
1. Education

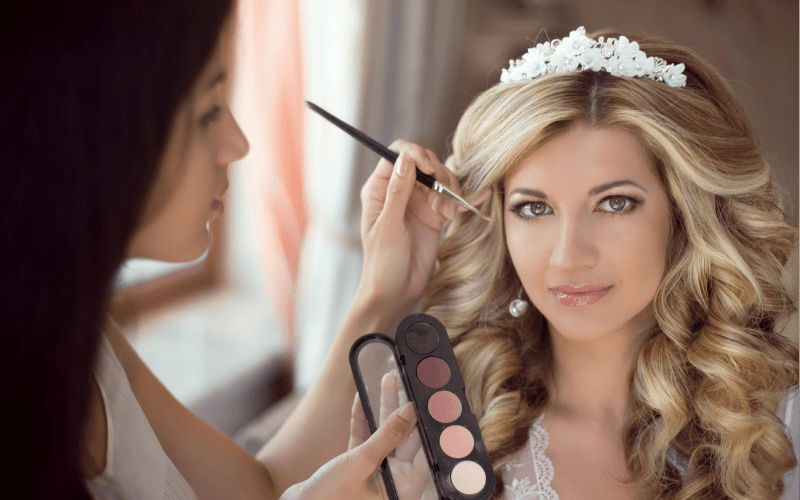
One of the most important things I learned when beginning my journey into the world of SFX makeup is how vital the right makeup education is!

I fully understand that the era we live in is one driven by social media and YouTube. However, when working with Special FX makeup, you have to know how to properly apply, mix, create, and work with these specialized products. To be able to do this correctly is a game changer for your business – and such techniques can only be taught in proper online makeup classes.

Unlike regular, everyday makeup tools and products, SFX makeup products can contain chemicals that are potentially harmful to the skin. This is why proper training is required, in order to know how to safely use and apply such products.

For example: when working with various types of paints, you would need to know which items are safe to put around your client’s eyes and/or mouth, and which ones are NOT. To not know your stuff can quite literally mean that you’re putting your client’s health and safety at risk, which we know if something you’d never want!

Similarly, it’s also critical to know what specific ingredients are in the SFX makeup products you’re using. This way, you can avoid your clients experiencing negative reactions, such as skin allergies.

If you want to become serious about growing your skills in Special FX makeup, one of the most beneficial things you can do for both yourself and your craft is to enroll in a makeup school that provides specialty classes. QC Makeup Academy is a great example, as they specifically offer a Special FX online makeup class! Not only does this course teach you the proper care and handling of SFX products, it also shows you first-hand how to apply these products and use the tools professionally!
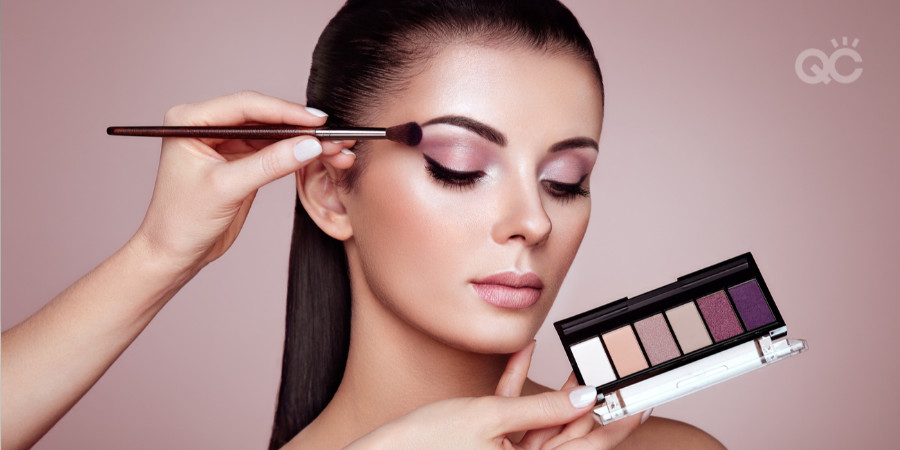
2. Tutorials

Aside from taking online makeup classes and obtaining a professional certification, tutorials can be a simple way for you to start learning about the Special FX world.

There’s so much information available to you online, and countless artists that you can learn from. When I first got into SFX makeup, two of my personal favorite YouTube accounts to watch were (and still are, to this day):

  1. GlamandGore (Mykie) and
  2. Ellimacs Sfx Makeup

What I love most about these two makeup vloggers is that they’re both professionally trained! They teach viewers how to properly use, apply, and safely remove Special FX makeup products. Through watching their videos, you can also learn how to create certain SFX products from scratch! There are even tutorials teaching you how to use simple, everyday products in order to create gory and whimsical SFX looks. Pretty cool!

Keep in mind that watching online tutorials can’t replace the education you’d receive from real online makeup classes. But that being said, it’s definitely a start!

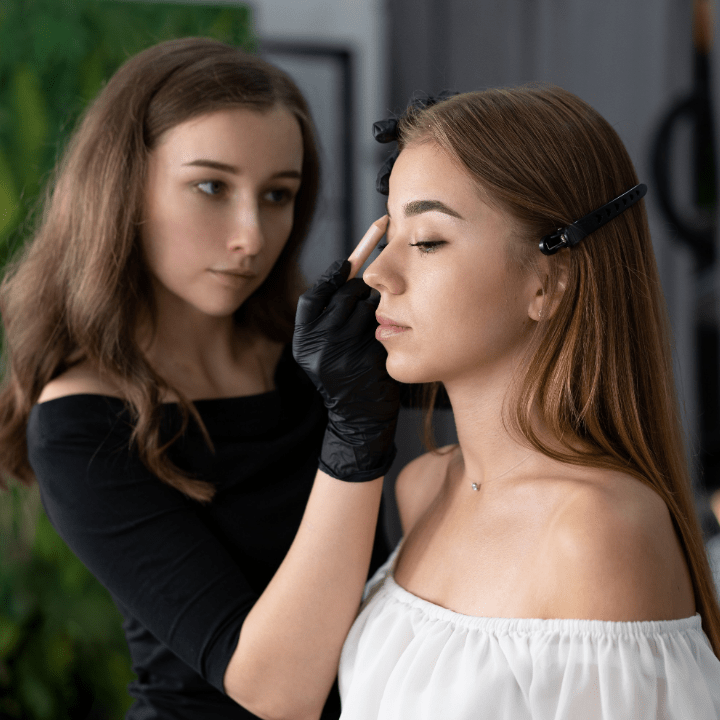
3. Practice, practice, and even more practice!

No amount of education and tutorials are going to help you improve your skills in SFX makeup if you aren’t actually practicing and obtaining real-world experience. The whole point of the education you gain from online makeup classes, or through watching YouTube tutorials, is to help you hone your skills through practice.

Pro tip: Doing makeup on just yourself won’t cut it, either. You need to also practice on as many models as you can, too! This is the only way you can get used to different skin textures, shades, types, etc.

MUA pouring airbrush paint into airbrush machine

My professional advice is to practice on models of all types. Here are some ways you can practice your Special FX makeup on as many different faces as possible:

  • Work with both male and female models
  • Work with clients who have facial hair, as well as those who don’t
  • Actively trying to work with clients that have differing skin types

Pushing yourself to practice on as wide of a clientele as possible will help you see just how versatile the makeup products are. Likewise, this real-world experience will help you learn how to use the products and tools – not just properly, but professionally as well!

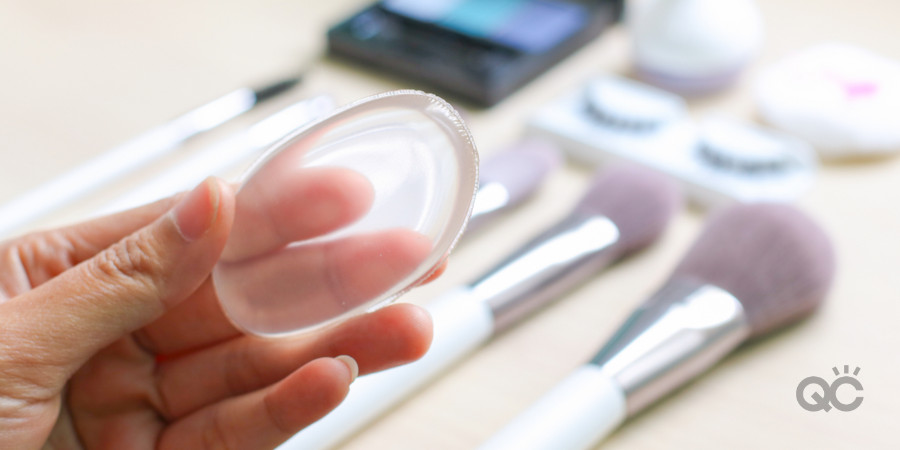
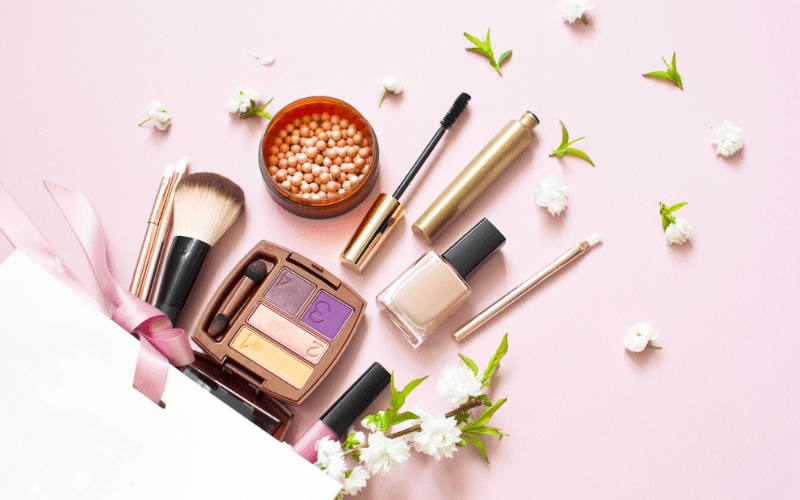
4. Purchasing the right tools and makeup products

A question that I get frequently asked is, “What are the best products to buy to create Special FX looks?”

For beginners, my advice is always: learn how to do SFX makeup by first using the basics. It’s the best foundation to build off of. The more experience you get, the more prepared you’ll be to move onto more advanced makeup products and tools.

Often times, up-and-coming SFX makeup artists or enthusiasts want to purchase the most expensive products and tools right from the get-go. The problem is, they don’t know how to actually use them properly or safely! Making this error can result in you not only wasting a LOT of product and money, you can once again be putting the client (and her skin) at risk by your lack of knowledge.

Special FX makeup takes a lot of practice to get it right. Sometimes, trial and error is required in order to figure out the best products and tools needed to create a look. (Which, again, is why an education and online makeup classes are so important!)

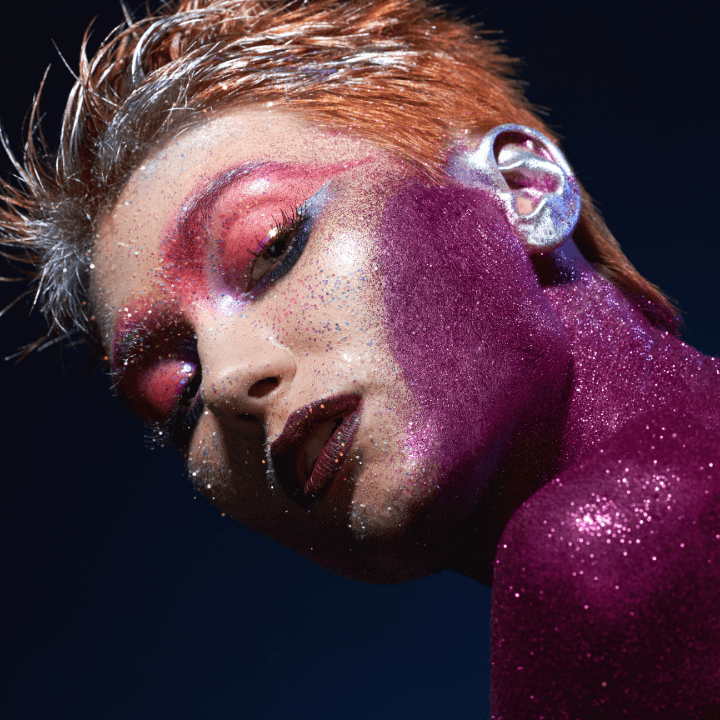
At first, many people who want to get into SFX makeup may feel overwhelmed or intimidated by all of the types of products and tools available. However, many Special FX techniques – even the more complicated ones – can be created using simple cosmetics!

makeup special effect with brush

If you’re ready to begin working with Special FX makeup, you can start by using basic SFX products such as:

  • Paints
  • Liquid latex
  • Scar wax
  • Spirit gum and other adhesives

Something that can easily help you gather your tools and build your kit is to purchase a Special FX makeup kit! QC Makeup Academy offers a Special FX Essentials kit that comes with all of the basics, plus so much more!

5. Networking

The last – but JUST as critical – thing you can do to prepare yourself for the professional world of SFX makeup artistry is to network yourself! Not only does it help you get to know other important people within the industry, networking is yet another irreplaceable way to gain knowledge about the craft!

Networking provides you with opportunities to connect with other artists. It’s a fantastic way to improve your skills, because you’re constantly being shown new tips and tricks of the trade. There’s nothing like learning hands-on from others!

Networking is also a great business move, too, as it can potentially advance your career. By meeting others within the industry, you open yourself up to possibilities you may not have had available to you before. For example, meeting the right people could possibly lead to you getting the chance to learn what it’s like to work on or behind the scenes of a movie set!

There are many ways that you can enter the world of Special FX makeup, and learn the ropes. But again, the single most effective way to become a pro is to enroll in online makeup classes and be taught by experts in the field. If you’re looking to dive into the world of SFX, but aren’t sure how or where to start, check out QC Makeup Academy today!

Serious about being a professional SFX artist? Don’t weigh down your SFX makeup kit with these 5 awful products!

Re-Purposing Your Makeup with These 5 Easy DIY Hacks

By Education, Makeup Tips and Tricks, Makeup Trends No Comments

As a certified makeup artist, if anyone’s going to be constantly branching out and trying new products on the regular, it’s going to be you. Sometimes, you’ll find brands and products you love, and use them up in the blink of an eye. Other times, you’ll try out things that won’t necessarily be your cup of tea.

Either way, it can result in a lot of leftover and/or unused product that winds up going to waste. We live in an age where reducing our waste and thinking green is crucial. So if provided with options to be able to save and use all those old or unwanted products, it’s in our best interest to jump on them! Besides, repurposing makeup means you get to save money on replacement products. Double win!

Note: The following tips are NOT applicable to any makeup products that have expired. If the product is past its expiration date, throw it away and do NOT use it. Expired makeup is unsanitary makeup.

Here are 5 easy do-it-yourself hacks for repurposing your makeup!

1. 2+ Broken Lipsticks 1 New Lipstick Shade

We all know the heart break of wearing your favorite lipstick down to a nub. There’s still the tiniest bit left, but not enough for a nice, full application. What a tease! Here’s a tip, though: instead of throwing it away, start saving your lipstick tubes when they’ve hit this stage. You can then combine them all to create a brand NEW lip shade!

Simply buy yourself a small container – nothing fancy, anything from your local dollar store will do. Very carefully, use a small knife to scoop out the remaining product from each lipstick tube. You can then melt all of the waxy remnants together in a big spoon. Once fully liquefied, pour the new color into the container, and then let harden in the fridge.

The coolest part is that this brand new lip shade will be 100% unique: you’ll be the only one who has it!

2. Liquid Lipstick Eye Makeup

One time, I purchased a royal blue liquid lipstick and was totally stoked to try it on. It took all of one application for me to realize that unless I was going to a night club, there was no way I could pull that shade off. I stopped using it and eventually lost it altogether. Not only was this a complete waste of money and unnecessary eco-waste, it was a missed opportunity!

Believe it or not, liquid lipstick can also be used as eye makeup – with GREAT results. Two examples we recommend trying out are:

  1. Using liquid lipstick as liquid eyeshadowLike liquid eyeshadow, not only is it simple to apply liquid lipstick to your upper lids, it also tends to be long-lasting and crease-free. If it’s a light enough shade, you can also treat it as a base for a nice, powdered shadow. With most liquid lipsticks, though, it doesn’t take much to apply a LOT of heavily pigmented product. So as QC executive MUA and tutor, Nathan Johnson, always recommends: start light, and build thin layers to increase the strength of the product.
  2. Using liquid lipstick as eyeliner – All you need is a clean eyeliner brush, and you can simply dip it into the liquid lipstick to extract the product, and voila! Draw it along your upper lid to create a stunning matte eyeliner look that’s both fierce and full of personality.

3. Mascara Wand Eyebrow Brush

Save yourself the unnecessary dollars spent on an eyebrow brush by simply making use of any mascara you’re intending to throw out. Even if the mascara itself is no longer good, the wand can still be utilized! All you need to do is clean it thoroughly, ensuring that any old makeup previously on it is removed, and the product is now sanitary. That’s all there is to it! Now you can tame your brows whenever necessary, without having to open your wallet.

If you’re unsure how to properly clean your mascara wand, don’t worry! There are plenty of tutorials you can read or watch online. Here’s one, in case you’re interested.

Mascara wand

4. Crumpled Up Eyeshadow Lip Tint

It’s a sad day when one of our favorite eyeshadows breaks apart. But that doesn’t mean it’s no good to you anymore! One obvious option is to repair it as best you can. But as long as the product hasn’t expired, you can also repurpose it into a really boss lip tint! This is especially the case for lighter colored and/or glittery eyeshadows. Quite literally all you need to do is gather the broken shadow into a small container, and that’s it!

5. Lip Balm Eyebrow Wax

I’ll admit that I’m 100% responsible for buying way more lip balms than necessary, using them a handful of times, and then losing them in my purse, jacket pocket, bedroom, etc. Typically, once I have found it, my natural inclination is to throw it away, regardless of whether it’s still good or not.

Instead, when you find yourself in this situation, there’s another purpose it can fulfill for you: eyebrow wax! When I’m having a bad brow day, they tend to look like startled caterpillars. If I can’t get them threaded anytime soon, I need a miracle to keep them tamed. Lip balm is a wonderful little miracle that can do the trick, for a fraction of the price eyebrow wax would cost!

The best part about these DIY makeup hacks is that not only can you use them for yourself, you can incorporate them into your professional kit and use them as part of your makeup artist business! There are countless ways to repurpose makeup and other beauty products, and find new and creative ways to put them to use. Who knows… Maybe YOU’LL come up with the next biggest trend!

Lip Balms

Looking for more ways to save money on your professional makeup artist kit? Here are 5 items you surprisingly DON’T need!

model outside in the snow, with beautiful brows, lashes, and red lip makeup

Brows, Lashes, and Lips: Getting Started with the Basics

By Makeup Tips and Tricks No Comments

In early 2010, movie star Jeremy Renner surprised the world when he revealed on The Ellen Degeneres Show that he’d once been a professional makeup artist. Back before he was the action hero we know him as today, Renner discovered a natural, artistic knack for doing makeup during his days in the theater. Instead of waiting tables between auditions, he earned his income by doing women’s makeup.

When asked what his tips are for women’s makeup, he had three simple words: “Frame the face.”

How best can you do that? According to Renner, it’s all in the brows, lashes, and lips! “It’s simple; it’s 5 minutes,” he added. Framing the face by highlighting these 3 areas can be done by anyone, even beginners. So let’s take a look at this, shall we?

beautiful woman with natural makeup

Let’s start by saying: if you’re a makeup lover and have been playing with the idea of turning this into your career, keep in mind that this tip isn’t going to be enough to make you a professional. The concept of framing the face, and learning how to do it, is more like the basic foundation of makeup artistry. In order to build off this starting point and truly hone the craft, you’ll need years of practice, a solid understanding of makeup theory, and lots of education/makeup training under your belt.

That being said, we believe that ANYONE with a passion for cosmetics and an eagerness to soak up new information can learn how to do makeup! Even if you have absolutely no background, at least by starting with these basics, you can get the ball rolling for yourself.

Step 1: Brows

How you choose to approach each step is dependent on your own taste. This can be said about the lashes and lips, too!

Tending to your brows can be as simple as using an eyebrow brush (a.k.a. a ‘spoolie’) to brush out and tame the hairs. If this is good enough for you, you can go the extra mile by lightly spraying a tiny amount of hairspray on your fingers, and then passing them over your eyebrows afterwards. When the hairspray dries, it’ll keep the hairs in place. Just make sure your hands are always clean first before you touch your face!

If you want to fill your eyebrows in but have no clue what you’re doing, never fear. There are plenty of easy options of what to buy to get the job done:

  • Pencils (which come in a variety of thickness)
  • Powders
  • Pomades
woman brushing eyebrows with a spoolie

Personally, I’ve tried all of the above, and found an equal preference for either a thin, pointed pencil, or an eyebrow powder. Powder can often be the quickest option, and many argue it gives the most natural result.

To better learn how to properly fill in your eyebrows, you can always look around and check out a makeup tutorial that speaks to you. Here’s just one example!

Of course, shaping the eyebrow can become more and more complex, depending on how much time and product you’re willing to put into it. But even just brushing them out (and lightly filling them in, if you want) can make all the difference!

Step 2: Lashes

If you’re not used to putting on makeup, putting anything close to your eyes might be a little nerve-wracking for you. But don’t worry! You just have to take it slow, and once you get the hang of it, it very quickly becomes second-nature.

When it comes to accentuating your eyes, lashes are one of the best ways to go. There are two primary ways you can do your eyelashes:

  1. Keeping things au naturel, and simply putting on mascara
  2. Combining mascara and fake lashes

Pro Tip: Fake lashes aren’t mandatory. It’s a personal preference; for as many people out there who love to wear them, just as many don’t. Falsies require a little bit more makeup experience, since they require more precision, and can be a hassle otherwise. If you’d like to challenge yourself, feel free to research further into fake lashes and how to properly apply them.

upclose of long lashes and mascara wand

Since we’re aiming for ‘quick and easy’, let’s just focus on emphasizing your lashes by using mascara alone. The first step is finding a color/shade that works best for you. You can always go to your local drugstore or makeup shop and ask a professional MUA there to help you. For example, some people like to go with the traditional black mascara. Others prefer a softer, more natural shade, and opt for brown. You’ll know your preference when you try some options out and see the results!

Another take-it-or-leave-it option is an eyelash curler. I know some people who swear by it, though I personally have never used one. Again, if you’re comfortable giving it a try, online tutorials or an in-person consultation can walk you through the steps of using an eyelash curler. But if you’re not comfortable with the idea of one, that doesn’t mean your lashes will look any less luscious! You can just keep going without one.

If you’ve never, ever tried to put mascara on your own lashes before, we recommend watching a few tutorial videos. This way, you can see how easy it is, as well as how many different ways you can apply it. Find whatever feels most natural for you, and remember – breathe! It helps to keep your hand from shaking!

Step 3: Lips

Again, this step can be kept super simple! It can be anything from a quick coating of lip gloss, to a full, dark lipstick, etc. When it comes to your lips, there’s a lot of wiggle room. Also, the nice thing is that, shy of replicating the shudder-inducing lip liner trend of the 90s, it’s really hard to go wrong.

If you want to wear more than just a transparent gloss, the key in finding the best shade for you is to know what’s right for your skin tone. This applies to not just lipsticks, but stains and glosses, too. There are plenty of Beginner’s Guides out there to break down the basics of which colors go well with which skin tones. But if speaking with an actual person works best for you, it’d be worth it to go back to the store and chat with one of the reps there.

woman making kissing face, while holding up pink lipstick

As with your brows and lashes, if your preference is to learn by watching others online, there are also plenty of online video tutorials to show you different ways for beginners to learn how to apply their lip product. You can customize the tutorials based on the type of product being used, etc.

This ‘Back to Basics’ lipstick tutorial, for example, looks pretty promising!

Keep in Mind…

Many of the beauty vloggers you see online aren’t actually trained professionals. While their work looks impressive, lots of the tutorials found online are guilty of teaching the wrong techniques, without anyone even realizing it. That’s not to say that EVERYTHING you learn from online tutorials is wrong – but rather, that if you truly want to ensure you’re learning how to do things the best way possible, the only answer is through makeup training/education and continued learning.

This way, you know you’re being taught by a true professional: someone who works in the industry and has the accredited background required in assuring the information you’re learning is accurate.

At the end of the day, everyone has the time and ability to frame the face, and anyone can learn how.  But to grow from there and truly become a makeup pro, you’re going to need so much more. Are you open to the challenge?

Become a certified makeup artist in 2020 by enrolling today in QC’s leading Master Makeup Artistry course!

DeShawn Hatcher doing makeup on female model

Industry Spotlight: DeShawn Hatcher

By Education, Featured, From the Experts, Makeup Tips and Tricks, Your Makeup Career No Comments

One of the greatest things any artist can do is continue to learn. Makeup artist classes are essential, but there is also mandatory “real world” learning that everyone interested in working in the beauty world needs. Our “Makeup Artists to Follow” series will introduce you to a new artist who has made an impact on the beauty industry.

Learning about them will give you a free master class in what’s happening with the titans in the industry. You’ll see the birth of trends from the people who actually created them – not the influencers who copied them. You’ll see a diverse array of techniques and styles that will ignite your own creativity, connecting you to the greater makeup community.

The first of these cosmetic pioneers that we’ll take a look at is DeShawn Hatcher.

Meet DeShawn Hatcher

DeShawn Hatcher headshot

As a makeup artist, educator, author, and Guinness World Record holder, DeShawn Hatcher is a true dynamo in the world of beauty. As an artist, she’s worked in every area of makeup, and had many different makeup artist jobs: TV, celebrity, editorial, and runway. She even holds the world record as the Beauty Director for the Cotton Inc. 24 hour fashion show.

With a hefty portfolio of images ranging from crisp and clean, to edgy and editorial, DeShawn’s work is a masterclass in diversity. Her passion is driven by an obsession for people to see the beautiful woman herself, not someone caked in makeup. Anything and everything within DeShawn’s portfolio demonstrates her mastery of creating perfect skin, precise lips, and captivating eyes. With her rich understanding of makeup and diverse use of technique, she’s proven herself to be a force in the world of beauty.

deshawn hatcher makeup example on female model #1

In her book, Assisting Rules”, DeShawn discusses how critical it is to become an assistant to a professional makeup artist, if you can, because it can be a fundamental move in blossoming your own professional MUA career. The book is a step-by-step guide to helping anyone break into the industry who has an interest in fashion, beauty, and print. It’s a must-have; rich with tips, tricks, and secrets that only someone who did it herself would know.

Not only do you get to see the ins and outs of what it’s like in the actual industry, you also get to learn from a pro in action. Just as importantly, it provides the chances for you to network, make connections, and get your name out there. These are opportunities that may be harder to come by if you weren’t assisting a professional makeup artist in your early days within the biz.

DeShawn has also contributed to nearly every major magazine, such as Elle, Vogue, Harper’s, WWD, etc. Her list of achievements is endless, but some notable contributions include:

  • Campaigns for some of the biggest international companies (e.g. MasterCard, Panasonic, Boost Mobile)
  • Runway looks for celebrated designers like Tory Birch, Tommy Hilfiger, Christian Siriano, etc.
  • Makeup for television, on networks such as E!, HBO, NBC, etc.
  • Makeup for Beyoncé, Tom Cruise, Vanessa Williams, and Anette Bening being just a few examples.
DeShawn Hatcher makeup example on female fashion model

As if this wasn’t impressive enough, she also teamed up with Graftobian to create the much-needed, and world’s first, Multicultural Foundation Palette for People of Color (Inclusion).

With a focus on education, DeShawn is often a featured speaker at makeup trade shows, makeup schools, and she writes her own blog. Her Instagram, @deshawnhatcher, is a must-follow. But her blog and her YouTube channel in particular are, in my opinion, some of the best resources for people wanting to learn about the beauty business from a true pro.

DeShawn Hatcher makeup example #3

Want to take your professional MUA career to the next level? Check out Nathan’s 3 tips to boost your success!

devyn gregorio holiday makeup look

Holiday Makeup Tutorial [video]

By From the Experts, Makeup Tips and Tricks, Makeup Tutorial, Tutorials & Tips No Comments

Devyn Gregorio is a QC Makeup Academy Student Ambassador. You can find her on her YouTube Channel, Gregorio Girls Makeup, where she makes beauty videos with her sister. Today, Devyn demonstrates how to create a gorgeous, holiday-inspired look you can rock right into the New Year!

Watch her video below!

Let’s Recap:

This look is what Devyn calls “classic glam” with “a good red lip”. As we’re in full holiday swing this time of the year, a red lip will always fit right in! The overall look is chic, yet subtle and elegant enough that you can wear for formal events (e.g. work parties, family get-togethers), casual events, or even just to do your Christmas shopping!

Keep reading to learn how to do this makeup look in time for the holiday season!

First Up: The Upper Eyes

Devyn begins by using her Chocolate Gold eyeshadow palette by Too Faced. Though released two holiday seasons ago, it’s still one of Devyn’s favorite Too Faced palettes to use. Most of the eyeshadows within it are shimmery, though there are a couple of matte pigments as well. This will be the palette used for this tutorial.

For this look, Devyn wants to do a natural halo eye. Her first color of choice is a rich brown, aptly named ‘Cocoa Truffle’. Using the back end of a smaller eyeshadow brush, Devyn starts by first applying the Cocoa Truffle to the inner corner of her eyelid, tapping more eyeshadow onto that spot to pack on the color. She then repeats this process on the outer corner of her eye.

Working on the crease

Next, Devyn uses her smaller sized blending brush, from the BH Cosmetics Marble Collection (#9), to apply and work the matte color, ‘So Boujee’, into her crease. This shade is a very soft peachy-brown. Since this is a halo eye, you want to pay extra attention in keeping the shape nice and round. Imagine when working on your crease that you’re creating a half-moon shape. Like Devyn, you may have a tendency to want to blend the eyeshadow outwards, for more of a cat-eye effect. Don’t do that for this look – in order to achieve a halo shape, the eyeshadows on the eyelid need to look round.

Devyn then uses an M139 Morphe Brush (which has a more pointed, tapered brush head) to allow for a more concentrated product application on her crease. She then uses ‘Cocoa Truffle’ again, this time applying it in the crease as well. Be careful not to blend upwards or outwards too much, you don’t want to cover the ‘So Boujee’ shade you just blended there!

The halo shade

From her palette, Devyn selects the color, ‘Gold Dipped’. Using a flat shader brush (#9 from the BH Marble Collection), she then swipes the golden eyeshadow right down the middle of her eyelid. Don’t worry about whether it looks pretty or not! You just need to get it on there. You’ll be able to do damage control shortly, we promise.

If you don’t want to use your brush for this step, you don’t have to! Just like Devyn chooses to do instead, you can always just use your finger to swipe it on. After all, as she says, “They’re the best brushes that you’ll ever have!” Just remember those downward strokes! Once applied, feel free to stipple on more product and tap it around your eyelid to blend it in, should you want that lovely, golden shimmer shade to pop even more.

Fun fact: Devyn is so used to wearing gel or acrylic nails that now that she’s NOT wearing them, she’s reminded of how much easier it is to apply makeup with her fingers!

Going back to her shader brush, Devyn then switches to rosy shade called ‘Classy & Sassy’, which she pats onto the edges of the halo shade she just laid down. She does this because this shimmery rose shade matches very close to the matte shade already used in the corners. This allows for a more natural-looking blend, instead of the appearance of an abrupt, rough line of color between the gold and the brown shades.  Once finished, Devyn goes back in one last time with more of the ‘Gold Dipped’ color, just to make sure it really stands out in the middle.

If you want to go a bit darker…

You can stop your upper eye makeup here, if you’d like. The result will be a bit more of a softer look. However, should you desire a little more dimension and depth in the inner and outer corners of this halo look, there is a black shade in the palette that Devyn recommends: ‘Decadent’. Take just the tiniest amount of this shade (just a tap or two) with a small, pointed brush. You don’t want the black to stand it, you just want to add a bit more depth to the inner and outer corners of your eyes.

You’ll probably notice, like with on Devyn, that immediately after applying this color, it will look black at first. Don’t worry! Take a mini blending brush with a bit of that ‘Cocoa Truffle’ shade again, blend it over the black. The brush that Devyn uses to complete this step is a Morphe M506.

Next Up: The Lower Lash Line

This step is relatively quick! First, using this same M506 small blender brush, Devyn dips back into the ‘Cocoa Truffle’, this time to blend along her lower lash line. She finishes off this part of the look by taking a little bit of the ‘Gold Dipped’ and patting it right in the middle, so it matches the gold shadow applied to the middle of the upper eyelid.

Highlighting the Brow Bone

For this next step, Devyn uses the same highlighter used on her cheeks: wet n wild’s ‘Precious Petals’. Since this is a halo eye you’re creating, Devyn reiterates that you don’t want to highlight the inner corner. You want to keep the shade nice and round, with the focus drawn to the center of the eye. That being said, the brow bone shouldn’t be neglected either. “It can still use some love!” Devyn insists, gently swiping on and creating that subtle glow.

In the Home Stretch: Adding Eyeliner

So long as the eyeliner is brown, any kind will do! (That being said, if you’re curious about the brand Devyn uses, it’s Butter London.) While you can use black eyeliner if this is your preference, Devyn has found brown to be an overall better choice for this holiday glam look! Apply to your lower and upper waterlines.

Note: Though Devyn does her eyelashes off-camera, any mascara and/or falsies will do! Devyn’s false lashes of choice are ‘Flirty’ by KISS Looks So Natural Lashes, because they’re dramatic – but not too dramatic. “Kind of like me,” Devyn adds with a giggle.

Last But Not Least: Lips

Because of the chosen colors used on your eyes, a red lip is the perfect way to tie everything together and bring more of that holiday vibe into the finished look! Devyn begins by taking her NYX lip pencil, in the bright, orange-red shade of ‘Summer Tease’, to outline and then color in her lips. If you’re thinking to yourself “this shade is way too bright!”, you’re not alone. Devyn agrees, but assures us that the actual lip color you’ll use next is a more blue-based red. The final result will be exactly what you want.

This next product is Lippie Stix’s ‘Bossy’ shade, by ColourPop. It’s a bit more of a cherry red, so if you don’t use this exact product, that’s alright. So long as it’s around this shade of red, it’ll do the trick.

Why Devyn Loves this Look

Admittedly one of her favorite looks to wear, Devyn feels the final product is super glam; a heavenly balance of the traditional red lip look, with the modern twist of the halo eye. Capable of dazzling others, while still delicate enough to be worn for every occasion. Truly the best of both worlds!

And there you go! Will you recreate this look for the holiday season? Let us know in the comments!

Interested in enrolling in QC Makeup Academy, but want to hear a real graduate’s opinion on the courses? Check out why Devyn chose QC, and how it’s helped her professional MUA career!

5 Useless Items You Don’t Need In Your Professional Makeup Kit

By Makeup Tips and Tricks, Uncategorized, Your Makeup Career No Comments

There are already countless makeup items lining the shelves (both physical and online), and with brand new products coming out every day on top of that, how are you supposed to know what’s legit and what’s no good to you?

Look, you’re a professional, the real deal. So we want to level with you, because a lot of these makeup companies aren’t. The truth is, there are a lot of items you simply do not need in your professional makeup kit. It could be because they don’t work as advertised, or maybe they cost way more than they’re actually worth. Perhaps there’s a more practical, cheaper alternative.

Either way, you’re too good for them, and we just want the best for you!

Keep reading to find out our list of the top 5 items you can go ahead and throw out of your makeup kit!

1. Silicon Makeup Sponge

makeup items you don't need - silicon makeup sponge

What it promises you

Silicon makeup sponges became a hot commodity when they first appeared on the makeup market. With its smooth texture and see-through appearance, they were marketed as the be-all-and-end-all of blending products. Argued to smooth out your foundation better than any competing brush, wedge, or foam sponge counterpart, the idea was that with the silicon makeup sponge, your skin would always have the perfect photoshopped finish.

Why you don’t need it

But once everyone started trying this product, it was very quickly exposed for the hack it is. In reality, most professional makeup artists strongly advise against using a silicon makeup sponge. Why? Unlike the latex-free foam sponge, the silicon’s smooth exterior gives it no way to actually soak up the product. This results in a heavier, cakier foundation application. Sure, the silicon sponge can spread it – but what good is that if it can’t actually blend the makeup into your client’s pores?

You’d be better off using a different applicator.

2. Expensive powders

makeup items you don't need - girl putting on powder with brush

What it promises you

More money, better quality. That’s the idea that’s being sold. The costlier the powder, the better it is for your client’s skin, and her results. Foundation, concealers, and creamy contours can make the skin appear dewy, even wet. It’s easy to sell the importance of a solid powder when it’s the very product that can make or break the look of your skin. With expensive powders, the finish will be seamless, and your client will look perfect. They will soften shine, soak into your client’s pores, create less residue, and be an overall better makeup product than any powder you could buy at a lower price.

Why you don’t need it

The truth is, all powders – regardless of cost – will use two important ingredients: mica and/or talc. So long as these ingredients are finely ground up (which they are in the majority of available makeup powders), they’ll all have the same basic effect. When it comes to the makeup industry, sometimes when you pay an arm and a leg, you’re not really paying for the quality of the product, but where the product’s coming from. If you’re spending $50+ on powder, the majority of that cost is actually just paying for the packaging, marketing, and relevance of the company and its brand.

Of course, that’s not to say that every powder is equal to the other. Some judgement should be used when determining which one you want to use on both yourself and your clients. All we’re saying is, you’re safe to ditch the (pointlessly) fancy stuff. Its drugstore equivalent will do the trick just fine.

3. High-end mascara

makeup items you don't need - MUA putting mascara on client

What it promises you

The really fancy stuff guarantees a superior formula to cheaper mascara. It will give your client longer, thicker lashes with far less clumping. The difference it’ll make for your client’s eyes will be drastically jaw-dropping, and if she were to blink too hard and too fast, her lashes will be SO LONG that she may just lift up and fly away! (Okay, we may be paraphrasing a bit here.)

You get the point, though.

Why you don’t need it

There’s some truth, depending on you and your taste. Many people feel both cheaper and pricey mascaras give the exact same results. Others have compared expensive mascara brands to cheaper ones and admitted they preferred the pricier mascara’s results – but only just by the tiniest bit.

Often times when you see side-by-side photos, you can barely tell them apart. Even if you can, it’s so miniscule that it’s hard to justify paying $25 more dollars just to get that teeny, tiny difference. Lots of drugstore mascaras create exceptional volume and thickness for lashes, with minimal clumping. You might as well save your money, since it won’t mean sacrificing quality.

4. Eyeshadow primer

makeup items you don't need - mua putting eyeshadow primer on client

What it promises you

Eyeshadow primer promises to do two main things:

  1. Keep your client’s concealer, eyeshadow, eyeliner, etc. looking flawless throughout the day by preventing it from creasing (thanks to its ability to absorb excess oils, etc.)
  2. If the primer has a nude or white tone, it can also provide a brighter, cleaner base for your client’s eyeshadow color(s) so they can really pop

Why you don’t need it

In this case, it’s not that the product doesn’t work as intended – it’s just that there are way cheaper alternatives that can give your client the same kind of outcome. For example, even something like Aloe Vera Gel can be used as a primer. It adds moisture without adding oil. Just dab a tiny amount on your client’s eyelids, give it a few seconds to dry a bit, and then continue!

Most concealers and foundations worth their salt are made to be long-lasting, so you should be able to use those as eyeshadow primer on your client without having to worry about creasing throughout the day. Another suggestion is to simply use a white cream/powder eyeshadow as the primer! The white will give her eyeshadow hues the best ability to really show themselves off.

5. Individual eyeshadow pots

makeup items you don't need - model wearing eyeshadow with eyeshadow palette held up

What it promises you

The exact color/shade you’re looking for in that moment, at an attractively low price.

Why you don’t need it

We’re a firm believer that you should never buy one of something when you can buy a bunch all at once. No, we’re not saying that you should buy multiple individual eyeshadows at the same time. That would cost a fortune! What you should be doing is looking for eyeshadow palettes.

Palettes are individual products that offer many pigments. While they will be a tad pricier upfront than it would be to buy a singular pot, you’ll save your money in the long run and get way more bang for your buck. Plus, palettes are a practical way to carry a wide array of different colors on you while saving space within your professional makeup kit!

In fact, if you’re able to get anything in a bundle (lip shades, contouring kits, makeup brushes, etc.) instead of buying each one individually, that is our greatest money-saving piece of advice for you. Whenever possible, try to go for bulk!

As a makeup artist, you want to ensure that you always present your best self to your clients. Part of doing that is having the best – and most effective – makeup products on-hand. You can achieve this without the most expensive tools and unnecessary products. So as 2020 quickly approaches, make it a New Year’s resolution to say goodbye to those items you don’t need in your professional makeup kit!

We’ve covered which makeup products you don’t need, but what about the essentials? Check out this list of top 10 MUST-HAVE items for your professional makeup kit!

How to Write a Makeup Artist Contract

By Makeup Tips and Tricks, Tutorials & Tips, Your Makeup Career No Comments

Not all makeup artists use contracts for their makeup jobs. If you have a home studio and book clients for small events, odds are you don’t need a contract. But for larger makeup jobs, where you’re going to travel to meet your client or commit an entire day of work to a single client or event, a good makeup artistry contract will help protect you and your business.

Read on to find out more about how to write a makeup artist contract.

makeup artist preparing her contract

What to Include in your Contract

A few years ago we wrote a full article about exactly what you should include in your contract. Below is a summary of those points, but you can find the full outline here.

  • Information on your client including contact information and any allergies/conditions they may have that will affect the products you can use
  • A clear outline of your services including the location, times you will be working, the scope of the job, etc.
  • Your payment terms, including the final price and any payment arrangements. For example, if a deposit is due in advance, etc.
  • Cancellation clauses including a clause that protects you in case of unforeseen circumstances
  • Indemnity clauses that protect you and your business against being sued for negligence

Best Practices for Writing Your Makeup Contracts

makeup artist client signing a contract

Contracts can easily be overdone or completely useless. If you want a simple makeup artistry contract that actually does its job, follow these important points:

  • It’s a good idea to use a basic template, and to have a lawyer scan it over to identify any potential legal problems ahead of time. After all, a contract is there to protect you and your makeup business.
  • Use simple, straight-forward language. Don’t try to be fancy with your contract. Use “you” when referring to your clients and “I” when referring to yourself.
  • Be specific and avoid words that are open to interpretation. For example, instead of saying “afternoon”, say “from Noon to 5pm”. This avoids having clients argue with you about semantics.
  • Some clients will ask you to revise some elements of your contract. This in itself isn’t outrageous. Most clients might ask for a slightly different payment structure/deadlines or ask you to clarify terms, etc. However don’t let a client browbeat you into removing your cancellation policy or make other changes you’re not comfortable with.

How to Use Your Makeup Contract

Using makeup contracts properly will help protect you and your makeup business. Here’s a quick rundown.

  • You should use a contract with every client if possible. You can use shorter contracts for quick same-day appointments.
  • Read through the contract with your client and explain it to them in plain language. Make sure they understand what they’re signing.
  • Send your client an electronic copy of your contract in a format that is not easily editable, like a protected PDF document.
  • If a client doesn’t sign the contract in front of you or if they printed your contract themselves, be sure to re-read the contract to ensure it hasn’t been altered in any way.

Makeup artistry contracts can be a pain to set up initially, but trust me, if anything happens, you’ll be glad to have it!

Have you ever written a makeup contract? Let us know if you encountered any unexpected problems in the comments below!

Wondering what you should you do if your client leaves you a bad review? Check out this guide on how to maintain your reputation!