Makeup Tutorial Archives - QC Makeup Academy
Category

Makeup Tutorial

Learn how to do makeup eyebrow tutorial Feature Image

Learn How to Do Makeup: Realistic Eyebrows Tutorial

By Education, Makeup Tips and Tricks, Makeup Tutorial, QC Student Ambassador 4 Comments

Want to learn how to do makeup so YOU can pursue a professional career as an MUA? We’ve got a killer tutorial that’ll help you get started! 💕

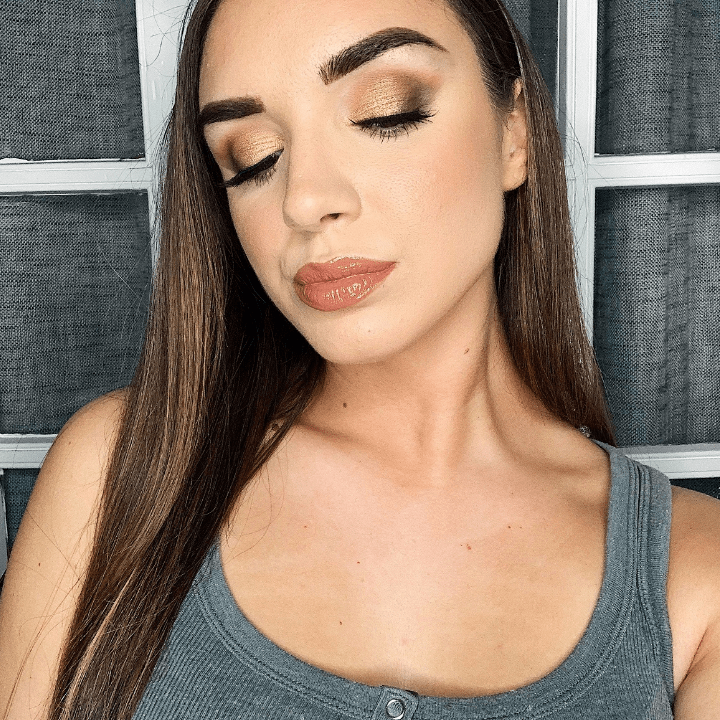
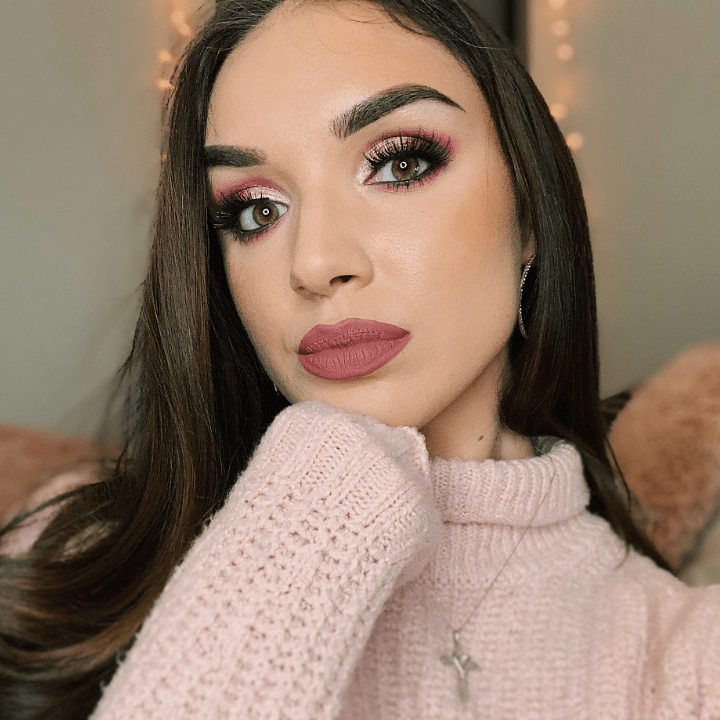
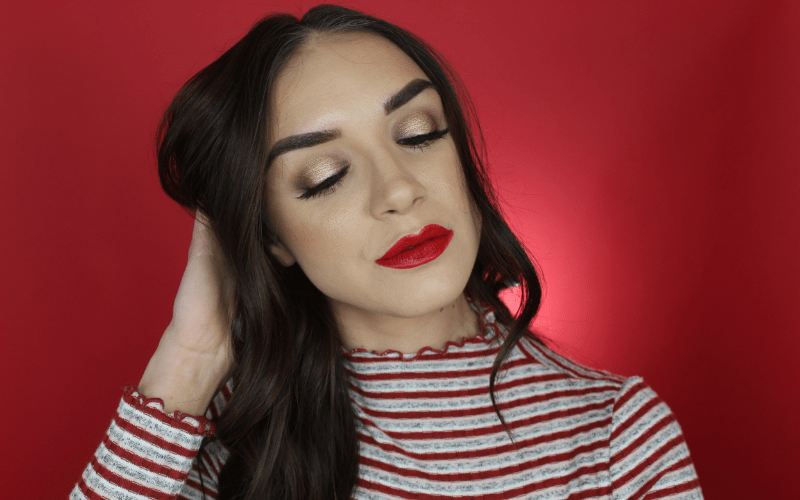
Amanda Ramey’s Realistic Eyebrows Makeup Tutorial

Amanda Ramey is a Student Ambassador of QC Makeup Academy. She is also a graduate of the follow certification courses:

  • Master Makeup Artistry
  • Pro Makeup Workshop
  • Airbrush Makeup Workshop
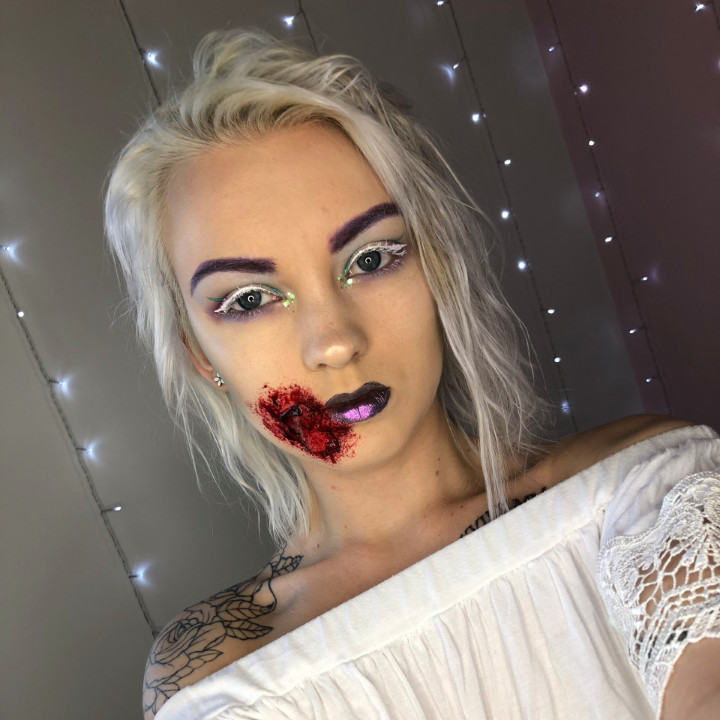
  • Special FX Makeup

Today, she’s here to demonstrate just how much QC’s competitive training has helped her learn how to do makeup! In the following video, watch as Amanda breaks down the technique and steps involved in creating hair-like, realistic eyebrows… even if you have no eyebrows at all!

Want to connect with Amanda directly? Join QC’s Virtual Classroom on Facebook today!

Let’s Recap!

When it comes to learning how to do makeup, the key is to get a proper education. Only through professional training will you gain a mastery of proper technique, makeup theory, and the fundamentals needed to create ANY makeup style.

In this tutorial, Amanda utilizes several critical techniques taught to her in QC’s Master Makeup Artistry Course. Particularly, she demonstrates:

  • A light hand;
  • The use of fine, hair-like stokes;
  • An understanding of color theory;
  • How to create dimension;
  • And how to achieve symmetry.

Prior to the tutorial itself, Amanda also shows an old photo of what her eyebrows used to look like before she got professionally trained. As you’ll see, the difference between then and now is like night and day!

Learn How to Do Makeup with QC Makeup Academy!

QC Makeup Academy offers a wide variety of self-paced, online makeup courses suitable for EVERY skill level. You get two full years to complete your program – but since your training is done entirely at your pace, you can graduate in as little or as much time as you need!

As part of your course, we will provide you with direct online access to all of your course materials. Moreover, we’ll also mail a physical copy of your materials – as well as your free makeup kit – right to your front door. Our wide array of assignments range from quizzes, self-studies, and hands-on training. Your tutor will be a real industry expert with years of in-field experience. After you submit each Unit, your tutor will review all of your work and provide you with audio feedback to help you grow and better your craft!

Once you graduate, you’ll receive your official, internationally-recognized certification in the mail. This certification is the PERFECT addition to any makeup artist’s resume. Not only will it impress your clients; it’ll help you stand out from the competition!

Learn how to makeup eyebrow tutorial in-post image

Additional Perks of Being a QC Student

Here are a handful of other reasons why you should learn how to do makeup with QC Makeup Academy:

  • We hold an A+ ranking with the Better Business Bureau and have been a pioneer of online learning since 1984.
  • Furthermore, all of our courses and certifications are internationally-recognized.
  • Our tuition is highly competitive, as well as flexible. You have the option to pay your course in full, or take advantage of our low monthly payment plan.
  • Plus, once you enroll in one course, all of your future courses will be 50% off.
  • As a QC student, you gain access to all sorts of amazing makeup discounts with big-name brands.
  • Our Customer Support and online community are second to none.

So, what are you waiting for? Learn how to do makeup professionally and start your dream career in as little as 3-6 months by enrolling with QC today!

Special effects makeup challenge article, Apr 28 2021, Feature Image

Makeup Challenge: Creating a Special Effects Makeup Look Using the WRONG Hand!

By From the Experts, Makeup Tutorial, Special Effects Makeup, Tutorials & Tips No Comments

Want to challenge yourself this upcoming weekend? Try creating a unique special effects makeup look using ONLY your non-dominant hand!

Gabrielle Rivera Attempts This Special Effects Makeup Challenge

Gabrielle Rivera is a graduate of QC Makeup Academy’s Master Makeup Artistry Course. Since one of her biggest niches is special effects makeup, she naturally jumped all over this challenge!

In the following video, Gabrielle attempts to recreate an SFX face chart originally created by Lauren Sullivan. However, she was tasked with completing this application only using her right hand. As a natural lefty, this would obviously prove to be quit the task!

So, how did Gabrielle do? You’ll have to watch the video below to find out!

Want to see more of Gabrielle’s makeup work? Check out her Instagram for some seriously awesome content!

Why Gabrielle Nailed This Makeup Challenge

As you’ll see in the video, Gabrielle does a surprisingly great job at creating a full SFX makeup application using her non-dominant hand. If you’re wondering how this is possible, there’s actually a very simple answer.

(No, it’s not because she practiced a million times beforehand. We pinky promise!)

The truth is, it’s all due to the professional training Gabrielle already has under her belt. Although she wasn’t able to use her dominant hand, Gabrielle still knew exactly what she was supposed to be doing. You see, when you learn the fundamentals of makeup artistry, you’ll know how to apply them correctly – regardless of which hand you use.

Sure, the application might have looked a bit more polished and precise had Gabrielle used her left hand. But the fact that she didn’t and it still turned out as amazing as it did is a true testament to Gabrielle’s educational background and skill!

Special effects makeup, glass all over female model

Become a Special Effects Makeup Expert Through QC Makeup Academy

In QC’s 4-unit Special FX Makeup Course, you’ll discover:

  • Safe and sanitary application for special effects makeup;
  • How to identify and work with common skin disorders;
  • The art of applying aging makeup, bald caps, and working with fake hair;
  • How to work with prosthetics;
  • The steps to creating a unique SFX and/or fantasy character;
  • How to create realistic gore/wound effects;
  • The critical components of starting and marketing your own MUA business;
  • And so much more!

What are you waiting for? Become an internationally-certified special effects makeup artist in as little as 3-6 months by enrolling with QC today!

ASMR makeup tutorial video feature image

ASMR Makeup Tutorial | Whispering, Tapping

By Makeup Tutorial, QC Student Ambassador, Student Ambassador No Comments

ASMR makeup tutorials have blown up in popularity over the past couple of years. If you’ve been searching for a new ASMR makeup video to scratch your itch, we’ve got good news: our awesome Student Ambassador, Jordan Garcia, is here with a brand-new video we think will be right up your alley! 💕

Watch Jordan’s ASMR Makeup Tutorial

Jordan Garcia is a student of QC Makeup Academy’s Master Makeup Artistry Course, Pro Makeup Workshop, and Skincare Course. Today, he uses the skills he’s acquired so far from his QC training to walk us through what his makeup routine looks like on a typical, casual day.

Watch Jordan’s full ASMR makeup tutorial below!

Want to connect with Jordan directly? Join QC’s Virtual Classroom on Facebook!

What is ASMR?

ASMR stands for “autonomous sensory meridian response”. In a nutshell, it’s a term used to describe the sensation certain people feel when watching videos considered mentally or visually stimulating. Often times, these kinds of videos involve the person (or people) on camera taking part in an activity. The activity in question can range. This article breaks down 28 of the most common types of ASMR triggers typically found in popular videos.

Those who enjoy ASMR videos tend to have a visceral response to what they’re watching and/or hearing. For some, it can relieve stress and anxiety. With others, it brings a strong sense of satisfaction. For this reason, ASMR videos are also very popular ‘bedtime’ videos for those looking to fall asleep in a peaceful, relaxed state.

In This ASMR Makeup Tutorial…

Jordan relies primarily on the whispering and tapping ASMR triggers. That being said, there are a few other ones thrown in there as well! As he breaks down the different steps involved in putting together his everyday makeup look, Jordan also explains why he’s doing what he’s doing.

To recap: Jordan is professional makeup student currently working through the Master Makeup Artistry Course. Along the way, he’s been getting tons of invaluable feedback from his tutor, Nathan Johnson. As a direct result, Jordan’s skill-set has already improved leaps and bounds since he first enrolled!

Thus, he relies on these skills and techniques he’s been acquiring from his training to not only satisfy our ASMR desires – but educate us as well!

ASMR makeup tutorial, Jordan Garcia, in-post image

Become a Makeup Artist with QC Makeup Academy

QC Makeup Academy has been a proud pioneer of online learning since 1984. We hold an A+ ranking with the Better Business Bureau and are affiliated with the Professional Beauty Association. All of our certifications are internationally-recognized. This means that once certified, you can work practically anywhere in the world!

Plus, QC’s online training is the very definition of convenient. Firstly, everything is taught entirely online. Thus, you can train right from the comfort of your own home! Secondly, there are no deadlines for you to abide by. Complete your program entirely at your own pace – and you get 2 full years to do it! Thirdly, we offer different payment options to suit every budget. Pay in full (if you want) or take advantage of our low monthly payment plan!

Oh, and did we mention that your course(s) will guarantee that you get ample hands-on training?

If you’d like to learn even more about the perks of training with QC Makeup Academy, check out Jordan’s other video here!

Get certified as a professional makeup artist in as little as 3-6 months by enrolling with QC today!

special effects makeup tutorial rainbow clown gabrielle rivera feature image

Special Effects Makeup Tutorial: The Rainbow Clown

By From the Experts, Makeup Tutorial, Special Effects Makeup No Comments

Want to challenge yourself this month? We’ve got a special effects makeup tutorial that we think will do the trick! Follow along with QC Makeup Academy graduate, Gabrielle Rivera, and see if YOU can recreate her rainbow clown design!

Gabrielle Rivera Breaks Down Her Special Effects Makeup Look…

Gabrielle is a graduate of QC’s Master Makeup Artistry Course. In addition to traditional makeup, she also specializes in special effects makeup. Check out Gabrielle’s Instagram for more incredible content!

Today, Gabrielle teaches us how to recreate her rainbow clown SFX design. Follow along by watching the full tutorial below!

Want to see how far Gabrielle’s skill-set has come, thanks to professional makeup training? Click here to watch her recreate her very first SFX look, using the skills and knowledge she has now!

QC Makeup Academy’s Special Effects Makeup Course

In this 4-unit course, you’ll learn all about:

  • Safe and sanitary SFX makeup application;
  • Identifying common skin disorders;
  • Building your special effects makeup kit;
  • Aging makeup, bald cap application, and using fake hair;
  • SFX makeup for trauma;
  • How to work with fake blood;
  • Creating original characters;
  • Client relations and starting your very own business;
  • And MUCH more!
QC's Special FX Course starter kit

What to Expect

Once enrolled, you’ll receive both a physical AND digital copy of your course materials. Plus, we’ll even send you a FREE starter SFX makeup kit! Your course curriculum will be broken down into textbook readings, instructional videos, quizzes, and tons of assignments! As a result, there’ll be plenty of different ways for you to learn!

Looking for real-world experience? Practical assignments will give you loads of hands-on experience working on models. As a result, you’ll know what to expect in the field and be ready to jump into the industry right away!

QC’s Special Effects Makeup Course is 100% online and self-paced. This means you’ll get to train from the comfort of your own home, on your own schedule. Moreover, there are NO deadlines or rigid class schedules to follow!

You’re likely going to want your mentor to be a true industry expert. After all, why wouldn’t you? We completely understand and wouldn’t have it any other way! When you enroll with QC Makeup Academy, your assigned tutor will be a working SFX makeup artist with years of experience!

After each unit, they’ll even provide you with extensive audio feedback. Importantly, this feedback will help both you and your tutor track your progress and help you to grow.

The best part? Once you graduate, you’ll become a designated (and officially certified) International Special FX Makeup Professional (ISMP)! QC Makeup Academy will even mail you a physical copy of your certification. As such, you can proudly display it in your home, your business, and in your professional resume!

Ready to get started? Enroll in QC’s Special Effects Makeup Course today and graduate in as little as 3-6 months!

QC Makeup Academy Ambassador Amanda Ramey has makeup done by partner feature image

QC Makeup Academy Ambassador, Amanda Ramey: My Partner Attempts to Do My Makeup for Valentine’s Day! [Video]

By Education, Makeup Trends, Makeup Tutorial, QC Student Ambassador No Comments

QC Makeup Academy’s very own Student Ambassador, Amanda Ramey, is here today to show the world just how challenging makeup artistry truly is!

Join Amanda as her partner, Adam, attempts to do a Valentine’s Day-inspired makeup look on her. The thing is, Adam has NO prior makeup training! Without a proper understanding of fundamental theories, principles, and techniques, will Adam rise to the challenge… or realize that being a makeup artist is a LOT harder than it looks?

Find out for yourself by watching the video below!

Want to connect with Amanda directly? Join QC Makeup Academy’s Virtual Classroom on Facebook today!

Why YOU Should Enroll with QC Makeup Academy Today

During a global pandemic, is now really the right time to pursue a new career and gain professional makeup training?

ABSOLUTELY!

Take this opportunity to maximize your time by earning an internationally-recognized makeup certification in as little as 3-6 months. This way, when the world does return to normal, you’ll be ready to take the industry by storm!

Here are just a few quick reasons why you should enroll with QC Makeup Academy today:

  • QC has been a pioneer of online learning since 1984 and has an A+ ranking with the Better Business Bureau!
  • There are plenty of students and alumni who’ve raved about their experience with QC Makeup Academy. Read over 270 reviews here!
  • Train on your own schedule (meaning NO deadlines) and in your own environment with QC’s self-paced, distanced learning!
  • Get a full 2 years to complete your QC Makeup Academy course!
  • Get tutored by a real industry expert and receive thorough audio feedback after every unit!
  • Receive awesome course materials to aid in your training – such as a makeup kit, textbooks, and instructional videos – and refer back to them throughout your career!
  • QC Makeup Academy’s competitive payment plans and tuition are affordable for ANY budget! Plus, take advantage of our monthly promotional offers for even more wicked discounts!
  • Practical assignments will provide you with real-world, hands-on experience!
  • And so much more!
makeup artist doing makeup on client

So, what are you waiting for? Start the career you’ve always wanted today!

Mastering the Smoky Eye Tutorial [video]

By From the Experts, Makeup Tutorial No Comments

Devyn Gregorio is a QC Makeup Academy Student Ambassador and professional makeup artist. You can find her on her YouTube Channel, DevDevGregs, where she makes beauty videos. Today, Devyn walks us through the step-by-step process of a killer smoky eye look!

Watch her video below!

Let’s Recap!

As a makeup artist, mastering the smoky eye is sort of like a rite of passage. It’s a skill that every respectable MUA needs to have, since you’ll encounter innumerable clients who will request this look from you. Not to mention, a solid smoky eye is an essential addition to your makeup portfolio!

As a graduate of QC’s Master Makeup Artistry Course, Devyn knows the importance of a good smoky eye better than anyone! Indeed, it’s a staple look she frequently incorporates into her own makeup routine, her YouTube vlog, and her professional makeup career.

In my opinion … if you’re only going to learn how to do one eyeshadow look, [smoky eye] is the type of look you should learn!

Devyn Gregorio

As Devyn points out, there are a LOT of different ways (and with different techniques) that you can approach the smoky eye. However, her go-to process for achieving this look can be broken down into 4 easy-to-remember steps.

So, let’s take a look at Devyn’s interpretation of the classic 4-step smoky eye!

Before You Begin, Make Sure to Prime!

Devyn begins by introducing the Soft Glam Palette by Anastasia Beverley Hills. This is what she’ll be using to create her eye makeup. While we will be referencing the colors from this specifically palette, you can use whichever eyeshadow products you’d like when recreating this tutorial!

You’ll want to start by priming your eyes, which Devyn has already done, using Urban Decay’s Primer Potion.

She then sets her upper eyelids with the very first shade in the Soft Glam Palette: Tempera. While she pats on this light shade, she urges you to keep in mind that working on your own face is an obviously different experience than applying your skills on a model.

If you wish to learn how to do a successful smoky eye on clients, it’ll be important that you also acquire some real-world experience in working on other people’s faces, too.

Step 1: Your Crease Shade

For her crease, Devyn selects the Burnt Orange shade from the Soft Glam Palette. In terms of brushes, she selects the Morphe M518 brush. Importantly, this brush is fluffy in texture, which will help create a more flawless blend.

Note: When choosing your brush, make sure that it’s not TOO fluffy! You want to maintain control over where the eyeshadow is being spread across the eye. You want the product to be primarily concentrated in your crease.

Devyn then begins to apply the Burnt Orange shade along her crease. Notice the way she swivels the brush head into tiny, circular strokes! This is a key technique she uses when blending eyeshadow.

Devyn also notes how, since she’s working on herself, she’s raising her eyebrow a bit. This helps her to get better access to the crease. If working on a client, you can urge them to keep their eyebrows neutral. Then, use your fingers to lightly lift the skin, just enough for you to properly work on their crease.

The goal of this step is to get an even blend!

Remember: Don’t try to start by doing too much, too quickly! During this step, try to keep things tight along your crease. It’s alright to create a small blending effect, but try not to spread it out too far or too high. Pay attention to where the brow bone sits, and how much crease and lid space it gives you to work with. Work with it, not against it!

Step 2: Your Outer Corner Shade

Next, Devyn selects a darker shade from the palette: Cypress Umber. If you’re using a different palette, choose a rich, medium brown hue. She switches brushes for this step, now opting for a much smaller blending brush.

Add the product to your brush, and begin applying it to the outer half of your lid. Apply the product on a diagonal, moving upwards towards your crease. Again, start small and gradually build! Don’t go into it with a heavy amount of product.

As with any type of makeup application, you’ll achieve way better results if you apply your product in sheen layers. If you have a heavy hand, be mindful to go in with lighter pressure. When it comes to a smoky eye, it’s all about the blend!

Once you’ve built it up to the corner, you can then begin inviting it up into the crease. Don’t blend this darker shade over the entire crease, though. Try to only incorporate the eyeshadow to about half way through.

Note: Once you’ve laid down the foundation with these two steps, you can now go back in and intensify the look (if desired). Now’s the time to embolden the color, fan out the blend a bit more, or even just to smooth out the blending so that every color transitions into each other seamlessly!

Step 3: Your Lid Shade

For her eyelids, Devyn picks a bright, glittery Bronze shade. Instead of using a brush, Devyn opts to tap the products directly onto her finger. So long as your hands are clean, this is absolutely a useful method for applying eyeshadow, since your body temperature will help warm up the product!

Should you not wish to use your finger, you can use a flat eyeshadow brush for this step.

She then stipples the eyeshadow onto the center of her lid, working it out so that it meets the outer corner and upper crease. Go back in with a second layer, to help build coverage. Use your finger to blend this brighter shade with the darker, contrasting shades already applied your outer corner and crease.

Afterwards, if you want to intensify the lid even more, now’s the time to go back in with your flat brush for a third layer of product! For an added POP, wet your brush with a setting spray after you’ve gathered the product (and before you apply it to your eyelid).

Step 4: Your Brow Bone + Inner Corner Highlight Shade

You’ll notice that Devyn takes a quick break off-camera before this final step, to apply the rest of her makeup and add some false eyelashes. You can also choose to do the same, or simply wait until you’ve completed your smoky eye.

Devyn then delves into the last part of this 4-step tutorial, which is to highlight the brow bone and inner corner of the eye. Using a flat eyeshadow brush, she gathers some of the shade, Glistening. For those not using the Soft Glam Palette, this is a glittery, peachy-gold color.

She then taps it onto the inner corner of her eye. It’s not a terribly dramatic result; more so a subtle pop that brings extra dimension to the overall look (especially from the right angles). Afterwards, she swipes her brush along the outer, lower half of her eyebrow. Because Devyn has a good amount of brow bone space, she lightly works this color out to cover more of that empty space.

Bonus Step: The Bottom Lid

This step is optional. However, to get a well-rounded smoky look, it’s definitely a great inclusion to add to the process!

Using the same color that you used on the outer corner of your eye, as well as a light hand, apply this hue along your lower lash-line. Blend it out so that it doesn’t look like a chunky, harsh line. Again, remember to approach this step by layering your product. If you want a darker result, add more layers.

Finish off the look with a little mascara on your lower lashes… and voila! You’ve achieved a sexy, perfect smoky eye!

Devyn’s Food for Thought

When it comes to the art of makeup, the key is to learn the basics first. Once you’re confident in your ability to get the basics of a given look down, you can then go back in and get more creative.

In terms of a smoky eye, this same notion applies. While the 4 steps outlined in Devyn’s tutorial help to teach you how to create a standard smoky eye, there’s still plenty of room to build off of it and add more dimension!

Play around with different colors; experiment with the depth, intensity, and blend. Makeup allows you to truly express yourself, so don’t hesitate to try new things!

It’s only by trying that you’ll learn how to truly grow!

Curious as to which other looks are needed within your professional makeup portfolio? Enroll in QC’s Portfolio Development Course, and learn everything you need to do!

Devyn Gregorio - still-frame - Valentine's makeup tutorial look

Valentine’s Day Makeup Tutorial [video]

By From the Experts, Makeup Tutorial 2 Comments

Devyn Gregorio is a QC Makeup Academy Student Ambassador. You can find her on her YouTube Channel, DevDevGregs, where she makes beauty videos. Today, Devyn shares how she created a beautiful and bright Valentine’s Day makeup look!

Watch her video below!

Keep reading to learn how Devyn designed and created this vibrant look.

Let’s Recap

February is the perfect time to create a fun Valentine’s-themed look. For this tutorial, Devyn will be working with only Anastasia’s new Amrezy Palette, which contains a variety of nude and rosy tones—perfect for Valentine’s Day!

The Eyes

Devyn starts her makeup look by applying E.l.f.’s Putty Eye Primer over her upper lids. This is a new product, so she’s excited to try it out!

She then uses the shade, ‘Waisted’, from her Amrezy palette to set her eyelids. Afterwards, Devyn uses her Morphe’s M573 brush to work the color, “OG”, into her crease. She chooses this neutral chocolate brown color to start off easy. By remaining in her comfort zone initially, she can then develop the confidence as the look progresses to step outside of it and gradually go bolder!

Devyn then uses the Morphe M504 (a bigger, fluffier brush) to blend out her crease color. Once the crease is finished, she lays down E.l.f.’s liquid eyeshadow, in the color, ‘Disco Queen’, on her inner-upper lid. She starts at the inner corner and slowly uses the included applicator to work the shadow into the center of her lid, as well as up into the crease.

Note: Devyn is NOT doing a cut crease in this tutorial! If you’d prefer a cut crease look, you can use a more precise brush to apply the liquid shadow.

Before the liquid eyeshadow dries completely, Devyn takes the color, ‘Barb’, and uses her finger to tap the product over the liquid shadow. This metallic lilac color will give her inner lids a hint of pink!

To fill in the rest of her eyes, Devyn uses the shade, ‘Šemsa’, (a matte red-plum shade). Using the brush from her Urban Decay Naked3 palette, she gradually packs the color onto the outer third of her eyelid.

Note that Devyn warns how the Anastasia’s eyeshadows are highly pigmented! To avoid making a mess, start with a little product and slowly build up your color with layers.

Pro Tip: By applying the liquid eyeshadow on your eyes first, it makes it easier to blend the two colors. Using this technique, Devyn is able to use the powder shadow to create a seamless transition between the two colors.

To bring the plum shade up to her crease, Devyn switches to a smaller and thinner brush. Again using the color, ‘Šemsa’, she slowly blends the color up. Remember: “Slow and steady wins the race!” To soften up the look, Devyn uses a fluffy blending brush to lightly blend out the edges.

Adding more depth

To add more depth to the eyes, Devyn decides to add a bit black eyeshadow to the outer corner of her eye. Using a pencil brush (Morphe’s e18), she selects the color, “BK”, and lightly packs it onto her outer corner.

The goal here is deepen the existing plum color, and not to make it look like there’s black shadow on her eyes! Use a blender brush to soften up the edges and fully blend the black into the plum color.

Using black shadow on the outer corner gives this look a smokey effect. Although the black takes a bit of time to blend out, it’s definitely worth the extra depth if gives to the eye! To make sure the black blends properly, Devyn warns that you will need to practice, practice, and even more practice!

To finish the upper lids, Devyn uses the same blender brush used for the plum color earlier, and softens up the edges of her shadow.

The lower lids

Devyn starts by using her Morphe eyeliner along her waterline. She also uses her eyeliner to tight-line her upper eyes.

Using a pointed liner brush, Devyn applies the color, ‘Šemsa’, on the bottom of her lash line. She starts from the outer corner and slowly brings it in. She then switches to a small blending brush (M506) to smudge out the color.

To help blend the eyeliner into her eye makeup look, Devyn uses a flat eyeliner brush and applies the black shadow, ‘BK’, right by the eyeliner.

All about the highlight

To highlight her inner corners and brow bone, Devyn switches to Anastasia’s Jacky Aina Palette. The Amrezy palette she was using previously just didn’t have the right shade!

Using her fingers, Devyn lightly applies the color, ‘Trust Issues’, onto her inner corner and brow bone.

Lashes for days

To finish her eyes, Devyn chooses to apply some dramatic lashes to match the bold colors. She chooses the Queen B lashes from KoKo.

The Lips

Because of the colors she chose for her eyes, a pink lip is the only way to go!

Devyn first lines her lips with the shade, ‘Oh Snap’, from Colorpop. Then she applies Anastasia’s liquid lipstick in the color, ‘Dusky Rose’. This shade is pinker than her lip liner, which matches her eye color pop perfectly!

The Final Look

Devyn is very happy with how her makeup look turned out! She had a lot of fun stepping outside of her comfort zone, and working with bright and bold colors.

And that’s it! What was YOUR favorite part of Devyn’s makeup look? Let us know in the comments below!

Ready to start your makeup training with QC Makeup Academy? Check out Devyn’s honest review of the popular Master Makeup Artistry Course here.

devyn gregorio holiday makeup look

Holiday Makeup Tutorial [video]

By From the Experts, Makeup Tips and Tricks, Makeup Tutorial, Tutorials & Tips No Comments

Devyn Gregorio is a QC Makeup Academy Student Ambassador. You can find her on her YouTube Channel, Gregorio Girls Makeup, where she makes beauty videos with her sister. Today, Devyn demonstrates how to create a gorgeous, holiday-inspired look you can rock right into the New Year!

Watch her video below!

Let’s Recap:

This look is what Devyn calls “classic glam” with “a good red lip”. As we’re in full holiday swing this time of the year, a red lip will always fit right in! The overall look is chic, yet subtle and elegant enough that you can wear for formal events (e.g. work parties, family get-togethers), casual events, or even just to do your Christmas shopping!

Keep reading to learn how to do this makeup look in time for the holiday season!

First Up: The Upper Eyes

Devyn begins by using her Chocolate Gold eyeshadow palette by Too Faced. Though released two holiday seasons ago, it’s still one of Devyn’s favorite Too Faced palettes to use. Most of the eyeshadows within it are shimmery, though there are a couple of matte pigments as well. This will be the palette used for this tutorial.

For this look, Devyn wants to do a natural halo eye. Her first color of choice is a rich brown, aptly named ‘Cocoa Truffle’. Using the back end of a smaller eyeshadow brush, Devyn starts by first applying the Cocoa Truffle to the inner corner of her eyelid, tapping more eyeshadow onto that spot to pack on the color. She then repeats this process on the outer corner of her eye.

Working on the crease

Next, Devyn uses her smaller sized blending brush, from the BH Cosmetics Marble Collection (#9), to apply and work the matte color, ‘So Boujee’, into her crease. This shade is a very soft peachy-brown. Since this is a halo eye, you want to pay extra attention in keeping the shape nice and round. Imagine when working on your crease that you’re creating a half-moon shape. Like Devyn, you may have a tendency to want to blend the eyeshadow outwards, for more of a cat-eye effect. Don’t do that for this look – in order to achieve a halo shape, the eyeshadows on the eyelid need to look round.

Devyn then uses an M139 Morphe Brush (which has a more pointed, tapered brush head) to allow for a more concentrated product application on her crease. She then uses ‘Cocoa Truffle’ again, this time applying it in the crease as well. Be careful not to blend upwards or outwards too much, you don’t want to cover the ‘So Boujee’ shade you just blended there!

The halo shade

From her palette, Devyn selects the color, ‘Gold Dipped’. Using a flat shader brush (#9 from the BH Marble Collection), she then swipes the golden eyeshadow right down the middle of her eyelid. Don’t worry about whether it looks pretty or not! You just need to get it on there. You’ll be able to do damage control shortly, we promise.

If you don’t want to use your brush for this step, you don’t have to! Just like Devyn chooses to do instead, you can always just use your finger to swipe it on. After all, as she says, “They’re the best brushes that you’ll ever have!” Just remember those downward strokes! Once applied, feel free to stipple on more product and tap it around your eyelid to blend it in, should you want that lovely, golden shimmer shade to pop even more.

Fun fact: Devyn is so used to wearing gel or acrylic nails that now that she’s NOT wearing them, she’s reminded of how much easier it is to apply makeup with her fingers!

Going back to her shader brush, Devyn then switches to rosy shade called ‘Classy & Sassy’, which she pats onto the edges of the halo shade she just laid down. She does this because this shimmery rose shade matches very close to the matte shade already used in the corners. This allows for a more natural-looking blend, instead of the appearance of an abrupt, rough line of color between the gold and the brown shades.  Once finished, Devyn goes back in one last time with more of the ‘Gold Dipped’ color, just to make sure it really stands out in the middle.

If you want to go a bit darker…

You can stop your upper eye makeup here, if you’d like. The result will be a bit more of a softer look. However, should you desire a little more dimension and depth in the inner and outer corners of this halo look, there is a black shade in the palette that Devyn recommends: ‘Decadent’. Take just the tiniest amount of this shade (just a tap or two) with a small, pointed brush. You don’t want the black to stand it, you just want to add a bit more depth to the inner and outer corners of your eyes.

You’ll probably notice, like with on Devyn, that immediately after applying this color, it will look black at first. Don’t worry! Take a mini blending brush with a bit of that ‘Cocoa Truffle’ shade again, blend it over the black. The brush that Devyn uses to complete this step is a Morphe M506.

Next Up: The Lower Lash Line

This step is relatively quick! First, using this same M506 small blender brush, Devyn dips back into the ‘Cocoa Truffle’, this time to blend along her lower lash line. She finishes off this part of the look by taking a little bit of the ‘Gold Dipped’ and patting it right in the middle, so it matches the gold shadow applied to the middle of the upper eyelid.

Highlighting the Brow Bone

For this next step, Devyn uses the same highlighter used on her cheeks: wet n wild’s ‘Precious Petals’. Since this is a halo eye you’re creating, Devyn reiterates that you don’t want to highlight the inner corner. You want to keep the shade nice and round, with the focus drawn to the center of the eye. That being said, the brow bone shouldn’t be neglected either. “It can still use some love!” Devyn insists, gently swiping on and creating that subtle glow.

In the Home Stretch: Adding Eyeliner

So long as the eyeliner is brown, any kind will do! (That being said, if you’re curious about the brand Devyn uses, it’s Butter London.) While you can use black eyeliner if this is your preference, Devyn has found brown to be an overall better choice for this holiday glam look! Apply to your lower and upper waterlines.

Note: Though Devyn does her eyelashes off-camera, any mascara and/or falsies will do! Devyn’s false lashes of choice are ‘Flirty’ by KISS Looks So Natural Lashes, because they’re dramatic – but not too dramatic. “Kind of like me,” Devyn adds with a giggle.

Last But Not Least: Lips

Because of the chosen colors used on your eyes, a red lip is the perfect way to tie everything together and bring more of that holiday vibe into the finished look! Devyn begins by taking her NYX lip pencil, in the bright, orange-red shade of ‘Summer Tease’, to outline and then color in her lips. If you’re thinking to yourself “this shade is way too bright!”, you’re not alone. Devyn agrees, but assures us that the actual lip color you’ll use next is a more blue-based red. The final result will be exactly what you want.

This next product is Lippie Stix’s ‘Bossy’ shade, by ColourPop. It’s a bit more of a cherry red, so if you don’t use this exact product, that’s alright. So long as it’s around this shade of red, it’ll do the trick.

Why Devyn Loves this Look

Admittedly one of her favorite looks to wear, Devyn feels the final product is super glam; a heavenly balance of the traditional red lip look, with the modern twist of the halo eye. Capable of dazzling others, while still delicate enough to be worn for every occasion. Truly the best of both worlds!

And there you go! Will you recreate this look for the holiday season? Let us know in the comments!

Interested in enrolling in QC Makeup Academy, but want to hear a real graduate’s opinion on the courses? Check out why Devyn chose QC, and how it’s helped her professional MUA career!