Uncategorized Archives - Page 2 of 4 - QC Makeup Academy
Category

Uncategorized

Graduate Feature: Nadia Calabro

By Uncategorized No Comments

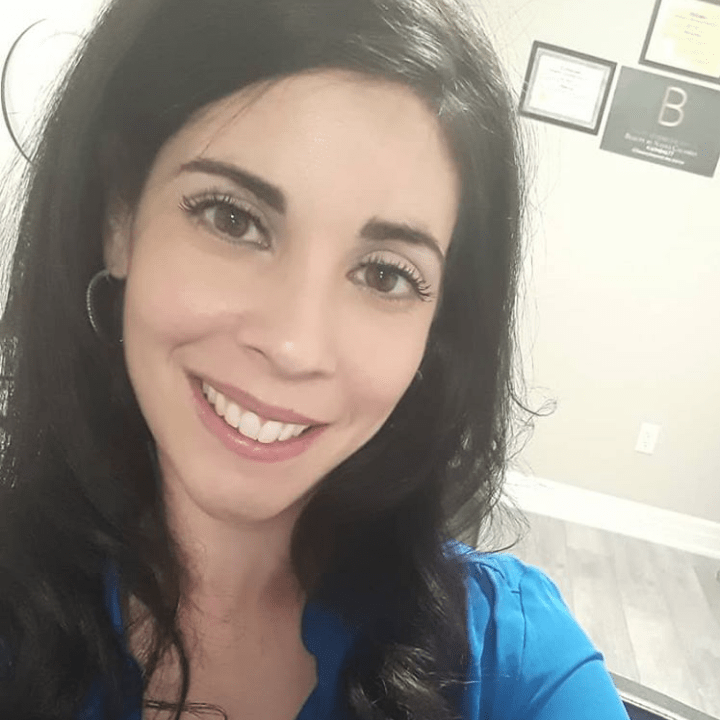
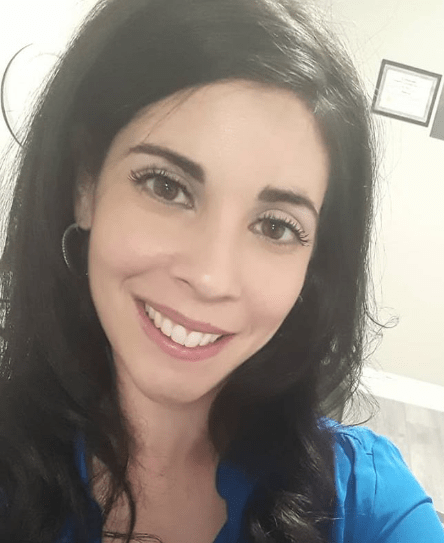
Tell us a little bit about yourself!

I am 30 years old, and was born and raised in Toronto, Ontario. I’m married and have two beautiful sons, who are 6 and 3 years old. I went to beauty school in 2009 (right after high school), and graduated within 15 months.

While there, I obtained my hairdressing diploma, as well as my makeup, waxing, facial, and manicure certificates. Since then, I’ve been working as a hairstylist.  For the past few years, I’ve been running a successful business from home. This has allowed me to balance my career with caring for my young children as well.

Why did you decide to earn your makeup artist certification?

I’ve always loved every part of the beauty industry. It’s in my blood! My father owned a company that distributed salon and spa products, and my mom was a makeup artist. I always loved playing with different products, fixing myself up, and asking others if I could do their hair and makeup.

When I was younger, the road lead me towards the hair industry. I’ve loved every minute of it! I found, though, that when I do hair for my clients, a lot of the time they ask if I offer makeup services as well. I always knew that it was logical to expand my business by offering more services.

But it really wasn’t until the last few years, while I’ve been at home with my boys, that I finally had the chance to expand my knowledge and skills. I’ve always loved makeup and had my eye on it – but to be honest, I was intimidated. I compared myself to everyone else’s work. I never really thought I could be good at it, even though I loved it.

But I had a consistent and intense urge; something telling me I needed more. My heart knew it was makeup. One day, I saw an ad for QC Makeup Academy. That same day, I did some research and knew right away that this was the program for me. I quickly signed up, and I will forever be grateful for that day!

Daytime to Nighttime Makeup Looks by QC Makeup Academy Graduate Nadia Calabro

What’s the meaning behind your business’s name, Beauty Beyond the Mirror?

I have to be honest… A few years back, I pushed aside my love for the beauty industry. My passion dwindled and I truly believed it just wasn’t for me. I allowed myself to fall into this place because of prior experiences I had working at salons.

When I was working in salons, I was told this wasn’t the world for me. I didn’t look the part. I didn’t act the part. My work wasn’t that good. I heard these vicious criticisms, and it broke me. Confidence has never been my thing. Hearing these things validated what was already lurking in the back of my own mind.

During this time where I let go of my dreams, I had this moment when I looked at myself in the mirror and said, “What happened to me?” I was a mess, in every aspect of the word, and it was most evident in my appearance. It was a terrible realization, especially since I loved the beauty industry so much.

It was in that moment that I promised to find myself again! I wanted to look in the mirror and see the person I wanted to be. Over time, I found there was something within me that was worthy.

My greatest lesson was that not all things are visible to the eye. We never know what a person is battling. Some of the hardest and most beautiful things lay beyond the surface. The same can be said about the beauty industry. It’s about feeling self-love and worth.

What I want for my clients is to allow the person they are to be present in its entirety. It’s to give them that moment where they look in the mirror and see themselves again. The first step is finding ourselves and loving ourselves, every part of ourselves. Sometimes, that means looking beyond the mirror.

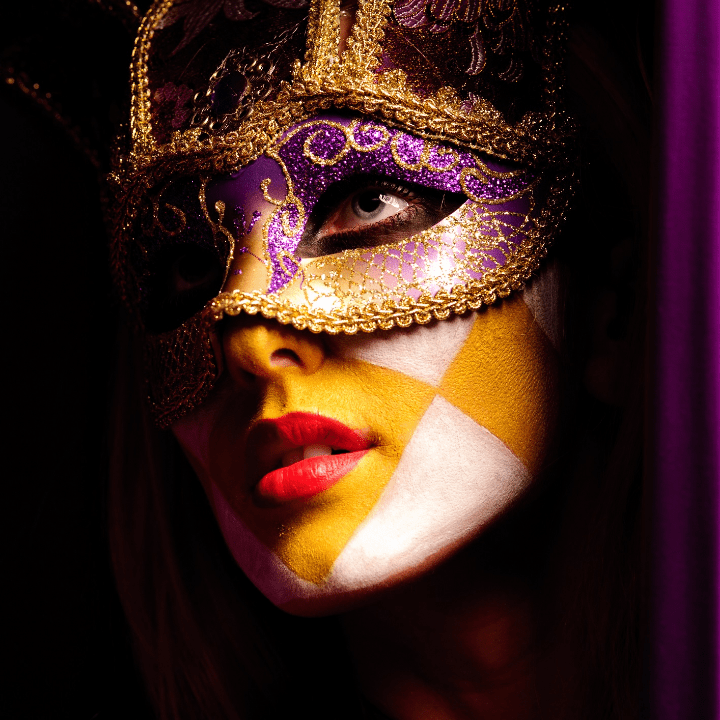
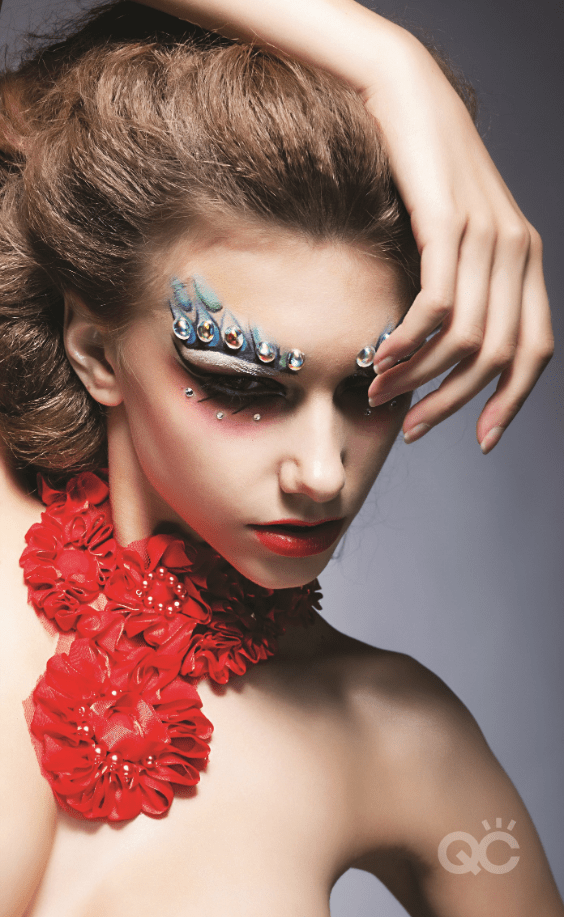
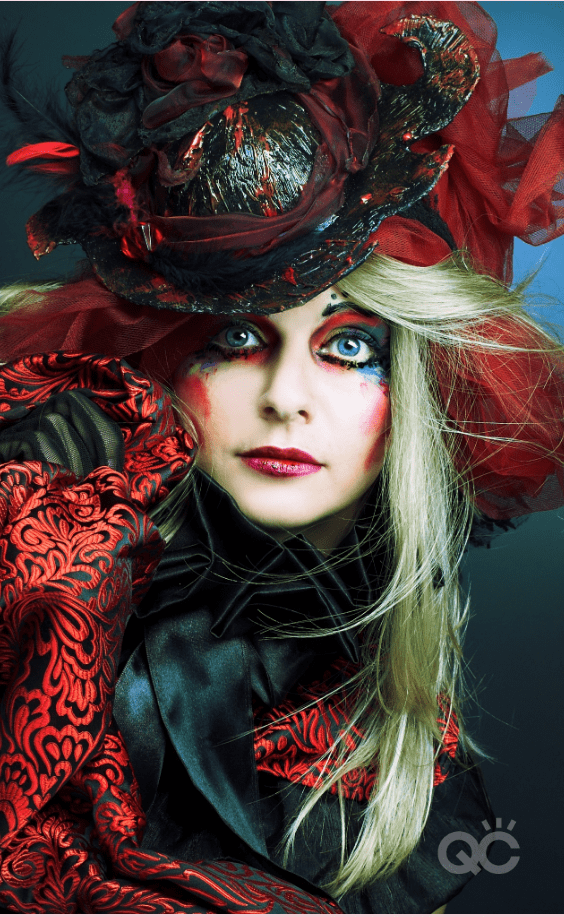
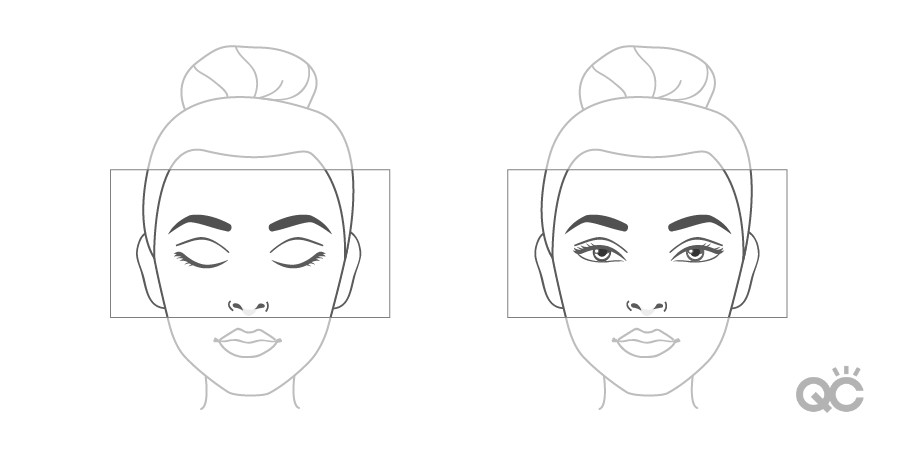
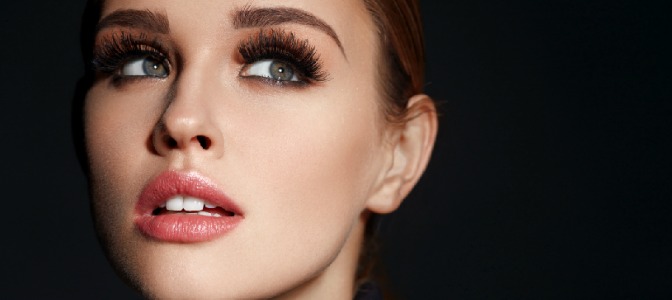
How would you describe your makeup style? Do you have a particular niche?

I always describe myself as a sucker for the timeless, classic beauty looks! I picture woman like Marilyn Monroe and Audrey Hepburn, and I see beauty that truly never dies. I tend to gear toward these kinds of looks.

But I have to say that QC Makeup Academy has opened my eyes to a LOT of different styles that I never thought would appeal to me! Not only that, I have learned a lot about myself and the artistic skills I have. This has pushed me to try new things.

Headshot of QC Makeup Academy Graduate Nadia Calabro

You’ve recently earned your BARBICIDE® Certification. For those who may not be familiar, can you tell us a bit about what this is and how it benefits your makeup business?

I became familiar with BARBICIDE® when I was in beauty school. As a hair stylist, BARBICIDE® is something you must use on a daily basis! It’s a disinfectant solution that’s used to disinfectant all of your tools.

It’s so critical in our profession that we use the right products, and keep everything as clean as possible. Without proper sanitary practices, we risk our business and reputation.

There’s no better time to acquire an updated certificate than now, in light of COVID-19. We work in a profession where we can’t avoid physical contact, and our tools are used on multiple people per day. In order to ensure it does its job of keeping ourselves and everyone we service safe, it’s important to use it properly.

I would recommend this to anyone especially during this time!

How did the optional Business component of your makeup artist certification training help prepare you to become an entrepreneur?

As a mom who’s been working from home the past few years, I already knew that I wanted to build my own business. When I saw that the last unit of the Master Makeup Artistry Course was all about Business training, I could not say no!

Part of the unit was to research an artist in your area. You had to look at the services they provided, and the price points for these services. This gave me insight into my local competition, and what I should (and shouldn’t) be charging in order to bring people in. It also made me sit back and really think about where I wanted my career to go from here.

Collage of Makeup Looks by QC Makeup Academy Graduate Nadia Calabro

Did I want to work at a beauty counter? Did I want to work at a salon again? Did I want to specialize primarily in bridal makeup? Etc.

I also got to start my own portfolio. I learned all about the things people would be looking for in there, as well as the things that could make people think twice. I think it was a great way to get the wheels in my head spinning, and put my first foot forward into building a plan for my future!

What has been the most challenging part of starting your own business? What about the most rewarding?

The most challenging is the fear – the “what if I fail?” worry.

I wonder if I’m cut out to build a business, if I have what it takes to really succeed, and if I can truly make something of myself. When you go to work for someone who has had a business for years, they’re already developed. You get the chance to work with the clients they’ve already accumulated throughout the years.

When you open your business, you have to build everything from the ground up and find ways to get your name out there. The most rewarding thing about being on this path is that it is mine, in every meaning of the world. It’s my dream that I worked so hard for, and held strong with my passion and dedication.

It’s knowing that every day, I can wake up and do what I love. I can tell myself, “I did this.” It’s that feeling of accomplishment; like you finally are where you were always meant to be.

You did SUCH an incredible job in your MMA Course. Congratulations! Overall, how did you find the program?

Thank you so much! Honestly, the MMA Course was even better than I ever thought it would be! The content, the videos, and Nathan’s guidance were all incredible. The material was detailed, and so thoughtfully outlined.

Every technique flows into the next, to the point where you can’t even believe how smoothly you’re moving through the Units. It taught me about so many of my bad habits that were causing me to have less-than-successful results. It took me right from the basics, up to something unbelievable.

I truly feel like I got an amazing education through this course! It left me with an infinite amount of knowledge that I can take anywhere!

Bridal Makeup Application - QC Makeup Academy Graduate Nadia Calabro

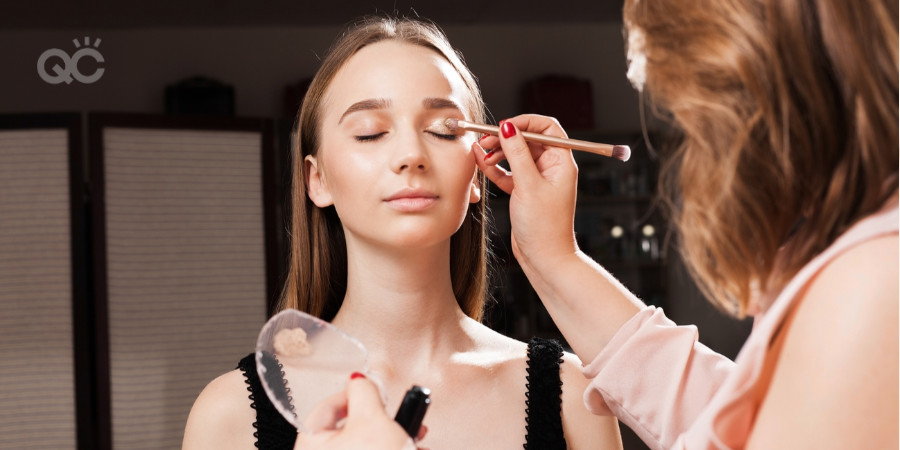
What made you want to enroll in online makeup school, and why did you ultimately choose QC to earn your makeup artist certification?

Being a mom is the most important thing in my life. I wanted to be able to be with my sons for however long they need me, while still being able to grow professionally (for when they no longer need me). My only way of doing this was to get my education online.

QC Makeup Academy popped up on my Facebook and Instagram pages, so I looked into it. I loved what I saw! I checked reviews, and looked up both past and present students. The reviews were amazing. When I saw the pictures of their students’ work, I couldn’t believe how amazing it all was.

I loved the fact that I would be learning online. I had 2 years to complete my course, and was able to work at my own pace – whenever and however it fit for me. As a mom, there was nothing more I could ask for!

What advice would you give aspiring makeup artists who are considering online school to earn their makeup artist certification?

Sign up with QC!!! Once you’ve done that, know that it’s normal to feel nervous, even overwhelmed, when you first start. We all have those doubts and worries whenever we start anything new.

Just take a deep breath and enjoy every moment of this time! It really is such an amazing experience, especially with QC Makeup Academy. This is more than just an online makeup school; it’s a community, and a family.

Absorb as much information as you can, ask the for help, accept the help, and just live in the moment. Let yourself enjoy the ride!

Want to become a professional makeup artist, just like Nadia? Enroll in QC’s internationally leading Master Makeup Artistry course today, and get certified in as little as 3-6 months!

Master Makeup Artistry Course Sample: Theatrical Makeup

By Uncategorized No Comments

If your dream is to be a makeup artist for live theatre and/or stage productions, the best way to work towards this is by getting professional training from a theatrical makeup course. Luckily, you need to look no further than QC’s most popular program of study, the Master Makeup Artistry Course!

In Unit F of this course, you’ll delve into the world of theatrical makeup: what it is, where it comes from, theory and techniques, and plenty of hands-on application! Today, we’re going to show you a sneak peek of what you can expect to learn from Unit F of the Master Makeup Artistry Course!

Importantly, you’ll get the insider’s scoop into what’s expected of you as a makeup student, as well as an example of a practical assignment. Let’s go!

Master Makeup Artistry Course Unit F

By this stage of the course, you’ll have gained tons of foundational knowledge and practice regarding:

Now, it’s time to learn about makeup for the entertainment industry! This is the entire focus of Unit F, but let’s look specifically at theatrical/stage makeup. The world of theatrical makeup is unlike any other. After all, it’s hard to match the thrill that comes with working on a live production!

In order to learn how to do makeup for the theatre, you must first understand what goes into theatrical makeup in-and-of-itself. It’s much different than bridal makeup, editorial looks, or even makeup you’d do for film and television. Theatrical makeup requires you to delve deeper! You’ll need to learn how to create a character, interpret a script, work with the cast and crew, etc.

In addition, the theatrical makeup course incorporated within your Master Makeup Artistry Course will teach you many other, critical things, such as:

  • Setting up a workstation
  • Adjusting the actors’ makeup suit various lighting conditions
  • Breaking down the steps to successful stage makeup application
  • Filling out and using a Makeup Worksheet
  • Clean up/makeup removal
  • Other roles and responsibilities you can expect on the job
  • How to conduct yourself professionally
  • And so much more!

Preparing for the Assignment

As you’ve learned by now, the best way to approach ANY of your course assignments is by ensuring you’ve first done all the required readings for the unit! For the theatrical makeup portion of Unit F, this means reading the textbook: Theatre, Dance, and Live Stage Performance.

There are also videos included within this section of the unit. We strongly recommend watching them all, too! For example, one of them demonstrates QC Makeup Academy’s executive tutor, Nathan Johnson, creating a “Red Queen” theatrical look on his model. It’s definitely fun to see how he brings this character to life!

Unit F Assignment F3: Case Study Part 2 – A Practical Application

It’s important to note that this assignment can only be done after you’ve already completed Part 1 of the Case Study assignment.

In Part 1, you’ll have used everything you learned from your required readings to create a stage character from scratch. First using the Makeup Worksheet (as provided in the “Handouts” section of your course materials), and then the face template, you’ll design your very own character and their theatrical makeup.

Once you complete that, you’re now ready to move onto Part 2! You can find this assignment on page 95 of your Course Guide. In this portion of the Case Study, it’s time to transfer that makeup design from the face template onto a real model.

Note: In light of COVID-19, we discourage you from using a model under social distancing rules that have been lifted – unless they live in your immediate environment and are willing to participate. Should you be working on this unit of your Master Makeup Artistry Course at the present time, it’s perfectly acceptable to use your own face for this assignment!

Step 1: Take a “before” photo of your model

As much as possible, try to remove all hair from the model’s face. Make sure their skin is clean, and that their eyes are open in the image. To focus as much on the face as possible, try to only include your model’s head and neck in the photo. The framing style should look like the one in the picture below.

before photo of makeup model for qc makeup academy master makeup artistry assignment

Step 2: Create the theatrical makeup look on your model

The goal of this part of the assignment is to bring to life your illustration from Part 1 of the Case Study. As such, try your best to mirror the look as you’ve already drawn it. Similarly, try to stick as closely as possible to the information you inputted into your Makeup Worksheet.

Having said that, if you get inspired and think of additional features that’ll enhance your character makeup for the better, don’t feel like you can’t add them in. One or two minor additions are fine. Just don’t stray too far from your original design, or you’re defeating the purpose of this assignment!

When doing the makeup itself, feel free to use whatever products and techniques you want. When grading your work, your professional tutor will be looking for things like:

  • Originality
  • Attention to detail
  • How well you brought your character makeup to life
  • A proper, accurate demonstration and understanding of the techniques used
  • And lastly, your ability to create attractive results

Keep all this in mind when approaching this assignment!

Step 3: Take an “after” photo of your model

Once you’ve completed your theatrical character makeup and you’re happy with the final outcome, it’s time to capture the results! Use the same framing style as you did in Step 1, with only the model’s face and neck in the image. Just as with the “before” photo, make sure your model’s eyes are open.

After that, you’ll need to take 2 more photos of your work. This time, focus specifically on your model’s eyes. In terms of framing, try to only capture the area from just beneath their nose, to above their eyebrows, as seen in the illustrations below.

master makeup artistry course sample

In the first photo, have them keep their eyes open again. For the second photo, have them close their eyes. Make sure the images are clear and accurately show off the makeup as much as possible. Save them to your computer, where you can then upload and submit them within QC’s Online Student Center.

Remember:

When you enroll in any QC makeup course, you have a full 2 years to complete the program. So, don’t feel rushed to have to complete and submit this (or any) assignment! Because everything is self-paced, there are no deadlines or rigid schedules. You have the freedom – and breathing room – to tackle your studies whenever works best for YOU!

This means that when you are ready to work on your unit assignments, you can put the dedication and effort into them that they require. If you aren’t happy with the results at first, you can keep practicing until you are!

That way, you’ll be able to produce your very best results, each and every time!

Want to take high-quality photos of your makeup assignments, so that your tutor can give you the most thorough feedback possible? Check out these 6 tips from QC’s executive tutor, Nathan Johnson!

6 Tips for Supporting Your Mental Health During COVID-19

By Uncategorized No Comments

As I sit here and type this article, I glance outside my living room window and see that it’s snowing. SNOWING. In APRIL. The sky looks gloomy, and my morning coffee hasn’t yet kicked in.

I’ve been having a hard time sleeping lately, and as my eyelids feel a little heavier than usual, I’m definitely feeling it today.

When you’re stuck indoors thanks to social distancing, these can be the makings of a lousy day. It’s up to me to try and turn it around! And the thing is, if I just put in a little bit of effort, I can turn it around.

Perhaps you can relate a little to what I’m talking about. Being cooped up at home can become taxing. With everything going on in the world lately, it’s no surprise that in the latest Mental Health Index released by Morneau Shepell, mental health has recently dropped by 16%.

The thing is, your mental health is IMPORTANT. You matter, and your well-being matters. So, it’s important that we take hold of the things we can still control, and utilize them to their full advantage.

While we’re by no means medical experts, we figure it can’t hurt to throw some suggestions out there for things you can try to do to lift your spirits when things are feeling a little tougher than normal.

Who knows, maybe one of them will help brighten your day!

1. Get some fresh air

It’s a proven fact that fresh air is excellent for your mental health! It boosts your immune system, decreases anxiety/stress, and can increase your energy. Even just the smell of fresh air can do wonders for your mood!

If the sun is shining, simply getting out and stretching your legs for as little as 20 minutes can turn your day around. Just make sure to keep at least 6-feet away from anyone who happens to cross your path!

Important Note:  That being said, you may live in a hard-hit area. If so, there might be a strict stay-at-home order that prohibits going outside for any non-essential reason. If this the case where you live, please follow these directives!

Yes, they may suck, they’re put in place to help save your life. Don’t be like that guy who dressed up in a T-Rex costume to try and break his city’s quarantine laws. Yeah, it was hilarious… but he also got arrested!

2. Exercise

Go for that walk we just talked about. Do some push-ups while watching TV. Re-enact the opening scene of The Lion King with your pet.

You can get as creative with it as you want, and make it fun! There are tons of easy home workouts you can do that don’t require any equipment.

You don’t have to suddenly become a CrossFit expert (though, hey, if you want to, be our guest). Even if you only feel like exercising 20 minutes each day, it can help boost your mood and benefit your body.

As the legendary Elle Woods once said: “Exercise gives you endorphins. Endorphins make you happy!”

3. Play around with makeup, just for YOU!

You may be currently doing professional makeup training, and working towards earning your professional MUA certification. If you find peace in focusing on your studies, then this is definitely another suggestion that can be added to this list!

But we also completely understand that sometimes, schoolwork can be a factor adding to your current stress.

If so, it’s more than okay to take a little break on it. You can always go back to it once you’re feeling better! (After all, QC gives you a full 2 years to complete your program.) But in the meantime, one thing that might help if you’re feeling down is doing your makeup just for yourself.

Over the past few weeks, I’m pretty sure I’ve morphed into some sort of couch goblin. Sure, I shower every day and make sure to exchange my pajamas for a cleaner set of pajamas… But my makeup routine has been completely ignored lately.

Yesterday, though, I decided to do my makeup after getting up and showering. It’s not like I had anywhere to be. But I was tired of feeling so grungy and bleh. It’s a small thing, but it actually made me feel a LOT better by the time I was done!

You love makeup for a reason, and that reason isn’t strictly limited to your makeup training. When you’re feeling down, it can really help to go back to your roots, and rediscover the power that makeup has to boost your mental health!

4. Put the phone away

If all we do is stare at a screen all day, it can increase feelings of isolation and loneliness. So, it might be helpful to try and unplug from your electronics here and there, at least for a bit.

Instead, use that time to do something that stimulates your brain, allows you to use your hands, gets you to move around, etc.

Need some ideas of what you can do instead of browsing Facebook or watching Netflix? Don’t worry, I got you! You can:

  • Have a living room dance party
  • Bake banana bread from scratch (this is actually incredibly popular right now, interestingly enough)
  • Put together a gummy bear concert
  • Do a puzzle
  • Take up a hobby you’ve always wanted to do
  • Read a book, or re-read one of your all-time favorites again
  • Start a Gratitude Journal
  • Try out random makeup ideas and do an impromptu selfie photoshoot to show off the results
  • If you have kids, make a home obstacle course to keep them busy
  • You can also do this for pets, too!
  • Speaking of pets, you can give them a proper cuddle
  • Learn all the lyrics to the Alphabet Aerobics. If Harry Potter can do it, so can you.
  • Watch paint dry. Actually, no, don’t do this.

5. Keep in touch with loved ones

We’re all in the same boat right now, which means that your friends and family are likely feeling exactly like you do. Chances are, they could use the company. Feeling cut off from the world is one of the easiest ways to harm your mental health, so it’s important to stay in touch!

Luckily, with today’s modern technology, there are so many ways you can do this. For example, you and your loved ones can:

  • Text
  • Chat over the phone
  • Video call, so you can see each other’s faces
  • Play online games together (here are 22 examples to get you started)
  • Organize a Netflix party/movie night
  • Remember that dance party you had in your living room? Why not invite them to it with an app like JQBX (Jukebox), and you can all dance together!

Yes, it’s obviously not the same – or as good – as the real thing. But it’s important that we all play our part in flattening the curve. Eventually, we’ll get to reunite with our loved ones.

For now, though, there are still tons of creative ways we can remain connected with them!

6. Let yourself feel your feelings

Sometimes, there’s such an emphasis on staying positive, that it can almost feel as though you’re doing something wrong by NOT feeling that way. Just know: it’s okay to not be okay. You’re not somehow falling short if you happen to have a day where you feel like you’re losing your marbles.

Emotion is what makes us human. Don’t hesitate to embrace how you feel, when you’re feeling a certain way. If you feel sad, it’s okay to cry. If you’re angry, that’s okay, too.

We’re all experiencing an up-and-down roller coaster of emotions these days, and that’s totally normal. Yes, it’s important to try and stay positive, and remind ourselves of the bigger picture (that this will not last forever). But it’s also healthy for us to let ourselves feel our feelings, and not bottle them up all the time.

The late Mr. Rogers had a habit of pressing all the low keys on a piano whenever he felt frustrated. You can always try that!

You and your mental health matter. So, don’t forget to take care of yourself, and make time for things that bring your soul some peace. If you have any other fun suggestions or tips for supporting your mental health, feel free to leave them in the comments!

And no matter what, remember: we’re in this together, and we’re ALWAYS here for you!

Another thing you can do to stay busy is spring clean your makeup kit! Keep reading for 5 awesome tips to do this!

scared worried woman in front of yellow background

Are Your Makeup Products Bathing in Bacteria?

By Uncategorized, Your Makeup Career No Comments

We apologize in advance, but you’re about to learn some pretty disturbing information about your makeup tools. If you’re an MUA, the contents of this article are crucial to your career. Nothing will tank your makeup business faster than using dirty products, spreading harmful bacteria onto your client, and potentially getting her sick!

That being said, this is directed just as much at all our fellow makeup lovers out there, too. Being aware of the potential health risks posed by dirty cosmetic products can help assure that you take all the necessary precautions for your health. Your health, at the end of the day, is what matters most.

woman shocked as she looks at makeup brush through magnifying glass

9 out of 10 makeup products are swimming in superbugs

Yes, you heard us right. It’s horrifying, but it’s true. A recent study at Birmingham’s Aston University took a close look at 497 makeup products, made up of the following:

  • 96 lipsticks
  • 92 eyeliners
  • 107 lip glosses
  • 79 blender sponges
  • 93 mascaras

The results of the study were shocking: of the 497 cosmetics, 70% to 90% were contaminated in some way!

Beauty bacteria

In order for any approved makeup product to be sold to the public, it absolutely CANNOT contain any pathogenic organisms – that is, any organism capable of causing diseases in a person. It’s primarily through how the product is used by people that exposes it to these bad organisms. The most common superbugs known to contaminate makeup tools are:

  • Staphylococci aureus
  • Salmonella and Citrobacter freundii
  • Pseudomonas Aeruginosa
  • Escherichia coli – a.k.a. E. coli

In case you didn’t know, that least one is linked directly to fecal contamination. We’ll give you a moment to wrap your head around that one. (We definitely needed it.)

If not properly used, washed, and taken care of, these are the types of germs we’re coating on our skin, packing into our pores, putting on our eyes, and even getting into our mouths. Gross!

purple-colored bacteria under miscroscope

Which makeup product is the worst for bacteria?

Beauty blenders win this by a landslide, unfortunately. The egg-shaped sponges – known for applying and smoothing out foundations and powders – are by far the dirtiest tool of them all. In the UK study, 26% of them even had traces of fecal matter found on them!

Following behind beauty blenders, the other products with the highest bacteria concentration are eyeliner, lipstick, and mascara.

Why the results are so bad

Obviously the natural question following this study is: Why? What’s the reason behind all of this bacteria making a home on our cosmetics? What are we doing when handling our makeup that’s so problematic?

Never cleaning your products

In the Aston University research study, a whopping 94% of beauty blenders had never been cleaned before. Not once! There were similar results in a 2013 study of 44 students in Brazil. There, 93% of the students had also never washed their blender, but continued to use it regularly.

Using a product after it’s been dropped

If you can believe it, it gets worse. What’s worse than never washing your products is dropping them on the floor, not cleaning it, and then continuing to use it anyway! Of that Brazil study group, over half of the students admitted they were guilty of doing this. The results of the Aston University study were startlingly similar, with approximately 50% of the beauty blenders having been dropped and reused, without being washed.

This is highly unsanitary, and opens you up to an army of germs!

dirty and broken beauty blenders

Ignoring the expiry date

Did you know that the lifespan of a beauty blender is only 3 months? Makeup products have an expiration date for a reason. If you use them past that point, you’re putting you and/or your client’s health at risk. Once it’s reached its shelf life, throw it away!

Bodily fluids

Ever coughed or accidentally sneezed while working on a client? Well, there’s a chance that contaminates just got all over the tool and product you’re using. If you don’t take the time to clean or sanitize your tools/products, you’ve likely just transferred bacteria, viruses, and other contaminates onto your client’s skin, eyes, or mouth.

Lipstick touchups

Whether it’s you or your client re-applying some lipstick, stain, or gloss, make sure nothing’s been eaten right beforehand. Otherwise, food particles can get onto the product. That alone is enough to get the ball rolling for all sorts of nasty superbugs! If you’ve just eaten and need to freshen up your pout, make sure to wash your hands and brush your teeth first.

Not cleaning your products properly

Research shows that the higher the water content on the product, the better the chances are of it becoming contaminated. I know what you’re thinking: “But… don’t I NEED water to be able to clean a lot of my products?”

Yep, water and soap. But the third and final step to the cleaning process is often times drying the product, which a lot of people forget to do. This means bad news bears for beauty blenders especially. If you clean your beauty blender with soap and water, and then leave it on its own to dry, you may as well throw it back on the floor.

When air-drying your beauty products, in order to ensure it’s not at risk of germs, try to let the item dry somewhere well-ventilated, on a clean surface, and where it isn’t exposed to or touching anything else. (So basically, don’t throw a wet or damp beauty blender into your makeup kit!)

Another useful tip is to avoid drying your makeup products in the bathroom, as this area and its surfaces can be easily contaminated in many ways.

set of clean makeup brushes

Adding to the problem

A huge part of the issue is that makeup companies aren’t always releasing as much information to us as they could be, especially in terms of how to properly use, maintain, and clean the product. For newer, trendy items such as the beauty blender, there’s even less info for us to rely on.

Dr. Amreen Bashir, who led the study at Aston University, argued that cosmetic brands really need to provide clear instructions; that “more needs to be done to help educate consumers, and the makeup industry as a whole, about the need to wash beauty blenders regularly and dry them thoroughly”. Clearly, there needs to be more effort devoted to regulating the product packaging within the makeup industry.

Tips to keeping things clean

Beyond what makeup companies do, the rest of the responsibility falls on us. So what can we do to try and keep our makeup products germ-free (at least, to the best of our ability)? Here are some helpful tips:

  • Always wash your hands AND face before putting on makeup. If making any touch ups later on, wash your hands again. Basically, never touch makeup if your hands aren’t clean.
  • Never let anyone else use your products. If you’re a makeup artist, always use new, fresh applicators on all clients. Once used, throw it away immediately. Never use the same applicator on two clients, unless it’s been thoroughly cleaned and properly dried first.
  • Don’t double dip with a disposable applicator. Remember, one applicator = one use. If more product is needed, use a fresh/clean applicator.
  • Stop using any product once it reaches its expiration date. Again, remember that the expiry date is there for a reason!
  • Always keep your makeup products themselves clean and properly stored. If you’re unsure the proper method of cleaning each product, QC offers a wonderful, thorough guide here.

If you’re guilty of a few of these sanitation sins, that’s okay. It’s still the first month of the new decade, so there’s plenty of time to turn things around! What matter is that now you know, so you can work on adopting new and better makeup habits in 2020.

If you’re already taking all of these measures? Hey, we’re proud of you! Use your knowledge to go forth and help protect others from the wrath of all those pesky superbugs. Make the world a better place, one squeaky clean beauty blender at a time!

redheaded woman applying lipstick

Want more advice on making sure you always keep your makeup products clean? Here are 8 extra tips!

5 Useless Items You Don’t Need In Your Professional Makeup Kit

By Makeup Tips and Tricks, Uncategorized, Your Makeup Career No Comments

There are already countless makeup items lining the shelves (both physical and online), and with brand new products coming out every day on top of that, how are you supposed to know what’s legit and what’s no good to you?

Look, you’re a professional, the real deal. So we want to level with you, because a lot of these makeup companies aren’t. The truth is, there are a lot of items you simply do not need in your professional makeup kit. It could be because they don’t work as advertised, or maybe they cost way more than they’re actually worth. Perhaps there’s a more practical, cheaper alternative.

Either way, you’re too good for them, and we just want the best for you!

Keep reading to find out our list of the top 5 items you can go ahead and throw out of your makeup kit!

1. Silicon Makeup Sponge

makeup items you don't need - silicon makeup sponge

What it promises you

Silicon makeup sponges became a hot commodity when they first appeared on the makeup market. With its smooth texture and see-through appearance, they were marketed as the be-all-and-end-all of blending products. Argued to smooth out your foundation better than any competing brush, wedge, or foam sponge counterpart, the idea was that with the silicon makeup sponge, your skin would always have the perfect photoshopped finish.

Why you don’t need it

But once everyone started trying this product, it was very quickly exposed for the hack it is. In reality, most professional makeup artists strongly advise against using a silicon makeup sponge. Why? Unlike the latex-free foam sponge, the silicon’s smooth exterior gives it no way to actually soak up the product. This results in a heavier, cakier foundation application. Sure, the silicon sponge can spread it – but what good is that if it can’t actually blend the makeup into your client’s pores?

You’d be better off using a different applicator.

2. Expensive powders

makeup items you don't need - girl putting on powder with brush

What it promises you

More money, better quality. That’s the idea that’s being sold. The costlier the powder, the better it is for your client’s skin, and her results. Foundation, concealers, and creamy contours can make the skin appear dewy, even wet. It’s easy to sell the importance of a solid powder when it’s the very product that can make or break the look of your skin. With expensive powders, the finish will be seamless, and your client will look perfect. They will soften shine, soak into your client’s pores, create less residue, and be an overall better makeup product than any powder you could buy at a lower price.

Why you don’t need it

The truth is, all powders – regardless of cost – will use two important ingredients: mica and/or talc. So long as these ingredients are finely ground up (which they are in the majority of available makeup powders), they’ll all have the same basic effect. When it comes to the makeup industry, sometimes when you pay an arm and a leg, you’re not really paying for the quality of the product, but where the product’s coming from. If you’re spending $50+ on powder, the majority of that cost is actually just paying for the packaging, marketing, and relevance of the company and its brand.

Of course, that’s not to say that every powder is equal to the other. Some judgement should be used when determining which one you want to use on both yourself and your clients. All we’re saying is, you’re safe to ditch the (pointlessly) fancy stuff. Its drugstore equivalent will do the trick just fine.

3. High-end mascara

makeup items you don't need - MUA putting mascara on client

What it promises you

The really fancy stuff guarantees a superior formula to cheaper mascara. It will give your client longer, thicker lashes with far less clumping. The difference it’ll make for your client’s eyes will be drastically jaw-dropping, and if she were to blink too hard and too fast, her lashes will be SO LONG that she may just lift up and fly away! (Okay, we may be paraphrasing a bit here.)

You get the point, though.

Why you don’t need it

There’s some truth, depending on you and your taste. Many people feel both cheaper and pricey mascaras give the exact same results. Others have compared expensive mascara brands to cheaper ones and admitted they preferred the pricier mascara’s results – but only just by the tiniest bit.

Often times when you see side-by-side photos, you can barely tell them apart. Even if you can, it’s so miniscule that it’s hard to justify paying $25 more dollars just to get that teeny, tiny difference. Lots of drugstore mascaras create exceptional volume and thickness for lashes, with minimal clumping. You might as well save your money, since it won’t mean sacrificing quality.

4. Eyeshadow primer

makeup items you don't need - mua putting eyeshadow primer on client

What it promises you

Eyeshadow primer promises to do two main things:

  1. Keep your client’s concealer, eyeshadow, eyeliner, etc. looking flawless throughout the day by preventing it from creasing (thanks to its ability to absorb excess oils, etc.)
  2. If the primer has a nude or white tone, it can also provide a brighter, cleaner base for your client’s eyeshadow color(s) so they can really pop

Why you don’t need it

In this case, it’s not that the product doesn’t work as intended – it’s just that there are way cheaper alternatives that can give your client the same kind of outcome. For example, even something like Aloe Vera Gel can be used as a primer. It adds moisture without adding oil. Just dab a tiny amount on your client’s eyelids, give it a few seconds to dry a bit, and then continue!

Most concealers and foundations worth their salt are made to be long-lasting, so you should be able to use those as eyeshadow primer on your client without having to worry about creasing throughout the day. Another suggestion is to simply use a white cream/powder eyeshadow as the primer! The white will give her eyeshadow hues the best ability to really show themselves off.

5. Individual eyeshadow pots

makeup items you don't need - model wearing eyeshadow with eyeshadow palette held up

What it promises you

The exact color/shade you’re looking for in that moment, at an attractively low price.

Why you don’t need it

We’re a firm believer that you should never buy one of something when you can buy a bunch all at once. No, we’re not saying that you should buy multiple individual eyeshadows at the same time. That would cost a fortune! What you should be doing is looking for eyeshadow palettes.

Palettes are individual products that offer many pigments. While they will be a tad pricier upfront than it would be to buy a singular pot, you’ll save your money in the long run and get way more bang for your buck. Plus, palettes are a practical way to carry a wide array of different colors on you while saving space within your professional makeup kit!

In fact, if you’re able to get anything in a bundle (lip shades, contouring kits, makeup brushes, etc.) instead of buying each one individually, that is our greatest money-saving piece of advice for you. Whenever possible, try to go for bulk!

As a makeup artist, you want to ensure that you always present your best self to your clients. Part of doing that is having the best – and most effective – makeup products on-hand. You can achieve this without the most expensive tools and unnecessary products. So as 2020 quickly approaches, make it a New Year’s resolution to say goodbye to those items you don’t need in your professional makeup kit!

We’ve covered which makeup products you don’t need, but what about the essentials? Check out this list of top 10 MUST-HAVE items for your professional makeup kit!