Sarah Seguin, Author at QC Makeup Academy - Page 2 of 21
All Posts By

Sarah Seguin

Understanding skincare labels Feature Image

10 Steps to Understanding Skincare Labels and Ingredients

By Skincare No Comments

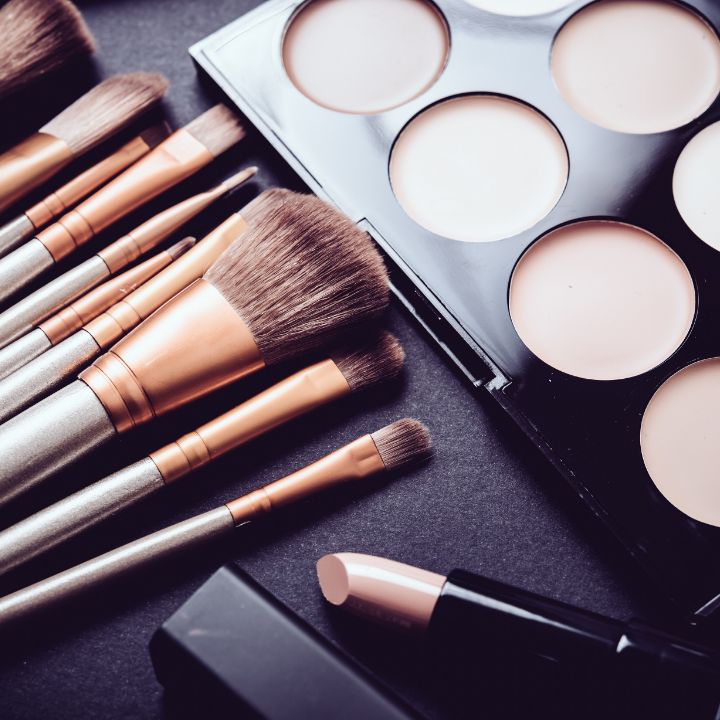
Let’s be real – when it comes to skincare, most of us are clueless. We don’t know what to look for on the label, and we definitely don’t know how to pronounce all of those ingredients. But that’s okay, because we’re here to help! In this blog post, we’ll break down the 10 steps to understanding skincare labels and ingredients, so you can feel confident about the products you’re using on your skin.

So, let’s dive in!

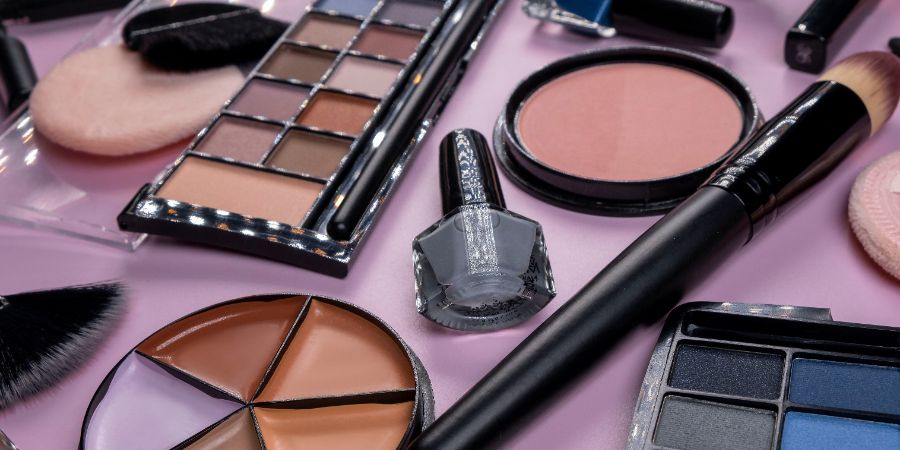
What are the 5 Main Categories of Skincare Products?

First thing’s first – you’ve got to understand the different types of products out there. Skincare can be broken down into five main categories:

1. Cleansers

These products help to remove dirt, oil, and makeup from your skin. Examples include face washes, scrubs, oils, and cleansing cloths.

Learn more about skincare cleansers (and their benefits) in this helpful article by Neostrata!

2. Exfoliators

Next, exfoliators are used to slough off dead skin cells, revealing a more radiant complexion. This can be done with physical exfoliants like scrubs, or chemical exfoliants like AHAs and BHAs.

3. Toners

Toners help to balance your skin’s pH levels and prep it for the next steps in your regimen. We recommend this article by Neutrogena to learn more about facial toners!
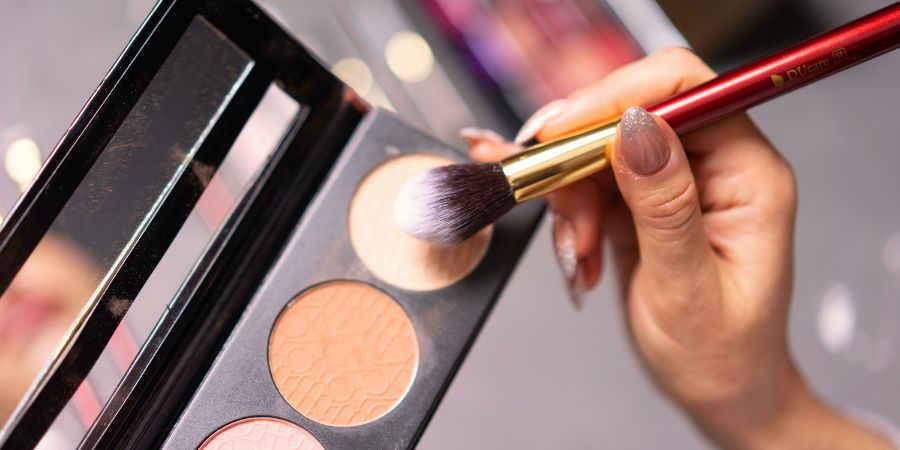
4. Moisturizers

After this, moisturizers are used to keep your skin hydrated and reduce dryness. Creams, lotions, balms, serums, and oils all fall into this category. If you need help finding out which moisturizer is best for your skin type, this article by Healthline is a terrific place to start!

5. Sun Protection

Last but certainly not least, sun protection is a MUST for any skincare routine! You should look for products with SPF (sun protection factor) ratings of 30 or higher. Furthermore, make sure to re-apply throughout the day.

Bonus Category: Skincare Serums

Serums are a bit of an outlier when it comes to skincare products, but they can be incredibly helpful in targeting specific skin concerns. When you’re looking for serums, you want to specifically search for active ingredients like retinol, vitamin C, and hyaluronic acid. These ingredients help to address wrinkles, hyperpigmentation, and dehydration.

Understanding skincare labels in-post image 1

The 10 Steps to Understanding Skincare Labels and Ingredients

Now let’s get into the nitty-gritty of reading skincare labels! This way, you can make sure that you know EXACTLY what you’re putting on your face!

Pro Tip: Dream of a career in professional skincare? Learn how to become a fully trained, certified, and working Skincare Consultant in just 5 easy steps!

Step #1: Know Your Skin Type

You can’t properly choose skincare products if you don’t know your skin type. That’s just a fact!

There are six main skin types that all people fall under:

  1. Normal skin;
  2. Dry skin;
  3. Oily skin;
  4. Combination skin (either Combination Dry or Combination Oily);
  5. Acneic skin;
  6. And Sensitive skin.

You can learn more about these different skin types in this awesome article by QC Makeup Academy executive instructor, professional makeup artist, and certified Skincare Consultant, Nathan Johnson!

How to Tell Your Skin Type

Once you know what type of skin you have, it’s time to figure out how to tell your skin type. One way that a lot of people do this is through a process called the “tissue test”.

To do the tissue test, wash your face with a mild cleanser and pat it dry. Next, press a single layer of tissue onto different parts of your skin – forehead, cheeks, nose, and chin.

If you find that the tissue has come away without any oil on it (or very little), you likely have normal or dry skin. If it’s come away with noticeable oil, you probably have oily skin.

Another way to identify your skin type is to look closely at your face – and know what to look for. For instance:

  • If you have normal skin, it should feel soft, balanced, and relatively free of blemishes.
  • If you have dry skin, it will often feel tight, flaky and/or red.
  • For those with oily skin, there may be a noticeable shine to your face. Additionally, pores may look larger than usual.
  • Combination Dry skin may feel dry in some areas and oily in others.
  • On the other hand, combination Oily skin can be shiny all over but may have larger pores more concentrated on your t-zone (the area of your forehead, nose, and chin).
  • Acneic skin will often have active breakouts or blackheads present.
  • Lastly, sensitive skin can range from being dry to oily and often has a feeling of tightness. It can be susceptible to reactions from harsh products.

Once you’ve identified your skin type, you can move onto Step #2…

Step #2: Check the Expiration Date

Safety first – you want to make sure that all of your products are still fresh and effective. Most products have a shelf life of around one year and will have “expires after” dates written somewhere on the packaging.

When you use expired skincare products, you risk the following:

  • Irritation or allergic reactions;
  • A decrease in the effectiveness of the product;
  • Bacterial growth, etc.

Therefore, make sure that you’re regularly checking your products for expiration dates. This way, you can replace them before they stop working as well!

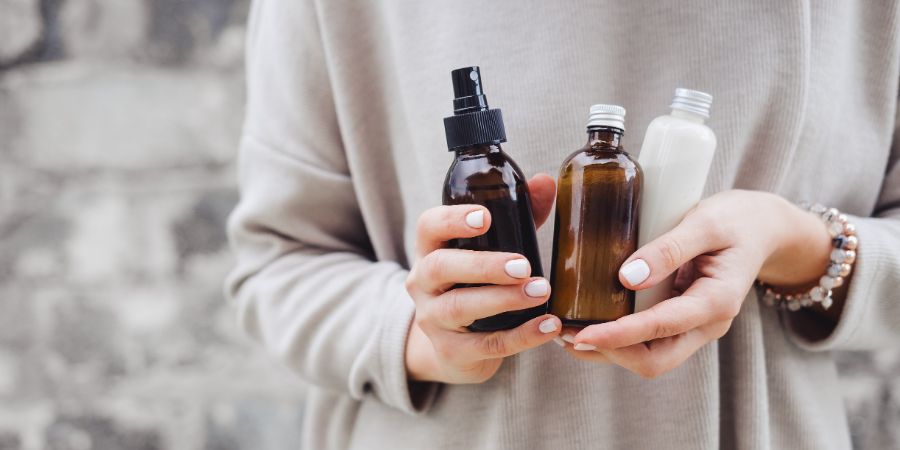
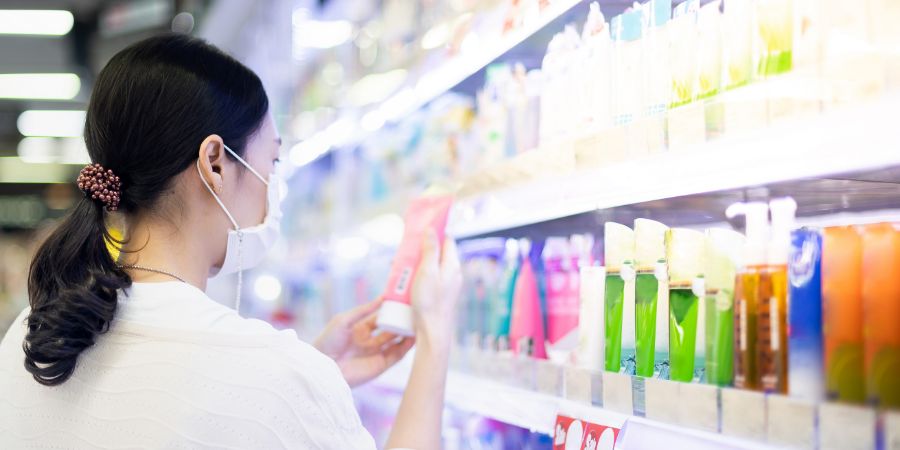
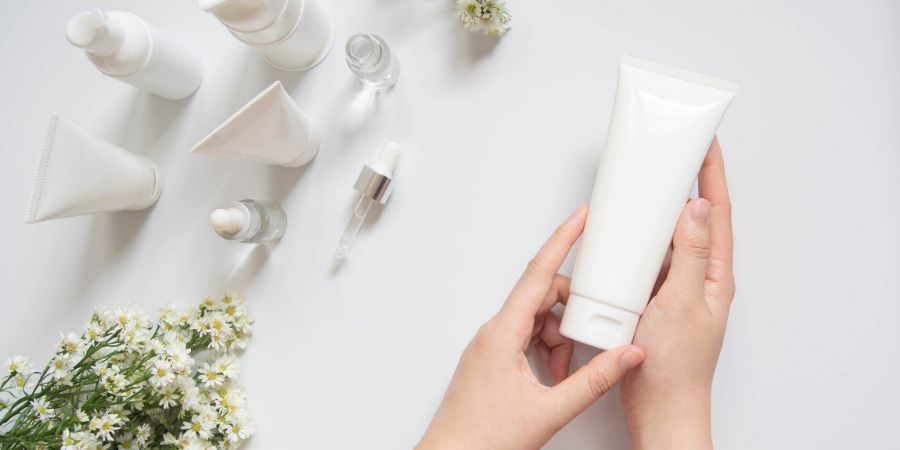
Step #3: Read the Skincare Labels and Ingredients List

Obviously, this is going to be arguably the biggest step in understanding skincare labels and ingredients.

What’s great about skincare labels is that they often provide a wealth of information! Usually, you’ll find the name of the product, directions for use, list of ingredients, and other important information.

The most important part, however, is the ingredient list. This section will tell you EXACTLY what is in your product and how it works!

For instance, many skincare products contain antioxidants, emollients, and humectants. All of these ingredients work together to nourish, soothe, and protect the skin from environmental damage.

Additionally, you’ll want to be aware of any potential risks or allergies associated with certain ingredients. For example, some people may be allergic to fragrances, parabens, or sulfates.

Therefore, if you see any of these ingredients listed on the label, it’s best to stay away from that product! Instead, look for something with more natural ingredients.

By becoming familiar with skincare labels and ingredient lists, you can make sure that you’re using the best products for your skin type!

Step #4: Check for Active Ingredients

Another thing to look for when reading skincare labels is active ingredients. These are the ingredients that actually interact with your skin in some way – be it moisturizing, calming, exfoliating, etc.

For example, salicylic acid is a common active ingredient used to treat acne and reduce inflammation. Retinol is another active ingredient that can help reduce wrinkles and other signs of aging.

When looking at skincare labels, make sure to check for active ingredients and make sure they match your skin type and needs.

Pro Tip: Make sure to watch this informative webinar to discover the TOP 5 secret skincare ingredients that ALL of your products need!

Step #5: See if the Skincare Ingredients Include any Fragrances

Fragrances can be an important part of a skincare routine, as they can offer a pleasant scent and make the product more enjoyable to use.

However, it’s important to make sure that any fragrances included in your products are natural and NOT synthetic! Synthetic fragrances often contain chemicals that may irritate or even damage your skin.

So, when looking at skincare labels and ingredients list, make sure to check for any fragrances listed. If you’re not sure if a fragrance is natural or synthetic, do some research online!

Woman's holding botles with spa cosmetics against gray wall. Beauty blogger, salon therapy, minimalism concept, copyspace. Skincare labels article.

Step #6: Research Any Unfamiliar Ingredients

Next, if you come across any unfamiliar ingredients on the label, do some research! Many skincare products contain a variety of different ingredients, so it’s important to know what each one does.

For instance, some products may include ceramides, which are lipids that help to lock in moisture and protect the skin barrier. Others may include hyaluronic acid, which is known for its ability to hydrate the skin.

Doing some research will help you to better understand product labels and how the different ingredients work together.

Step #7: Research the Brand

Speaking of doing research, it’s always a good idea to do dig into the brand themselves when understanding skincare labels and ingredients.

You can often find out more information on a brand’s website or social media pages. Here, you’ll be able to learn more about how the product was made, what ingredients were used, where it was sourced from, and other important details.

For instance, if you want to only use all-natural products, you can look for brands that are certified organic or use natural ingredients. In the same breath, if you want to avoid brands that test on animals, you can look for brands that are certified cruelty-free.

Knowing the brand behind the product is just as important as understanding skincare labels and ingredients. This will help you to make an informed decision when it comes to buying skincare products!

Step #8: Read Directions for Use

Before using a product, it’s always important to read the directions for use.

Some products may require you to apply them differently than others, so this is an essential step in understanding skincare labels and ingredients. For instance, some products may need to be used twice a day while others may only need to be used once or twice a week.

This information can be found on the label and should be carefully followed to ensure optimal results and safety.

Step #9: Consider Trying a Sample

At this point, if you’re still unsure about a skincare product after reading the label and researching the ingredients, it can be helpful to try a sample.

Many skincare brands offer free samples or travel-size versions of their products so you can test them out before committing to buying the full-size version. This way, you can see if the product works for your skin type before spending money on it!

Step #10: Consult with a Certified Skincare Professional

Lastly, if you’re still feeling uncertain about which products are best for your skin type, don’t be afraid to consult with a Skincare Consultant! A qualified skincare professional can provide advice on which products and ingredients are best for your skin type, as well as answer any questions you may have about skincare labels and ingredients.

Plus, if you’re ever unsure about a product or ingredient, they’ll be able to provide more information on it, too!

Pro Tip: Or you can become a certified International Skincare Consulting Professional (ISCP) yourself in as little as 2 months by enrolling in QC Makeup Academy’s self-paced, online Skincare Course!

How to Read Skincare Labels: Must-Have Ingredients

Now that you know how to read skincare labels and understand ingredients, let’s take a look at some must-have ingredients for your routine:

  • Hyaluronic acid – This humectant helps the skin to retain moisture
  • AHA (Alpha Hydroxy Acid) & BHA (Beta Hydroxy Acid) – AHA and BHA gently exfoliate the skin to help reduce acne, blackheads, and other blemishes
  • Antioxidants – These help protect the skin from environmental and free radical damage
  • Vitamins C and E – These vitamins help to nourish the skin and support its natural barrier
  • Glycerin – This emollient helps keep the skin hydrated and soft
  • Ceramides – These lipids help to lock in moisture and protect the skin barrier
  • Niacinamide – This vitamin helps to reduce inflammation and even out skin tone
  • Retinol – This form of Vitamin A helps improve skin texture and reduce the appearance of wrinkles
  • SPF – An essential ingredient to protect skin from UVA/UVB rays

These are just a few of the many ingredients that can be found in skincare products. As you continue learning more about skincare, you’ll become familiar with other ingredients and their benefits for your skin!

Skincare Ingredient List Order: Ranked Most to Least Important

Another thing to keep in mind when understanding skincare labels and ingredients is the order of the ingredient list. Usually, ingredients are listed in order from most to least. As such, it’s important to know which ones should come first!

Here’s a helpful guide to the ranked order of importance:

  1. Active ingredients (like retinol and Vitamin C)
  2. Humectants (like hyaluronic acid and glycerin)
  3. Emollients (like ceramides, shea butter, and jojoba oil)
  4. Surfactants (used to help lift dirt and oil off the skin)
  5. Preservatives (to prevent bacteria growth)
  6. Fragrances (optional, depending on your preference)
Understanding skincare labels in-post image 3

How to Read Product Ingredients: Skincare Ingredients to Avoid

On the other hand, there are certain skincare ingredients that you should avoid, as they can be potentially irritating or damaging to the skin.

Some of these unwelcome ingredients include:

These chemicals can cause an array of skin troubles such as dryness, sensitivity, and irritation. So, make sure to read the ingredients list carefully and avoid anything that could potentially harm your skin!

Skincare Ingredient Checker: Recommended Apps

Now, sometimes skincare brands can be a bit sneaky in their packaging. They may group several ingredients under one name. Sometimes, they might use scientific names that are hard to understand. Or worst of all, they don’t even list the ingredients on the product packaging!

Fortunately, there are several apps you can use to make sure the products you’re buying are safe and effective. For instance, Environmental Working Group’s Skin Deep® Database is an excellent app to check if a product contains any of the ingredients that should be avoided.

Additionally, the Think Dirty App allows users to scan barcodes on their skincare products to check the ingredients. And if you want to check out even more options, The Good Face Project has a list of their 7 most recommend ingredient checker apps at your disposal!

How to Find the Percentage of Ingredients in Skincare Products

Here’s another secret: it’s not enough for a skincare product to have an ingredient listed on the label. You should also check if that active ingredient is present in a high percentage!

For instance, if your anti-aging moisturizer has retinol listed as an ingredient but it’s way further down the list, chances are that it won’t be effective in treating wrinkles and fine lines. So, make sure to check the percentage of active ingredients in your skincare products!

How to Do This

The best way to figure out the percentage of ingredients in skincare products is to do a little math. The rule of thumb is to divide the weight of each ingredient listed by the total weight of all the ingredients and then multiply it by 100. This will give you the percentage of each active ingredient present in your product!

For example, if a moisturizer contains 20% hyaluronic acid, this means that out of the total weight of all the ingredients in the product, 20% is made up of hyaluronic acid.

Lastly, be sure to check whether the percentage of active ingredients fall within the recommended range. This will ensure that your skincare product is as effective as possible!

Asian woman wearing surgical mask and hand holding the bottle of facial foam for shopping in the aisle of the skincare department in supermarket, Due to the Covid-19 pandemic crisis. Skincare labels article.

FAQs

Finally, let’s wrap things up by taking look at and answering some frequently asked questions on the subject of understanding skincare labels and ingredients:

Q: Any tips on how to label skincare products yourself?

A: Labeling your own skincare products can be a tricky task. Be sure to research the correct labeling regulations and safety guidelines for your country or region before you get started. Additionally, make sure that the labels are accurate and up-to-date. Lastly, always include an ingredients list on the packaging!

Q: Are natural skincare products always better than chemical-based ones?

A: Although the answer is USUALLY “yes”, the honest truth is that this isn’t always the case. In reality, both can be equally as effective and safe if they use the same active ingredients (and in the same percentages).

What makes natural skincare products superior is that they don’t contain any of the harsh chemicals or preservatives that are often found in chemical-based skincare products. So, if you want to ensure that the natural skincare products you’re purchasing legitimately are better than their chemical counterparts, make sure to look into their ingredients list and percentages!

Q: What are some red flags when reading skincare labels?

A: Keep an eye out for any ingredients that you can’t pronounce, as well as those with names that are too long and complicated. Additionally, check if there’s an excessive amount of preservatives, fragrances, and colorants present in the product. These could be signs that the skincare product isn’t as effective or safe as it claims to be!

Pro Tip: Are makeup removers actually damaging to our skin? The answer will surprise you!

Q: What is an INCI list?

A: An INCI list is an abbreviation for International Nomenclature of Cosmetic Ingredients. This is the official way that skincare product ingredients are listed and can be found on the packaging of any skincare product you purchase.

Q: How do you read an INCI list?

A: An INCI list should always be read from the top to bottom, with the most prominent ingredient coming first. For example, if you have a moisturizer that contains hyaluronic acid as its active ingredient, it should be listed first on the INCI list.

This doesn’t always mean that it is present in the highest percentage, however. Thus, make sure to always check the percentages of the active ingredients before you make a purchase!

Q: What are the 7 skincare steps?

A: The 7 skincare steps are as follows:

  1. Cleanse
  2. Exfoliate
  3. Tone
  4. Treat
  5. Moisturize
  6. Sunscreen
  7. Nighttime Skincare Routine (optional)

These steps should be done in that order in order to properly cleanse, nourish, and protect your skin.

Q: What are the 3 most important skincare products?

A: The three most important skincare products are:

  1. A cleanser;
  2. A moisturizer;
  3. And sunscreen.

These three products work together to keep your skin healthy and protected from the elements. Additionally, they can also help reduce wrinkles, prevent acne breakouts, and even out any discoloration in your complexion!

Understanding skincare labels in-post image 5

Conclusion

We hope you found this article on understanding skincare labels and ingredients helpful! Now that you know how to read skincare labels, as well as which ingredients to look for in skincare products, you’ll be sure to pick the best product for your skin type.

Remember: always check the label before buying a new skincare product, and take the time to research the ingredients used in order to ensure that you’re getting the best possible product for your skin.

Thanks for reading – and good luck on your skincare journey!

Become a certified Skincare Consultant and book your very first client in as little as 8 short weeks! Enroll in QC Makeup Academy’s self-paced, online Skincare Course and start your dream career today!

Bad business habits to leave in 2022 Feature Image

15 Bad Business Habits to Leave in 2022 as a Professional Makeup Artist

By Career Advice, Your Makeup Career No Comments

Hey, makeup artists! Are you looking to start the new year off on the right foot? If so, then you’ll want to break some bad habits that’ve been holding you back professionally. Luckily, we’ve put together a list of 15 bad business habits to leave in 2022.

So, let’s take a look together and see what they are!

What are Some Bad Business Habits?

Before we reveal our list of 15 bad business habits to leave in 2022, let’s first take a more general look at what constitutes a “bad” business habit…

Essentially, any habit that prevents you from growing your business or achieving your goals is a bad one. This could mean:

  • Overspending on unnecessary items;
  • Not taking time to network and build relationships;
  • Or even procrastinating important tasks like bookkeeping.

In any case, these habits get in the way of success and should be left behind as soon as possible!

Bad business habits to leave in 2022 in-post image 1

15 Bad Business Habits to Leave in 2022 as a Professional MUA

In a nutshell, these are the 15 bad business habits that you should leave behind in 2022 as a professional makeup artist:

  1. Not keeping up with the latest trends;
  2. Not staying organized and timely;
  3. Relying solely on word-of-mouth marketing;
  4. Not setting goals and objectives;
  5. Not taking advantage of online resources and tools;
  6. Poor communication with clients and other MUAs;
  7. Not diversifying your makeup portfolio;
  8. Spending too much time on social media;
  9. Being overly competitive against other MUAs;
  10. Not delegating tasks to free up time for important work;
  11. Ignoring customer feedback, not listening to what they want, and being unreceptive to constructive criticism;
  12. Failing to take risks;
  13. Not asking for help when you need it;
  14. Letting negative thoughts derail your goals;
  15. Not investing in yourself and your business.

Let’s take a closer look at each one, shall we?

While we’re on the topic of bad habits to break, here are 5 bad makeup habits (not business-related) that ALL MUAs need to stop doing ASAP!

Bad Habit #1: Not keeping up with the latest trends.

The beauty industry is always changing and evolving. So, it’s important to stay up-to-date with the latest trends! In turn, this will help you create looks that are fresh and on-trend for your clients.

Consequently, if you choose not to keep up with the latest trends, your makeup looks can quickly become outdated.

FUN FACT: Here are 15 makeup trends that EVERY professional MUA needs to know!

What Things Should You Do in the New Year to Break this Habit?

In the New Year, make sure to allocate time each month (or even week) to research the latest trends.

Also, try reading beauty magazines for inspiration or industry-related books. Another excellent idea is to enroll in a makeup course (such as the self-paced, online programs offered at QC Makeup Academy) to learn the latest techniques – and add a reputable certification to your resume at the same time.

Finally, attending makeup workshops or conferences can also be a great way to stay informed on the latest looks and techniques!

Bad Habit #2: Not staying organized and timely.

When it comes to running a successful business, organization and timeliness are key. That is, if you don’t have a solid plan for how to run your business efficiently, then chaos can quickly ensue. For example, not responding to inquiries in a timely manner, not having a proper filing system for paperwork, or forgetting about important appointments are all mistakes that will cost you clients AND profits.

Furthermore, being organized and timely also extends to each and every makeup application, too. Meaning, you’ll need to be prepared in advance (having all the necessary tools on-hand), ensure your clients don’t have to wait too long for their service, and hone your makeup skills so that the application process is fast and efficient – without losing quality!

What Things Should You Do in the New Year to Break this Habit?

To break this habit in the New Year, start by creating detailed plans ahead of time. For example, prepare a list of all the supplies you’ll need for each client ahead of time, and try to arrive at least 10 minutes earlier than your appointment time.

Additionally, create a filing system to store all of your paperwork in one place. This way, it’s easy to find when needed. Moreover, make sure to set reminders on your phone or calendar app for any upcoming appointments.

Finally, invest in good quality makeup brushes and other tools that will make the application process smoother and faster. You can (and should) also work on improving your application time by challenging yourself to time trials in the New Year. If you’ve never heard of time trials, this is basically a process where you time yourself while doing a makeup look, and then try to beat your time in every time trial afterwards.

As a result, you can compare and measure your progress over time. And of course, the ultimate goal here is to be able to shorten the amount of time it takes for you to do makeup looks, without sacrificing any of its quality.

Bad Habit #3: Relying solely on word-of-mouth marketing.

Yes, word-of-mouth marketing can be a powerful tool for any MUA… However, it’s important to diversify your marketing methods! After all, relying solely on word-of-mouth will only get you so far – and it won’t help you reach clients outside of your current network.

Consequently, investing in other types of digital or traditional marketing (such as social media or print advertising) will help you reach a much larger pool of potential clients.

What Things Should You Do in the New Year to Break this Habit?

To break this habit in the New Year, start by creating an online presence for your business. This can include setting up a website, social media accounts, and even a blog. The more places potential customers can find you, the better!

Additionally, make sure to create quality content for your social media accounts. Think behind-the-scenes videos/photos of you doing makeup looks, helpful tips and tricks videos for beginners, or even reviews from happy clients. Doing so will not only help people get to know you better, but it can also act as free advertising for your business.

On top of that, consider investing in paid advertising campaigns on social media, as well as other methods to improve your SEO (search engine optimization). For this, just remember to set a budget before launching any ads and keep track of its progress over time. Also, don’t forget about traditional marketing methods such as print or radio ads! They can still be effective in reaching potential clients.

Finally, don’t forget to ask your satisfied customers for referrals. After all, word-of-mouth marketing is still a great way to attract new people to your business. And while it shouldn’t be your ONLY marketing strategy, it should still be ONE of them!

PRO TIP: Here are 15 of the BEST ways to successfully market your professional makeup business!

Makeup artist applies eye shadow . Beautiful woman face. Hand of visagiste, painting cosmetics of young beauty model girl . Make up in process. Bad business habits article.

Bad Habit #4: Not setting goals and objectives for your business.

It can be easy to get caught up in the day-to-day operations of your business and forget about taking time to set goals. But without them, it’s hard to measure success and growth. And as a result, it can be difficult to know what areas you should invest more time and energy in.

What Things Should You Do in the New Year to Break this Habit?

To break this bad habit and leave it behind in 2022, start by setting both short-term and long-term goals for your business.

Short-term goals are usually things that you’d like to accomplish within a year, such as increasing your client base or launching a new product. Meanwhile, long-term goals are those that you’d like to achieve over the next 5 years or more, such as opening your own brick-and-mortar makeup store.

Once you have your goals in place, create action steps for each of them so that you know how to get there. From there, make sure to create a timeline for each action step so that you can measure and track your progress throughout the year.

Finally, don’t forget that all of your business goals should be SMART goals. Meaning, goals that are:

  • Specific
  • Measurable
  • Achievable
  • Relevant
  • And Time-Based.

Doing so will ensure that your goals are clear and achievable – which is essential for business success!

Bad Habit #5: Not taking advantage of online resources and tools.

With everything going digital these days, it can be easy to miss out on useful online resources and tools. For instance, there are countless programs out there that can help with invoicing, client management, marketing, and even social media scheduling.

By failing to maximize these resources to your benefit, you could be missing out on a LOT of opportunities for growth, marketing success, and more.

What Things Should You Do in the New Year to Break this Habit?

To break this habit in 2022, start by doing some research on the various online tools and resources that are available to you. From there, create a list of those that could potentially help your business – whether it’s an invoicing program or website hosting service.

Once you have this list in place, take the time to read reviews and do your own testing if necessary. Then, decide which online tools and resources you’d like to invest in for your makeup business.

Finally, make sure to set up a timeline for when you’d like to use these tools. Doing so will help ensure that you have the budget for them, that you’re making the most of them throughout the year, and that you’re getting the best possible results for your business!

Bad Habit #6: Poor communication with clients and other MUAs.

Poor communication can be a MAJOR issue for makeup artists. Whether it’s not responding to client inquiries in a timely manner or failing to follow through on commitments, bad communication can quickly lead to unhappy customers and lost business.

What Things Should You Do in the New Year to Break this Habit?

To make sure you’re communicating effectively with your clients and other MUAs in 2022, start by setting clear expectations from the very beginning. Make sure that you’re upfront about your scheduling and availability so that clients know what to expect when they book an appointment with you.

Also, make sure to set up a reliable system for responding to messages and inquiries – whether it’s via email or through a messaging app. Doing so will ensure that no messages slip through the cracks and that you’re always responding in a timely manner.

Finally, make sure to follow through on your commitments – no matter how big or small they may be. This could mean anything from turning up on time for an appointment to sending out invoices promptly after a job is completed. By following through, you’ll be able to build trust with your clients and other MUAs – which is essential for long-term success.

Bad Habit #7: Not diversifying your makeup portfolio.

It’s easy to get into a creative rut when you’re doing the same kind of makeup looks for every client. But if you want to stand out from the competition and attract new clients, it’s essential that you diversify your portfolio!

After all, if your makeup portfolio isn’t diverse enough, it could lead to:

  • Clients not wanting to book you because they’re not impressed with your range
  • You getting bored with the same types of makeup looks
  • More difficultly promoting yourself and your services, etc.

What Things Should You Do in the New Year to Break this Habit?

So, how can you leave this bad business habit in 2022 and make sure you have a diverse makeup portfolio in the New Year (and beyond)?

Start by setting aside some time each month to practice different styles of makeup – whether it’s bridal, glamor, special effects makeup, or something completely unique. Also, make sure to take high-quality pictures of your work and upload them to your portfolio on a regular basis. This will help potential clients get an idea of your range and could potentially lead to more bookings.

Finally, consider taking a makeup course or attending a makeup workshop so that you can refine your skills and learn new techniques. Furthermore, you can enroll in a course that’s specifically about building a solid makeup portfolio – such as QC Makeup Academy’s self-paced, online Portfolio Development Workshop!

Doing so will help ensure that you have all the tools you need to create unique and stunning makeup looks for every client!

PRO TIP: Never put together a professional makeup portfolio before? These 10 steps will walk you through the process from start to finish!

Bad Habit #8: Spending too much time on social media.

Spending too much time on social media can be a huge productivity killer. After all, if you’re not careful, it’s easy to get sucked into an endless cycle of scrolling and liking – which can lead to lost hours (and dollars) in the long run.

What’s more, if you’re not using social media strategically, it can also be a huge waste of time for you and your makeup business!

What Things Should You Do in the New Year to Break this Habit?

To make sure you’re using social media efficiently in 2023 and beyond, start by setting aside a specific amount of time each day to dedicate to your business’s presence on the various platforms. Make sure to stick to this allotted time and use it strategically. As in, think about what content you should be posting and how often.

Also, consider investing in tools and software that can help you further streamline and optimize your social media management. This could include anything from scheduling apps to analytics tools that give you insights into your performance, etc.

Finally, make sure to take regular breaks from social media! Too much time on the platforms can not only be bad for productivity but also for your mental health. So, be mindful of how much time you’re spending scrolling, and strive to find a healthy balance.

Bad business habits to leave in 2022 3

Bad Habit #9: Being overly competitive against other MUAs.

Although it’s natural to be competitive in business, being overly competitive against other MUAs can really hurt your own success – and the makeup community as a whole.

Why?

Because it can lead to a negative environment and create unnecessary drama. Plus, it’s important to remember that everyone is at different stages in their career. Making comparisons won’t do you any good.

So, instead of competing with one another, you should focus on collaborating and supporting each other!

What Things Should You Do in the New Year to Break this Habit?

To break this bad business habit in 2022, start by taking the time to reach out to other MUAs and build relationships. You never know when someone may have a job opportunity that they need extra help with!

Also, don’t be afraid to ask for advice – especially if you’re just starting out in your career. Chances are, fellow MUAs will be more than happy to help you out. Finally, try to focus on your own business rather than worrying about what other MUAs are doing.

That way, you can strive for success without letting negative feelings of comparison get in the way!

PRO TIP: Learn more about why other professional makeup artists are your FRIENDS – not enemies!

Bad Habit #10: Not delegating tasks to free up time for more important work.

If you’re not delegating tasks, it can be really easy to become overworked and overwhelmed. After all, there’s only so many hours in the day – and if you’re trying to do everything yourself, your progress is likely to suffer. Not to mention, you’ll probably wind up burning yourself out… and forgetting why you love makeup in the first place!

What Things Should You Do in the New Year to Break this Habit?

To successfully break this habit, start by figuring out which tasks you should be delegating – and who you should delegate them to! Then, make sure to set up clear expectations and deadlines for each task that’s being delegated.

Also, set aside a specific amount of time each week for planning and strategizing. That way, you’ll have enough time to think about the tasks that need to get done – and how best to delegate them.

Finally, don’t be afraid to take things off your plate if they’re not essential! Learning when it’s okay to say no will help you to create more space for yourself and focus on the tasks that you actually enjoy doing.

Now, what if your makeup business is a one-person-operation and you don’t have anyone to delegate things to? In this case, you should look into outsourcing! Hiring freelancers or independent contractors can be a great way to help free up your time and delegate certain tasks.

Lastly, make sure to outsource the right tasks for you – such as administrative work or marketing – so that you can focus on the creative side of things. That way, you can still be productive without getting overwhelmed.

Bad Habit #11: Ignoring customer feedback, not listening to what they want, and being unreceptive to constructive criticism.

As a makeup artist, it’s essential to make sure that you’re listening to your customers and taking their feedback into consideration. After all, they’re the ones who are going to be using your services. So, it only makes sense to take their opinion into account.

Furthermore, the beauty industry is one where being able to take constructive criticism is VITAL for your success. If you’re not able to accept and learn from it, then you’ll never be able to grow and improve as an artist. Not to mention, you’ll likely gain a poor reputation for being unprofessional.

What Things Should You Do in the New Year to Break this Habit?

To break this bad business habit, start by creating a feedback system that allows customers to share their thoughts and opinions. Then, make sure to take the time to actually listen and respond to what they have to say. Even if it’s not necessarily something you agree with or want to hear, try your best to remain open-minded and be receptive.

Finally, be sure to thank customers for their feedback – even if it’s negative – and show that you’re taking it seriously. This will help to build trust and ensure they know their opinion matters.

PRO TIP: Check out this helpful article to learn the difference between constructive criticism vs. insults – as well as tips for receiving and giving constructive feedback!

Bad Habit #12: Failing to take risks.

When it comes to makeup artistry, being able to take risks and experiment can be incredibly helpful for your career. After all, stepping outside of your comfort zone can help you to grow and develop new skills that will set you apart from the competition. However, if you’re not taking any bold steps or trying something new – then chances are your work will remain stagnant and you’ll miss out on opportunities.

What Things Should You Do in the New Year to Break this Habit?

To break this bad habit, start by committing to taking at least one risk every month. This could be anything from trying out a new technique to taking on a daring project. Just make sure it’s something that pushes you out of your comfort zone!

Additionally, make an effort to stay up-to-date on the latest trends and news in the makeup industry. That way, you’ll be more informed about what types of risks might pay off. Finally, remember that taking risks doesn’t guarantee success – but it does give you a better chance of achieving something amazing.

So, stay positive and keep pushing yourself!

Bad Habit #13: Not asking for help when you need it.

One common downfall of an entrepreneur is the misconception that you need to be able to do it all – from marketing to accounting and everything in-between. However, it’s important to remember that you don’t have to be superhuman – and it’s totally okay to ask for help!

What Things Should You Do in the New Year to Break this Habit?

To kick this bad habit, start by reaching out to your network and letting people know that you’re looking for assistance. You’d be surprised how many people are willing to lend a helping hand! Additionally, think about hiring an assistant or virtual assistant to help with tasks like scheduling and customer service. That way, you can focus on the creative side of your business without getting overwhelmed.

Finally, don’t forget to take advantage of all the amazing online resources available, such as tutorials and online courses. In turn, you’ll be able to develop the skills you need – without needing anyone else’s help!

Are you currently a QC Makeup Academy student? Our Student Support Team is always available to help with any questions or concerns you have! Simply contact them by phone, email, and/or live chat!

Professional makeup artist working with young bride at home, closeup. Bad business habits article.

Bad Habit #14: Letting negative thoughts derail your goals.

As an artist, it’s normal to experience a bit of self-doubt now and then. However, letting negative thoughts go unchecked can quickly lead to a spiral of despair that derails your progress and make it difficult to move forward.

What Things Should You Do in the New Year to Break this Habit?

The first step is being aware of your thoughts and the words you use when talking about yourself. Whenever you catch yourself in a negative thought cycle, take a step back and reframe it into something more positive and empowering.

Remind yourself of all the things you’ve accomplished so far, as well as any successes that have come from taking risks or stepping outside your comfort zone. Finally, don’t be afraid to ask for help from friends and mentors. Having a support system can make it much easier to stay focused on your goals and keep the negative thoughts at bay.

By breaking this bad habit in the New Year, you’ll be able to focus more of your energy on what’s important – creating amazing makeup looks!

Bad Habit #15: Not investing in yourself and your business.

Finally, our last bad business habit to leave in 2022 is not investing in yourself and your business. Whether it’s not taking the time to attend workshops and seminars or neglecting to upgrade your equipment, failing to invest in yourself can quickly lead to burnout and stagnation.

What Things Should You Do in the New Year to Break this Habit?

In the New Year, start by setting aside a budget (no matter how small) for investing in yourself and your business.

Put aside money for workshops, online courses, or even a new piece of equipment to help you uplevel your artistry. Additionally, consider volunteering or interning with other makeup artists. Not only will you learn valuable skills, but you’ll also be able to expand your network!

Finally, don’t forget to take care of yourself. Invest in self-care activities like getting a massage, going for a walk, or even just taking some time to relax and recharge.

By breaking this bad habit in the New Year, you’ll be able to stay motivated and work towards creating amazing looks with confidence!

Frequently Asked Questions

Before we wrap things up, let’s take a look at some frequently asked questions related to breaking bad business habits in the New Year.

Q: What 3 habits of an entrepreneur can most negatively impact entrepreneurial growth?

A: Three of the biggest habits that can most negatively impact entrepreneurial growth include:

  1. Procrastination;
  2. Spending too much time on unproductive tasks;
  3. And not investing in yourself and your business.

Q: What are the top 5 bad habits that will negatively affect your makeup career?

A: The top 5 bad habits that can negatively affect your makeup career include:

  1. Not setting clear and achievable goals;
  2. Failing to market yourself and promote your work;
  3. Staying stuck in the same style instead of trying new things;
  4. Letting negative thoughts derail you;
  5. And not investing in yourself and your business.

Q: How can you identify “bad” career habits?

A: To identify “bad” career habits, it’s important to take a step back and look at your current workflow. Ask yourself if any of the following applies to you:

  • Do you procrastinate or lack motivation?
  • Are you stuck in your comfort zone instead of taking risks?
  • Do you struggle with time management or setting clear goals?
  • Are you neglecting to invest in yourself and your work?

If the answer is yes to any of these questions, it’s likely that you have developed some bad career habits. Fortunately, by identifying them and taking steps to break them in the New Year, you can reignite your passion for makeup artistry!

Q: How can you track your progress so that you know if you’re actually improving your bad career habits?

A: One of the best ways to track your progress is to keep a journal and write down your thoughts, feelings, and successes. Additionally, you can create a vision board or set measurable goals for yourself that you can work toward each week.

Moreover, there are also ways that you can gather stats and data to measure your progress. For instance, you can track the number of followers you have on social media or analyze how many bookings you’re getting each month. By tracking these metrics, you can easily see where your bad business habits are hindering your success and adjust accordingly!

PRO TIP: Here are 12 business metrics that EVERY business owner should know and keep track of, courtesy of Scoro!

Bad business habits to leave in 2022 5

So, What Would YOU Improve in 2023 and Beyond?

Now that you know how to break your bad habits, the only thing left is for you to start taking action! Set yourself up for success by investing in yourself and your business, expanding your network, and taking time for self-care. With these tips in mind, you’ll be able to create amazing artwork and reach new heights of success in no time.

Good luck and Happy New Year, beauties!

Start the New Year on the best foot possible by getting professionally trained and internationally-certified as a makeup artist! Enroll with QC Makeup Academy and earn globally-recognized certification in as little as 8 short weeks!

QC Makeup Academy Feature Image

QC Makeup Academy’s Top 10 Blog Articles of 2022

By Makeup and Beauty Resources No Comments

FACT: QC Makeup Academy has been a trusted leader in the beauty certification training industry for 38 years and counting. And our blog has had quite the year! Over the last 12 months, countless Beauty Buzz articles have garnered some major attention… And for good reason!

So, with 2023 just a couple more weeks away, we figured we’d do a little #throwback. Today, we’re breaking down the top 10 QC Makeup Academy blog articles from 2022.

So, lets see which of YOUR favorite articles made the list!

The Top 10 QC Makeup Academy Blog Articles of 2022

Coming in at 10th place, this blog post is all about helping aspiring entrepreneurs build their dream business in the skincare industry! Specifically, we dive into:

  • The role and responsibilities of a professional skincare consultant;
  • The size and profitability of the skincare industry;
  • Who the target market is for skincare consultants;
  • 15 trusted skincare brands;
  • 25 tried-and-true tips to successfully build your skincare business from scratch;
  • And more!

So, if you’ve been playing with the idea of launching a career in skincare, this is definitely the article for you.

PRO TIP: Become a fully trained and globally-certified International Skincare Consulting Professional (ISCP) in as little as 2 short months by enrolling in QC’s self-paced, online Skincare Course!

QC Makeup Academy in-post image 1

This article looks at the nitty-gritty of niche marketing, and how YOU can use it to build an incredibly successful makeup business. Here, you’ll discover:

  • What a niche is and what makes a niche strong;
  • Whether or not the beauty industry is a niche market;
  • Who the target market for makeup is;
  • Key steps for finding a niche for your own makeup business;
  • And 11 wildly popular examples of specialized makeup business ideas!

Plus, for each of the 11 examples given, we’ll break down:

  • What it is;
  • Who the target market is for that particular niche;
  • Special skills needed;
  • And top pros and cons of that niche.

If you want to start taking your makeup business to the next level in the New Year, then this QC Makeup Academy blog article is a MUST-read!

Now, this particular article is especially useful – regardless of whether you’re just starting out as an MUA or are already established.

Why?

Because if you’re just getting your feet on the ground, it can be difficult to figure out which direction you should go in. And if you’re already a seasoned makeup artist, it never hurts to get a refresher course on some of the most profitable and in-demand makeup services around. That way, if you want to expand your business and make more money, you know what the best paths are!

In this blog article, we cover:

  • What the highest qualification is in makeup;
  • Which field is best for makeup artistry;
  • The average salary of a professional MUA;
  • Common factors that’ll impact your salary;
  • Other things makeup artists can do to earn a higher income;
  • 16 of the highest-paying career paths for MUAs (including the what this career entails, average income expectations, etc.);
  • And more!

As a professional makeup artist, your portfolio is the bread and butter of your business! Moreover, a strong portfolio will serve as one of your GREATEST marketing materials, and will be the driving factor behind a large portion of your bookings.

But if you’re new to the game and haven’t yet put your portfolio together, where should you start? How will you know if you’re on the right track?

Luckily, this QC Makeup Academy blog article has all the answers!

Read on to learn all about:

  • What a makeup portfolio is and why it’s so important;
  • The average number of pictures that should be in your portfolio;
  • The types of makeup looks you should represent in your portfolio;
  • Building your professional makeup portfolio in 10 easy steps;
  • And how QC’s self-paced, online Portfolio Development Workshop can help you achieve the PERFECT, client-winning portfolio!

Learn more about QC Makeup Academy’s online Portfolio Development Workshop and get started today!

Want to become a professional skincare consultant… But don’t have any experience and not sure where to begin? This Ultimate Guide has you covered!

By the time you finish reading this article, you’ll know:

  • Why skincare is such a lucrative career choice;
  • The difference between a skincare consultant and an esthetician;
  • Salary expectations;
  • How to become a fully trained, certified, and working skincare consultant in just 5 steps;
  • And more!

Think of this article as a one-stop-shop for EVERYTHING you need to know about becoming a skincare consultant!

Alright, we’re officially at the halfway point of our Top 10 list…

In 5th place, this QC Makeup Academy blog article will be EXTREMELY helpful to those of you who already work as a makeup artist but want to increase your income and add more services to your repertoire!

Specifically, we take a look at the following 8 services (and dive into why your business will benefit from offering them to your clients):

  1. Bridal and bridal party makeup
  2. Bachelorette party makeup
  3. DIY workshops/makeup classes
  4. Mobile services
  5. Skincare consultations
  6. Hairstyling services
  7. Fashion styling services
  8. Virtual makeup services

Start the New Year on a high note for your makeup business by adding literally ANY of these services to your roster!

Beautiful woman face. Hand of visagiste, painting cosmetics beauty model girl . Makeup in process.

Think that being a makeup artist is your destiny – but not entirely sure what this career actually looks like on a day-to-day basis?

In this blog article, we paint a vivid picture of the life of an MUA by detailing what they do on an average day!

You’ll discover:

  • How to get the right makeup training to kick-start your career;
  • How many hours the average MUA works every day;
  • Different types of makeup jobs and how they’ll affect your hours;
  • Specific skills all makeup artists need to be successful;
  • What a typical day in the life of an MUA looks like;
  • Working for a company vs. running your own business;
  • And more!

So, consider this article YOUR SIGN to take the leap in 2023!

PRO TIP: Become a fully trained and certified Master International Makeup Professional (MIMP) in as little as 2-6 months with QC Makeup Academy’s leading online Master Makeup Artistry Course!

Earlier, we looked at tips for growing your skincare business. Now, coming in at 3rd place, we’re switching gears and focusing on the top tips for growing your makeup business!

In this QC Makeup Academy blog post, you’ll learn:

  • How makeup artists grow throughout their careers;
  • How to get noticed and put your name out there;
  • What a freelance MUA is (and how to become one);
  • Our top 15 sure-fire tips for growing your makeup business!

By the end of this article, we guarantee you’ll have a better understanding of how to take your makeup career to the next level!

In 2nd place, we have this EXCELLENT blog post that we think EVERY makeup artist should read!

This article covers the fundamentals of makeup artistry and takes a deep dive into why mastering these skills is so important for MUAs (regardless of experience level).

In particular, we cover:

  • The importance of practice;
  • Subjects you need to know in order to thrive as a makeup artist;
  • Learning makeup through social media vs. professional training courses;
  • Whether or not you need to be good at drawing to be an MUA;
  • 5 basic skills you NEED to know before you can book any clients;
  • And soft skills vs. hard skills as a makeup artist.

We highly recommend this blog post for any MUA who’s looking to brush up on their fundamentals and become a top-tier artist!

Alas, we’ve come to QC Makeup Academy’s MOST popular article of 2022! In our #1 spot, we tackle the pros and cons of working as a makeup artist. If you’ve been playing with the idea of becoming a makeup artist, but aren’t sure if it’s right for you, this article should help you make a decision!

In this blog post, we discuss topics like:

  • The job description of an MUA;
  • 6 different/common types of makeup artists;
  • Benefits (and drawbacks) of being a freelance MUA;
  • 20 pros of working as a makeup artist;
  • 8 cons of working as a makeup artist;
  • And interesting statistics about professional makeup artistry!

Thus, as 2022 comes to a close and a new year is about to begin, this article is the perfect way to get a jump-start on your makeup career plans! So, give it a read and see if being an MUA is something you can picture yourself doing in 2023!

QC Makeup Academy in-post image 3

Final Thoughts

As always, everyone here at QC Makeup Academy thanks you for taking the time to read this blog post – and all the other blog posts we’ve published to date! What’s more, we hope you’ve been inspired to launch a successful makeup career!

With that in mind, don’t forget to check out our wide variety of self-paced, online certification courses if you’re looking for the most comprehensive online training available. In as little as 8 short weeks, you can earn your internationally-recognized certification + designation and be ready to book your very first client!

Happy New Year, beauties, and we wish you all the best in 2023 and beyond!

Turn your New Year’s resolution into a REALITY in as little as 2 short months. Enroll with QC Makeup Academy and start your training today!

When to throw away makeup and skincare products Feature Image

When to Throw Away Your Old Makeup and Skincare Products

By Education, Makeup Tips and Tricks, Your Makeup Career No Comments

With the New Year fast approaching, now is the perfect time to sort through all of your makeup and skincare products, and get rid of anything that’s old or expired. After all, there are definite expiration dates that you should be aware of… And not paying attention to them can have damaging effects on your skin. In this article, we’ll reveal when to throw away your makeup and skincare products so you can keep your skin its healthiest!

Let’s get started!

Makeup

We’re going to break this article into two sections:

  1. Makeup
  2. Skincare

So, let’s start with your makeup products…

When to throw away makeup and skincare products 1

What Happens to Makeup as it Gets Old?

Makeup products don’t last forever. As soon as you open them, they begin to expire due to natural oxidation and the growth of bacteria. When makeup gets old, it can cause irritation, breakouts and other unwanted reactions on your skin.

Are YOUR makeup products bathing in bacteria? Here are 6 reasons why this may be the case – and what to do about it!

How to Tell When Makeup Products Have Expired

There are a few ways to tell when your makeup products have gone bad. The first is the smell test – if it smells rancid, then it’s probably time to toss it. You can also look for changes in texture or color, as this is another good indication that the product has expired. Finally, you may want to check the packaging for an expiration date.

What Happens When You Use Old/Expired Makeup?

Using old/expired makeup can lead to a variety of skin issues, such as:

  • Irritation
  • Rashes
  • Allergic reactions
  • Breakouts
  • Dryness, etc.

Not only that, but it can also make your skin look dull and aged due to the oxidation process. So if you want to keep your skin looking its best, be sure to throw away any old or expired makeup!

So, How Often Should You Get Rid Of Your Makeup?

Most experts suggest tossing out any makeup that you haven’t used in the last 3-6 months. Of course, the shelf life may vary, depending on the product. (We’ll delve more specifically into different products momentarily!)

In general, though, whenever you purchase any makeup products, be sure to find and note its expiration date. From there, you can make things easier for yourself by setting reminders or writing yourself little notes to remind you when it’s time to toss out your products.

And as we mentioned earlier, it’s also a good idea to regularly check your makeup products for any changes in smell, color or texture. After all, these can all be signs that it’s time to throw them away!

Foundation makeup products on aged paper. Selective focus, retro toning. Makeup and skincare products article.

When to Throw Away Makeup Products

Foundation

Average Shelf Life: 6 – 12 months

In terms of your foundation(s), you should be sure to replace it every 6-12 months. This is because these products contain water and oil, which can easily become breeding grounds for bacteria.

When to Get Rid of Foundation

Some signs that your foundation is going bad are:

  • Changes in color
  • A strange scent
  • Clumps of product forming

Concealer

Average Shelf Life: 1-2 years

Whereas powder and/or stick concealers can last up to two years, liquid concealers should be replaced after one. When it comes to using these products on your skin, you want to make sure that they’re as fresh and bacteria-free as possible. When it’s expired, the product may not blend as easily, and it can also cause irritation, breakouts or dryness.

When to Get Rid of Concealer

When your concealer has gone bad, you may notice changes in texture or colors. Similarly, there may be flakes forming or a strange scent.

Highlight and Contour

Average Shelf Life: 1-2 years

Similarly, highlighting and contouring products can last up to two years if they are powders. Meaning, you won’t have to worry about replacing them as often. If they are liquid products, however, then their shelf life will be closer to one year.

When to Get Rid of Highlight and Contour Products

When it comes to these products, you’ll want to pay attention for any changes in texture or color. If you notice that they’re starting to look cakey or discolored, it’s probably time to throw them out.

Blush

Average Shelf Life: 6 months-2 years

Just like with highlight and contour, powder blush products can last up to two years. If it’s cream-based, however, then it can last anywhere from 6 months to a year.

When to Get Rid of Blush

When your blush begins to look cakey or discolored, you’ll want to replace it. Furthermore, you’ll also want to make sure that your blush products are properly stored in a cool place away from direct sunlight. This can actually help extend their shelf life!

Mascara

Average Shelf Life: 3 months

In terms of mascara, you should be sure to replace it after three months. Mascara is especially prone to bacteria buildup, so it’s important to keep an eye on the expiration date and toss it out when needed. When you open a new tube, be sure to store it away from heat or humidity.

When to Get Rid of Mascara

If you’re unsure whether or not your mascara is starting to get old, look for any of the following indicators:

  • Clumping
  • A strange smell
  • Crumbly texture
  • Stiff/hard wand

Lipstick and Lip Gloss

Average Shelf Life: 6 months-2 years

Lipstick typically lasts between one to two years. Lip gloss, on the other hand, is usually good for six months to a year.

When to Throw Out Lipstick and/or Lip Gloss

When it comes to these products, you’ll want to pay attention to any changes in the texture or color. When it looks dry and cakey, it’s time to say goodbye!

When to throw away makeup and skincare products in-post image 3

Eye Shadow

Average Shelf Life: 2 years

Most eye shadows can last up to two years, so long as they’re stored correctly. Meaning, you’ll want to make sure that they’re away from heat, humidity and direct sunlight. That said, you should still check for any signs of expiration before using them.

When to Throw Out Eyeshadow Palette

When your eye shadow starts to look too dry, too powdery, or discolored, it’s a sign that it’s time to replace it.

Eye Liner (Pencil)

Average Shelf Life: 1-2 years

Pencil eyeliners usually last between 12 months and two years. When using these products, remember to always sharpen them after each use.

When to Get Rid of Eye Liner Pencil

When the pencil tip becomes dull or dry, it’s time to replace it with a new one!

Eye Liner (Liquid)

Average Shelf Life: 3-6 months

On the other hand, liquid eyeliners should be replaced every three to six months. When purchasing liquid eyeliners, be sure to check the label for any expiration dates or other important information.

When to Get Rid of Liquid Eye Liner

If you notice that your liquid eyeliner has changed color, texture or consistency, it’s time to toss it out and get a new one. For instance, one telltale sign that liquid eyeliner is going bad is if it starts becoming more clumpy.

Fake Eyelashes

Average Shelf Life: 6 months

Granted that they’re properly taken care of, fake eyelashes have an average shelf life of six months. Fake eyelashes can easily collect bacteria, so it’s important to keep them as fresh as possible.

When to Throw Out Fake Eyelashes

When the lashes start to look worn, dry, or clumpy, it’s time to throw them away!

Makeup Brushes

Average Shelf Life: 3-5 years

Your brushes are probably your biggest long-term investment when it comes to your makeup products! If you care for them properly and clean them regularly, they should be able to last you anywhere from a year to a whole decade! That said, a good average is that you’ll probably need to replace most brushes every three to five years.

When to Throw Away Makeup Brushes

A good indicator is that when the bristles start to flake off or become dry, it’s time to get a new set. Remember that you should always be gentle and careful when cleaning your brushes – harsh cleaners can damage the bristles!

PRO TIP: You may be cleaning your brushes (and other makeup products) the wrong way. But don’t worry, we’ve put together a little guide to help you clean your products the RIGHT way!

Makeup Sponges/Beauty Blenders

Average Shelf Life: 3-6 months

Lastly, makeup sponges should be replaced every three to six months. We know, this may not sound like a whole lot of usage time… And if you’re on a budget, we totally understand that paying to replace them this frequently can be a challenge.

But, if you’re trying to keep your skin healthy and free from bacteria, it’s essential that you replace them regularly! After all, this is one product that’s especially susceptible to bacterial buildup.

When to Throw Out Makeup Sponges/Beauty Blenders

When your beauty blenders start to look dry or discolored, it’s time to say goodbye and invest in a new set!

How to Tell When Makeup Products Have Expired

Specifically, where should you be looking to find the actual expiration date on the product itself?

Well, most makeup products should have an expiration date printed somewhere on the packaging or label.

If you don’t see anything that explicitly says ‘expiration date’, then it’s a good idea to check for a ‘best by’ or ‘use by’ date. You should be able to find this by looking at either the bottom, side, or back of the product. This will tell you how long the product is good for and when it should be replaced.

Finally, it’s also important to keep in mind that your makeup products may expire sooner if they’ve been exposed to extreme temperatures or humidity. When in doubt, replace your products as soon as you can to make sure that your skin stays healthy and free from bacteria.

Do You Really Need to Throw Out Makeup?

Now, you may be wondering, “Can’t you simply clean old makeup?”

The short answer is no – you should not attempt to clean old makeup products. When it comes to eye shadow, eyeliner, and other products that come in a powder form, the bacteria buildup may be too deep into the product and simply can’t be removed.

For liquid makeup products such as foundation or concealer, they tend to expire much faster due to the bacteria that can form from being exposed to air. When it comes to makeup and skincare products, we always recommend replacing them as soon as they become expired or look like they have been used too much.

Bottom line? When in doubt, throw it out! Not only will this help you stay safe and healthy, but it will also help you stay looking fabulous!

Pink beauty tear-shaped blender, dirty and clean egg-shaped sponges isolated on light background. Cosmetic tool for makeup in hand. Makeup and skincare products article.

Skincare Products

Now let’s move onto the second section of our article – this time, all about skincare products.

What Happens to Skincare Products as They Get Old?

Most people don’t realize this, but using expired skincare products can actually be really damaging to your skin. When skincare products get old, the active ingredients start to break down and become ineffective… Meaning that they won’t give you the same benefits as when they were fresh!

Additionally, bacteria can start to form on the surface of the product, which can be really bad for your skin if you don’t clean it off regularly. When this happens, it’s important to throw away the product and invest in a new one.

What Happens When You Use Old/Expired Skincare Products?

Using expired skincare products can cause a number of issues, including:

  • Irritation
  • Breakouts
  • Dryness
  • Allergic reactions
  • Redness
  • Bacterial infections

Furthermore, as we mentioned above, using expired skincare products won’t actually be beneficial for your skin – or helping you achieve the goals you have for your skincare routine.

Basically, when it comes to skincare products, you should always check the expiration date and replace them as soon as they become expired. This will help keep your skin healthy, safe and looking/feeling its best!

What is the Shelf Life of Skincare Products?

In general, most skincare products (once opened) have a shelf life of 6-12 months. If left unopened and stored correctly, many skincare products can last up to three years.

However, the shelf life ultimately varies, depending on the type of product and how you store it.

For example, products that come in a pump or spray bottle often have shorter shelf lives than products that come in a jar or tube. Additionally, storing your skincare products in areas with excessive heat or humidity may cause them to expire sooner than expected.

As we suggested earlier, the best way to keep track of your skincare products’ expiration dates is to check the bottom, side or back of the product for a ‘best by’ or ‘use by’ date. Then, set yourself reminders to replace them as soon as they become expired.

Interested in a career in professional skincare? Enroll in QC Makeup Academy’s self-paced, online Skincare Course and become a globally-certified International Skincare Consulting Professional (ISCP) in as little as 2 short months!

How to Tell When Skincare Products Have Expired

Next, let’s talk about how you can tell when your skincare products have expired. When it comes to liquids, the product may change in consistency or color – often becoming darker or runnier than usual.

For powders and creams, they may become lumpy or discolored. When this happens, they should be immediately thrown away.

Additionally, you may notice a foul odor or a change in the scent of your skincare product when it has expired – this is often an indication that bacteria has started to form on the surface of the product. When this happens, it’s best just to throw it away and invest in a new one.

What Happens if You Get an Infection?

Whether the root of the issue is your makeup products or your skincare products, what should you do if you use old products and it leads to an infection?

While you may be tempted to just wait it out and hope things clear up on their own, we don’t recommend this. If your skin has become inflamed, red, or irritated after using an expired product, then it’s important to see a doctor as soon as possible. Depending on the severity of the infection, they may prescribe antibiotics or other treatments to help clear it up.

Better to be safe than sorry, right?

After all, in some cases, infections caused by using old makeup and skincare products can be serious! For example, staph infections can lead to long-term skin damage and even scarring. So, it’s important to take the necessary steps towards healing as soon as possible.

When to throw away makeup and skincare products in-post image 5

How to Make Your Makeup and Skincare Products Last

Finally, what can you do to make sure your makeup and skincare products last as long as possible? Well, it all boils down to properly taking care of your products!

Here are a few things you can do:

  • Keep them away from heat and direct sunlight
  • Check expiration dates regularly
  • Don’t share or swap old products with friends (as this can lead to bacteria and infections)
  • Store them in a cool, dry place
  • Clean brushes and beauty blenders regularly (with soap and warm water)
  • Throw away expired products immediately

By following these tips, you’ll be able to maximize the shelf life of your makeup and skincare products, as well as avoid any potential infections.

When to Throw Away Makeup and Skincare Products: In Conclusion…

And voila! Now you know when to throw away makeup and skincare products. When in doubt, always check the product labels for a ‘best by’ or ‘use by’ date – this way, you’ll be sure to stay on top of your beauty routine!

Importantly, don’t forget to see a doctor if you experience any signs of infection after using old products – it’s always better to err on the side of caution.

Finally, remember to take proper care of your products and store them in cool, dry places. This way, you’ll be able to make them last as long as possible!

Happy shopping (and throwing away)! 😊

NEXT UP: Dream of an exciting, successful career as a professional makeup artist? This Ultimate Guide reveals how to become fully trained, certified, and booking clients in just 3 simple steps!

Frequently asked questions for hair stylists Feature Image

40 Frequently Asked Questions for Hair Stylists (and Their Answers)

By Hair Styling No Comments

As a hair stylist, you will likely be asked a lot of questions throughout your career. Similarly, if you’re thinking of booking with a hair stylist, you may not know where to start – or what to ask. In this article, we’ll go over (and answer) 40 of the most frequently asked questions for hair stylists! We hope that this information will help those:

  • In need of guidance when it comes to choosing a hair stylist;
  • Working transparently with clients;
  • Looking to ask the right questions.

So, let’s get started!

Common Questions You’ll Hear as a Hair Stylist

First, let’s take a look at the sort of questions you’ll get if you yourself are a professional hair stylist…

Frequently asked questions for hair stylists in-post image 1

Q: “Can you cut and/or dye my hair?”

A: No, as a hair stylist, you are not trained or qualified to make any chemical and/or permanent changes to a client’s hair. This would fall under the job description of a hair dresser, rather than that of a hair stylist. By the same extension, you would not be able to:

  • Perm their hair
  • Perform any chemical treatments to their hair
  • Install permanent hair extensions

Learn more about the similarities and differences between hair stylists vs. hair dressers!

Q: “What hair services do you offer?”

A: As a hair stylist, you are qualified to offer the following services:

  • Cutting and styling men’s, women’s, and children’s hair
  • Temporary blow-drying
  • Applying temporary coloring products like wax sprays or colorful gels
  • Creating updos, half updos, down hairstyles, and braiding for special occasions

Q: “How healthy is my hair/scalp?”

A: It’s important to answer this question honestly and accurately. As a hair stylist, you must be able to assess the health of your client’s scalp and hair in order to provide them with the best advice on how to take care of it. In order to do so, you should:

  • Perform a full scalp/hair inspection
  • Check for signs of damage such as split ends or brittleness
  • Inquire about their current hair care routine

Q: “Do you offer any styling tips or advice?”

A: Yes, of course! This is a great way to make sure that the client leaves your salon feeling satisfied with their new look. Make sure to use plenty of product and tell them which products they should use at home in order to keep their hair looking its best.

Q: “How often should I be shampooing and conditioning my hair?”

A: This can vary greatly, depending on individual hair type. However, as a general rule of thumb, most people should shampoo their hair every other day and condition it once or twice a week for best results.

With that in mind, here’s what you can recommend, based on their hair type…

Hair Texture:

  • Straight: Shampoo every other day, condition once or twice a week.
  • Wavy: Shampoo every 3 days, condition 1-2 times a week.
  • Curly: Shampoo every 4 days, condition 2-3 times a week.
  • Coily: Shampoo every 5-7 days, condition 3-4 times a week.

Hair Structure:

  • Fine: Use a lightweight shampoo and conditioner.
  • Medium: Use a mild cleanser and rinse out conditioner.
  • Thick: Use a volumizing shampoo and deep conditioner.

Scalp Moisture:

  • Dry: Use a nourishing shampoo and conditioner.
  • Normal: Use a moisturizing shampoo and conditioner.
  • Oily: Use a clarifying shampoo and light conditioner.

Need help identifying your hair type? This chart, courtesy of Function Of Beauty, will point you in the right direction!

Q: “What hair styling tool will I need to use at home to replicate this look?”

A: Once you’ve finished styling the client’s hair, it’s important to provide them with a list of the products used. Plus, you should list any tools they’ll need in order to replicate their look. This could include items such as:

  • Curling irons
  • Flat irons
  • Blow dryers
  • Products like texturizing sprays, mousses, and gels, etc.

Q: “My hair is burnt. What should I do?”

A: Unfortunately, this is something that can happen when using too much heat when styling. It’s important to be honest and tell the client that they should avoid further heat styling until their hair has been treated by a professional with the right qualifications for such a task. Professional treatments could include using specialized products such as protein masks or keratin treatments to help repair their damaged hair.

Finally, make sure to emphasize the importance of using a heat protectant prior to any future heat styling, in order to prevent further damage!

Q: “How much do hair stylists make?”

A: Throughout your career, you may get asked this questions by clients who are also thinking of pursuing a job in this field. Because there’s no clear-cut answer to this question, you can let them know that salaries vary and depend on things like:

  • Experience
  • Qualifications
  • Skill set(s)
  • Whether they run their own business, are a freelancer, or work for an employer, etc.

Should you want to be a bit more specific, you can always give them a general yearly salary range based on the country you live in:

  • United States: Between approx. $20,900 and $68,200 USD annually (Source: Salary Expert).
  • Canada: Between approx. $29,000 and $64,000 CAD annually (Source: Glassdoor).
  • United Kingdom: Between approx. £23,400 and £39,500 GBP annually (Source: Talent.com).
  • New Zealand: Between approx. $19,700 and $66,200 NZD annually (Source: Salary Expert).
  • Australia: Between approx. $40,000 and $71,000 AUD annually (Source: Payscale)

“How Much Does a Hair Stylist Make an Hour?”

Again, since this can vary depending on a number of factors, it’s best to provide an average hourly rate (if you really want to get into the nitty gritty details). Depending on the country you live in as a hair stylist, you can make:

  • United States: Between approx. $17-$28 USD per hour (Source: Talent.com).
  • Canada: Between approx. $15-$23 CAD per hour (Source: Talent.com).
  • United Kingdom: Between approx. £7-£11 GBP per hour (Source: Payscale)
  • New Zealand: Between approx. $16-$26 NZD per hour (Source: Glassdoor).
  • Australia: Between approx. $21-$30 AUD per hour (Source: Payscale).

Q: “How long does it take to become a hair stylist?”

A: It really depends on where you get your training from. Some hair stylists opt to get their credentials from a cosmetology school. This typically takes between 8 months and 2 years, depending on the program you choose.

Other stylists decide to gain experience by working in salons as an apprentice. This route usually takes 3-4 years.

You can also obtain a certificate or diploma through online courses, such as the Hair Styling Essentials Course taught by QC Makeup Academy. Since this program is entirely self-paced and done right from the comfort of home, YOU get to decide when you graduate!

(As a point of reference, if you were to devote just 1-2 hours per week to this QC course, you could earn your internationally-recognized Hair Styling Essentials certificate in as little as 2 short months!)

Want to learn more about QC Makeup Academy’s self-paced, online Hair Styling Essentials Course? Check out the full course curriculum!

Hair stylist in colorful hairstyle looking at mobile phone while working on woman's hair. Woman showing her preferences to the hairstylist in mobile phone at the salon.

Questions to Ask a Hair Stylist

Next, let’s talk about the questions that you – as the client – should ask your hair stylist before booking an actual appointment. Here are a few of the most important ones…

Q: “Do you have any experience with my type of hair?”

A: It’s important for your stylist to be familiar with the type of hair you have. Questions like this will help you gauge how experienced your stylist is. Plus, it can also give you more insight into their overall skill set.

Q: “What are your areas of expertise?”

A: Your hair stylist might specialize in things such as updos, color services, straightening methods, etc. Asking this question can give you a better understanding of what your stylist is capable of doing!

Q: “Do you use professional products?”

A: Ask to see what kind of products they use on clients’ hair, as well as which ones they recommend for your specific hair type. Professional products can make a huge difference in terms of quality and longevity! Not to mention, if a hair stylist is only working with lower-quality products and/or tools, this can be seen as a reflection of the type of work they’d do on your hair.

Q: “Can I see your hair styling portfolio?”

A: Any hair stylist worth your consideration should have a professional portfolio to show you. This is especially the case if that hair stylist has been in the industry for a while!

The purpose of the portfolio is to be able to show you their past work. Ideally, this work should reflect various different styles, techniques, and areas of expertise.

Seeing a hair stylist’s portfolio is important for you to get an idea of their styles and techniques, as well as the results they’re realistically capable of achieving.

Q: “Do you offer consultations or trial services?”

A: It’s always a good idea to ask your hair stylist if they offer consultations prior to actually booking an appointment. This can help you get a better sense of the type of work they do and whether or not their style aligns with yours.

In terms of trial services, this is especially important for anyone that’s looking to book a more complicated service, such as an up-do or color service. A trial run will ensure that you’ll be happy with the results.

Q: “What are your qualifications as a hair stylist?”

A: This is an especially important question to ask if you’re looking for a more experienced or upper-level hair stylist. It’s totally fine to ask what kind of qualifications and credentials they have, as well as where and when they received their training.

The answers to these types of questions can help give you peace of mind that the individual you are booking with is knowledgeable and experienced.

Q: “How long have you been a hair stylist?”

A: This is another important question to ask in order to gauge a hair stylist’s experience level. Generally speaking, the longer someone has been in the industry, the better!

Furthermore, asking this question can also help you determine if they’re up-to-date with the latest hair styling trends and techniques.

Q: “What are your rates?”

A: It’s always a good idea to ask about their pricing before booking an appointment. Most hair stylists will have different rates for various services, so it’s important to make sure that you understand exactly what you’re paying for and why.

Most importantly, don’t be afraid to shop around – price is often a reflection of quality and experience!

Q: “Do you offer any discounts or loyalty programs?”

A: Discounts and loyalty programs can be a great way to save money while still receiving quality services. Ask your hair stylist if they offer any such incentives or programs.

Most salons will have some type of deal that you can take advantage of. So, it’s definitely worth inquiring about!

Q: “Do you have a website?”

A: This is an especially important question if the hair stylist is a freelancer or running their own business. Having a website is essential for any serious hair stylist! After all, it can provide you with valuable information about their services, rates, contact information, and portfolio.

If the hair stylist is running their own business and doesn’t have a professional website, this could be a sign that they’re either new to the industry or not taking their work seriously. Therefore, it’s best to proceed with caution if you’re thinking of booking with them.

PRO TIP: Make sure their website contains these 7 essentials items!

Q: “Can I find you on social media?”

A: This is the kind of questions that’s useful, regardless of whether the hair stylist works independently or for an employer. Here’s why:

  • Social media is a great way to stay connected with your hair stylist!
  • You can get updates on any special offers they may have!
  • You can check out more of their work that may not be included within their portfolio!

Q: “Can you provide references?”

A: A reliable stylist should be able to provide you with references from past clients who have been satisfied with their results. Taking the time to read these reviews can give you a better idea of what to expect from their services.

Having references also adds an additional layer of trustworthiness and credibility, which is always a plus!

Q: “Do I need to come to you or can you travel to me?”

A: If you’re in need of a hair stylist for a special event (such as a wedding), it’s important to clarify if they are willing to travel and what the associated fees may be.

Also, make sure to ask how far in advance you need to book their services if they do need to travel to you!

Q: “Do you offer virtual hair styling services?”

A: You may require virtual services for a number of reasons, such as:

  • The hair stylist you’re interested in doesn’t live/work in your area
  • The event you need your hair styled for is a destination one
  • You’d like to learn first-hand styling techniques from the comfort of your own home, etc.

In any case, virtual hair styling services have become increasingly popular over the past few years. So, it’s worth asking if your hair stylist offers this type of service.

Keep in mind that there may be additional fees associated with virtual styling, so make sure to check on this in advance as well in case you need to include it within your budget!

Q: “Do you have a contract?”

A: Depending on the environment the hair stylist works in, there may or may not be a contract for you to sign. For example, if the stylist is employed by a salon, there likely won’t be one. However, if the hair stylist works as a freelancer or small business owner, it’s quite common to have some type of contract in place.

So, make sure to ask about this beforehand. And if they do provide you with a contract, read it over carefully. This will help ensure that you’re aware of any terms and conditions that may apply!

Q: “What’s your cancellation policy?”

A: It’s always a good idea to ask about the cancellation policy. This will help avoid any potential misunderstandings when it comes time to cancel an appointment. It’ll also help you avoid losing any money in the event that there’s any sort of cancellation fee.

Most salons have a strict 24-hour notice policy. If the hair stylist is a freelancer or business owner, their own policy may be the same – or it may be different. So, make sure you know what their specific rules are beforehand!

Q: “Do I need to tip my hair stylist? If so, how much?”

A: Tipping your hair stylist is a great way to show your appreciation for the quality of their work. And while it’s not mandatory by any means, generally speaking, it’s customary to tip between 15-20%. That said, some people choose to leave more or less depending on their satisfaction with the end result.

Ultimately, it’s up to you as the customer!

Frequently asked questions for hair stylists in-post image 3

Questions to Ask Your Clients During the Consultation

Finally, let’s circle back and assume that you’re the professional hair stylist. Of course, you’ll want to ensure that the client feels comfortable and safe during the consultation. Moreover, you’ll want to walk away from the consultation with a firm understanding of their needs.

So, here are some essential questions to ask prospective clients during the first consultation…

Not yet a professional hair stylist – but want to be? This comprehensive guide will show you how to become one in as little as 5 easy steps!

Q: “How did you hear about [my business/the salon]?”

A: This question will help you gain insight into any potential referral sources that could be beneficial for your business. Additionally, it may give you an idea of what type of marketing efforts have been the most successful so far!

Q: “Do you know your hair type?”

A: Knowing the client’s hair type is essential, as it will play a major role in determining what products and techniques you’ll use. If they don’t know their hair type, encourage them to bring in photos of themselves with wet and dry hair!

Q: “What are you hoping to achieve with this hairstyle?”

A: Ultimately, you want to make sure that the client walks away with a style they’re happy with. Asking this question will help you gain additional insight so that you can provide them with the best possible outcome.

Q: “Is this for a specific event?”

A: If the client is getting their hair done for a special event, make sure you know what it is. This will provide additional context and help you craft the perfect style to suit the occasion.

Q: “When is this event?”

A: If your client answered “yes” to the previous question, it’s important to get an understanding of when the event is. From there, you craft a strategy for timeliness and ensure that the client has their hair looking great in time for the event!

Q: “What are you looking to get done?”

A: This may seem like a no-brainer, but you obviously can’t do your job as a hair stylist if you don’t know what the client wants – and if you’re capable of providing it to them. So, make sure you get a clear understanding of what they’re looking to achieve. This will ensure that both parties are on the same page and expectations can be met!

Q: “What products do you use on your hair?”

A: It’s always beneficial to have an understanding of the type of hair products the client uses on their hair. From there, you craft a strategy as to what type of products and techniques you’ll use during the hairstyling process!

Q: “Do you have any allergies or sensitivities?”

A: This is a VERY important one! You’ll want to make sure your client doesn’t have any allergies or sensitivities that would cause an adverse reaction. So, make sure you get very clear answers on this one!

Q: “Do you have any hair styling preferences?”

A: Asking this question is essential, as it helps make sure that any preferences the client has are taken into account. For instance, some clients may have a preference for updos, whereas others may prefer to wear their hair down. By asking this question, you can make sure that their hair is styled exactly how they want it to be!

Q: “Do you have any cowlicks?”

A: Cowlicks, or the natural direction that certain hairs grow in, can be a bit of a challenge to work with. This can especially be the case when working with bangs. So, make sure to ask your client if they have any so you can factor it into your styling process.

Q: “Do you have a budget?”

A: In some cases, the client may have a budget in mind for their hair styling session. Knowing this ahead of time will help you plan accordingly and make sure that you won’t be going over their budget!

Now, what happens if a client’s budget doesn’t match with your service rates?

Don’t be afraid to negotiate! It’s a great way to show your client that you understand their needs and wants, and it’ll help ensure that both parties are happy with the outcome.

And if they outright refuse to work with you and pay a fair cost for your services? It’s okay to turn down a potential customer if they’re unwilling to meet a price that you feel is reasonable. Just be sure to do so politely, respectfully, and professionally.

What’s a “Choosing Beggar”? Find out who they are – and why you should avoid working with this type of client!

Q: “How do you like to part your hair?”

A: The best way to get the answer to this question is by asking the client to show you how they typically part their hair. This will give you a better understanding of whether or not their preference is to have their hair parted down the middle, on one side, or a bit more off-center. Once you’ve got a good visual, it’ll be much easier to craft their hairstyle and make sure it’s exactly how they want it!

Q: “Would you also like to get your makeup done?”

A: This is a GREAT question to ask during the initial consultation if you also happen to provide makeup services. Not only will you be able to make sure that your client has their entire look ready for their special occasion – it can also be a great opportunity to upsell and possibly provide additional services.

If they answer “yes” to this question, let them know that you can also provide them with this service at the same time as their hair styling. If you’re able to bundle the services together and give them a discounted rate, let them know this, too!

Interested in adding makeup to your hair styling business? Become a fully trained and globally-recognized Master International Makeup Professional (MIMP) in as little as 8 short weeks with QC Makeup Academy’s online Master Makeup Artistry Course!

Q: “Do you have any reference photos?”

A: If a client has reference photos, this can help give you a better idea of what kind of look they’re going for and make sure that the final style is exactly the way they want it. So, if your client does have any reference photos be sure to ask them to show them to you.

However, approach the reference photos carefully. Sometimes, they can give clients unrealistic expectations. So, take a good look at the style and let them know honestly whether their hair type would produce the same results. If not, let them know how their results may be different, so the client isn’t unpleasantly shocked after all the work is done.

Male hair stylist working on blonde client in salon.

Frequently Asked Questions for Hair Stylists: Final Thoughts

As a hair stylist, it’s important to be prepared for any and all questions that your clients might have. And as a client, being prepared with the right questions to ask will help you get the best results.

Knowing the answers to all the questions listed above will not only ensure that your hair styling experience is a smooth one, but it’ll also make sure that you and your stylist are on the same page and understand each other.

Got any questions or comments to add to the conversation?

Drop them below, as we’re always happy to hear from you!

Thanks for reading! 💕

Become a fully trained hair stylist in as little as 2 months. Enroll with QC Makeup Academy and start your journey today!

How to go viral on TikTok as a makeup artist Feature Image

How To Go Viral on TikTok as a Makeup Artist

By Uncategorized No Comments

As a makeup artist, you probably dream of going viral on TikTok. I mean, who doesn’t want to be the next Mikayla Nogueira? TikTok is the perfect platform to share your skills and talent with the world! In this article, we’ll provide some tips and tricks on how to go viral on TikTok as an MUA. Plus, we’ll also discuss ways to get more followers, properly use hashtags, and more.

Follow these tips and you’ll be well on your way to becoming a social media superstar!

Why Everyone Wants to Go Viral on TikTok

It’s not hard to see why so many makeup artists and other creatives flock to TikTok. On the platform, it’s easy to showcase your skills and connect with like-minded people. Plus, being featured on the “For You” page can mean a huge influx of followers and likes! As a result, your makeup career can go from a 0 to 100 in the blink of an eye!

How to go viral on TikTok as a makeup artist in-post image 1

Making Money on TikTok

There are also financial perks to making it big if you live in the following countries:

  • United States
  • United Kingdom
  • Germany
  • France
  • Italy
  • Spain

Tiktokers living in these countries qualify for what’s known as the “Creator Fund“. This fund pays qualifying creators every month based on how many views and interactions their videos receive. In order to qualify for the Creator Fund, you must meet the following criteria:

  • Be 18 or older
  • Have more than 10,000 followers
  • Have at least 100,000 views over the last 30 days

How Much Money Can You Make from the Creator Fund?

It depends on how popular you are. Generally speaking, the top 1% of Tiktokers (in terms of views and interactions) will receive a larger amount than those who have less followers and fewer views. That said, generally speaking, the average Tiktoker makes about $500 a month from the Creator Fund.

FUN FACT: Here’s what the 7 highest-earning TikTokers are making!

Other Ways To Make Money

But what about if you live in a country that doesn’t qualify for the Creator Fund? Are you SOL in terms of your earning potential?

Not at all! Just look at Canadian hairstylist and TikTok star, Kris Collins, as a prime example. She has over 47 million followers and has managed to to make quite a living off of her videos. She does this by working with brands and creating sponsored content.

This is because, on top of the Creator Fund, there are other ways you can leverage TikTok to earn an income…

1 – Sponsorships & Affiliate Links

Reaching a certain level of popularity on TikTok can open the doors to sponsored content opportunities. This involves having brands pay you to promote their products or services, either through video endorsements or affiliate links in your profile’s bio.

2 – Selling Your Own Products

Whether it’s makeup tutorials, digital downloads, classes, ebooks, etc., you can use TikTok to promote and sell your own products. This is a great way to leverage your following in order to build a sustainable income stream.

3 – Crowdfunding & Donations

You can also ask your followers for donations or crowdfund the creation of a project. All you need to do is create a campaign page on a platform like Patreon or GoFundMe and then share it with your followers on TikTok.

4 – Coaching Services

If you consider yourself an expert in makeup artistry, why not offer your services as a coach? You can use TikTok to promote the coaching services that you offer and monetize your skills. Furthermore, you can even take it a step further by using your TikTok platform to guide viewers to your business website and other social media pages!

5 – Live Events

Finally, you can use TikTok to promote live events that you are hosting. This could be anything from a meet and greet, product launch, or makeup tutorial session.

Who is The Best Makeup Artist on TikTok?

This is subjective, to be honest. But, if we had to pick one makeup artist that is really killing it on TikTok right now, then our vote would go to Charli D’Amelio. She has over 103 million followers and she even recently collaborated with Urban Decay for a special makeup collection!

Of course, there are plenty of other TikTokers of note, too. Literally any of the following MUAs could also easily contend for the top spot:

DID YOU KNOW: QC Makeup Academy is now on TikTok? It’s true! And we’d sure be grateful if you gave us a follow!

Beauty blogger woman filming daily make-up routine tutorial near camera on tripod. Influencer blonde girl live streaming cosmetics product review in home studio. Vlogger female comparing lipsticks., Viral tiktok makeup artist article.

How To Go Viral on TikTok as a Makeup Artist

Before we go any further, it’s important to remember that this isn’t a “for-sure” kind of guide… After all, if there was one clear way to go viral, literally everyone would be a macro-influencer! In reality, the best way to stand out and achieve success on TikTok is by being creative, consistent and patient.

(And, yes, sometimes a little luck does play its part, too!)

Rather, what we’re providing to you is a set of tips and advice that you can use as a makeup artist on TikTok in order to increase your chances of going viral. So, without further ado, let’s dive into it!

Step 1: Understand Your Audience

As with any social media platform, it’s important to understand who your target audience is. For instance, are you aiming for teenage girls, brides, young adults, or something else entirely? Knowing this will help you create content that resonates with them.

Step 2: Leverage Trends

TikTok LOVES trends! It’s the algorithm’s blood and bones! Chances are, if you want to go viral, you’ll need to incorporate trending topics or challenges into your videos. And the good news is that as a makeup artist, you already have access to plenty of creative ideas from which to draw inspiration.

Step 3: Quality Content Is Key

As always, it’s important to create content of high quality. This means investing in decent equipment and makeup. However, don’t forget that high-quality content doesn’t necessarily mean expensive! Even if you don’t have the budget to buy a fancy camera or pricey products, there are plenty of affordable options out there.

Step 4: Put Your Spin On It

It’s also important to remember that even if you are using trending topics, it’s important to put your own twist on the video. This is what will help you stand out from the crowd and potentially make your content go viral!

Step 5: Use Hashtags

Don’t forget to use hashtags in order to increase visibility! All you need to do is pick several relevant keywords associated with your content and add them to your post. This will help you reach a wider audience and increase the chances of going viral.

Relevant Hashtags

As a makeup artist on TikTok, it’s critical that you make use of hashtags that are relevant to your content. Here are some examples of trending makeup hashtags on TikTok:

  • #MakeupTutorial
  • #EyebrowTutorial
  • #ContourTutorial
  • #EyeshadowTutorial
  • #Beauty
  • #MakeupArtist
  • #MUA
  • #MakeupLover
  • #Skincare
  • #MakeupAddict
  • #HudaBeauty
  • #KBeauty
  • #BeautyHacks
  • #MakeUpLooks
  • #BeautyBlogger
  • #Cosmetics

Trending Hashtags

On the other hand, you may have also noticed a trend where people suddenly use seemingly random hashtags – but those hashtags have a TON of popularity. This happens when a popular challenge or topic is currently viral and people are jumping on the bandwagon!

Importantly, these hashtags may have little to nothing to do with the beauty world. All the same, it’s worth it to experiment with these and add them to your video. You never know… You may just be able to capitalize on the moment of high popularity and increase your chances of your video(s) going viral!

Step #6: Jump On Trending Sounds

Another key tip is to make sure you jump on the right trend sound. Just like tags and challenges, sounds tend to go viral quickly. As such, if you can incorporate a trending sound into your video, you may be able to capitalize on the surge of popularity while it’s still fresh!

Step #7: Duet and/or Stitch Videos

Duets and Stitch videos are a great way to increase your reach and engagement!

A duet is when you create a video alongside another person’s content (usually by standing on the left or right side of the frame) – this then shows up as “your version” of that video in your followers’ feeds.

On the other hand, a stitch is when you combine two videos from different people into one. This would mean that the original video would first play for a few seconds, before changing to your video. It’s like a double feature!

Firstly, these can be great for collaborations. Secondly, it’s also a great way for posting content that’s new to your followers (but still leverages the popularity of someone else’s content). Just make sure to add something of value to your Duets and Stitches. Otherwise, your followers may be put off by the constant reposting.

Step 8: Post Regularly and Consistently

Another critical way to go viral on TikTok is to post regularly and consistently. This will ensure your followers don’t forget about you. Plus, it keeps the algorithm happy and it increases the chances of making it onto the For You Page – which is essential for TikTok stardom.

If you need help posting on a consistent basis, you may want to consider using a social media scheduling tool like Hootsuite or Buffer. This will help you plan and manage your content efficiently!

Step 9: Share Everywhere

You should also make sure that you share your video everywhere – especially on other social media platforms. This will not only help you reach more people, but it can also help to strengthen your online presence and build relationships with an even wider audience!

Step #10: Use TikTok to Network

It’s also a good idea to use TikTok as an opportunity to network and collaborate with other makeup artists. This will help you build meaningful relationships and increase the reach of your content!

How?

You can do this by engaging with other people’s content, searching for influencers to work with, and even creating your own challenges or collaborations. Plus, when existing influencers learn about you, they may be inclined to give you a shout-out on their own videos, collaborate with you, and/or help you reach a wider audience!

Step #11: Make Sure Your Brand is Consistent

Finally, we need to talk about your brand. Basically, it’s important to make sure that your content is consistent with your brand image. This will ensure that you have a recognizable and memorable presence on TikTok.

So, when creating videos, make sure you stick to elements like:

  • The same filter (or no filter at all)
  • Similar angles and shot types
  • The same sound(s)/music(s) if you want to build an association between you and that sound
  • A signature intro/outro
  • Character recognition (if you create sketch content)
  • Consistent text/titles on your video thumbnails, etc.

By keeping your brand consistent, you not only build credibility and trust with your followers – you also make it easier for people to recognize you as a professional makeup artist!

PRO TIP: Need more help with your branding? This Beginner’s Guide breaks down everything you need to know!

How to go viral on TikTok as a makeup artist in-post image 3

How to Go Viral on TikTok Overnight

Going viral on TikTok is no easy feat! It requires a lot of work, dedication and patience. For this reason, we don’t recommend going into things with the expectation that you’ll hit stardom overnight. Yes, while it can happen, it’s not guaranteed – and it certainly won’t happen if you don’t put in the effort.

But if you stay consistent, keep experimenting with new ideas, and follow the tips we mentioned above, you’ll eventually start to see results. Just make sure to stick to your authentic self and enjoy the process – it’s all part of the journey!

How to Go Viral on TikTok with No Followers

This leads us to the next question: Can you legitimately go viral on TikTok if you have little to no followers?

The answer is YES!

While having a large following does certainly help, you don’t actually need to have a massive following in order to go viral. After all, even the biggest TikTokers all had to start somewhere. In fact, there have been plenty of people who went viral with a tiny following… Only to have their follower count BLOW UP as a result of their video going viral!

The key here is to focus on the quality of your content instead of the quantity of followers you have. If you can create something valuable and entertaining enough, it’ll eventually reach a large audience no matter what! So, just keep creating and don’t give up!

How To Get TikTok Followers

Now, what if one of your goals is to build a massive follower count?

In that case, the best thing you can do – again – is to stay consistent and make sure your content is engaging. That said, here are a few additional tips you can use to help grow your following:

  • Figure out what kind of content works for the platform
  • Optimize for TikTok’s algorithm
  • Engage with other users in order to get your content seen
  • Partner with influencers or brands
  • Post regularly and stick to a schedule
  • Experiment with new ideas/styles
  • Use hashtags and trends strategically

By following these tips, you should be able to start gaining TikTok followers in no time! Plus, don’t forget that growing your follower count is a long-term strategy and should never be rushed.

Frequently Asked Questions

Lastly, let’s wrap things up by addressing a few frequently asked questions about going viral on TikTok:

Q: How long does it take to go viral on TikTok?

A: It depends on a few factors, such as the quality of your content and how often you post. That said, it can take anywhere from a few days to several weeks or months before a video goes viral.

Q: Do you need expensive equipment to go viral?

A: Not necessarily. There are tons of viral TikTokers who use nothing more than their phone or a webcam to film themselves. While having fancy cameras and editing software certainly helps, the most important factor is creating content that resonates with your audience.

With that in mind, just remember that if you do start to go viral, you may want to invest in fancier equipment. After all, the quality of your videos should always reflect the level of success you’re aiming for!

Q: How often should you post on TikTok to go viral?

A: Unfortunately, there’s no one-size-fits-all answer here. The best thing to do is experiment and see what works for you. That said, it’s generally recommended to post at least once a day in order to maximize your chances of success.

Q: How do you track your progress on TikTok?

A: TikTok makes it easy to track your progress by providing analytics for each of your videos, such as how many views and likes you’ve received. Additionally, you can check out the “Discover” page which shows who’s following you, what kind of content they like, and other insights into their behavior.

Q: How many views does it take to go viral on TikTok?

A: Again, there’s no one-size-fits-all answer here. Generally speaking though, you should aim for at least a few thousand views on a video in order to have a chance of going viral. Keep in mind though, even if you don’t get that many views, it’s still possible to go viral. So, don’t let it discourage you!

Q: How many likes does it take on a video for it to go viral?

A: Here’s the thing – likes are important, but they aren’t the only factor that determines if a video goes viral or not. So, while having a lot of likes certainly helps, it’s not necessarily an indication that your video will become viral.

Q: How do you do a TikTok makeup video?

A: Doing a makeup video on TikTok is pretty straightforward. First, pick the makeup look you’d like to create and then make sure you have everything you need to do the look. Next, take a few clips of yourself doing your makeup and add any music or effects (if desired). Finally, post the video and make sure to use relevant hashtags in order to get your content seen.

If you need some pointers for editing your TikTok videos, here are some resources you’ll probably find useful:

Q: Does going viral on TikTok really work?

A: Absolutely! There are countless TikTokers who have gone from having zero followers to millions in the span of a few weeks or months just by creating a few viral videos. So, if you’re willing to put in the work and show patience, you can definitely go viral on TikTok.

Q: Will getting certified as a makeup artist help you go viral on TikTok?

A: Yes, it can definitely help! Having a certification in makeup artistry can show that you have expertise and knowledge in the topic. Additionally, having a certification can give you credibility, which can help to attract more followers on TikTok.

Think of it this way: if you don’t actually know what you’re talking about, you’re more likely to demonstrate poor form and/or teach improper techniques. In turn, if you happen to go viral, it could be for entirely the wrong reason… And we know you don’t want that!

To ensure that you don’t run into this problem, make sure that if you’re demonstrating a makeup look or giving advice, you have the necessary qualifications to do so. The best way to achieve this level of expertise? Take a makeup certification course, such as any of the self-paced, online ones offered at QC Makeup Academy!

Become a fully trained and internationally-certified MUA in as little as 2 short months! Check out QC Makeup Academy’s full list of online training programs and enroll today!

man showing makeup brush on social media live video feed with video camera. lifestyle and fashion concept. Viral TikTok makeup artist article.

Conclusion

Going viral on TikTok is achievable if you have the right strategies. From creating engaging and shareable content, to leveraging analytics and understanding your audience – having a plan in place will help increase your chances of success. Additionally, getting certified as a makeup artist can also help to attract more followers and showcase your expertise in the topic!

So, what are you waiting for? With some hard work and dedication, you can become the next viral makeup artist on TikTok!

Good luck!

Launch your dream career as a professional makeup artist in as little as 8 short weeks. Enroll with QC Makeup Academy today!

Skin conditions you'll see as a skincare consultant Feature Image

14 Skin Conditions You’ll See as a Skincare Consultant

By Career Advice, Education, Skincare No Comments

As a skincare consultant, you’ll be faced with a variety of skin conditions. It’s important to be familiar with each condition and know how to best help your clients deal with them. In this article, we’ll discuss 14 common skin conditions you’ll see as a skincare consultant. Plus, we’ll also provide information on what each condition is, and how you can help your clients manage it.

So, let’s get started, shall we?

What Is a Skincare Consultant?

You obviously know the answer to this question if you’re already a working professional. But if you’re considering a career in skincare consulting, you should first understand what the job entails.

A skincare consultant provides advice and guidance to clients on how to best care for their skin. Providing information on ingredients, treatments, and products that may be beneficial for a given skin type or condition are all examples of this.

Skin conditions you'll see as a skincare consultant in-post image 1

Skincare Consultant vs. Dermatologist

You must also understand where your job description ends and where a dermatologist‘s begins – because they are very different professions.

A skincare consultant is not a medical professional, whereas a dermatologist is. As a result, there are certain services you won’t be qualified to provide. For instance, you can’t:

  • Prescribe drugs, medicated ointments, and medicated creams
  • Diagnose skin diseases
  • Perform skin biopsies or other medical procedures

Rather, as a skincare consultant, you’ll provide guidance and advice on how to best care for one’s skin. Should you ever come across skin conditions that require medical treatments or prescriptions, advise your client to seek out a dermatologist for further evaluation and treatment.

As a skincare consultant, part of your job description will be knowing when your client’s concern can be handled by you… And when a referral to a dermatologist is in order!

Not yet a certified skincare consultant, but want to be? Become a skincare consultant in 5 easy steps!

What Are Skin Conditions?

Alright, you understand the roles and responsibilities of a skincare consultant. Now let’s talk about skin conditions! Skin conditions are diseases and disorders that affect the appearance or function of one’s skin. They can range from mild to severe in nature, with some being more easily treated than others.

What Can Cause Skin Conditions?

Skin conditions can be caused by a variety of factors, such as:

  • Genetics
  • Allergies
  • Environmental exposure
  • Poor skincare habits

Skin conditions can also develop due to underlying issues like hormonal imbalances or autoimmune diseases.

What Are The Most Common Skin Conditions?

There are a multitude of skin conditions out there, and here we’ll discuss 14 of the most common ones you’ll see as a skincare consultant. They include:

  1. Acne
  2. Sensitized Skin
  3. Rosacea
  4. Eczema
  5. Psoriasis
  6. Skin Cancer
  7. Vitiligo
  8. Cold Sores
  9. Hives
  10. Warts
  11. Shingles
  12. Perioral Dermatitis
  13. Folliculitis
  14. Keratosis Pilaris

14 Skin Conditions You’ll See as a Skincare Consultant

Let’s take a look at each one individually…

Skin Condition #1: Acne

Teen girl with acne problem squeezing pimple indoors. Skincare consultant skin conditions article.

What is Acne?

Acne (a.k.a. acne vulgaris) is a skin condition that is characterized by clogged pores and small, raised bumps on the face, neck, back, chest, and shoulders. It’s most common among adolescents. That said, it can occur in people of all ages, such as babies and the elderly.

What Causes Acne?

Acne can be caused by a variety of factors such as hormonal imbalances, stress, poor diet, genetics, and certain skincare products.

How To Spot Acne as a Skincare Consultant

Luckily, acne is relatively easy to spot as a skincare consultant. Look for small, raised bumps on the face and other areas of the body like the neck, back, chest, or shoulders. However, keep in mind that these may be painful to the touch and can even cause scarring if not treated properly. So, use a gentle (gloved) hand if touching your client’s skin!

How Can You Help Your Clients Manage Acne?

You can help your client manage their acne by first determining the underlying cause. From there, create a treatment plan that targets it. This could include recommending lifestyle changes (i.e. improving diet).

Topical treatments and/or medications may need to be implemented, should the acne be severe enough. Again, though, anything medicated should only be suggested to the client by a dermatologist.

Once you’ve identified the underlying cause, provide your clients with a skin care routine tailored to their needs. This should include using gentle cleansers, non-comedogenic moisturizers (if needed), and products that are specifically formulated for acne management.

Finally, don’t forget to remind your clients of the importance of not picking or popping their zits. This can lead to infection and further inflammation, so it’s best to leave it alone!

Will You Need To Refer Your Client To a Dermatologist?

For mild cases of acne, you should be able to help your client manage the condition with lifestyle changes, topical treatments, and skincare products. However, if the acne is severe or doesn’t seem to be responding to treatment, you may need to refer your client to a dermatologist for further evaluation and treatment.

Skin Condition #2: Sensitized Skin

Skin conditions you'll see as a skincare consultant in-post image 3

What is Sensitized Skin?

Sensitized skin – also known as irritant contact dermatitis – is a condition in which the skin becomes over-reactive to certain stimuli. In turn, this can lead to redness, inflammation, and discomfort.

What Causes Sensitized Skin?

This skin condition can be caused by a variety of factors such as:

  • Environmental stressors (i.e. pollution, wind)
  • Skincare products that irritate the skin
  • Underlying conditions like eczema or rosacea

How To Spot Sensitized Skin as a Skincare Consultant

Unfortunately, sensitized skin can be quite tricky to spot. Many people may not realize they have it until it’s triggered.

With that in mind, you can look for signs of redness or inflammation on your client’s face. This could indicate sensitized skin. Other symptoms may include stinging, burning, or tightness of the skin, too.

How Can You Help Your Clients Manage Sensitized Skin?

If your client has sensitized skin, then the goal is to identify and avoid the triggers that cause it. For example, you might discover after some investigating that they have an underlying condition, such as eczema or rosacea.

To combat sensitized skin, you might suggest that they avoid certain skincare products. Alternately, maybe you advise that they avoid environmental stressors (like pollution or wind).

When it comes to their skincare routine, your clients should look for gentle cleansers and moisturizers that are free of fragrance and other potential irritants. Also, opting for a more natural-based line of products may help reduce irritation as well!

Will You Need To Refer Your Client To a Dermatologist?

In most cases, you should be able to help your clients manage sensitized skin with lifestyle changes and the right skincare routine. However, you may should refer them to a dermatologist if their symptoms seem severe or don’t respond to treatment. From there, a dermatologist can then assess any underlying conditions that could be causing the sensitization and develop an appropriate treatment plan.

Skin Condition #3: Rosacea

Portrait of a young pretty Caucasian woman who frowns and shows reddened and inflamed cheeks. Beige background. Copy space. The concept of rosacea, healthcare and couperose. Skincare consultant skin conditions article.

What is Rosacea?

Erythematotelangiectatic rosacea (known simply as rosacea) is a chronic inflammatory skin condition. It’s often characterized by facial redness, bumps, and/or visible blood vessels. Rosacea can range from mild to severe, depending on the individual case.

What Causes Rosacea?

The exact cause of rosacea is unknown. However, it’s believed to be related to a combination of factors such as:

  • Genetics
  • Environmental triggers (like stress)
  • Certain lifestyle choices (like drinking alcohol)

How To Spot Rosacea as a Skincare Consultant

As with any skin condition, proper diagnosis should only come from a dermatologist. However, as a skincare consultant, you may want to look out for signs of persistent facial flushing or redness in your clients. Other signs may include visible blood vessels or bumps on the skin.

How Can You Help Your Clients Manage Rosacea?

When it comes to rosacea, the goal is to identify and avoid potential triggers. Moreover, you want to help your client maintain a gentle skincare routine that won’t aggravate their sensitive skin. As such, avoiding products that are fragranced, alcohol-based, or otherwise irritating is a must!

You should also suggest non-irritating moisturizers and cleansers that are specifically designed for sensitive skin. What’s more, remind your clients of the importance of wearing sunscreen every day. After all, UV exposure can worsen their condition!

PRO TIP: Not sure which ingredients your client’s skincare products NEED to have? Watch this webinar about the 5 best ingredients all skincare products should have!

Will You Need To Refer Your Client To a Dermatologist?

Typically, you can help your clients manage rosacea with lifestyle changes and the right skincare routine. However, you may need to refer them to a dermatologist if their symptoms seem severe or don’t respond to treatment. A dermatologist can then assess any underlying conditions that could be causing the rosacea and develop an appropriate treatment plan.

Skin Condition #4: Eczema

Skin conditions you'll see as a skincare consultant in-post image 5

What is Eczema?

Eczema (also known as atopic dermatitis) is a chronic inflammatory skin condition. This skin condition is characterized by itchy and dry patches of skin. It can range from mild to severe. Typically, eczema appears in areas where the body bends such as the elbows, knees, or wrists.

What Causes Eczema?

The exact cause of eczema is unknown. However, it’s believed to be related to:

  • Genetics
  • Environmental factors (like allergens)
  • Certain lifestyle choices (such as wearing tight clothing)

How To Spot Eczema as a Skincare Consultant

If your client suspects they have eczema, look out for signs of dry and itchy patches of skin. The appearance of cracked, scaly, or red skin can also be an indicator of this condition as well.

How Can You Help Your Clients Manage Eczema?

You want to help your client identify and avoid potential triggers, as well as maintain a gentle skincare routine that won’t aggravate their sensitive skin. Thus, you may suggest that they avoid products that are fragranced, alcohol-based, or otherwise irritating.

Furthermore, advise your client to look for non-irritating moisturizers and cleansers that are specifically designed for sensitive skin. They should also focus on calming their inflamed skin using products made with soothing ingredients. Colloidal oatmeal or aloe vera are two awesome examples!

Finally, make sure your client is keeping their skin properly hydrated and wearing sunscreen every day to protect against further irritation.

Will You Need To Refer Your Client To a Dermatologist?

Usually, you should be able to help your clients manage eczema with lifestyle changes and the right skincare routine. But if their symptoms seem severe or don’t respond to treatment, refer them to a dermatologist. They’ll be able to thoroughly assess any underlying conditions that could be causing the eczema and develop an appropriate treatment plan for your client.

Skin Condition #5: Psoriasis

CLOSE UP: Unrecognizable young woman suffering from autoimmune incurable dermatological skin disease called psoriasis. Large red, inflamed, flaky rash on elbows. Joints affected by psoriatic arthritis. Skincare consultant skin conditions article.

What is Psoriasis?

Psoriasis is a chronic skin condition that also goes by psoriasis vulgaris, chronic stationary psoriasis, and/or plaque-like psoriasis. This condition is characterized by thick, patchy, red or silvery scales on the skin. Typically, psoriasis appears on the elbows, knees, scalp, hands and feet – but it can occur anywhere on the body.

What Causes Psoriasis?

The exact cause of psoriasis is unknown. However, it’s believed to be related to genetics and certain triggers such as stress and injury to the skin (like sunburns).

How To Spot Psoriasis as a Skincare Consultant

You should look for signs of thick patches of inflamed skin that are covered with silvery-white scales. One thing to remember, though, is that psoriasis can be itchy and/or painful. So, if you need to touch your client’s skin for any reason, be sure to do so gently and sanitarily.

How Can You Help Your Clients Manage Psoriasis?

As we’ve mentioned previously, your goal is to identify and avoid potential triggers for your client. You also want to help your client maintain a gentle skincare routine that won’t aggravate their sensitive skin. Furthermore, remind your clients to keep their skin properly hydrated and wear sunscreen every day to protect against further irritation.

Will You Need To Refer Your Client To a Dermatologist?

For the most part, psoriasis can be managed with the right lifestyle changes and skincare routine. Meaning, you should be able to get the job done. Of course, if your client’s symptoms seem severe and/or they don’t respond to treatment, then you may need to refer them to a dermatologist.

Skin Condition #6: Skin Cancer

Skin conditions you'll see as a skincare consultant in-post image 7

What is Skin Cancer?

Skin cancer is an abnormal growth of skin cells. It can also form on areas of the body that haven’t been exposed to the sun, like the palms and underneath fingernails. Skin cancer can take several forms, including:

What Causes Skin Cancer?

Skin cancer is usually caused by overexposure to ultraviolet (UV) radiation from the sun. That said, it can also be caused by a combination of genetic and environmental factors, such as a family history of skin cancer.

How To Spot Skin Cancer as a Skincare Consultant

Skin cancer can present itself in a variety of ways. So, it’s important to know what you’re looking for when examining your client’s skin.

You’ll notice a bump or patch of abnormal skin (that’s typically discolored) if your client is dealing with basal cell and squamous cell carcinoma. Pay special attention if your client says that these areas are itchy and tender. On the other hand, with melanoma, you should look for a mole that appears asymmetrical. It’ll likely also have irregular borders and changes in color.

Of course, if you’re unsure about anything on your client’s skin, don’t hesitate to refer them to a dermatologist!

How Can You Help Your Clients Manage Skin Cancer?

Most importantly, your client should avoid overexposure to the sun. This includes:

  • Avoiding the sun during peak hours (from 10 am – 4 pm)
  • Wearing protective clothing
  • Using a broad-spectrum sunscreen with an SPF of 30 or higher

You should also advise them to check their skin regularly for any unusual changes, as well as to get regular skin exams from a dermatologist.

Will You Need To Refer Your Client To a Dermatologist?

Yes, your client will need to see a dermatologist right away if they suspect they have any type of skin cancer. In terms of the many skin conditions you’ll see as a skincare consultant, this one is arguably the most serious and dangerous. As such, it will require immediate medical attention.

Skin Problem #7: Vitiligo

Portrait of a smiling young african casual woman with vitiligo condition standing over green background looking at camera close up. Skin consultant skin conditions article.

What is Vitiligo?

Vitiligo is a skin disorder that causes depigmentation. This means that affected areas of the skin lose their color. Typically, vitiligo presents itself in patches of pale or white skin on various parts of the body, including the face, hands, arms and legs.

What Causes Vitiligo?

The exact cause of vitiligo is not known for certain. However, it’s thought to be an autoimmune disorder in which the body’s own immune system attacks its melanocytes. These are the cells responsible for producing pigment. Vitiligo can also potentially be caused by genetic factors or environmental triggers (like extreme sun exposure).

How To Spot Vitiligo as a Skincare Consultant

In terms of the different types of skin conditions you’ll see as a skincare consultant, vitiligo is usually quite easy to spot. It typically presents itself as patches of pale or white skin on various parts of the body, such as the face, hands, arms and legs.

How Can You Help Your Clients Manage Vitiligo?

At this time, there is no known cure for vitiligo. That said, there are a few things you can do to help your clients manage their symptoms. This includes helping them adapt their skincare routine with products that contain ingredients like copper peptides, vitamin C and niacinamide. Moreover, they may also benefit from light therapy treatments like laser therapy or phototherapy.

Will You Need To Refer Your Client To a Dermatologist?

Yes, you should refer your client to a dermatologist if they suspect they have vitiligo. This is because the only way to definitively diagnose it is through a physical exam by a medical professional. Furthermore, they may be able to provide additional treatments like steroids or topical immunomodulators that can help manage symptoms.

Skin Problem #8: Cold Sores

Skin conditions you'll see as a skincare consultant in-post image 9

What is a Cold Sore?

A cold sore, also known as a fever blister, is a contagious viral infection caused by the herpes simplex virus. Usually, it presents itself as an itchy or painful blister on the lips or around the mouth.

What Causes Cold Sores?

As we just mentioned, cold sores are caused by the herpes simplex virus (HSV). This virus can be spread through direct contact with an affected person, including kissing or sharing utensils and drinking glasses. Stress, hormone changes, and certain medical conditions can also trigger outbreaks of cold sores.

How To Spot Cold Sores as a Skincare Consultant

When examining your client’s skin for any potential skin conditions you’ll see as a skincare consultant, look out for any small fluid-filled blisters on their lips or around the mouth. These usually start as an itchy or painful spot before forming into visible blisters.

How Can You Help Your Clients Manage Cold Sores?

First, advise them to keep their affected area clean and dry. Second, they may benefit from using topical medications like antiviral creams or ointments. If your client experiences frequent outbreaks of cold sores, they may need to take oral antiviral medications prescribed by their doctor.

Will You Need To Refer Your Client To a Dermatologist?

If your client is experiencing significant pain or discomfort from their cold sores or if they suspect they have a serious underlying condition, you should absolutely refer them to a dermatologist for further evaluation and treatment.

Skin Problem #9: Hives

Close up image of skin texture suffering severe urticaria or hives or kaligata on back. Allergy symptoms. Skin consultant skin conditions article.

What are Hives?

Hives, also known as urticaria, are itchy and raised welts on the skin that can range in size and shape. They usually appear suddenly and can last for a few minutes up to several weeks.

What Causes Hives?

The exact cause of hives is often unknown, but they’re thought to be triggered by an allergic reaction or irritation from certain substances like pollen or food. Also, physical factors like extreme temperatures or stress can sometimes cause hives to flare up.

How To Spot Hives as a Skincare Consultant

When examining your client’s skin for any potential skin conditions you’ll see as a skincare consultant, look out for red, raised welts on the skin that are itchy or painful. These may range in size, shape and duration.

How Can You Help Your Clients Manage Hives?

You should first recommend that they use topical medications (like hydrocortisone cream) to reduce itching and swelling. Furthermore, your client should avoid any potential triggers, such as certain foods or extreme temperatures, if possible.

Will You Need To Refer Your Client To a Dermatologist?

Yes, if your client’s hives are severe and do not respond to over-the-counter treatments, you should refer them to a dermatologist for further evaluation and treatment. The doctor may prescribe stronger medications to help control their symptoms.

PRO TIP: Become a globally-certified International Skincare Consulting (ISCP) in as little as 2 short months with QC Makeup Academy’s self-paced, online Skincare Course!

Skin Problem #10: Warts

Skin conditions you'll see as a skincare consultant in-post image 11

What are Warts?

Warts are non-cancerous skin growths caused by the human papillomavirus (HPV). Common types of warts include:

  • Flat warts
  • Plantar warts
  • Genital warts

They can appear anywhere on the body, but they’re most common on the hands, feet and face.

What Causes Warts?

As previously mentioned, warts are caused by the HPV virus. The HPV virus can be caught in a number of ways, such as (but not limited to):

  • Direct contact with an affected person
  • Sharing items like towels, clothing, or razors
  • Coming into contact with surfaces that have been touched by an affected person

When it comes to skin conditions you’ll see as a skincare consultant, you should approach this particular condition with caution. The reason being, this virus is highly contagious and can spread through direct contact with an infected person or from contaminated surfaces.

How To Spot Warts as a Skincare Consultant

When examining your client’s skin, keep an eye out for small bumps that may have a rough texture and slightly raised surface. These usually develop on the fingers, toes, face, neck and hands.

How Can You Help Your Clients Manage Warts?

To help your clients manage their warts, you should advise them to keep the affected area clean and dry. They may benefit from topical medications like salicylic acid or cryotherapy. You should also let them know that they should avoid touching the wart, as this can spread it to other parts of their body or to other people.

Will You Need To Refer Your Client To a Dermatologist?

Yes, if your client’s warts do not respond to self-care measures or over-the-counter treatments, you should refer them to a dermatologist for further evaluation and treatment. The doctor may prescribe stronger medications to help control their symptoms.

Skin Problem #11: Shingles

Shingles on men herpes zoster. Skincare consultant skin conditions article.

What are Shingles?

Shingles, also known as herpes zoster, is an infection caused by the same virus that causes chickenpox. It can cause a painful rash on one side of the body, which typically appears in a band-like or belt-shaped pattern.

What Causes Shingles?

The exact cause of shingles is unknown, but it’s thought to be triggered by a weakened immune system or stress. It’s also worth noting that anyone who has had chickenpox in their lifetime may experience shingles, since the virus remains dormant in their body after they have recovered from chickenpox.

How To Spot Shingles as a Skincare Consultant

When examining your client’s skin for any skin conditions you’ll see as a skincare consultant, look out for a red rash or blisters on one side of the body. It may be accompanied by itching, tingling or burning pain before the rash appears.

How Can You Help Your Clients Manage Shingles?

To help your clients manage their shingles, you should advise them to keep the affected area clean and dry and use over-the-counter topical medications like calamine lotion to reduce itching. On top of this, they should get plenty of rest and eat nutrient-rich foods to help boost their immune system.

Will You Need To Refer Your Client To a Dermatologist?

Yes, if your client’s shingles do not respond to self-care measures or over-the-counter treatments, you should refer them to a dermatologist for further evaluation and treatment. The doctor may prescribe antiviral medications to help control their symptoms.

Skin Problem #12: Perioral Dermatitis

Skin conditions you'll see as a skincare consultant in-po0st image 13

What is Perioral Dermatitis?

Perioral dermatitis is a skin condition that causes red, scaly patches to appear around the mouth. It’s usually seen in women and can be triggered by using topical corticosteroids or other cosmetic products.

What Causes Perioral Dermatitis?

The exact cause of perioral dermatitis is unknown, but it’s thought to be caused by an imbalance of bacteria on the skin. Additionally, certain triggers like harsh skincare products or topical medications, may cause it as well.

How To Spot Perioral Dermatitis as a Skincare Consultant

When examining your client’s skin, look out for red patches or bumps around their mouth that may be accompanied by itching or burning sensation. It’s usually seen in combination with whiteheads and blackheads.

How Can You Help Your Clients Manage Perioral Dermatitis?

To help your clients manage their perioral dermatitis, you should advise them to avoid using harsh skincare products and topical medications. They can also benefit from switching to a milder cleanser and fragrance-free moisturizer. In addition, they should make sure they keep their skin hydrated by drinking plenty of water.

Will You Need To Refer Your Client To a Dermatologist?

Yes, if your client’s perioral dermatitis does not respond to self-care measures or over-the-counter treatments, you should refer them to a dermatologist for further evaluation and treatment. The doctor may prescribe topical antibiotics or steroid creams to help control their symptoms.

Skin Problem #13: Folliculitis

Folliculitis Inflammatory glands or inflammatory follicles. Skincare consultant skin conditions article.

What is Folliculitis?

Folliculitis is an infection of the hair follicles that can present as red bumps and pus-filled blisters. It’s typically seen on the face, scalp, chest and back.

What Causes Folliculitis?

While the exact cause of folliculitis is unknown, it’s believed to be caused by a bacterial or fungal infection. It can also be triggered by tight clothing that rubs against your skin or shaving with a blunt razor.

How To Spot Folliculitis as a Skincare Consultant

When examining your client’s skin for any skin conditions you’ll see as a skincare consultant, look out for clusters of red bumps or blisters that may be accompanied by itching, burning sensation or pus.

How Can You Help Your Clients Manage Folliculitis?

To help your clients manage their folliculitis, you should advise them to keep the affected area clean and dry and avoid hot showers or baths. They can also benefit from applying an over-the-counter cortisone cream to reduce inflammation. You should also advise them to try wearing loose fitting clothing, as well as opting for electric shavers when shaving.

Will You Need To Refer Your Client To a Dermatologist?

If your client’s folliculitis does not respond to self-care measures or over-the-counter treatments, then yes, you should refer them to a dermatologist for further evaluation and treatment. The doctor may prescribe topical or oral antibiotics or antifungal medications to help control their symptoms.

PRO TIP: Be your own boss and do what you love for a living by starting your very own skincare consulting business!

Skin Problem #14: Keratosis Pilaris

Skin conditions you'll see as a skincare consultant in-post image 15

What is Keratosis Pilaris?

Keratosis pilaris (sometimes called “chicken skin”) is a common skin condition that causes rough, bumpy patches on the upper arms, thighs and cheeks. The bumps are caused by excess build-up of keratin, which is a protein found in the skin.

What Causes Keratosis Pilaris?

The exact cause of keratosis pilaris is unknown, but it’s thought to be hereditary or due to a deficiency in certain vitamins or minerals. It can also be triggered by dry skin or excessive exposure to the sun.

How To Spot Keratosis Pilaris as a Skincare Consultant

When examining your client’s skin for any skin conditions you’ll see as a skincare consultant, look out for small, rough bumps on the upper arms, thighs and cheeks. They may be accompanied by itching or dryness.

How Can You Help Your Clients Manage Keratosis Pilaris?

To help your clients manage their keratosis pilaris, you should advise them to keep the affected areas moisturized with thick emollient creams. In addition, they should use gentle cleansers and avoid scrubbing or exfoliating the area too aggressively. Finally, they can benefit from taking daily supplements of vitamins A and C to boost skin health from within.

Will You Need To Refer Your Client To a Dermatologist?

If your client’s keratosis pilaris does not respond to self-care measures or over-the-counter treatments, then yes, you should refer them to a dermatologist for further evaluation and treatment. The doctor may prescribe topical retinoids or moisturizers to help control their symptoms.

Conclusion

Well, there you have it – 14 skin conditions you’ll see as a skincare consultant and how to handle each one. It’s important to be able to accurately identify and advise your clients on how best to manage their particular condition. If the case is more severe, then don’t hesitate to refer them to a dermatologist for further evaluation and treatment.

Got any questions or comments for us? We’re all ears, so leave them for us down below!

Thanks for reading!

Become a certified skincare consultant in as little as 8 short weeks by training online with QC Makeup Academy. Start your journey by enrolling today!

Running a makeup business Feature Image

Running a Makeup Business: Expectation vs. Reality

By Career Advice, Your Makeup Career No Comments

There’s no question that owning your own business is a dream for many professional makeup artists. But what is the reality of owning and running a makeup business? Is it all glitz and glamor – or are there some hidden truths that you need to know before taking the plunge? Today, we’ll explore the expectations vs. realities you may not have considered.

So, keep reading to learn everything about the reality of having your own makeup business!

What It’s Like To Run Your Own Makeup Artistry Business: Expectation vs. Reality

Alright, let’s dive right in! Here are 10 expectations vs. realities of running a makeup business that you need to know…

Running a makeup business in-post image 1

Expectation #1: You’ll Make Bank Right Off The Bat

Many people expect that they’ll make a ton of money right away when they start their own makeup business. As in, they’ll be raking in cash hand-over-fist and living the high life within a few short months.

Where does this myth come from?

Probably from all of the social media “gurus” out there who make it look like they’re swimming in dough. Similarly, celebrity MUAs who work with A-listers probably charge – and earn – a pretty penny. In turn, this can mislead the everyday makeup artist into thinking that they, too, will be making a killing right out of the gate.

HOWEVER, that’s not to say that you can’t eventually make a wicked income! Learn more about the average yearly salary for a makeup artist to get a better idea of the kind of figures YOU can earn!

Reality #1: It Might Take A While To Build Up Your Makeup Business (and In Turn, Your Profits)

In the real world, it will likely take time to build up a clientele and establish yourself as a reputable makeup artist. This means that in the beginning, you might not be bringing in as much money as you’d like.

And that’s okay! Remember, Rome wasn’t built in a day.

The same goes for building up a successful makeup business. It takes time, patience, and a whole lot of hard work. So, if you’re not making bank right away, don’t sweat it. Just keep hustling and eventually, the money will start rolling in.

Expectation #2: Starting a Makeup Business Can Be Done For Dirt Cheap

If you want to start your own makeup business, you might think that all you need is a few decent brushes, some good quality products, and voila – you’re in business! Understandably, this misconception is especially appealing to those who are just starting out and might not have a lot of disposable income.

Reality #2: Starting ANY Business Requires an Investment

While you might be able to get away with spending very little money when you first start out, it’s important to understand that starting ANY business requires some level of investment.

For example, in addition to brushes and products, you’ll also need things like:

  • A registered business name
  • A website
  • Business cards
  • Business insurance
  • Marketing materials, etc.

Plus, if you’re planning on working from a brick-and-mortar location, you’ll need to factor in the cost of rent, utilities, etc.

Furthermore, you’ll want to plan ahead to make sure your finances are covered for the first year of operation. This is especially important because it can take time to build up a clientele when starting any business… And that means your income might be a bit erratic in the beginning. Therefore, during the first year of business, there may be times where you’ll need to dip into your own pockets in order to stay afloat.

To give you a tangible number that you can work with, Small Biz Trends states that in the United States, the average startup + first-year costs for small businesses tends to range between $30,000 and $40,000 USD. Of course, it’s 100% possible to spend less (or more) than this – it all depends on the specific business being started and where it’s located.

What we’re basically saying is, while you might be able to get by with spending very little in the beginning, understand that there will be some costs associated with starting your own makeup business!

Expectation #3: You Can Work Anywhere, Anytime

As a makeup artist, you might think that you can work whenever, wherever, since you get to determine your schedule. After all, you’re your own boss, right? So, if you feel like working at 3 am on a Tuesday, who’s going to stop you?

Reality #3: Running a Makeup Business Means Making Certain Sacrifices

While it’s true that being your own boss has its perks, it’s important to understand that running a business also requires making certain sacrifices.

For example, as much as you might want to, you can’t always work whenever, wherever. Yes, having the ability to create your own schedule is amazing… But ultimately, you’ll need to be available when your clients are available. And that might mean working during weekends, evenings, and even holidays!

Furthermore, you’ll need to be willing to travel to wherever your clients are. So, if you’re not up for putting in the extra miles (literally), then being a makeup artist might not be the right career for you.

Young woman sitting at dressing table and looking in the mirror while makeup artist applying concealer with cosmetic brush. Female stylist doing professional makeup for client in beauty salon. Makeup article.

Expectation #4: You Can Quit Your Day Job Immediately

This is a big one. A lot of people think that once they decide to start their own makeup business, they can immediately quit their day job and pursue their passion full-time.

Reality #4: You Should Probably Keep Your Day Job – At Least for a Little While

Look, we totally get it. Choosing to pursue your passion and start your very own business is a huge accomplishment – and it’s super exciting! So, it’s understandable that you might get caught up in all of the hype and want to quit your day job immediately in order to pursue your new career.

But here’s the thing: as much as we’d all love to be able to do that, it’s just not realistic for most people. In fact, unless you have a ton of savings that you can fall back on, quitting your day job without any sort of backup plan is actually a pretty big gamble. This is because, in reality, the average small business takes approximately 2-3 years to become profitable.

So, while we know it might be tempting, our best advice would be to keep your day job (at least in the beginning) and work on building up your makeup business on the side. This way, you’ll have a steady income to fall back on in case things don’t go as planned.

Expectation #5: Running a Makeup Business is All Fun and Games

Another common misconception about running a makeup business is that it’s all fun and games.

After all, what could be better than getting paid to do something that you love? Not to mention, the world of makeup artistry is not like, say, the world of finance. Rather, it’s creative, it’s fun, and it’s pretty darn glamorous.

So, understandably, this might lead you to believe that running a makeup business is all rainbows and butterflies…

Reality #5: Running a Makeup Business is a Lot of Hard Work

Make no mistake about it – running a successful makeup business IS creative, fun, and glamorous. But at the same time, it also takes a lot of hard work.

Yes, you’ll get to play with makeup all day long and make people look and feel their best… But you’ll also have to deal with the not-so-fun parts of running a business, like advertising, marketing, accounting, and (if you have employees) HR.

So, if you’re thinking about starting your own makeup business, just know that it’s not all fun and games. Running a successful business requires dedication, discipline, and a whole lot of hard work. But if you’re up for the challenge, then we say go for it!

Expectation #6: You Can Operate a Successful Business WITHOUT Proper Makeup Training

Interesting fact that you may not have known: in many places around the world, makeup artistry (unlike cosmetology and esthetics) is NOT actually a regulated field. Meaning, there are no formal education or training requirements in order to become a makeup artist.

So, obviously this means that you have the green light to launch a career – and makeup business – without first getting some professional training under your belt… Right?

WRONG.

Reality #6: Professional Training is a MUST If You Want Your Makeup Business to Succeed

Just because there are no formal education or training requirements in place for makeup artists, doesn’t mean that you can operate a successful business without proper makeup training. In fact, we would argue that the opposite is true.

If you want people to take your business seriously (and trust us, they will), then it’s important that you have some sort of professional makeup training. This could be anything from a certification program (such as the self-paced, online certification courses offered at QC Makeup Academy) to a full-blown degree from a cosmetology school.

Think of it this way: if YOU were the client, and you had to choose between an MUA without any formal training and an MUA with a professional certification or degree, who would you choose? We’re guessing the answer is pretty obvious.

So, if you’re serious about starting your own makeup business, then our best advice would be to get some proper training first. Trust us, it’ll be worth it in the long run!

Check out the full list of online makeup certification courses currently offered at QC Makeup Academy!

Running a makeup business in-post image 3

Expectation #7: Running a Makeup Business is Expensive

This is another common misconception about running a makeup business – that it’s expensive. While we can’t pinpoint for sure where this myth stemmed from, our best guess is due to the fact that, in order to run a successful business, you need to make sure you have the proper tools and equipment.

And let’s face it, quality makeup products aren’t exactly cheap!

Reality #7: You Can Easily Operate Your Makeup Business On a Budget

While it’s true that you running a makeup business requires having the proper tools and equipment, this doesn’t necessarily mean that it’s expensive. In fact, depending on how you choose to operate your business, it can actually be quite inexpensive.

For example, if you decide to work freelance and visit your clients at their homes or chosen location, then you won’t need to worry about the costs associated with renting out a studio space.

Or, if you choose to specialize in a certain area of makeup (like weddings or special effects), then you can invest in the specific tools and products required for that area, rather than buying a bunch of expensive, general-use products.

So, as you can see, there are a number of ways to operate your makeup business on a budget. It’s all about being strategic with your finances and only investing in what you need.

Tips For Creating a Realistic Budget for Your Business

Now that we’ve busted this common myth about starting a makeup business, it’s time to give you some practical tips for creating a realistic budget for your own business. Here are a few of our best suggestions:

  • First and foremost, it’s important that you have a clear understanding of your financial situation. This means knowing how much money you have to work with and what your regular expenses are. Once you have a good handle on this, you can start to think about how much you can realistically afford to spend on your business.
  • Next, make a list of all the essential items you need for your business. This could include things like makeup products, brushes, a website, business cards, etc. Once you have your list, start to research the prices of these items so that you can get a better idea of what they will cost.
  • Finally, remember that your business budget is not set in stone. As your business grows and changes, so too will your budget. So, don’t be afraid to revisit it on a regular basis to make sure that it’s still accurate and realistic.

PRO TIP: Discover how you can better budget yourself as a makeup artist with the help of these 4 industry secrets!

Expectation #8: You’ll Need To Undercharge Your Makeup Services At First

This is another myth that we hear all the time from aspiring MUAs: that they’ll need to undercharge their services at first in order to get their business off the ground. Now, we can absolutely understand why this logic appears to make sense. After all, if you want to attract customers, then you need to offer them a good deal, right?

Furthermore, especially if no one knows who you are yet, you might think that it’s going to be hard to charge top dollar for your services.

Reality #8: You Should NEVER Undercharge Your Makeup Services

As a general rule, you should never undercharge your services in order to attract customers. In fact, if you do this, you could actually end up doing more harm than good.

Why? Well, first of all, it sends the wrong message to your potential clients. If you charge too little for your services, they might think that your work is also low quality. After all, why would someone pay top dollar for something that’s not worth it?

Secondly, undercharging for your services can also make it difficult to run a profitable business. After all, if you’re not making enough money to cover your costs, then how are you supposed to stay in business?

But thirdly, and arguably most importantly, undercharging your makeup services is doing YOU a major disservice! As a professional makeup artist, you have invested time, money, and energy into perfecting your craft (especially if you’ve gotten professionally trained and certified). So, why sell yourself short by not charging what you’re truly worth?

So, What’s The Solution?

The key is to find a happy medium between charging too little and too much for your services. Do some research on what other makeup artists in your area are charging and use that information to help you determine a fair price for your own services. And, of course, don’t forget to factor in your own unique experience and skills when setting your prices.

Need help figuring out what you should be charging clients for your makeup services? Here are 4 types of makeup artistry services and what you should be charging for them!

Expectation #9: You Can (and Should) Be Doing Everything Yourself

Running your own business can be a lot of work. But as a result, it’s easy to fall into the trap of thinking that you have to do everything yourself in order to be successful. After all, it’s your makeup business. So, shouldn’t you be the one in charge of everything?

Reality #9: This Will Probably Lead To Burnout

One of the biggest mistakes that new makeup artists make is trying to do everything themselves. And while it’s admirable to want to be in control of every aspect of your business, the truth is that this is simply not realistic (or sustainable) in the long run.

Think about it this way: as a makeup artist, your time is better spent doing what you’re good at (i.e. doing makeup). So, why waste your time on tasks that someone else could easily do for you (like social media, marketing, bookkeeping, etc.)?

The key is to learn how to delegate and outsource the tasks that you’re not good at or that you don’t have time for. This way, you can focus your energy on growing your business and doing what you love!

But What If You Don’t Have The Budget For This?

If you’re just starting out, then it’s understandable if you don’t have the budget to hire someone to help you with your business.

In this case, the key is to be strategic about the tasks that you delegate. Start with the tasks that are taking up the most time or that are causing you the most stress. Then, once you have more money coming in, you can gradually start outsourcing more and more tasks.

Expectation #10: Getting Your Startup Running Will Take Up Most Of Your Time

Depending on how you view this particular myth, this may actually be a reason why you’re hesitant to start your own makeup business. After all, if it’s going to take over and dominate your entire life, then is this endeavor really worth it?

This can be an especially damaging misconception if you happen to have a full-time job, are a student, and/or are a busy parent.

Reality #10: This Depends On Your Definition Of “Most Of Your Time”

Yes, the truth is that starting your own makeup business will probably take up more of your time than you originally anticipated. But this doesn’t mean that it has to take over your whole life!

As we mentioned earlier, one of the best things about being your own boss is that you get to set your own hours. So, if you only have a limited amount of time to work on your business, then you can simply schedule your work around the other important things in your life.

Of course, this doesn’t mean that you won’t have to make some sacrifices in the beginning. But if you’re strategic about how you use your time, then you should be able to get your business up and running without completely sacrificing your personal life.

After all, keeping a healthy work-life balance is one of the most important things you can do for your business (and for yourself)!

Young girl with a make-up artist in the studio in front of a mirror. Makeup article.

Final Thoughts

Starting your own makeup business can be a very rewarding experience. But it’s important to go into it with your eyes wide open. Be prepared for the challenges that you’ll face and don’t be afraid to ask for help when you need it.

If you can do these things, then you’ll be well on your way to success!

Got any questions or comments for us? We’d love to hear from you! Leave us a comment down below or send us an email at [email protected].

Thanks for reading! 💕

Pros and cons of airbrush makeup Feature Image

The Top 10 Pros and Cons of Airbrush Makeup

By Airbrush Makeup, Education No Comments

There’s a lot of buzz around airbrush makeup – and for good reason! In fact, many would argue that it offers a lot of benefits over traditional makeup. But like everything, it also has its downsides… Which is why today, we’re going to break down the top 10 pros and cons of airbrush makeup for you.

Plus, we’ll also answer some FAQs about airbrush makeup. This way, you can decide once and for all whether it’s the right kind of makeup for YOU… As well as, if you’re a professional in the beauty industry, whether it’s a service your business should be offering clients!

Pro Tip: Are you already a working MUA? If so, here are 4 key reasons why you should consider adding airbrush makeup to your repertoire!

10 Pros and Cons of Airbrush Makeup

Pro #1: Airbrush makeup is flawless!

There’s no denying that one of the biggest benefits of airbrush makeup is that it looks incredibly natural and flawless. In fact, many people say it offers a much more “airbrushed” look than traditional foundation – hence the name! This is because it’s applied using an airbrush gun, which gives you a much more precise finish.

What’s more, airbrush makeup is also great at hiding imperfections like scars, blemishes, and under-eye circles. And because it’s applied in very fine layers, it doesn’t settle into fine lines and wrinkles like some traditional foundations can.

Con #1: The initial cost can be more expensive.

When first starting out, airbrush makeup can be a bit of an investment. Not only do you need to buy the airbrush machine itself, but you also need to purchase special airbrush foundation. On average, the amount it’ll cost you to get a good-quality airbrush machine, foundation, and other necessary products is around $200-$300.

HOWEVER…

While the initial investment for airbrush makeup might be a bit higher than traditional foundation, it actually works out to be cheaper in the long run. This is because a little goes a LONG way with airbrush makeup. Essentially, you only need a few drops of foundation to cover your entire face.

Plus, if you take care of your airbrush machine, it can last for years and years!

Pro #2: Airbrush makeup lasts all day long!

Another great thing about airbrush makeup is that it’s incredibly long-wearing. In fact, when applied correctly, it can last for up to 24 hours! This is thanks to the fact that it’s applied in very fine layers – meaning there’s less chance of it rubbing off or transferring onto clothing.

What’s more, airbrush makeup is also waterproof. So, if you’re planning on hitting the beach or pool this summer, it’s a great option to help ensure your makeup stays put. Similarly, if you’re a professional MUA, offering long-lasting makeup applications will be a major selling point for clients such as brides.

Con #2: It can be difficult to find products that match your skin tone.

While there are now more airbrush foundation shades available on the market than ever before, it can still be tricky to find the perfect match for your skin tone. This is because, unlike traditional foundation, airbrush makeup is applied in very fine layers. As a result, any mismatched shades will be much more noticeable.

So, if you’re thinking of trying out airbrush makeup, make sure to take your time in finding a foundation shade that matches your skin tone perfectly. Once you’ve found the right shade, though, you’ll be good to go!

What If You Can’t Find Your Shade?

Now, it’s also worth mentioning that sometimes, you simply won’t be able to find a product that already comes in a shade closest to your skin tone. In a situation like this, it’ll be up to you to mix and match different shades until you create the perfect custom color.

Doing this properly can be a bit difficult… Unless you have the proper training! Especially if you are (or want to be) a professional makeup artist, this is just one of many reasons we strongly recommend taking a proper airbrush course.

Fun Fact: With QC Makeup Academy‘s self-paced, online Airbrush Makeup Workshop, you’ll learn everything you need to know to professionally apply airbrush makeup to your face – as well as clients’ faces – in as little as 2-6 months! Plus, as part of your program, we’ll provide you with your very own airbrush makeup kit at no extra cost!

Pros and cons of airbrush makeup in-post image 1

Pro #3: Airbrush makeup is good for your skin!

One of the best things about airbrush makeup is that it’s actually good for your skin. This is thanks to the fact that it’s applied in very fine layers, as we mentioned before. As a result, this helps to reduce clogged pores.

Not to mention, airbrush makeup also contains fewer chemicals than traditional foundation. So, if you’re someone with sensitive skin, it’s a great option to help ensure your skin stays healthy and free of irritation.

Con #3: Applying airbrush makeup takes time to master.

One downside of airbrush makeup is that it can take some time to master. This is because, unlike traditional foundation, you need to be very careful when applying it. If you’re not careful, you could end up with an uneven finish – or worse, a makeup disaster!

So, if you’re thinking of trying out airbrush makeup, make sure you’re prepared to take your time in learning how to apply it properly. Fortunately, though, once you get the hang of it, applying airbrush makeup will be a breeze!

Pro #4: Airbrush makeup is very versatile!

Another great thing about airbrush makeup is that it’s incredibly versatile. Not only can you use it to achieve a natural look, but you can also use it to create more dramatic looks – such as smoky eyes or contoured cheekbones.

Moreover, airbrush makeup isn’t just for everyday looks or bridal applications. Rather, it can also be used for special effects makeup – which is great if you’re a makeup artist interested in working in theatre, film, and/or television.

So, whether you’re a beginner just starting out with makeup, or a professional MUA looking to add another skill to your repertoire, airbrush makeup is definitely a great option for you!

Con #4: It can be dangerous if you don’t know proper airbrush makeup etiquette and safety.

Now, although airbrush makeup is definitely a great option for both beginners and professionals alike, it’s important to note that it can be dangerous if you don’t know proper safety procedures.

This is because, when used improperly, airbrush makeup can actually cause physical injury – such as conjunctivitis (pink eye) or even blindness.

So, if you’re thinking of using airbrush makeup, it’s important to make sure you’re aware of proper safety procedures. Fortunately, though, as long as you take the necessary precautions, you’ll be able to use airbrush makeup without any problems!

Pro Tip: Learn how to apply airbrush makeup safely with the help of these 7 tips!

Pro #5: There are different airbrush makeup bases to choose from!

When it comes to airbrush makeup, there are actually 4 main bases you can choose from:

  1. Water-based
  2. Silicone-based
  3. Alcohol-based
  4. Mineral-based

Water-Based Airbrush Makeup

Water-based airbrush makeup is the most popular type of base. This is because it’s the most user-friendly, and it’s also the least likely to cause irritation.

Silicone-Based Airbrush Makeup

Silicone-based airbrush makeup is another popular option. This is because it provides a smooth, long-lasting finish. However, it is worth noting that silicone-based airbrush makeup can be a bit more difficult to apply than water-based makeup. This is because it tends to dry out more quickly, so you need to work quickly when applying it.

Alcohol-Based Airbrush Makeup

Next, there’s alcohol-based airbrush makeup. This type of makeup is great for those who want a quick, easy way to apply their makeup, since it dries almost instantly. In the same breath, however, it’s important to note that alcohol-based makeup can be very drying for the skin. As such, it’s not a good option for those with dry or sensitive skin.

Mineral-Based Airbrush Makeup

Lastly, there’s mineral-based airbrush makeup. This type of makeup is ideal for those who want a natural look, since it contains no synthetic ingredients. However, it is worth noting that mineral-based airbrush makeup can be a bit more difficult to apply than other types of bases. This is because it tends to be thicker, so you need to be careful when applying it or else it’ll look cakey.

Con #5: It’s tough to re-blend airbrush makeup once it’s been applied.

Another downside of airbrush makeup is that it can be tough to re-blend once it’s been applied. This is because the makeup dries quickly – meaning, you have to work quickly when applying it.

Moreover, airbrush makeup can also be difficult to build up. So, if you’re looking for a full-coverage look but don’t have the time to patiently layer up the application, airbrush makeup might not be the best option for you.

How To Re-Blend Airbrush Makeup

If you do find yourself needing to re-blend airbrush makeup, there are a few things you can do. First, try using a setting spray. This will help to re-hydrate the makeup and make it easier to blend.

Another option is to use a beauty blender or sponge. This will help to absorb any excess makeup and help blend it out more evenly.

Pro Tip: You can also use a setting spray to help extend the wear time of your airbrush makeup after it’s been applied to your liking!

Fashionable portrait of a girl model with hand airbrush. Fashion, glamour accessories, evening makeup. Freedom spring bright style, nude shoulders. Airbrush makeup article.

Pro #6: Airbrush makeup can help you apply makeup on more people in less time!

This one is especially beneficial if you’re a bridal makeup artist or an MUA working on set. For jobs like this, there will be time crunches to abide by… And airbrush makeup can help you adhere to these time limits while still providing your clients with a flawless finish!

So, why is airbrush makeup capable of allowing you to apply makeup so much faster?

Well, for one, airbrush makeup is incredibly lightweight. This means that you don’t have to worry about layering on too much product, which can save a lot of time.

Another reason why airbrush makeup is so quick to apply is because it’s very buildable. So, if you need to achieve a full-coverage look, you can do so without having to go through the process of meticulously layering on product.

Lastly, airbrush makeup is also great for those who want to apply a sheer, natural-looking finish. This is because you can simply add a light layer of foundation and be done – no need to spend time applying concealer, powder, blush, etc.

Con #6: There’s a higher chance of the look being flakey.

When it comes to airbrush makeup, one of the biggest downfalls is that there’s a higher chance of the look coming out flakey. This is because airbrush makeup dries quickly – meaning, if you don’t work quickly enough or you apply too much product, the makeup can start to flake off.

However, there are a few easy steps you can take to avoid this:

  • Make sure to start with a clean, exfoliated face. This will help to create a smooth canvas for your makeup.
  • Next, apply a hydrating primer. This will help to keep your skin from drying out and will create a barrier between your skin and the airbrush makeup.
  • Finally, make sure to apply the airbrush makeup in thin, even layers. It’s better to build up the coverage than to cake on too much product at once.

Pro #7: Airbrush makeup is especially great on oily skin!

If you have an oily skin type, then you know the struggle of trying to find a foundation that won’t slide off your face by midday. But, thankfully, airbrush makeup can help to combat this issue!

This is because airbrush makeup is water-resistant and oil-free. So, even if your skin starts to get a bit shiny throughout the day, your makeup will still look just as good as it did when you first applied it.

Pro Tip: Do YOU have oily skin, or simply want to better understand how to work with clients who have this skin type? Then make sure to watch our informative webinar, The Power of Skincare: Dealing with Oily Skin, hosted by celebrity MUA and skincare expert, Nathan Johnson!

Con #7: That said, airbrush makeup isn’t a magical eraser for scars or active breakouts.

While airbrush makeup can do wonders for those with oily skin, it’s important to remember that it’s not a magical eraser for scars or active breakouts. Yes, one of the biggest perks of airbrush makeup is that it can give you that photoshopped, flawless-looking finish…

But, at the end of the day, it’s still makeup. So, if you or your clients have any scars or blemishes that you’re trying to cover up, it’s important to use a concealer beforehand. And even then, just make sure that the expectations for what the airbrush makeup can do are realistic.

Chances are, while airbrush makeup can help to camouflage scars and blemishes, it won’t completely make them disappear.

Pro #8: Airbrush makeup is perfect for editorial makeup and photoshoots!

If you’re a professional makeup artist, then chances are you’ve done your fair share of editorial shoots and photoshoots. At the very least, you’ve taken part in some in order to build up your professional portfolio.

Either way, you know just how important it is to have a long-lasting, photo-ready makeup look. And thankfully, airbrush makeup is perfect for just this!

This is because, as we talked about before, airbrush makeup is water-resistant and oil-free. So, even if you’re shooting in hot and humid conditions, or if your clients are sweating under the lights, their makeup will still look amazing.

Pro Tip: Need help building your professional makeup portfolio? Learn everything you need to know in as little as 8 weeks with the help of QC Makeup Academy’s self-paced, online Portfolio Development Workshop!

Con #8: Airbrush makeup can be more expensive to re-stock than traditional makeup.

Earlier, we discussed the initial cost of airbrush makeup. And while it may be a bit more expensive to purchase an airbrush machine and compressor, once you have these items, they should last you for years to come.

The only time you’ll need to spend more money is when it comes time to re-stock your makeup supply. And unfortunately, airbrush makeup can be a bit more expensive than traditional makeup.

So, if you’re on a budget, or if you’re just starting out in your professional makeup career, it might be best to stick with traditional makeup for now. Once you’ve built up your clientele and have a bit more financial wiggle room, then you can experiment with airbrush makeup.

Pros and cons of airbrush makeup in-post image 3

Pro #9: Airbrush makeup can be used for way more than just foundation!

One of the best things about airbrush makeup is that it’s not just limited to foundation. In fact, there are a ton of different products that can be used with an airbrush machine!

This includes things like:

  • Blush
  • Bronzer
  • Eyeshadow
  • Lip color
  • Highlighter
  • Contour
  • SFX stenciling
  • Body/face art
  • And more!

So, if you’re looking for a way to mix things up and add some variety to your makeup routine, then definitely consider investing in an airbrush machine.

Con #9: You’ll need to clean your airbrush machine regularly.

Another downside to airbrush makeup is that you’ll need to clean your airbrush machine regularly. Depending on how often you use it, you might need to clean it after each use. Or, if you only use it occasionally, you might be able to get away with cleaning it once a week.

Either way, cleaning an airbrush machine is pretty simple and only takes a few minutes. But, it’s still something that you’ll need to factor into your makeup routine.

How To Clean Your Airbrush Machine

If you’re not sure how to clean your equipment, simply follow these 6 steps:

  1. Empty any remaining makeup from the cup.
  2. Run water through the airbrush machine to flush out any leftover makeup.
  3. Fill the cup with warm water and a few drops of airbrush cleaner.
  4. Run the machine for a few seconds to allow the cleaner to circulate.
  5. Empty the cup and rinse with warm water.
  6. Repeat steps 5-7 until the water runs clear.

Pro #10: If you’re a professional MUA, airbrush makeup will make you more money!

As a professional makeup artist, your ultimate goal is to make your clients happy and to make as much money as possible. And luckily, airbrush makeup is a great way to do both!

This is because most people are willing to spend a bit more money on their makeup if they know it will last all day (or night) long. So, if you offer airbrush makeup services, you can charge a bit more than you would for traditional makeup services.

Not to mention, once you’ve mastered the art of airbrush makeup, you’ll be able to complete makeup applications much faster than with traditional methods. This means you can take on more clients and make even more money!

Pro Tip: Learn more about why it’s in a professional MUA’s best interest to get trained in airbrush makeup!

Con #10: Airbrush makeup is not easy to apply if you’re a beginner.

If you’re new to airbrush makeup, it’s definitely not going to be easy for you to apply – at least, not at first. This is because airbrush makeup is applied with a machine, which can be difficult to maneuver if you’re not used to it. Moreover, airbrush makeup is also very buildable, so it’s easy to go overboard and end up with a cakey, unnatural-looking finish.

So, if you’re thinking about trying airbrush makeup for the first time, we recommend doing your research beforehand. It’d also be worth it to practice your techniques on yourself a few times before applying them onto others.

Furthermore, as we briefly discussed earlier, we also recommend looking into some sort of professional airbrush training – particularly if you want to offer this type of service to clients.

FAQs About Airbrush Makeup

Q: Does airbrush makeup last longer than traditional makeup?

A: Yes, airbrush makeup does tend to last longer than traditional makeup. This is because it’s applied with a machine, which provides a more even and consistent finish. Plus, airbrush makeup is also waterproof and sweat-resistant, so it’s ideal for special occasions or long days/nights.

Q: Is airbrush makeup better for your skin than traditional makeup?

A: Yes, airbrush makeup is actually much better for your skin than traditional makeup. This is because it’s applied with a machine, which allows for a more even and consistent finish. Plus,  as we’ve already mentioned, airbrush makeup is also waterproof and sweat-resistant. This means it won’t clog your pores or cause breakouts.

Q: Is airbrush makeup better in general than traditional makeup?

There’s no real “yes” or “no” answer to this question, because it depends on who you ask. Some people prefer airbrush makeup because it lasts longer and provides a more even finish. Others prefer traditional makeup because they find it easier to apply and remove.

At the end of the day, it really comes down to personal preference. If you’re thinking about trying airbrush makeup for the first time, we recommend doing your research beforehand to see whether it’s a good fit for you or not.

Q: What are the benefits of airbrush makeup services for a professional MUA?

A: As we’ve already mentioned, airbrush makeup is a great way to make more money as a professional makeup artist. This is because most people are willing to spend a bit more money on their makeup if they know it will last all day (or night) long. So, if you offer airbrush makeup services, you can charge a bit more than you would for traditional makeup services.

Not to mention, once you’ve mastered the art of airbrush makeup, you’ll be able to complete makeup applications much faster than with traditional methods. This means you can take on more clients and make even more money.

Other benefits of offering airbrush makeup services to clients include (but aren’t limited to):

  • Offering a popular niche service that not many other makeup artists are offering
  • Being able to create a more flawless finish
  • Building a great portfolio
  • Standing out from your competitors
  • The capability of working in various areas of the beauty industry (e.g. weddings, movies, theatre, film, live events, editorial makeup, photoshoots, etc.)

Q: Are there any disadvantages of airbrush makeup services as a professional MUA?

You may be wondering, “Are there any reasons I might not want to offer airbrush makeup services as a professional MUA?”

Well, the answer to that question is, yes, there can be a few disadvantages (if you see them that way).

The first one is that you’ll need to invest in an airbrush machine and compressor, which can be quite expensive. If you’re just starting out as a makeup artist, this may not be the best investment for you.

Another disadvantage of airbrush makeup is that it can take some time to master the technique. This means you’ll likely need to practice on yourself (and/or friends and family members) a few times before you’re able to provide this type of service to clients.

Of course, as we mentioned earlier, you could always look into getting professional airbrush makeup training to speed up the learning process.

So, those are a few things to keep in mind if you’re thinking about offering airbrush makeup services as a professional MUA. Just remember that, at the end of the day, it’s really up to you whether or not this is something you want to do.

Portrait of a young woman who is posing covered with blue paint in the studio on a black background. girl's hands around the face and painted blue. Airbrush makeup article.

Q: What are some of the most popular airbrush makeup brands?

A: Some of the most popular airbrush makeup brands include Dinair, TEMPTU, Marc Harvey Beauty Cosmetics, and Iwata. These brands offer high-quality products that will help you create a flawless finish.

Of course, there are other airbrush makeup brands out there, so be sure to do your research before making a purchase. This way, you can find the brand that’s right for you and your needs!

Did You Know: As a student of QC Makeup Academy’s Airbrush Makeup Workshop, you’re automatically eligible for a 15% industry-level discount with TEMPTU? It’s true! And if you’re a graduate of this program, that discount increases to a 30% artisan discount!

Q: Is airbrush makeup good for mature skin?

A: Yes, airbrush makeup is actually a great option for mature skin! This is because it can help to create a smooth, even finish that will diminish the appearance of fine lines and wrinkles.

Q: Is airbrush makeup hard to remove?

A: No, airbrush makeup is actually quite easy to remove! All you need is a gentle cleanser and some warm water.

Q: Do celebrities use airbrush makeup?

A: Yes, many celebrities use airbrush makeup! In fact, it’s become quite popular in Hollywood over the last few years. Some popular celebrities you’ve likely seen wearing airbrush makeup include Kim Kardashian, Jennifer Lopez, and Beyonce.

Q: Can you use airbrush makeup daily?

A: Yes, you can use airbrush makeup daily! However, it’s important to make sure you’re using a gentle, alcohol-free formula that won’t dry out your skin.

Q: Is airbrush makeup worth the investment?

A: If you wear makeup regularly, then airbrush makeup is definitely worth the investment! Not only will it save you time, but it will also give you a more flawless finish.

Furthermore, if you’re a professional MUA (or you’re thinking of becoming one), offering airbrush makeup services is a great way to set yourself apart from your competitors. And while the commitment will require an initial investment, it’ll be well worth it in the long run when you make back that money (and then some)!

Conclusion

So, there you have it! Those are the top 10 pros and top 10 cons of airbrush makeup. As you can see, there are some great benefits to using this type of makeup. However, there are also a few things to keep in mind if you’re thinking about offering airbrush makeup services as a professional MUA. Just remember that, at the end of the day, it’s really up to you whether or not this is something you want to do.

Do you have any questions about airbrush makeup? Leave a comment below and we’ll be sure to answer them!

Thanks for reading! 😘

Hiring a makeup artist Feature Image

Hiring a Makeup Artist: Everything You Need To Know

By From the Experts, Makeup Tips and Tricks No Comments

Is hiring a makeup artist worth it?

Well, picture this… You’re all dolled up for your friend’s wedding, and as you take a step back to admire your handiwork in the mirror, you realize that something doesn’t look quite right. Your eyes are puffy, your lipstick is smudged, and your blush is streaky.

Uh oh!

It’s time for a wardrobe change – but not before you put on some concealer to cover up those dark circles!

If this sounds like a familiar story, then you know firsthand how important it is to have a good makeup artist on-hand. In this article, we’ll explore everything you need to know about hiring a makeup artist – from the benefits they offer to the key information you should gather before booking with anyone.

So, let’s jump in!

First Thing’s First: What Is a Makeup Artist?

A makeup artist is a professional who uses their creative talents to apply cosmetics and enhance an individual’s appearance. They have the ability to completely transform a person’s look with the stroke of a brush, and they often work in the fashion, film, television, and theater industries.

Makeup artists typically use a wide range of products, including:

  • Foundation
  • Powder
  • Concealer
  • Eye shadow
  • Eyeliner
  • Mascara
  • Lipstick
  • Lip gloss
  • Fake eyelashes
  • And more!

What’s more, they may also use special-effect makeup to create certain looks or bruises.

What Does a Makeup Artist Do?

In terms of job duties and responsibilities, makeup artists typically:

  • Meet with clients to discuss their specific needs and wants
  • Create a custom makeup look that meets the client’s individual needs
  • Apply the makeup using a variety of techniques
  • Touch-up the makeup throughout the day or evening as needed
  • Remove the makeup at the end of the event or shoot

Furthermore, many MUAs work as freelancers and/or run their own business. As such, they are also responsible for:

Pro Tip: Learn even more about the job description of a professional makeup artist!

Hiring a Makeup Artist: Know The Different Types

There are six main types of makeup artists:

  1. Beauty makeup artists
  2. Theatrical and performance makeup artists
  3. Airbrush makeup artists
  4. Makeup artists for TV and film
  5. Special FX makeup artists
  6. Celebrity makeup artists

Let’s take a closer look at each one, shall we?

Hiring a makeup artist in-post image 1

Beauty Makeup Artists

Beauty makeup artists typically work in the cosmetics industry. They may be employed by a cosmetics company, department store, or salon. Alternately, they may freelance and/or run their own business. Either way, their job is to apply makeup. They may also teach people how to properly use cosmetics as well.

Bridal makeup artists are a particularly popular type of beauty makeup artist. As the name suggests, they specialize in doing makeup for brides (as well as, potentially, bridesmaids and family members) on their big day.

Interested in professional beauty makeup? Check out QC Makeup Academy‘s self-paced, online Master Makeup Artistry Course and discover how YOU can become a trained Master International Makeup Professional (MIMP) in as little as 8 short weeks!

Theatrical and Performance Makeup Artists

Theatrical and performance makeup artists are responsible for applying makeup to actors, dancers, and other performers. They often work in live theater or film and television productions.

Airbrush Makeup Artists

Airbrush makeup artists use an airbrush gun to apply a thin layer of makeup. This type of makeup is often used in weddings, proms, and other special events. It can also be used in the film and television industry.

Interested in airbrush makeup? QC Makeup Academy also offers a self-paced, online Airbrush Makeup Workshop, too. We’ll even provide you with your very own airbrush kit as part of the course – absolutely free!

Makeup Artists for TV and Film

Speaking of the film and television industry, makeup artists who work in this field are responsible for creating makeup looks for actors, actresses, and other on-screen talent. This may include special effects makeup as well.

Special FX Makeup Artists

And then we have special FX MUAs. These professionals are responsible for creating realistic (or even unreal!) effects using makeup. This might include wounds, bruises, scars, aging, etc. Special FX makeup artists often work in the film and television industry as well.

Interested in special effects makeup? You guessed it – you can also get professionally trained and certified in this niche with QC Makeup Academy! Check out our self-paced, online Special FX Makeup Course to see how you can become an International Special FX Makeup Professional (ISMP) in just 2 months!

Celebrity Makeup Artists

Last but not least, we have celebrity makeup artists. As the name suggests, these professionals work with celebrities to help them create red carpet-ready looks. They may also work with models, athletes, and other high-profile individuals.

Should YOU Hire a Makeup Artist?

There are countless scenarios in which hiring a makeup artist can help save the day! For instance, maybe you’re getting married and want to look your absolute best for the big day. Or, perhaps you’ve been invited to a gala or black-tie event and need some help creating a glamorous look.

Other times, you might just need a little pick-me-up after a long week. Hiring a makeup artist for a makeup lesson can teach you techniques to help you feel more confident in your everyday makeup routine.

Additionally, if you have a big job interview or presentation coming up, having your makeup professionally done can help boost your confidence – not to mention make the right impression on your potential employer or client.

In short, there are lots of reasons why someone might seek out the services of a makeup artist. And there’s no shame in it! Hiring a professional to help you look and feel your best is a smart investment.

Benefits of Hiring a Makeup Artist

There are many benefits of hiring a makeup artist, whether you’re getting ready for a special event or you just want to feel more confident in your everyday makeup routine.

For one, a professional makeup artist can help you create a look that’s tailored specifically for you. They’ll take into account your unique features, skin type, and personal style to create a look that flatters you and makes you feel your best.

Additionally, makeup artists have access to the latest products, trends, and techniques. They know which products work best for different skin types and can help you find the right foundation, concealer, eyeshadow, etc. to suit your needs.

And lastly, a makeup artist can save you time and hassle. They’ll do all the hard work for you so that you can sit back and relax while they transform you into a glam goddess!

Makeup artist working on young diva before filming.

How Much Do Makeup Artists Cost?

Now that we’ve discussed some of the reasons why you might want to hire a makeup artist, let’s talk about how much it might cost.

The average cost of hiring a makeup artist varies depending on a number of factors, including:

  • Their location
  • Their experience of the makeup artist
  • The length of time needed
  • The type(s) of service(s) you’re requesting

Generally speaking, you can expect to pay anywhere from $50-$200+ for professional makeup services. According to Thumbtack, for example, the current national average cost for an MUA in the United States is between $120 and $170 USD.

However, it’s important to keep in mind that you usually get what you pay for.

If you’re looking for a top-notch makeup artist to help you create a stunning look for your wedding day, you can expect to pay on the higher end of the spectrum. However, if you just need a little help with your everyday makeup routine, you may be able to find someone who charges on the lower end.

It’s also worth noting that many makeup artists offer discounts for groups, so if you’re getting your makeup done with a friend or family member, you may be able to save some money!

What’s Included In The Cost?

When hiring a makeup artist, you’re not simply paying for them to apply makeup in a one-and-done situation. Instead, you’re paying for their time, expertise, and access to high-quality products.

Typically, the cost of hiring a makeup artist includes:

  • A consultation: This is where you’ll discuss your desired look, skin type, etc. with the makeup artist. They’ll use this information to create a custom look for you.
  • A makeup trial: This is an optional service, but it’s a good idea if you’re hiring a makeup artist for your wedding day or another major event. During a trial run, the makeup artist will do your makeup exactly as they would on the day of the event. That way, you can see how you like the finished product and make any necessary adjustments.
  • The actual makeup application: This is the time when the magic happens! The makeup artist will use their skills and expertise to transform you into a glam queen.
  • A touch-up: Once the initial makeup application is complete, the makeup artist will usually do a quick touch-up to ensure that everything looks perfect.

What You Should Know Hiring a Makeup Artist: Key Questions To Ask

Before The Consultation

If you’re thinking about hiring a makeup artist, there are a few key questions you should ask before making your decision and scheduling a consultation. These include:

  • “How professional is their website?” A professional website is a good indication that the makeup artist is serious about their work and takes pride in their business. It also shows that they’re willing to invest in their career.
  • “What is their education and/or experience?” It’s important to hire a makeup artist who has plenty of experience. If they also have some sort of professional training/certification, this is also a great indication that this MUA is the real deal… And will be worth your time and money!
  • “What are their rates?” As we mentioned before, the average cost of hiring a makeup artist ranges from $50-$200+. However, it’s important to get an idea of the MUA’s specific rates before booking anything. That way, there are no surprises later on.
  • “What’s their portfolio like?” Seeing a makeup artist’s previous work is critical! After all, this will give you a good idea of their style and whether or not they’re a good fit for you.
  • “Do they currently have any discounts?” Many makeup artists offer discounts for groups, so if you’re getting your makeup done with a friend or family member, you may be able to save some money.
  • “Are they on social media?” Social media is a great way to see what kind of work a makeup artist does on a day-to-day basis. It’s also a good way to get an idea of their personality and see if you’ll be a good fit.
  • “What do their reviews say?” Checking out online reviews is always a good idea before hiring any type of professional. That way, you can see what other people’s experiences have been like and get an idea of what to expect.

During The Consultation

Once you’ve found a makeup artist whose work you like and who you feel you can trust, it’s time to schedule a consultation. This is where you’ll discuss your desired look, skin type, etc. with the makeup artist. They’ll use this information to create a custom look for you.

Some things you should ask during the consultation include:

  • “Do you offer trials?” As we discussed earlier, trials are a great way to see how the makeup artist’s work will look on you in person. Not all makeup artists offer trials, but it’s worth asking if they do.
  • “What’s included in your rates?” When hiring a makeup artist, you’re not just paying for them to apply makeup. You’re also paying for their time, travel expenses, etc. So, it’s important to know what’s included in their rates.
  • “What products do you use?” Make sure to ask about the products the makeup artist uses. That way, you can avoid any potential allergies or skin reactions.
  • “Are you available on the day and time that I’ll need you?” This is critical! Make sure to ask about the makeup artist’s availability before booking anything.
  • “Can you do my makeup on site?” If you’re getting your makeup done for a special event, you’ll want to make sure that the makeup artist can do your makeup on site. Otherwise, you’ll have to travel to them, which can be inconvenient.
  • “What is your cancellation policy?” Life happens, and sometimes things come up that we can’t control. So, it’s important to know the makeup artist’s cancellation policy in case you need to cancel or reschedule.
  • “Can I take a look at your contract?” Always, always, always read over the contract before signing anything! This will help you avoid any misunderstandings or surprises later on.
  • “Do you have insurance?” Hiring a makeup artist who is insured is always a good idea. That way, if anything goes wrong, you’ll be covered. If you discover that the MUA does not have any insurance, this should be considered a red flag.
  • “What makeup look would you suggest for me?” Although you may come prepared with some inspiration/reference photos, it’s always a good idea to get the makeup artist’s professional opinion. After all, they’re the experts!
  • “Do you have any questions for me?” This is an important one! Make sure to ask if the makeup artist has any questions for you. This will help them understand your vision and create a look that you love. And if they don’t have any questions for you, just know that that’s a bad sign.

Fun Fact: Here are 6 questions that most makeup artists will ask you during the consultation!

Hiring a makeup artist in-post image 3

How To Pick a Makeup Artist: Breaking Down The Process

Now that you know what to ask and what to look for, it’s time to start the process of finding a makeup artist. Here’s how to do it:

1. Know what you need!

The first step in finding a makeup artist is knowing what you need. Are you looking for someone to do your makeup for your wedding? Or do you just need a makeup lesson? Once you know what you need, you can start the process of finding a makeup artist who can provide that service.

2. Set a budget!

Before you start reaching out to makeup artists, it’s important to set a budget. Makeup artists typically charge by the hour, so you’ll need to know how much you’re willing to spend. That way, you can avoid any sticker shock later on.

3. Do your research!

Use Google, social media, etc. to find makeup artists in your area. Once you’ve found a few MUAs that you like, check out their websites and social media pages to get a better idea of their work.

4. Make a list of your top 3-5 choices!

After you’ve done your research, it’s time to make a list of your top 3-5 choices. Once you have your list, you can start reaching out to the makeup artists to set up consultations.

5. Set up the consultations!

This is where you’ll get to meet the makeup artists in person and see their work up close. During the consultation, be sure to ask all of the questions that we listed above. And when you’re done, you should have a good idea of which makeup artist is the right fit for you.

How To Pick a Makeup Artist: Red Flags To Avoid

Now that you know how to find a makeup artist, it’s time to talk about some red flags to avoid. Here are a few things to watch out for:

  • Makeup artists who are underinsured or uninsured. As we mentioned earlier, it’s always a good idea to hire a makeup artist who is insured. That way, if anything goes wrong, you’ll be covered.
  • Makeup artists who refuse to sign a contract. A contract is important because it protects both you and the makeup artist. So, if a makeup artist refuses to sign a contract, that’s a major red flag because it shows that they’re not professional.
  • Makeup artists who are late to the consultation. This is just unprofessional and shows a lack of respect for your time.
  • Makeup artists who are inexperienced or untrained. Hiring an inexperienced and/or untrained makeup artist is definitely a gamble. And while you may get lucky, it’s probably not worth the risk.
  • Makeup artists who have little to no online presence. In today’s day and age, it’s important for businesses to have an online presence. So, if a makeup artist doesn’t have a legitimate website or social media page, that’s a major red flag!
  • Makeup artists who have more bad reviews than good ones. When you’re looking at reviews, it’s important to take the bad with the good. But if a makeup artist has more bad reviews than good ones, that’s definitely something to be aware of.
  • Makeup artists who are self-taught through YouTube videos. Watching YouTube videos does not make someone a professional makeup artist – FULL STOP! Hiring a self-taught makeup artist is a huge risk because they likely have no formal training. Instead, they’ve only learned the style of “social media makeup”, rather than actually learning the core techniques that’ll allow them to do ANY style of makeup.

Pro Tip: Here’s why YouTube tutorials are NOT the same as professional makeup training!

So, Is Hiring a Makeup Artist Worth It?

Now that we’ve gone over everything you need to know about hiring a makeup artist, it’s time to answer the big question: is hiring a makeup artist worth it?

The short answer is: yes, hiring a makeup artist is definitely worth it! Here’s why:

  • A professional makeup artist has the experience and training to do your makeup exactly the way you want it!
  • Professional makeup artists will save you time and hassle!
  • A professional makeup artist comes with a kit full of high-quality products – products that you likely don’t have access to!
  • Professional makeup artists can give you advice on what colors and styles will look best on you!
  • Hiring a makeup artist is a great way to pamper yourself and feel your best on a special day!
beautiful woman makeup artist painting brows for client in beauty salon. makeup for model, applying paint on eyebrows

How To Become a Makeup Artist Yourself

If by now, you’re thinking to yourself, “Hey, that sounds like an awesome career… I want to do that!” – then great news, because you can ABSOLUTELY make this happen.

What’s more, with the help of QC Makeup Academy, you can make it happen in as little as 2 short months!

With QC’s self-paced, online makeup certification training, you’ll gain all the skills you need to take the beauty industry by storm – all while learning right from the comfort of home, on your preferred schedule!

Starting from the date you first enroll, you’ll be given two full years to finish your program. However, since there are no deadlines or due dates, you get to choose how much or how little of those two years you’ll actually need. For reference, many of our grads found that they could complete their training and earn their internationally-recognized certification in approx. 2-6 months… All by dedicating a mere 1-2 hours of their week to their studies!

If this sounds like the path for you, then make sure you check out our full list of wildly popular online makeup and beauty courses!

Wrapping It Up

We hope this article has helped to give you a better understanding of what’s involved in hiring a makeup artist, as well as whether or not it’s worth it for you.

Remember, if you’re thinking of becoming a professional makeup artist yourself, then QC Makeup Academy can help make your dream a reality! With our world-renowned, online makeup courses, you’ll be able to study right from home and graduate in as little as 2-6 months!

Have any questions? Feel free to reach out in the comments below and we’ll answer them as best we can. Alternatively, our Support Team is available 7 days a week (between 9am and 5pm EST) and are always happy to chat. Don’t hesitate to contact them by email, phone, or live chat.

Thanks for reading! 💕

Become a working, successful makeup artist by starting your training with QC Makeup Academy today!