Are you a professional makeup artist and want to improve your portfolio? Have you been hired to do editorial makeup and you want to make sure you deliver the best possible results? Or maybe you’re a makeup lover who simply wants to improve your makeup photography skills for your Instagram feed?
If you answered YES to any of these questions, we’ve got some great news for you! Makeup photography doesn’t have to be complicated. In this article, we’ll go over 18 secrets that will help you take your makeup photos from mediocre to magazine-worthy.
So, let’s get started!
Makeup plays an an important role in in photography, as it helps enhance your features and create a certain look. Furthermore, makeup also makes it easier for photographers to capture colors, tones, and textures in the images they take.
In the world of professional makeup artistry, makeup is especially important in editorial work. In a nutshell, editorial photoshoots are all about creating a specific look or atmosphere. Usually, the purpose is to sell some sort of product, tell a story, or portray a concept. Makeup is the key to helping achieve this vision!
You’ll also find that makeup photography is of major importance when it comes to building your professional portfolio. After all, as a makeup artist, your portfolio is essentially your resume! It’s what potential employers look at to determine if you have the skillset they’re looking for. As such, knowing how to apply makeup for the camera is a must.
Now, let’s say you’re not a professional MUA. Perhaps you simply want to take your social media content to the next level. Well, makeup is just as important here, too. It helps you look your best and creates a more polished image!

18 Secrets to Makeup Photography Success
Okay, let’s not waste anymore time! Here are 18 tips to help you achieve the perfect makeup look for photography…
But WAIT! Before we reveal these 18 secrets, make sure you know HOW to build a professional makeup artistry portfolio first!
Secret #1: Prep the skin with moisturizer and primer!
Make sure your (or your client’s) skin is well-hydrated and prepped first before applying makeup. This will help ensure that the products you use stay put and look their best all day long!
Secret #2: Know how to color correct!
Color correcting is basically using a specific product to cancel out any unwanted tones in your skin. Make sure you have a good understanding of how to color correct before doing makeup for photography. Otherwise, you’ll end up with an uneven and inconsistent look.
Pro Tip: Become a color correcting master with the help of this educational webinar – hosted by QC Makeup Academy executive instructor and professional MUA, Nathan Johnson!
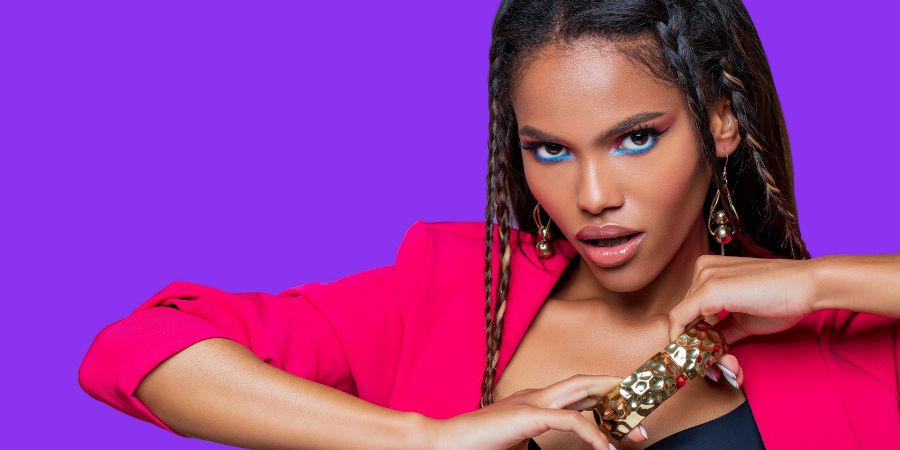
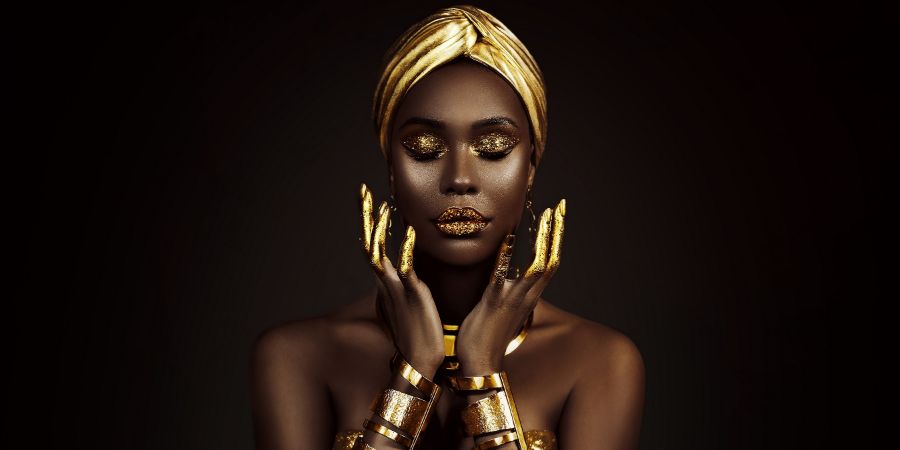
Secret #3: Use bold colors that’ll pop on camera!
When it comes to makeup photography, bold colors are always best! So, make sure you use products that’ll show up clearly and will stand out in photos.
Secret #4: Ditch the cakey foundation!
Cakey foundation looks unnatural and unflattering in photos. For this reason, it’s important to avoid this look! Instead, make sure you use a lightweight foundation that’ll provide a sheer and polished finish.
Secret #5: Focus on the eyes!
The eyes are the most important feature in makeup photography because they’re the “windows to the soul”. So, make sure you focus on creating a dramatic and beautiful eye look that’ll make an impact in photos. You can achieve this by:
- Swiping on some colorful eyeshadow;
- Applying a dramatic cat eye;
- Doing a sharp, crisp wing;
- Applying false lashes;
- Choosing colors that enhance the eye color;
- And more!
Pro Tip: Need help perfecting your smokey eye? This step-by-step video tutorial by QC Makeup Academy grad, Devyn Gregorio, will show you everything you need to know!
Secret #6: Make sure the lips don’t go unnoticed!
Just because you’re focusing on the eyes doesn’t mean you should overlook the lips. Make sure to create a luscious and full-looking pout with the help of lip liner, lipstick, and/or gloss!
Secret #7: Go with matte products!
Shimmery and sparkly products can be distracting in photos. Furthermore, they can also cause unwanted shine. Instead, make sure you opt for matte or subtle sheen products instead.
By doing this, you’ll be able to create a more subtle and polished look!
Secret #8: Use powder so skin doesn’t look shiny!
While we’re on the subject, applying a translucent setting powder on the face is also essential for keeping skin from getting shiny or greasy. So, make sure you lightly dust this over your (or your client’s) face – either before or after taking photos.
Secret #9: The fashion should match the makeup (and vice versa)!
If you’re choosing your or your client’s wardrobe, make sure to choose an outfit that’ll match the makeup look. This means making sure the colors, styles, and textures don’t clash with each other! And if someone else has picked out the wardrobe, make sure to adjust the makeup accordingly.
Either way, creating a cohesive look is key for achieving the perfect makeup photography look!
Interested in a career as a Fashion Styling Consultant? Become trained and certified in as little as 8 weeks with QC Makeup Academy’s self-paced, online Fashion Styling Course!
Secret #10: Choose colors that compliment the skin tone (and undertones)!
The colors you use in makeup photography can make or break the final look. Thus, we strongly recommend choosing colors that are flattering and will highlight the best features of the person you’re working with. Make sure to take their skin into consideration before you choose colors – as this will help create a more balanced and harmonious look.
For example, all people’s skin tones fall into any of these categories:
- Cool (blue undertone)
- Warm (yellow/golden undertone)
- Neutral (a balance of cool and warm undertones)
Once you know the undertones, you can then choose colors that’ll enhance them!
Secret #11: Don’t be afraid of natural skin texture!
No amount of makeup in the world can completely erase skin texture – and that’s just a fact. Personally, when I see a model who has no pores, I immediately think “Photoshop”… And Photoshop doesn’t sell me on anything other than Photoshop.
So, when applying makeup for photography, as it’s important to keep some of the natural skin texture still visible. Of course, this doesn’t mean you should leave your or your client’s skin looking dull and dry. It simply means that you shouldn’t cake on the makeup.
Make sure to use the right products and techniques to create a glowing, healthy complexion without losing the skin’s natural texture. Remember: having texture on our skin is part of being human. There’s absolutely nothing wrong with it!
Secret #12: Make sure to use a setting spray!
Setting spray is essential for keeping your makeup in place and ensuring it still looks fresh after hours of shooting. We recommend using a product that’s specifically designed for photography (such as any of these), as this will give you the best results.
Secret #13: Know how to do a variety of looks!
You’ve probably noticed that so far, we’ve put a lot of emphasis on the bolder, more dramatic side of makeup photography. That being said, you should also be aware of the importance of subtler looks as well. Not only does your professional portfolio need variety; if you’re limited to one or two styles, you won’t be able to book as many photoshoot jobs!
With that in mind, you should learn how to do a variety of looks, such as:
- Everyday makeup;
- Soft glam makeup;
- Bridal/wedding makeup;
- SFX makeup;
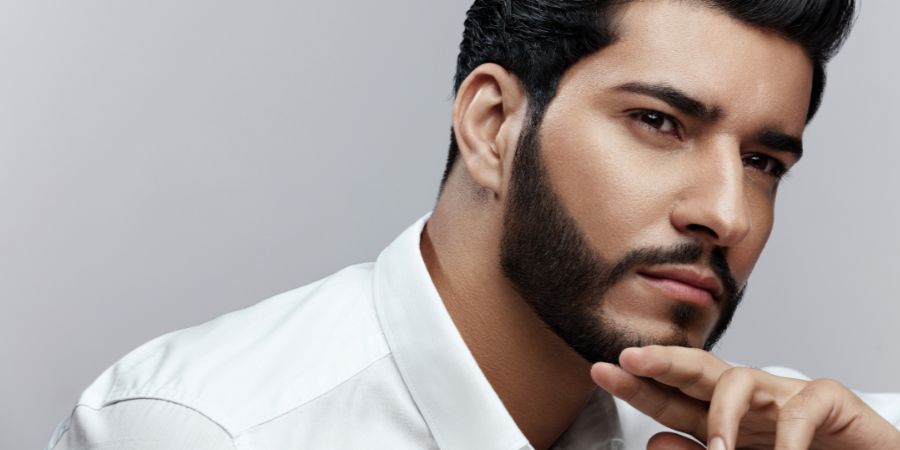
- Makeup for men;
- Makeup for mature skin;
- Global beauty makeup, etc.
Pro Tip: QC Makeup Academy’s self-paced, online courses cover ALL of these styles of makeup (and SO much more)! Plus, you’ll earn a legitimate, globally-recognized certification AND learn how to start/run your own MUA business… All in as little as 12 short weeks!
Secret #14: Do touch-ups throughout the photoshoot!
No matter how perfect the makeup looks at first, it’s bound to need a few touch-ups here and there. When you forget to re-apply powder or blend eyeshadow, the makeup will begin to look patchy and cake-like. So, make sure you have a few key products on hand to help you out when needed.
How to Retouch Makeup for Photography
If you or your client/model needs their makeup retouched during the photoshoot, you’ll need to do two things:
- Make sure your makeup is still intact (i.e., powder, eyeshadow, blush, etc.);
- And make sure your skin is still matte and not shiny or greasy.
To do this, use a setting spray to re-set the makeup and blot any excess oil with a tissue or blotting paper.
Secret #15: Lighting is literally everything!
We can’t stress this one enough! Makeup photography is all about playing around with light and making sure it’s hitting the face in the most beautiful and flattering way possible. Make sure to experiment with different lighting techniques, as this will help you create a more dynamic look!
Makeup Photography Lighting
Here are the different types of lighting you can work with, and the pros and cons of each:
Natural Lighting
This is widely considered the most flattering type of light, as it comes from the sun and is softer on the skin. However, you’ll need to plan your photoshoots around certain times of day (which may be difficult to do!)
Studio Lighting
This is often used in professional photography studios, and provides a more direct/intense light. It’s trickier to work with, as you’ll have to experiment a lot until you find the right balance.
Moreover, the type of light bulbs used will also affect the final result. For example, “warm” bulbs are often used to create softer and more subtle lighting, while “cool” bulbs can be used to create a sharper look.
Ring Lighting
Used predominantly by social media influencers and beauty gurus, this is a diffused light that’s perfect for makeup photography. Why? Because it provides an even and soft illumination on the face.
While ring lighting isn’t common for professional shoots, it’s definitely recommend for those wanting to take pics of themselves for social media. If you’re interested in trying out ring lighting for your personal photos, make sure to play around with the strength of the light, too. This will help you create different effects.
Secret #16: Take multiple shots from different angles!
If you’re working with a professional photographer, we guarantee this is something they’ll do. But if you’re the one snapping the pics, you’ll need to remember to take multiple shots from different angles. This will ensure that you get the best results!
For starters, this will allow you to capture more detail (such as different eyeshadow colors). And secondly, it allows for better creativity, too, as you can choose the most flattering angles of your – or your client’s – face.

Secret #17: NEVER take selfies!
This one’s important, whether you’re taking pics of makeup for your portfolio or simply adding content to your social media pages. Now, it’s first key to point out that when we say “selfie”, we don’t simply mean a photo you take of yourself. If done correctly, a self-portrait is absolutely fine!
What we’re referring to is when people take photos of themselves with their arms stretched out and the camera in an unflattering position. A better solution is to buy a tripod, position it at the correct angle, and place your phone or camera on it. This will provide much more professional-looking results.
Remember: makeup photography should be taken seriously. If you have trouble taking the perfect pic of yourself, try getting help from a professional photographer or even an assistant.
Secret #18: Know what makes for a high-quality shot!
Finally, it’s important to understand what makes for a high-quality makeup shot. If you’ve been hired for a professional gig, then you probably won’t have to worry about this. Chances are, the photographer hired will be able to deliver the best images.
Essentially, makeup photography should be crisp, clear, and detailed. It should NOT be blurry or grainy – no matter the type of camera you (or the photographer) are using!
How to Take Amazing Makeup Pictures
Here are some tips to help you achieve this, if you’re the one snapping the pics:
- Make sure to adjust your white balance settings correctly, as this will help create a more even and accurate tone;
- Set your camera to “Manual Mode”, so you can adjust the exposure, shutter speed and aperture;
- Set your camera to the highest resolution available. This will ensure that no details are lost in translation;
- If you’re using the camera on your phone, make sure to check your focus before taking a photo.
- Furthermore, if you have an iPhone, you can also set your phone camera settings to “Portrait Mode”. This will greatly help you blur out the background – which is perfect for showcasing makeup looks!
If You’re Hiring a Photographer
Now, if you’re looking to hire a photographer to take the pics (say, for your professional portfolio or social media), the key is doing your research. The goal here is to hire somebody who has an eye for detail and knows how to capture the best shots.
Make sure to look through their portfolio and ask questions about their experience and process. Furthermore, don’t be afraid to ask them for any tips they have on taking great makeup pictures!
How to do Makeup for Photography: Black and White Photos
Now, we would be remiss if we didn’t mention black and white photography. After all, makeup looks can look amazing in black and white! However, as an MUA, you’ll have to pay extra attention to detail when doing makeup for this type of photography.
The key here is to think of the contrast. Make sure your makeup pops! This means going for a bold lip or an eyeshadow that will stand out against the darkness of the photo. Plus, you should also make sure you also focus on highlighting your or your client’s features, as this will help them stand out even more.
FAQs
Phew, that was a lot of info! Let’s wrap things up by answering some of the common questions people have about makeup and photography:
Q: What is makeup photography called?
A: Makeup photography is also known as beauty photography.
Q: What is the best makeup for photography?
A: Makeup for photography should be bold and full coverage, in order to make sure all the details show up in the pictures. Some brands that meet this criteria include (but certainly aren’t limited to):
- Tarte Cosmetics
- Rimmel London
- Anastasia Beverly Hills
- Hourglass
- Urban Decay
- Becca
- Charlotte Tilbury
- Jouer
- Fenty Beauty
- e.l.f. Cosmetics
- Huda Beauty
- Marc Jacobs Beauty
- Patrick Ta
As an added bonus, all of these makeup brands are also cruelty-free! Win-win!
Q: What are the steps for flawless makeup on camera?
A: Here are the steps for flawless makeup on camera:
- Make sure your (or your client’s) skin is properly prepped and hydrated.
- Choose makeup products that are full-coverage and long-lasting.
- Make sure to pay extra attention to the lips, cheeks, and eyes.
- Keep your makeup natural and dewy-looking.
- Set the makeup using a setting spray or powder.
- Finally, adjust the white balance settings on your camera to ensure accurate colors.
Q: What are the 7 tips for taking good photographs?
A: In the world of makeup photography, it’s important to keep these seven photo-taking tips in mind:
- Have a clear vision of what you want the end result to look like.
- Set up your lighting correctly.
- Choose the right lens and background.
- Stick to natural poses, as they tend to look better on camera.
- Pay attention to the makeup details and adjust accordingly.
- Use a setting spray or powder to set the makeup in place.
- Make sure the colors are accurate by adjusting the white balance on the camera.
Q: Why doesn’t my makeup look good in pictures?
A: Makeup doesn’t always look the same in pictures as it does in person – and there are lots of factors to consider.
Make sure your makeup is full coverage, long-lasting, and natural-looking. What’s more – make sure to focus on the details of the eyes, lips, and cheeks. Next, ensure that the lighting is good, and adjust the white balance on your camera. Lastly, use a setting spray or powder to make sure everything stays in place!
Q: Is makeup really necessary for photography?
A: Makeup is essential for photography – both for everyday pictures AND professional photoshoots! Makeup can enhance the features of whoever’s in the photo, as well as bring out the colors and help create contrast. Plus, it’s also a great way to experiment with different looks and create something unique!
Recommended Reading:
- 5 Looks EVERY Makeup Artist Should Have in Their Portfolio
- Avoid These 4 Rookie Mistakes in Your Makeup Portfolio
- 5 Things You Need to Take AMAZING Makeup Portfolio Photos
- Building Your Makeup Portfolio: How to Connect with Photographers
- How to Showcase Your Makeup Portfolio on Your Website
- The 6 Best Ways to Market Your Makeup Portfolio
- What NOT to Do in Your Editorial Makeup Portfolio
- 3 Amazing Makeup Portfolios and Websites to Look up To
- Will Having an Online Portfolio Help You Find Makeup Artist Jobs?
- Building Your Makeup Artistry Portfolio: How Much Editing is Too Much?
- How to Throw a Stylized Photoshoot
- Finding Models for Your Makeup Portfolio
Conclusion
Makeup is an essential part of photography, whether you’re a professional MUA or just someone taking pictures for personal use!
As such, make sure to pay attention to the details and use products that are full coverage and long-lasting. Your lighting should be good and the white balance should be adjusted on your camera for accurate colors. Lastly, set everything in place with a setting spray or powder.
With all of these tips in mind, you’ll be able to take stunning makeup photos every time! Make sure to also check out the recommended reading section for more information on makeup portfolios and how to showcase them.
Good luck, beauties, and happy snapping!