Makeup Tips and Tricks Archives - Page 26 of 27 - QC Makeup Academy
Category

Makeup Tips and Tricks

5 Pro Makeup Tips from a Celebrity MUA

By From the Experts, Makeup Tips and Tricks 2 Comments

With over two decades in the beauty business under my belt, I have stumbled upon hundreds of little secrets. Some of them make my job easier, some correct mistakes, and some are just plain fun!

Today, I want to share a handful of my favorite makeup tips with you.

Softening harsh lines and too much color

If you have ever put on too much blush or gone a bit heavy on your brow powder, eyeliner, or eye shadow, you know the woes of having to wipe it off and start the makeup fresh. The good news is that you don’t have to take off all the makeup anymore! There is an easier alternative that can save the day. Translucent powder and cotton swabs are two must-have products. If you go a bit heavy on the eyeliner or the brow color, a touch of translucent on the swab will blend it down until it is the perfect depth. For bigger areas like the cheek or eyelid, use the power on a brush or your fingertip.

Lower lash definition

Most people tend to avoid mascara on the lower lashes out of fear of the raccoon eye! If you don’t know how to apply it right, that’s probably for the best. If you want all the magic of a defined lower lash line without any of the negatives, apply the mascara for color and depth, not for length. Just set the wand tight to the lash line and wiggle it back and forth. You will get the perfect lay of color. Black is always beautiful, but if it seems too heavy for you try brown instead.

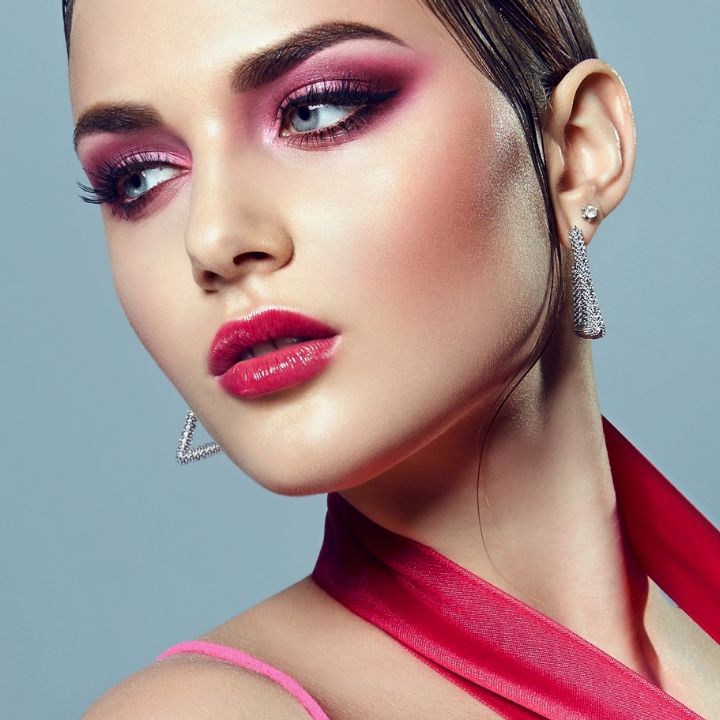
The perfect “overnight” smoky eye

This may seem like a huge no-no, but if you want the perfect smoky eye with minimal effort, sleep in your eyeliner. The liner will smudge so perfectly, you would not be able to duplicate the look if you tried. If you want to give this a go, I have one tip…swap out your white pillowcase!
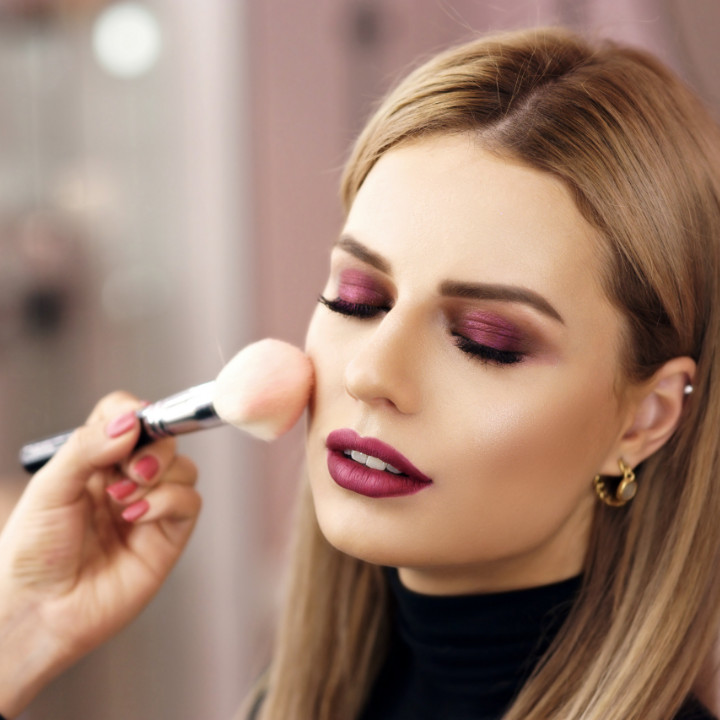
Glowing cheeks

If you watch award shows, you will notice the dewy glow that most celebrities have on their cheeks as they walk the red carpet. There are a lot of ways to achieve this, but my favorite, and perhaps the easiest, is to apply a skin-brightening primer over the blush. True highlighters can sometimes be too bold but a brightening primer will take a beautiful cheek to AMAZING. Just tap it over the blush with a foundation brush.

Super Bright Eyes

Lining the inner rim of the upper lash line with a blue pencil will make the whites of the eyes look super bright! This trick is amazing because you can magnify the intensity of the eyes without anyone knowing you used a blue pencil. An added bonus is that it adds immediate depth to the lash line giving the appearance of fuller, thicker lashes.

Don’t miss Nathan’s Guide to Working as a Celeb Makeup Artist! He shares advice, tips, and an inside look at the industry!

Those are a few of my favorite little makeup tricks. I would love to hear a few of yours! Leave a comment letting me know what makeup tricks you’ve discovered along the way.

Want to read some more makeup tips? Check out this guide of 50 makeup tips everyone should know!

How to: Cranberry Glitter Makeup Tutorial

By Makeup Tips and Tricks No Comments

So as most of you probably know, QC Makeup Academy is running an awesome contest. Check the details out here! You need to create a makeup look using glitter. I’ve created another look to inspire you to get creative with glitter. If you’d like to check out a previous glitter-inspired post by me, click here. This time around I used the beautiful model Marie. I also decided to incorporate more than just the eye in my step-by-step instructions so I can show you how we achieved her complexion as well. For a glitter look or any type of bolder eye look, I find it’s easier to start with the eyes. That way you can just wipe clean any fallout from the glitter or dark shadows with a makeup wipe.

Here is a look at the shadows used to create this eye look!

Products I Used

  • A matte black shadow
  • A cranberry shadow
  • A brow highlight
  • A glitter (this look can be done with any type of glitter you have in your kit!)

Step-by-Step

  1. Start with a clean, primed eyelid
  2. Since this is very finely milled glitter, I did not need to use glitter glue. The primer was enough to hold the glitter. Apply the glitter to the high point of the eye, just in the center of the lid. The glitter I used is a limited edition from Make Up For Ever, but check out their glitters and diamond powders. They are amazing! This one has a reddish undertone with a blue/green glitter. It reminds me of mermaid skin!
  3. Take a cranberry shadow (MAC has a great one called “cranberry”), and blend it into the outer crease
  4. Take that same cranberry hue and blend it up around the top of the glitter into the crease and down into the inner corner of the eye
  5. Deepen the outer corner of the crease with a matte black shadow
  6. Clean up any fallout and sharpen up the edge of the shadow using a makeup wipe
  7. Apply a brow highlight and a tear duct highlight
  8. Apply liquid liner and mascara
  9. Apply a nice, full set of false lashes!

Next up: Complexion

Prime the face and apply medium to full coverage foundation. In Marie’s case, I wanted to do some color correction as there is a bit of redness in the skin. I used a color-correcting primer and I used a slightly yellow foundation to counteract the pinkness in her skin.

Next up, I applied an under-eye concealer to brighten up the look. I chose to keep the under-eye clean of any shadow or liner, so I brought the concealer right up along the lash line. This will give us a very clean look. Then I contoured her face using a liquid foundation in a dark color. I applied this contour along her hairline, under her cheekbone, and under her jaw line.

Then, I softened the liquid contour using a fluffy brush. With that same brush (as shown in the first picture below), I applied a matte bronzer to set the liquid contour, blending into the center of the face to soften any edges. Next, I applied a blush along her jawbone right on top of the contour.

Lastly, I set the whole look using a translucent powder and applied a powder highlight along the tops of her cheekbones (right above the blush), and down the center of her nose. Pop on some lipstick and away you go! I chose to stick with a super neutral lip as the eyes are the focus of this look.

Hope you all enjoyed this tutorial! The best of luck to those who are entering the All That Glitter’s contest! Not only is this an inspiration for that contest but it’s also a great look for holiday parties or any night out!

QC Staff Tips: Day to Night Makeup

By Makeup Tips and Tricks No Comments

We all know the feeling—you’re off work in 10 minutes but have a dinner date in 30. With the time it takes to commute and change, you need a streamlined day-to-night makeup routine. And that’s where we come in!

Keep reading for some tried and tested tricks from the QC Makeup Academy staff.

Julia Says:

“Metallics are huge right now. I like to wear a sheer brown eyeshadow during the day, and before I head out of the office it’s as easy as smudging the whole look out with a layer of bronze. I finish everything off with lengthening black mascara, a swipe of sheer pink lip gloss, and a tap of powder on any oily areas.”

QC Asked: What’s your favorite product for long-lasting makeup?

“Urban Decay De-Slick Setting Spray. I have textbook combination skin. In the morning I give my face one or two sprays of this, and my face stays matte until late into the afternoon. I’m never without it!”


View this post on Instagram


A post shared by Urban Decay Cosmetics (@urbandecaycosmetics) on

Sandra Says:

“I keep about three lipsticks in my purse at all times (okay, probably more like six!). When I don’t have the time to change my look for the evening, I just pick my favorite shade and I’m good to go! It’s amazing how much drama a deeply saturated lip can add to an otherwise clean face.”

QC Asked: What three lipsticks do you have in your purse right now?

“Right now I have the Rimmel’s Kate Moss lipstick in shade 01, NARS Velvet Matte Lip Pencil in Never Say Never, and Wet n’ Wild’s Mega Shield Lip Color in Ring Around the Rosy.”

Carly Says:

“I wear simple winged eyeliner almost every day. If I’m going out after work, especially on a Friday night, I’ll take a minute to add some drama by smudging the eyeliner out a bit. I really like Clinique’s Quickliner for this. Then it’s all about the falsies. They can change my entire look in an instant. I like keeping the focus on the eyes, but I’ll usually swipe on some light lip gloss to finish it off. This dramatic look has never failed me!”

QC Asked: What’s your one must-have beauty product?

“There’s actually two I absolutely can’t live without! I adore STILA Stay All Day Matte Liquid Lipstick, and can’t get enough of  Benefit’s They’re Real mascara.”

Interested in learning more about our online makeup academy?

Click here to request a free brochure with no obligation to enroll!

How to Tackle Dry, Chapped Lips

By From the Experts, Makeup Tips and Tricks No Comments

One of the most frequent beauty dilemmas a makeup artist encounters is perfect lipstick application on dry, irritated, or chapped lips. Lipstick can enhance the face by adding color and freshness, but if it grabs on to dry or chapped areas it will do exactly the opposite.

It is part of your job to know how to overcome this obstacle.

When caught in this pinch, many people grab a chap stick or a waxy lip primer. Yes, this will allow you to put the product on, but it will not last long or give your client any knowledge as to how to prevent the problem in the future. As a professional, it is not only our job to resolve the issue (to the best of our ability), but it is also our responsibility to educate our clients so they can prevent it in the future.

In the old days, people would grab a toothbrush and rub the dead skin away. This is acceptable as an at-home do-it-yourself, but as a professional, there are much better options. The Fabulips collection by Bliss will not only make the lips super smooth and supple, but it will also prevent any future dryness or irritation. The foaming lip cleanser is the first step on the road to flawless. It is a bubbly cleanser that lifts away debris without stripping or drying. Work this over your client’s lips and any of the residue that causes irritation will be wiped away. Step two, the Sugar Lip Scrub, is a delicious combination of finely ground sugar, almond shells, walnut shells, and hydrating oils. A light buff of this soothing exfoliator will turn your client’s chapped lips into a soft, perfectly smooth pout. Step three is a peptide-packed Instant Lip Plumper that will immediately rejuvenate the lips with a lush, hydrated plump. To make sure the word chapped is never used to describe your lips follow the plumper with the Softening Lip Balm. Shea butter, jojoba, and grape seed oil protect and penetrate, leaving the mouth soft, smooth, and kissable.

A simple, smart routine, focused on protection and rejuvenation, is all you need to take the chap off your client’s lips.

How To Do Natural Looking Makeup

By Makeup Tips and Tricks No Comments

Everyone knows what I’m talking about when I refer to the “no makeup” look. Of course, a lot of people aren’t sure how to achieve this ultra-natural look without going accidentally overboard. The no makeup, or natural makeup look, is all about letting natural beauty shine through and only really evening out the complexion, hiding blemishes, and emphasizing the eyes.

Read on to learn how to do natural looking makeup!

Natural-looking makeup starts with a good base. For the “no makeup” look, I would recommend going with a light but build-able coverage—something like NARS Sheer Glow. This will allow you to let natural beauty marks like freckles show through while being able to build up the coverage to cover any imperfections—like a minor breakout, scar, or dark circles. Apply with a dampened sponge (I love the Beauty Blender sponge!) for a line-free, flawless finish. Working with a slightly dampened sponge will also help you use less product and blend more evenly.

To hide any imperfections that you weren’t able to conceal with foundation, grab a creamy concealer like MAC’s Studio Fix palette. Apply a little and build when necessary. For the under-eye, try using the salmon-colored concealer and only targeting the darkest area—typically right near in inner corner of the eye. This will break up the darkness and make the eyes look more awake, refreshed, and avoid too much product from being used on the face. Be sure to set the product with a light dusting of powder or setting spray!

As for the eyes, you have a few options. You can apply a matte champagne shadow, dark brown kohl liner, and finish with a swipe of mascara—or you can just go with mascara. If your client has darkened lids from lack of sleep or genetics, you’ll likely want to use a matte shadow to add some brightness without looking overdone. The dark brown liner will draw further emphasis to the eyelashes and the mascara will provide a finished effect.

Opt for a soft, peachy blush like NARS Sex Appeal or grab a bronzer like the Shimmer Brick from Bobbi Brown. For lips, we love a neutral gloss or balm. If your client’s lips are a little chapped, like the model above, recommend a sugar lip scrub like the ones available at LUSH. They’ll help slough away dry, dead skin while infusing the lip with peppermint oil and moisturizing at the same time.

Et voila, you now have the “no makeup” makeup look. This is a great look for every day, weekend, or when you’re headed to the beach and want to feel confident but not look overdone. There are plenty of waterproof mascara and cream blush options out there that will help keep you looking gorgeous and natural all day long, too!

What do you think of the natural-looking makeup shared above? Let me know in a comment and feel free to share your product recommendations for achieving the look!