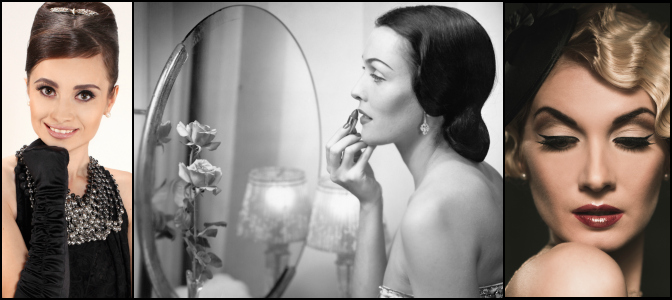
Every makeup item you know and love has a long history of use and technique. Eyeliner, lipstick, mascara and rouge have been widely used over the last hundred years to beautiful results. But can a 1930s-inspired eye or a 1970s-inspired nude lip still work for makeup artists today?
Short answer: yes! These techniques have some serious staying power. Get out your makeup kit—we’ll show you how to rock these retro makeup looks!
1. Cupid’s Bow
The 1920s were an age of rebellion and frivolity for women. Restrictive corsets and Victorian rules were out, and short skirts, short hair, and vampy makeup were in!
One key beauty look from the 1920s was the cupid’s bow lip, in which the lips were outlined with a lip pencil to de-emphasize the width, then filled in with a show-stopping shade of red lipstick. Any makeup artist can achieve an updated cupid’s bow in four easy steps:
Step One
X marks the spot! Choose a lip liner and lipstick that are similar shades of red, and then beginning at the highest point of your lips, use the liner to draw a straight line down, and then repeat on the other side of your top lip to make an X.
Step Two
The centre of your bottom lip is below the centre of the X you just drew. At this centre point, trace a horizontal line along the curve of your bottom lip.
Step Three
Open your lips just slightly and draw a sideways V at each corner of your mouth.
Step Four
Your mouth probably looks like a map at this point, so it’s time to connect the lines! Using short, quick strokes, use your lip pencil to connect the lines, and then fill in your outlined lips with your favorite shade of red.
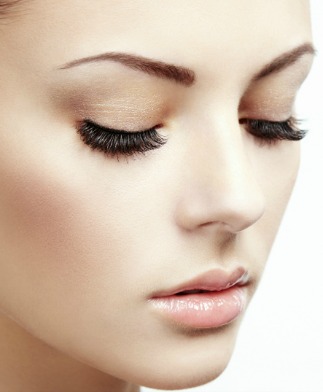
2. Full Lashes
The Great Depression of the 1930s forced everyone into rationing and penny-pinching, but one makeup item prevailed through it all: mascara! One of the key makeup looks from the 1930s was a thick, dramatic eye created by several coats of what was then called “cake mascara”.
Thick lashes are always in style, so here’s a short tutorial to keep this retro makeup look alive:
Step One
Start with an eyelash curler to really get those lashes ready. Curl the lashes of both eyes.
Step Two
Now here’s a trick straight from the 1930’s—take your favorite light moisturizer and apply it evenly to your fingertips. Now, lightly brush the cream on your lashes. Use your fingertips to brush some loose powder on top. This will prime your lashes and create thickness before you even apply the mascara!
Step Three
Brush the mascara on lightly at first, sweeping upwards, which makes your eyes look larger. Slightly wiggle the brush at the ends of the lashes to prevent clumping, and apply three thick coats to each eye. Don’t forget to accentuate your lower lashes as well, but you’ll only need one coat for those.
Step Four
To finish the look, a shimmering cream eyeshadow can be added from the lid to the eyebrow. You can also use an eyeliner to line your top eyelid for an even more dramatic effect.
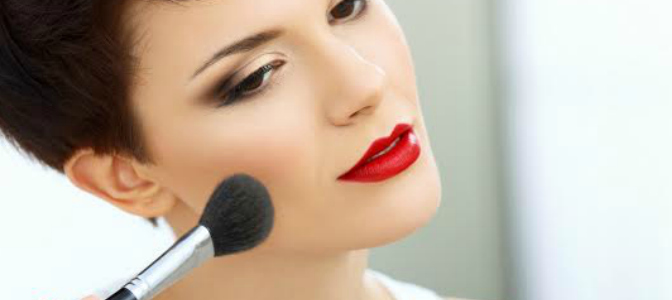
3. Rouge
Makeup artists and enthusiasts today know it as blush, but the term “rouge” has been around for hundreds of years and literally means “red” in French. Rouge is a red-based powder or cream used by women as an accent for cheeks, and although it was used sparingly in the 1950s, there was still a specific technique.
This look accentuates bone structure and gives a warm look to any complexion:
Step One
Using a powder or a cream (cream works best for this look!), lightly blend a pink “rouge” to the upper cheekbones and blend right up to your temple. Be sure to choose a pink that suits your complexion.
Step Two
Work with your individual bone structure. If your cheekbones are already defined, you don’t need to blend the color too much and can instead lightly accentuate your cheekbones. If you have a round face, you can blend lower and not go as high as your temple.
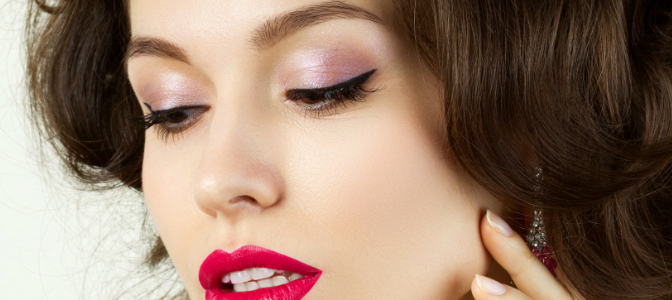
4. Cat Eye Liner
They say cats have nine lives, and the staying power of the 1960s cat eye just proves it!
The bold flick that made the cat eye so popular over fifty years ago continues to live on in the makeup techniques of today. In fact, it’s an essential skill for any modern makeup artist! Keep in mind that the shape of your individual eye will dictate the exact direction of the wing you create—so this may take some practice! The tutorial below is a classic cat eye, but you can also try out an angled lower liner version.
Here are some steps to get you started on a classic cat eye:
Step One
A primer is recommended on your eyelids for this look, as it will help the makeup go on easily and increase its staying power. Once your primer is set, apply a nude shadow over the lids using a small brush.
Step Two
We recommend liquid eyeliner because it glides on oh-so-smoothly, but you can choose pencil if you prefer. Stare straight into a mirror with open eyes while creating the cat eye, as this will create an even look. Starting in the inner corner of your eye and following its natural curve, gently drag the liner across, until you get to the end of your lashes. Let the line become slightly thicker as you move it along.
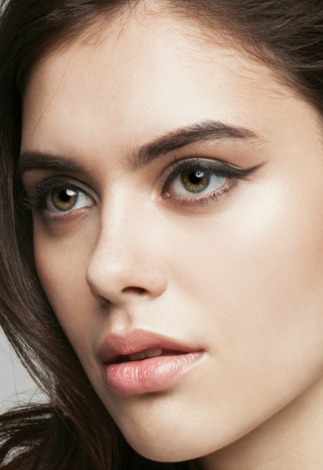
Step Three
Now, take note of where you just ended your line. Pick a point even further out, near your temple. Drag the liner in the opposite direction, connecting the two lines.
Step Four
Repeat this on your other eye. This may take a few tries, but practice makes perfect! It’s helpful to keep some Q-tips and makeup remover nearby in case of mistakes
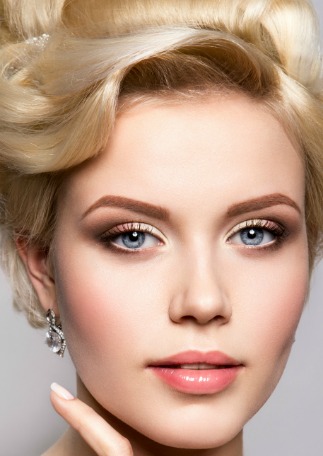
5. Nude Lips
Bright eyeshadow, bold cheeks, and voluminous hair were the defining looks of the 1970s. Lips, on the other hand, were kept natural—nude and soft pink were coveted lipstick shades, and a clear gloss was a popular choice as well.
If you’re playing up other features of your face such as your eyes and cheeks, you’ll want to emulate this natural look for your lips. Here’s how:
Step One
The creation of the nude lip starts way before you put on your lipstick! While applying foundation, add some to your lips as well. This will allow your lip color to blend into your skin.
Step Two
Line your lips with a nude lip liner, then fill with your favorite natural shade of lipstick.
Step Three
This look can be finished with a hint of gloss—just put some on your finger and trace the inside area of your top and bottom lip for some shine. If you prefer a matte look, just use your finger to blend the lipstick and lip liner together slightly.