QC Makeup Academy graduate, Kerry Sleeman, is an experienced photographer and makeup artist. This week, Kerry gives us her advice on how to take photos that will accentuate your makeup techniques and fit perfectly into your portfolio! See more of her work here!
Part of being a makeup artist is also about showcasing your work to potential clients. A great way to start to showcase your work is to build up a beautiful portfolio of images to display on a Website, Facebook or any type of advertising.
Being a photographer, I took the opportunity to take professional images of work that I had completed to build my portfolio in my early makeup career, and I still take images of my work to regularly update my portfolio when trends change or I do create work. Not everyone has a professional camera or studio set up, but please do not let this stop you from taking beautiful images!
How do a take a good image you might ask to start building your portfolio? Here are some simple tips to get you started.
 For photography, it’s always best to use a High Definition Makeup with no SPF to avoid flashback and to give a flawless look in images. It’s good to powder as well to give a lovely matte finish and avoid any shine. I always avoid shimmer highlighter on the cheek bones. In photographs, highlighter can make the subject look sweaty or greasy. A light, rather than shimmer, highlighter is always good.
Avoid frosted lipstick for photography – again it creates a shimmery highlight on the lips! I always stick with satin or matte lipstick looks for portfolio building. Use matte eye shadows to define the crease and outer corners or outer V. This creates depth in the eye area and create a gorgeous satin lid to define the color. Use a nice set of natural lashes to enhance the eyes! I love Ardell Whispies for Boudoir. Finally, have the hair styled nicely to complement the makeup application.
For photography, it’s always best to use a High Definition Makeup with no SPF to avoid flashback and to give a flawless look in images. It’s good to powder as well to give a lovely matte finish and avoid any shine. I always avoid shimmer highlighter on the cheek bones. In photographs, highlighter can make the subject look sweaty or greasy. A light, rather than shimmer, highlighter is always good.
Avoid frosted lipstick for photography – again it creates a shimmery highlight on the lips! I always stick with satin or matte lipstick looks for portfolio building. Use matte eye shadows to define the crease and outer corners or outer V. This creates depth in the eye area and create a gorgeous satin lid to define the color. Use a nice set of natural lashes to enhance the eyes! I love Ardell Whispies for Boudoir. Finally, have the hair styled nicely to complement the makeup application.
 Don’t use flash where possible! Natural light is always best for Makeup Photography (unless you’re a Beauty Photographer that knows the ins and outs of lighting set ups!). Find a lovely bright window, which may have sheer curtains to soften the light. Sit or stand the subject about a meter away with the light against their face to highlight their features and color of the makeup. If it seems too bright or washing out the color, move the model further away from the light.
If you have a darker room or are doing shoots more regularly, look for a continuous light soft box or light that does not give off a yellow glow. EBay has some good, affordable options which light the face well for photography. Here’s an example to give you the idea.
If you want to get rid of dark circles under your model’s eye due to harsh lighting or shadows, invest in a small reflector. Hold this under the model’s chin around the chest area (out of camera view) – this will take the dark circles away! Use either a white or silver reflector to enhance your images so that they are not so flat-looking, like this one.
Don’t use flash where possible! Natural light is always best for Makeup Photography (unless you’re a Beauty Photographer that knows the ins and outs of lighting set ups!). Find a lovely bright window, which may have sheer curtains to soften the light. Sit or stand the subject about a meter away with the light against their face to highlight their features and color of the makeup. If it seems too bright or washing out the color, move the model further away from the light.
If you have a darker room or are doing shoots more regularly, look for a continuous light soft box or light that does not give off a yellow glow. EBay has some good, affordable options which light the face well for photography. Here’s an example to give you the idea.
If you want to get rid of dark circles under your model’s eye due to harsh lighting or shadows, invest in a small reflector. Hold this under the model’s chin around the chest area (out of camera view) – this will take the dark circles away! Use either a white or silver reflector to enhance your images so that they are not so flat-looking, like this one.
 Posing a model is important for good looking makeup photos. Make sure the model is level with your camera, and don’t take an image pointing the camera up to the model. This is not flattering at all – it will make her neck look bad and expose those double chins!
Sit the model on a stool at your level, turn the body slightly to the side a little, ask the model to turn her chin around to her shoulder (don’t touch the chin on the shoulder, just turn over the shoulder). Ask the model to push her chin out towards you and then tilt down just a little. This elongates the neck, hides double chins, makes the eye drop exposing more of the moving eyelid and lashes (making them pop). Just remember: chin out and down. Easy!
I always take a set of photos, especially if it’s for a client’s wedding trial and add it to their file. Take an image of the model with an open eye looking at you, looking down (don’t close fully as this scrunches the moving lid) and looking out towards the light, as if they are looking at something outside. This set can be created into a collage for the client’s portfolio sheet, for your social media or advertising.
Examples of types of makeup posing
Posing a model is important for good looking makeup photos. Make sure the model is level with your camera, and don’t take an image pointing the camera up to the model. This is not flattering at all – it will make her neck look bad and expose those double chins!
Sit the model on a stool at your level, turn the body slightly to the side a little, ask the model to turn her chin around to her shoulder (don’t touch the chin on the shoulder, just turn over the shoulder). Ask the model to push her chin out towards you and then tilt down just a little. This elongates the neck, hides double chins, makes the eye drop exposing more of the moving eyelid and lashes (making them pop). Just remember: chin out and down. Easy!
I always take a set of photos, especially if it’s for a client’s wedding trial and add it to their file. Take an image of the model with an open eye looking at you, looking down (don’t close fully as this scrunches the moving lid) and looking out towards the light, as if they are looking at something outside. This set can be created into a collage for the client’s portfolio sheet, for your social media or advertising.
Examples of types of makeup posing
 You don’t need a professional camera! But if you have one, great! You can use an iPhone if you really want to – images from iPhones are great quality these days. Play with your settings, check the ISO is on 100 if you are in full bright light or change the ISO to 400+ if the room is darker. If your new to photography, set your camera to automatic focus, then focus on the eyes and click away! There is nothing worse than blurry eyes, so make sure they are sharp!
I hope this helps you with getting started with taking images of your makeup for your portfolio!
You don’t need a professional camera! But if you have one, great! You can use an iPhone if you really want to – images from iPhones are great quality these days. Play with your settings, check the ISO is on 100 if you are in full bright light or change the ISO to 400+ if the room is darker. If your new to photography, set your camera to automatic focus, then focus on the eyes and click away! There is nothing worse than blurry eyes, so make sure they are sharp!
I hope this helps you with getting started with taking images of your makeup for your portfolio!
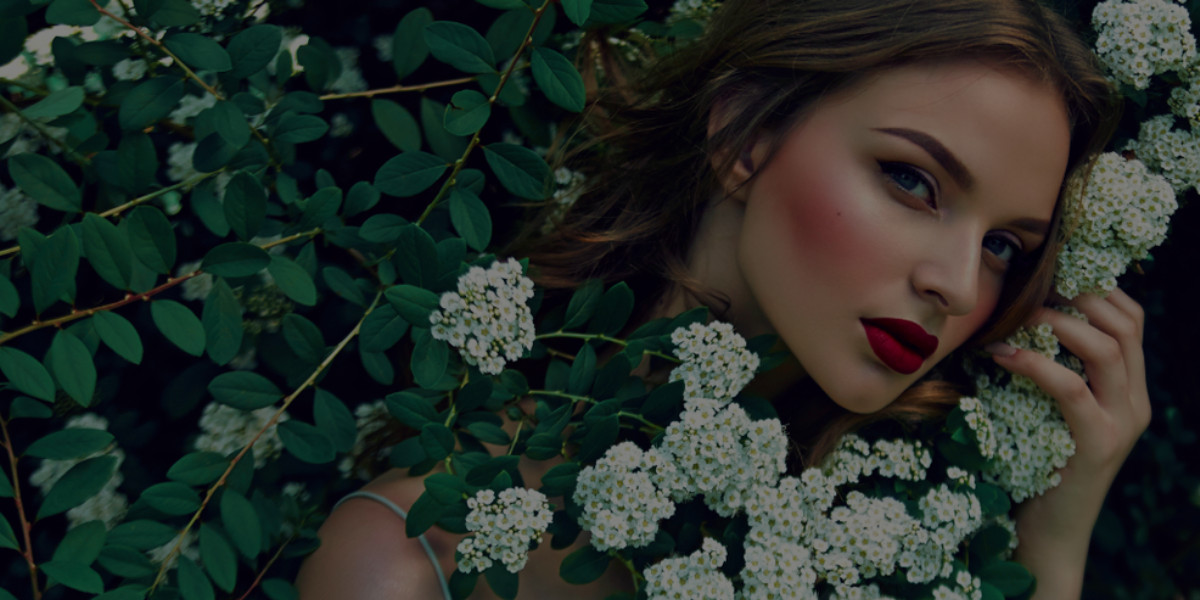
Most Important: Model’s Styling
For photography, it’s always best to use a High Definition Makeup with no SPF to avoid flashback and to give a flawless look in images. It’s good to powder as well to give a lovely matte finish and avoid any shine. I always avoid shimmer highlighter on the cheek bones. In photographs, highlighter can make the subject look sweaty or greasy. A light, rather than shimmer, highlighter is always good.
Avoid frosted lipstick for photography – again it creates a shimmery highlight on the lips! I always stick with satin or matte lipstick looks for portfolio building. Use matte eye shadows to define the crease and outer corners or outer V. This creates depth in the eye area and create a gorgeous satin lid to define the color. Use a nice set of natural lashes to enhance the eyes! I love Ardell Whispies for Boudoir. Finally, have the hair styled nicely to complement the makeup application.
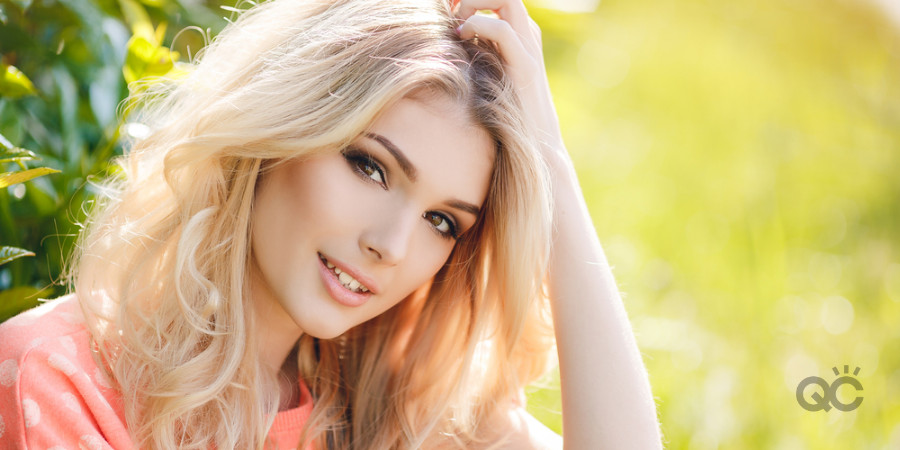
Lighting
Don’t use flash where possible! Natural light is always best for Makeup Photography (unless you’re a Beauty Photographer that knows the ins and outs of lighting set ups!). Find a lovely bright window, which may have sheer curtains to soften the light. Sit or stand the subject about a meter away with the light against their face to highlight their features and color of the makeup. If it seems too bright or washing out the color, move the model further away from the light.
If you have a darker room or are doing shoots more regularly, look for a continuous light soft box or light that does not give off a yellow glow. EBay has some good, affordable options which light the face well for photography. Here’s an example to give you the idea.
If you want to get rid of dark circles under your model’s eye due to harsh lighting or shadows, invest in a small reflector. Hold this under the model’s chin around the chest area (out of camera view) – this will take the dark circles away! Use either a white or silver reflector to enhance your images so that they are not so flat-looking, like this one.
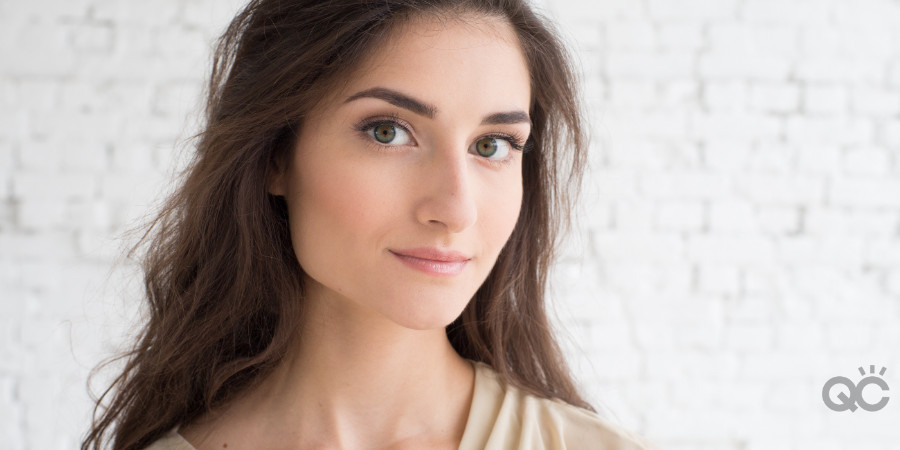
Model Pose
Posing a model is important for good looking makeup photos. Make sure the model is level with your camera, and don’t take an image pointing the camera up to the model. This is not flattering at all – it will make her neck look bad and expose those double chins!
Sit the model on a stool at your level, turn the body slightly to the side a little, ask the model to turn her chin around to her shoulder (don’t touch the chin on the shoulder, just turn over the shoulder). Ask the model to push her chin out towards you and then tilt down just a little. This elongates the neck, hides double chins, makes the eye drop exposing more of the moving eyelid and lashes (making them pop). Just remember: chin out and down. Easy!
I always take a set of photos, especially if it’s for a client’s wedding trial and add it to their file. Take an image of the model with an open eye looking at you, looking down (don’t close fully as this scrunches the moving lid) and looking out towards the light, as if they are looking at something outside. This set can be created into a collage for the client’s portfolio sheet, for your social media or advertising.
Examples of types of makeup posing
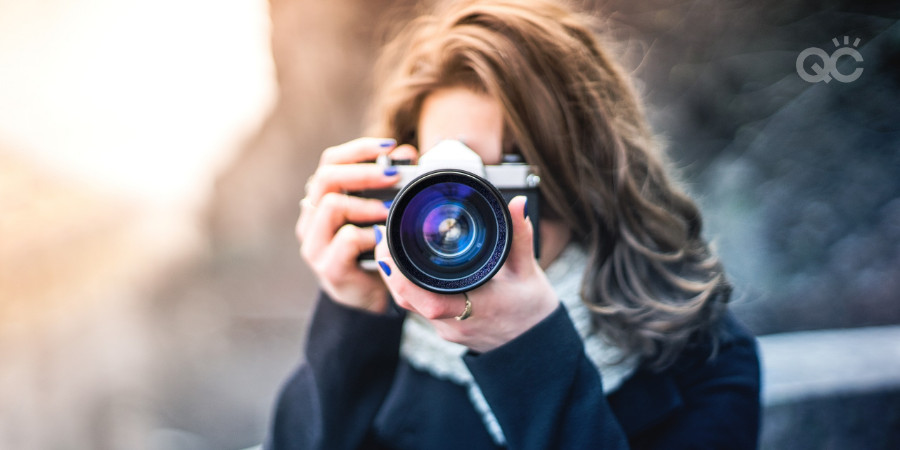
Camera
You don’t need a professional camera! But if you have one, great! You can use an iPhone if you really want to – images from iPhones are great quality these days. Play with your settings, check the ISO is on 100 if you are in full bright light or change the ISO to 400+ if the room is darker. If your new to photography, set your camera to automatic focus, then focus on the eyes and click away! There is nothing worse than blurry eyes, so make sure they are sharp!
I hope this helps you with getting started with taking images of your makeup for your portfolio!
Thank you for the publishing my article. I hope your viewers found it informative. Kerry Sleeman
Interesting article, thank you.
I would have loved to read about background/backdrops and their effect on the the overall composition especially what shades are best – light or dark
Wonderful article Kerry. Really. Thank you very much. I’m a photographer but will soon work with make up artists who want to learn how to take better photos of their work. Thanks again.