So you want to wear false eyelashes? Whether you’re looking for thicker, fuller lashes or something a little more dramatic, the basics of eyelash application are universal! You’ll learn all about applying falsies in the Master Makeup Artistry course. But if you’re looking to brush up on your skills, we’re here for you!
As far as eyelash types, there are two ways that eyelashes are manufactured. We’ll explore both types: Strip Lashes and Individual Lashes. Keep reading!
Strip Lashes
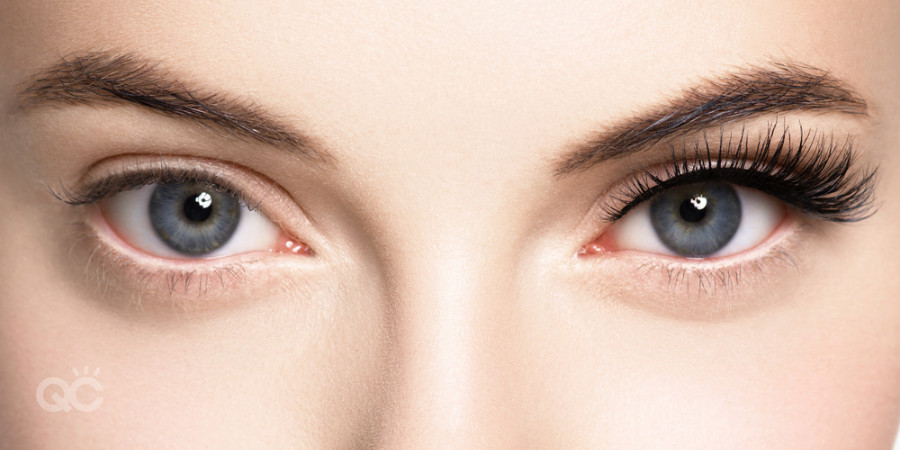
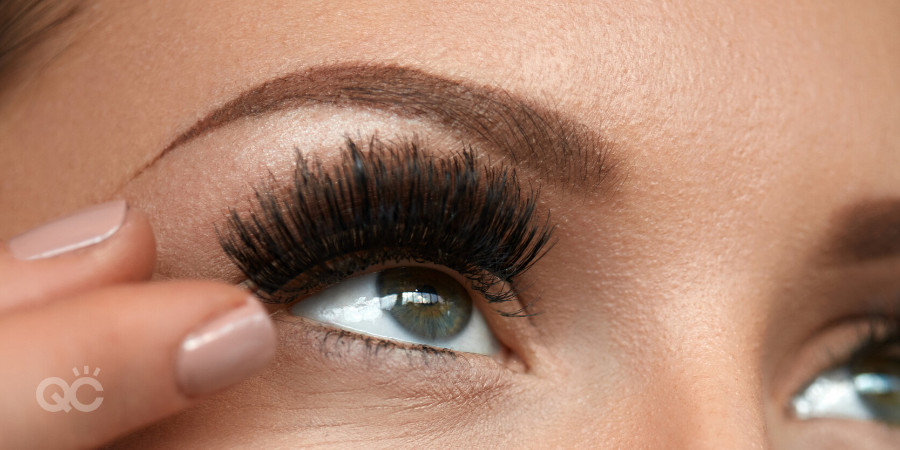
This is the one you’re probably most familiar with. These are sets of natural or synthetic fibers that are attached together by either a clear or dark strip as a base. These are the most common type of false lashes and they are generally used for looks that are meant to have a little more drama to them. There are also clear strip lashes that can be used for daytime or natural makeup, but if you’re trying to achieve a makeup-free look, then you might want to skip to the individual lashes!
Application
Step 1: Take them Out
To apply a fresh pair of strip lashes, take them gently out of the package by the strip.
If you grab them by the actual lash you risk tearing them off from the strip base. If that happens, you may as well kiss your lash goodbye! Singular hairs are virtually impossible to re-attach without high levels of frustration.
Step 2: Make them Pliable
Once you’ve successfully peeled your lashes from the package, take both ends gently with your thumb and index finger. Hold the lash on both ends and wave the strips up and down. The lash has been in that package for a while and has most likely become rigid and stuck in one shape. In order to loosen up the strip, you can stretch out the band a bit by undulating it up and down. This allows the band to form a better curve around your lash line as you’re gluing it on.
Step 3: Measure!
Once your lash is good and pliable, the next thing to do is measure. Lashes are mass produced and everyone’s eyes are different lengths, sizes and shapes. By measuring and cutting, you can make sure your lash looks like it belongs on your eye!
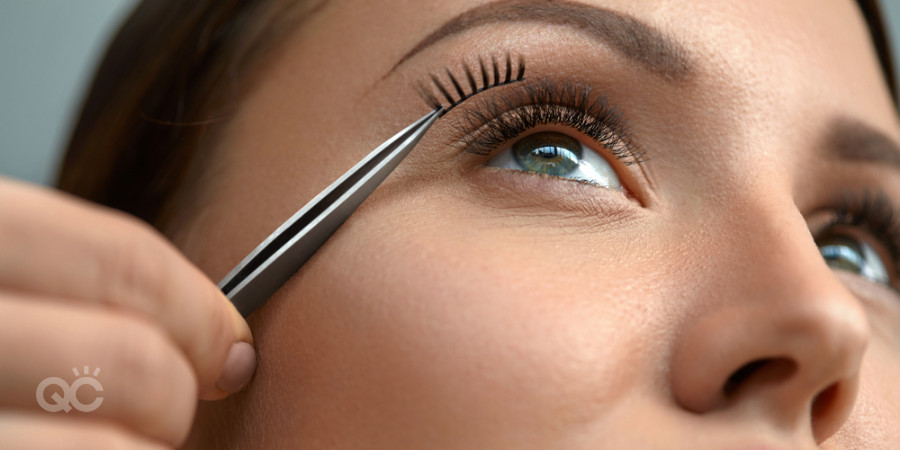
Typically, you want your lash to start after a few of your own lashes on the inner corner of your eye so it can blend with your actual eyelashes, creating the illusion that the false lashes belong there. You want the strip to end at the natural end of your lash line, by the outer corner of your eye. If you hold your lash up to your eye (without glue) you can roughly measure your proper lash length and cut your lashes to that size.
Remember this key rule of lashes: never cut from the inside of the lash! Always cut from the outer edge of the lash. Place the inner corner where you want your lash to start and then remove what isn’t needed from the outer edge.
Step 4: Glue your falsies on
Once you’ve gotten your strip lash sized, you can pick which kind of glue you want to use. Just like lash bands, there are two kinds of glue. One dries clear, which is useful for that lashes you want to blend into your lash line and so they look like part of your natural lash. The other is a dark glue that dries a dark brown. If you are doing a very dark eye, this helps blend everything together nicely.
PRO TIP! Before applying your lash, you’ll want to use a lash curler to give your natural lashes a little extra length and a higher angle. If you want your lashes to flare out at the outer edge, you can also use a half lash curler to just curl the edge of your lashes.
When applying the glue to your lash, it’s best to take a palette knife and transfer the glue to the lash. This way, you aren’t transferring any of the bacteria between the old lash and the glue, making them safe to reuse on yourself and potential clients!
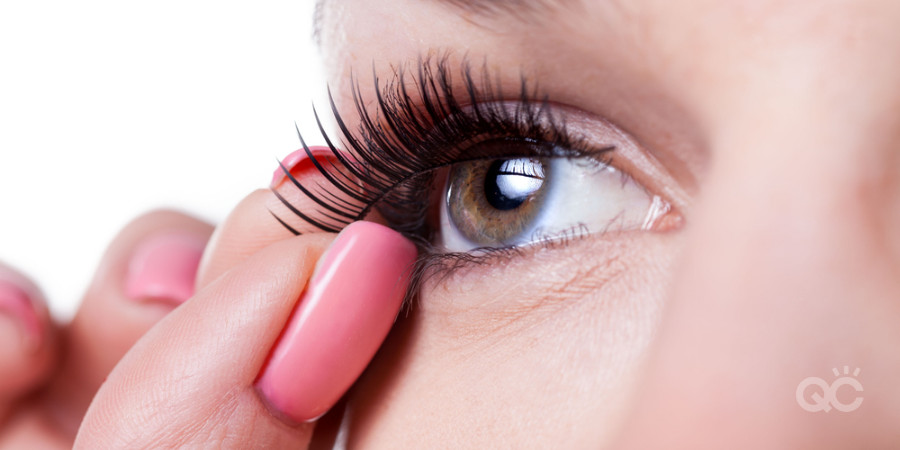
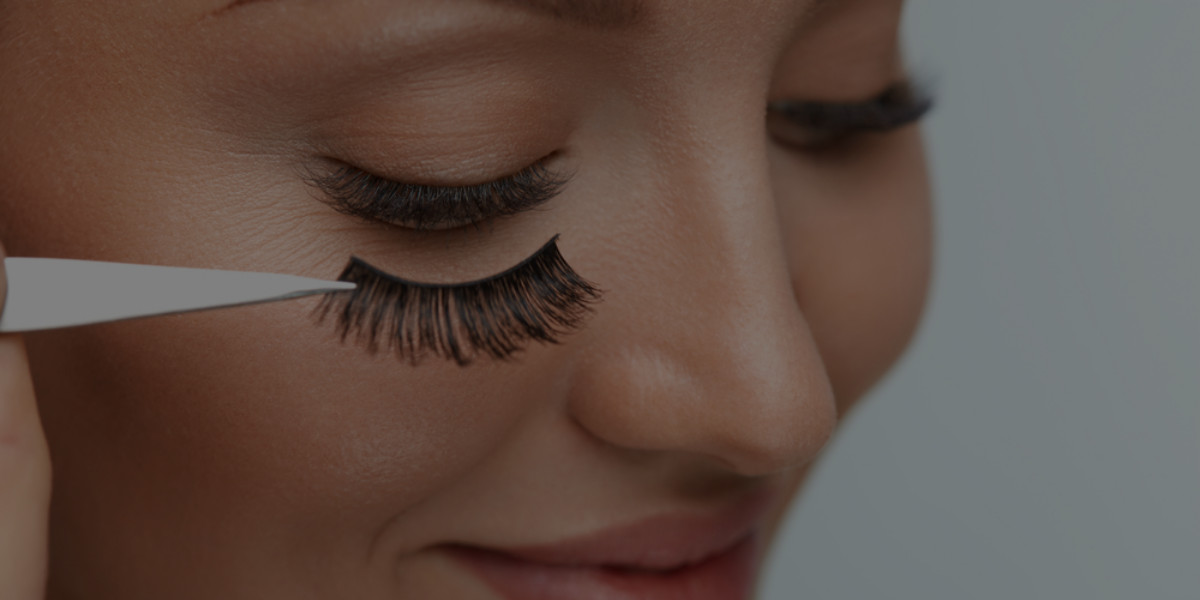
Leave the glue to dry for about 30-45 seconds until it becomes tacky. Place the lash as close to your lash line as possible with a pair of tweezers, beginning in the inner corner. Work your way to the outer corner, making sure to go back and press down on sections where you can see that the glue hasn’t touched skin yet.
Repeat this process on the other eye and wait until it’s fully dry (about 2-3 minutes). Once your strip lash is dry, you can apply mascara to both your natural lashes, and the false lash. To blend them with your natural lashes even more, you can use your lash curler again to press them together as one.
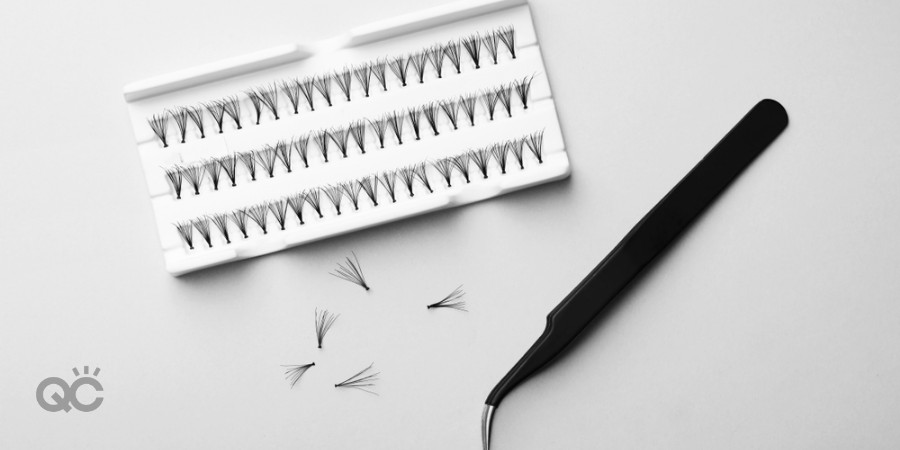
Individual Lashes
The second type of false eyelash is an individual lash. These are tiny clusters of singular hairs joined together by a small glue dot at the base. Individual lashes can be placed strategically where you want a little more length, or used to fill in spots that require an extra lash or two.
These lashes are notoriously finicky to work with, and if they’re not placed at the right angle they can cause major frustration. With some practice, however, you’ll find your perfect combination of your own lashes and individuals!
Application
Individual lashes work the same way, just with a varied technique.
Using tweezers, grab onto each cluster of hairs as close to the glue as possible, and remove them carefully from the package. An easy way to apply a few at a time is to have a dot of wet lash glue ready to dip each lash into, wait 30 seconds, and then apply it to your lash line. Repeat the application until you are satisfied, and then coat all of your lashes with mascara.
Removal
When you’re all finished with your lashes, gently remove them and pull the glue delicately off. If you want to re-use your lashes, which is a great idea financially, you can definitely do so.
To clean your lashes, place them on a paper towel and spray them with 99% alcohol to clean them and loosen leftover glue. Brush the lashes clean with a spoolie. Once you’ve brushed the lashes through and the liquid is clear, you can leave them out to dry so that they’re ready to use again! There will come a point where a pair of lashes has run its course. When you begin to notice they are looking a bit rough, it may be time to purchase a new pair!
Additional Techniques
Stacking
‘Stacking’ simply means applying more than one pair of lashes on top of each other. This allows for endless combinations of lash types! Perhaps you want a little more flare on the end, or just more volume? Stacking lashes can let you customize your own pair of lashes!
Bottom Lashes
If you want to venture into the world of bottom lashes, the same basic rules apply with just a few variations. You won’t curl your own lashes and the glue will be placed on top of the strip instead of underneath it.
You then place them upside down as close to your lash line as possible. The most popular styles for bottom lashes are individual lashes or tiny clear strip lashes, because they draw the least attention to your face. If you want extreme drama, you can use the same method to apply a thick strip lash and achieve whatever look you want!
What’s your favorite falsies brand? Let us know!
This is another application that I struggle with but hopefully with practice i can become a master at applying them.
I’ve never worn individual lashes, but I think I will give them a try. Thank you for the tips.
It is so easy. I thought applying eyelash extensions is really hard. thank you for the tips. I love your blog.
xoxo
nadine
We couldn’t agree more! Applying false lashes can be really tricky when you aren’t sure what you’re doing. But once you learn the proper technique, it becomes a piece of cake! 🙂 We’re so happy to hear that you found the tips in this article so useful. Thanks a bunch for reading and commenting! <3
All the best,
The QC Team
Dermalmd Eyelash Growth Serum works just as well as Latisse and lash boost at a much better price. I am going to have a lash tint and lift and get rid of mascara use. Very happy with the product. Easy to use and often just use once a day and lashes are still long and thick.
Hey Corey, thanks so much for the tip and product recommendation! 😀 We’ll be sure to look into it!
All the best,
The QC Team
Thanks for share.
Looking for an eyelash salon in Sarasota? Book an appointment at Lash Boutique. They are the best eyelash salon in Sarasota and have a team of experts who can help you achieve the lashes of your dreams.