Sarah Seguin, Author at QC Makeup Academy - Page 13 of 21
All Posts By

Sarah Seguin

Graduate Feature: 
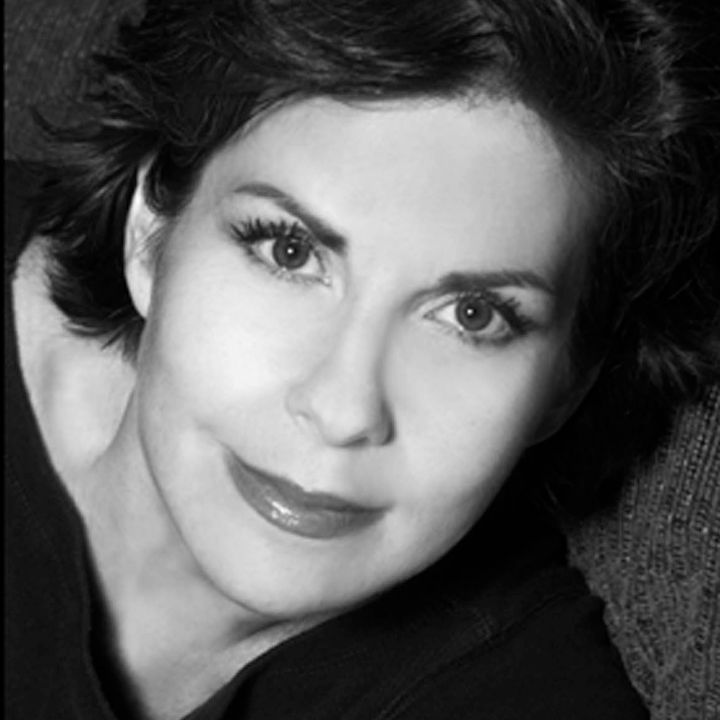
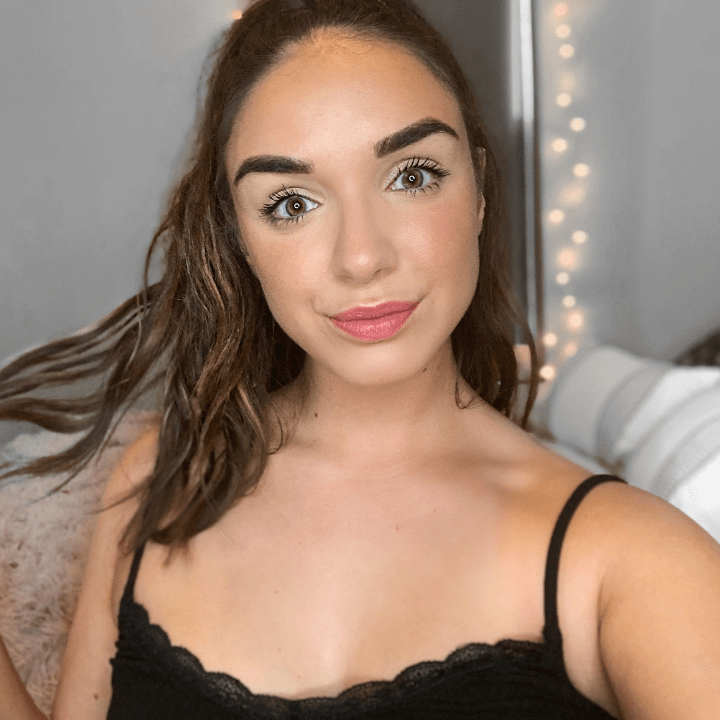
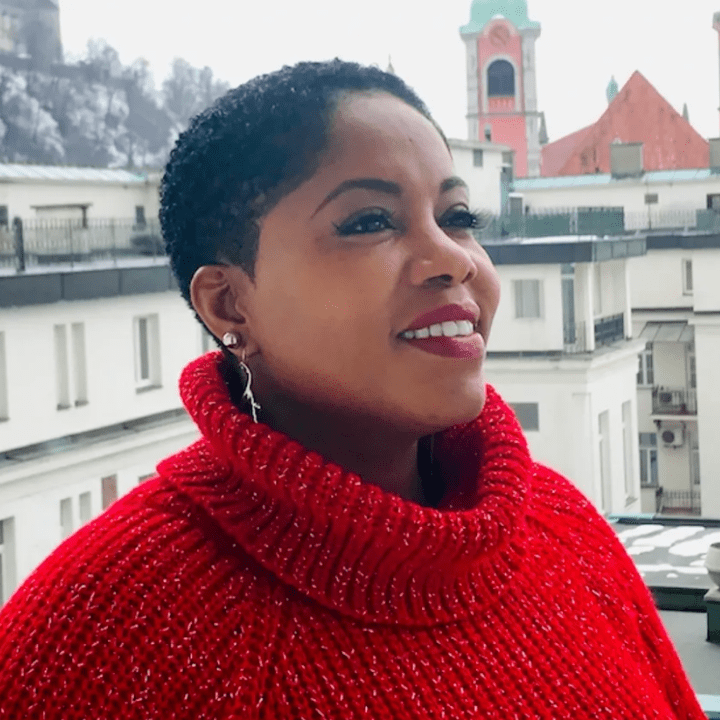
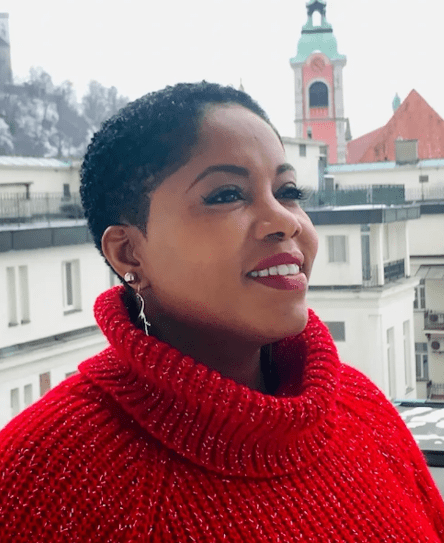
Emma-Louise Churcher

By Graduate Feature One Comment

Why did you decide to do professional makeup training and become a makeup artist?

It all started on my wedding day. The makeup artist that did my makeup did such a fantastic job – I looked and felt amazing!

I decided then and there that I wanted to make others feel the way I felt. The feeling you get when a client looks into the mirror for the first time, after you’ve done their makeup, is the best feeling!

How would you describe your makeup style?

Bridal Glam is absolutely where my passion lies, but I also love to be creative with color!

You first began your makeup training with QC Makeup Academy back in 2017. How has your professional career grown since then?

When I started my QC journey, I was a complete novice when it came to makeup! I mean, I didn’t even know the difference between a cut crease and a smoky eye. Now I have my dream job on a makeup counter, and I’ve just started taking bookings for bridal makeup jobs in 2021!

View this post on Instagram

This look was inspired by @judastape - I am crushing over the contrast of Orange & Blue 🧡💙⠀ ⠀ I also took inspiration from @meganschrama with the reflection photo!⠀ ⠀⠀ Products Used:⠀⠀ Base:⠀⠀⠀ @collectionlove Pore Minimiser Primed & Ready Primer⠀⠀⠀ @itcosmeticsuki @itcosmetics CC Cream - Medium⠀⠀⠀ @makeuprevolution Conceal & Define Concealer - C5⠀⠀⠀ @muacosmetics Professional Loose Setting Powder - Translucent ⠀⠀⠀ @chanel.beauty Bronzer⠀⠀ @physiciansformula @physiciansformulauk - Butter Bronzer⠀⠀⠀ @elfcosmetics @elfcosmeticsuk Monochromatic Blush Stick - Berry⠀⠀⠀ @fentybeauty Highlighter⠀⠀ ⠀⠀⠀ Eyes: ⠀⠀⠀ @plouise_makeup_academy @plouise1 Baseic Bright Bases - OTT Orange & Yes Aye Yellow⠀ @staceymariemua @bperfectcosmetics XL Carnival Palette - Lit, Shuffle, Keen⠀ @shrine @mehronuk Collab Palette⠀ @lagirlcosmetics @lagirlcosmeticsuk Neon Liner - Electric⠀ @maybelline @maybelline_makeupuk The Falsies Lash Lift Mascara⠀⠀⠀ @ardellbeauty_uk @ardellbeauty Demi Wispie Lashes⠀ @rimmellondonuk Kohl Eyeliner - Black⠀⠀ @peachesmakeup Pigment - Moonlight⠀ @anastasiabeverlyhills @abhlondonuk @abhworldwide Dip Brow Pomade - Medium Brown⠀⠀⠀ @pinkhoneyuk Raspberry Flex Brow Glue⠀⠀⠀ @morphebabemakeup @morphebrushes @morphefeatures @mykitco Brushes ⠀ @mollyobrienbrushes Jim Bob Brush ⠀ @superdrug @superdrugpr ⠀ ⠀ Lips: ⠀ @shrine @mehronuk Collab Palette⠀ @staceymariemua @bperfectcosmetics XL Carnival Palette - FairPlay⠀ ⠀ Black Pig Mirror @jeffreestar @jeffreestarcosmetics @shanedawson Conspiracy Collab

A post shared by Emma I Makeup Artist (@emma_louise_beauty) on

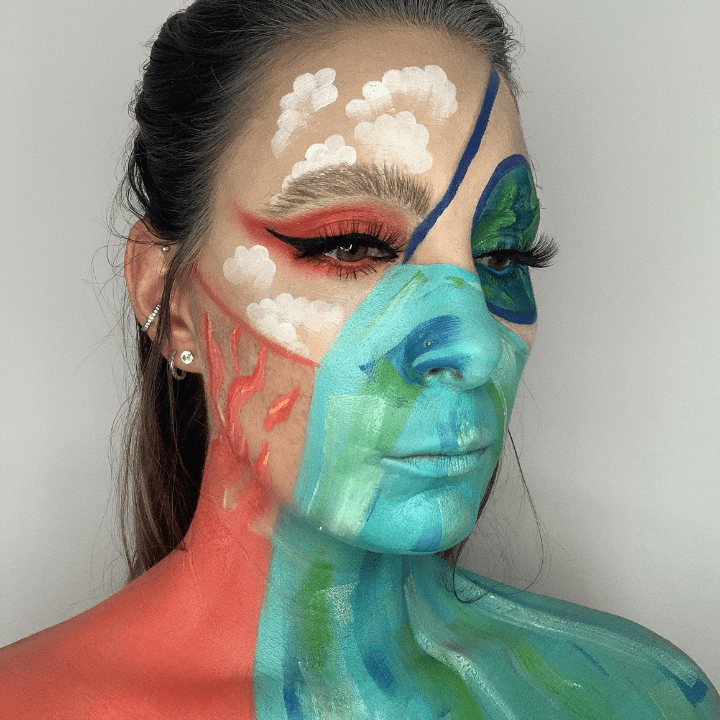
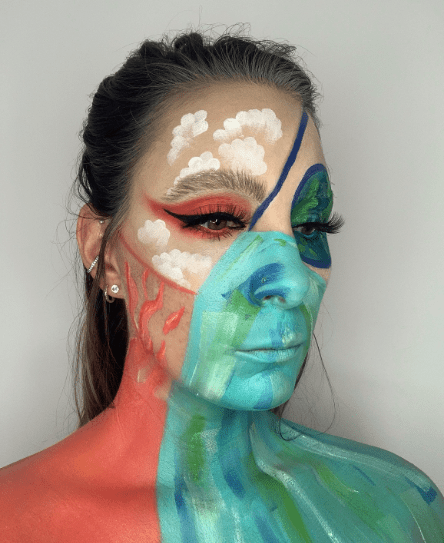
You have a knack for creating innovative and artistic eye makeup. Where does your inspiration come from?

I take inspiration from everywhere! My camera roll is full of images of other people’s work that I admire. It can even come from a pretty pattern, or a flower that caught my eye.

Social media also has a huge impact on what inspires me. I enjoy spending hours looking at other people’s creations.

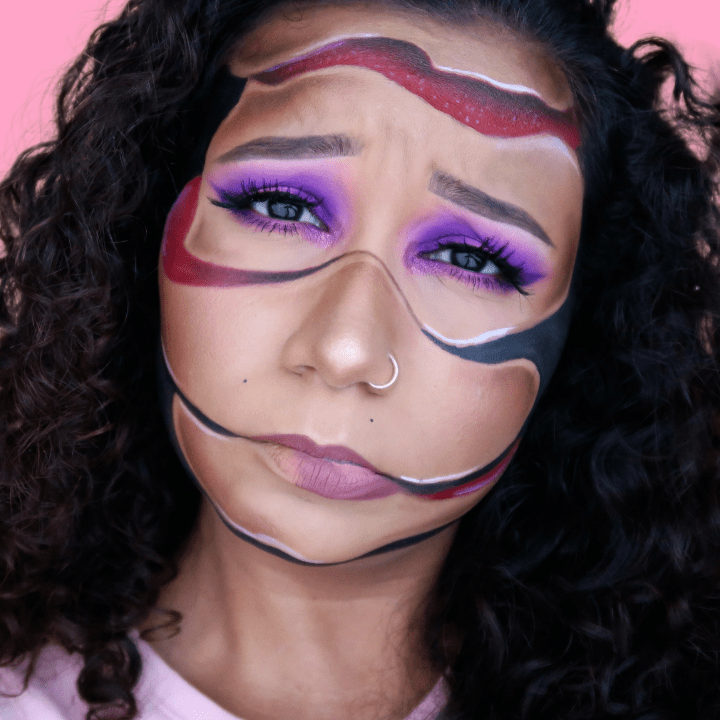
You also have a lot of fun, quirky looks involving glitter, jewels, and funky makeup colors. What draws you to this out-of-the-box style of makeup?

Festivals and bright neon colors represent summer time for me. I thoroughly enjoy representing this side of myself through my makeup!

Makeup is an art; it’s a way to express yourself. I use my Instagram platform to showcase the different kinds of makeup I enjoy, and to show how versatile makeup can be. I also like the idea of being able to inspire others to get creative!

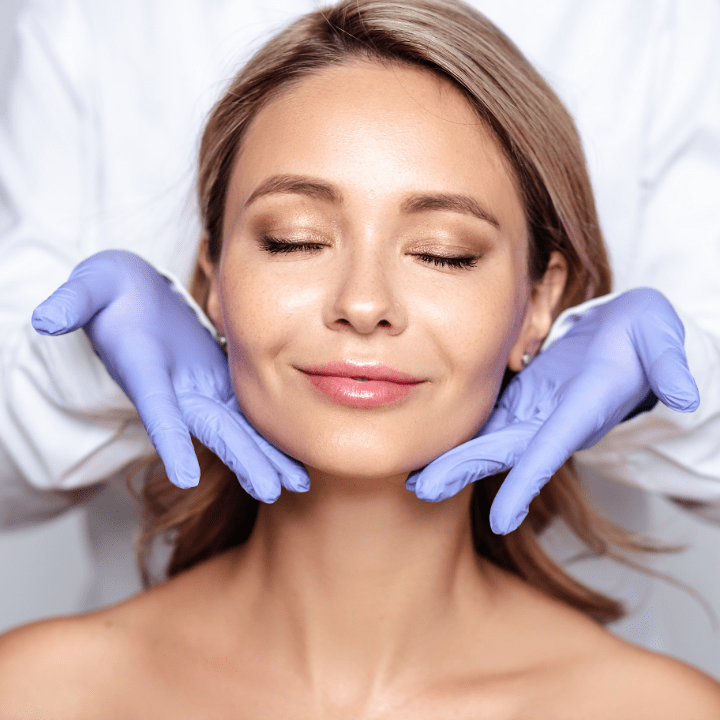
You offer a large array of services to you clients, such as: bridal makeup, prom/occasion makeup, skincare assistance, waxing, eyelash/eyebrow services, and even makeup training! What’s your favorite area of the beauty industry, and why?

Makeup is by far my favorite area of beauty. It took me a little while to realize this, as my MUA journey started by accident. For years, I have been a Beauty Therapist/Nail Tech, offering treatments to friends and family in my spare time.

Eventually, my friends started asking me to do their makeup. After realizing I had a natural flair for it, I decided to pursue this as a career and study to become a professional makeup artist.

What has the process been like in starting your own business?

As with all things that start from scratch, it was tough at the beginning. I live in quite a remote area, so building clients was a long journey. But honestly, I only started because I was passionate and wanted to share my passion with others. Everything that has followed has just been an amazing journey!

View this post on Instagram

🌈 Love is Love 🌈⠀ ⠀ My Pride Inspired Look - Happy Pride Month ⠀ I’m constantly inspired by how people express themselves through art & my art is my makeup, my face the canvas. What inspires you the most?? ❤️🧡💛💚💙💜 I enjoyed recreating my pride look from last year — it’s good to see how far I’ve come in just a year! Swipe to See ➡️⠀ ⠀ Products Used:⠀ Base:⠀⠀⠀⠀⠀ @elfcosmetics @elfcosmeticsuk Pore Putty Primer⠀⠀⠀⠀⠀ @makeupforever Ultra HD Foundation⠀⠀ @nyxcosmetics @nyxcosmetics_uk HD Concealer⠀⠀⠀⠀⠀ @makeuprevolution Trans Setting Powder⠀⠀⠀⠀⠀ @chanel.beauty Healthy Glow Bronzing Glow⠀⠀⠀ @physiciansformula Butter Bronzer⠀⠀⠀⠀ @b._by_superdrug Liquid Blush⠀⠀⠀⠀ @hudabeauty Winter Highlight Palette⠀⠀⠀⠀ @morphebrushes Setting Spray⠀⠀⠀⠀⠀ ⠀⠀⠀⠀⠀ Eyes: ⠀⠀⠀⠀⠀ @plouise_makeup_academy @plouise1 Base⠀⠀⠀⠀⠀ @staceymariemua @bperfectcosmetics XL Carnival Palette - Wasted, Mood, The Hype, Inferno, Lit, Keen ⠀ @peachesmakeup Pigment - Moonlight⠀ @rimmellondonuk Black Kohl Liner⠀⠀ @lagirlcosmetics Neon Liner - Screamin’ & Gotcha⠀ @collectionlove Lash Surge Mascara ⠀⠀⠀⠀⠀ @anastasiabeverlyhills @abhlondonuk Dip Brow Pommade - Medium Brow⠀⠀⠀ @pinkhoneyuk Raspberry Flex Hold Brows @__dollbeauty_ lashes - Jamie G⠀ @morphebrushes @jaclynhill @jeffreestarcosmetics @jeffreestar Brushes Used⠀⠀⠀⠀ ⠀⠀⠀⠀ Lips:⠀⠀⠀⠀ @ctilburymakeup Medium Pillow Talk Liner @ Refresh Rose Collagen Lip Bath

A post shared by Emma I Makeup Artist (@emma_louise_beauty) on

You also have your own beauty vlog on YouTube! What are your long-term goals for your channel, and how do you intend to achieve them?

YouTube is something that I have always wanted to get into. The concept of sharing advice and knowledge is really appealing to me. Between you and me, I’m a serial YouTube watcher! I know that I personally have learned so much, so I thought it would be fantastic to be able to give something back.

What ONE piece of advice would you give aspiring makeup artists who want to get makeup training and one day launch their own business?

Never give up!

If you’re super passionate about something, then always follow that dream. The journey there will likely be hard, and you will have moments of doubt. But know in your heart that it’s what you really want, and don’t stop striving for it until you reach your final goal.

What made you want to earn your makeup certificate, and why did you decide to do your makeup training through online school?

My love for makeup came a little later in my life. By the time I realized that this was what I wanted to do, I already had a full-time job. As much as I would of loved to attend a physical makeup school full-time, it wasn’t really an option for me.

So, I decided to look into other options. A friend of mine had already enrolled with QC Makeup Academy and recommended it to me. After doing extensive research, I decided to go ahead and book with them.

View this post on Instagram

Today I start a new series —— A series of looks inspired by people I follow who I find constant inspiration from ——— Whether that is from the looks they create or from being genuinely lovely people! ⠀ ⠀ Today’s look is inspired by @katiewakenshaw —— Her account is GOALS if you love bold colourful makeup as much as I do!! ⠀ ⠀ I have been trying really hard to improve on my blending skills and create more bolder looks —— I just HAD to get a close up of this one as I am really proud of my progress 🙌⠀ ⠀ Products Used: ⠀ Base:⠀⠀ @elfcosmetics @elfcosmeticsuk Pore Putty Primer⠀⠀ @ctilburymakeup Unisex Healthy Glow⠀ @nyxcosmetics @nyxcosmetics_uk HD Concealer⠀⠀ @makeuprevolution Trans Setting Powder⠀⠀ @chanel.beauty Healthy Glow Bronzing Glow @physiciansformula Butter Bronzer⠀ @b._by_superdrug Liquid Blush⠀ @hudabeauty Winter Highlight Palette⠀ @morphebrushes Setting Spray⠀⠀ ⠀⠀ Eyes: ⠀⠀ @plouise_makeup_academy @plouise1 Base⠀⠀ @staceymariemua @bperfectcosmetics XL Carnival Palette ⠀⠀ @peachesmakeup Pigments - Snakebite @lagirlcosmeticsuk @lagirlcosmetics Neon Eyeliner⠀⠀ @collectionlove Lash Surge Mascara ⠀⠀ @soapbrows Brow Lamination Effect ⠀⠀ @anastasiabeverlyhills @abhlondonuk Dip Brow Pommade @cocoandclassbeauty Lashes - Elizabeth ⠀⠀ @morphebrushes @jaclynhill @jeffreestarcosmetics @jeffreestar Brushes Used⠀ ⠀ Lips:⠀ @muacosmetics Lip Liner - TLC & Lipgloss Unique

A post shared by Emma I Makeup Artist (@emma_louise_beauty) on

At first, I was anxious about learning such a hands-on skill online. But the resources available, as well as the feedback from the tutors, really are amazing!

I didn’t feel like I missed out from not being in a physical classroom. If anything, I think it was better because I was able to go at my own pace. If there was something I needed to practice more before moving on, I knew I had the time to perfect that skill.

Why did you ultimately choose QC Makeup Academy for your makeup training, and how has your experience been?

Overall, my experience has been fantastic! There is so much support from the QC Virtual Classroom, the live webinars, the online live chat with QC’s Support Team. There’s always someone nearby to answer any questions you might have.

I have learned so much in the past 3 years, and I wouldn’t have been able to do that without the support of QC. Also, the personalized feedback you receive after you submit each unit is great! Because it’s recorded and sent to you as an audio file, you can listen to it as often as you need to.

That way, you can practice, practice, practice!

Is there any particular makeup technique you’re currently working on perfecting?

At the moment, I’m really trying to get into more creative looks. I love the idea of playing with different textures and face paint. It’s exciting to learn new skills again and push myself out of my comfort zone more!

What’s in store for you and your makeup business in the next year?

Bridal makeup is something that I definitely want to be doing more of, as being a part of someone’s wedding day is such a special experience. I’m also just about to join a local salon, so hopefully in a year, I’ll be doing more of what I love every day!

What is your ONE Holy Grail makeup product and why?

I think it would have to be Charlotte Tilbury’s Hollywood Flawless Filter. If you like glowing skin, this product will change your makeup game! It looks so stunning when used as a primer underneath foundation, but you can also apply a very small amount over the top of foundation as a gorgeous highlighter. I find that it blends into the skin perfectly!

Ready to begin YOUR makeup training and start your MUA journey? Enroll today in QC’s internationally-leading online Master Makeup Artistry Course!

My Experience Doing Makeup Jobs for Popular TV Shows

By From the Experts No Comments

Australian MUA, Charlotte Ravet, is the proud owner of her very own hair and makeup business. From bridal, to editorial, to film and television, and everything in-between – Charlotte provides a wide variety of services that cater to all types of clientele!

Her extensive resume includes working for Prada, L’Oreal, and even the cast of the hit show, Glee! A developer of educational programs, Charlotte has even been awarded Best Makeup Educator of the Year by the Australian Industry Makeup Awards.

Here, she looks back on her experience as a makeup artist for popular TV shows, and shares some of her favorite memories!

The TV industry can provide a very exciting work environment for makeup artists! I worked in TV for 8 years before working in fashion and education. I can definitely say: some of the best memories of my career are from during this time.

How I Broke Into the Industry

Right after finishing makeup school, I had the opportunity to do an internship for a TV channel for 2 weeks. It was a local TV channel that was just starting out. All of us involved were fresh out of school, so needless to say, everything was very new for us!

I remember being very impressed to be working with such a full team. We started shooting on location, while we waited for the studio to be ready. After the initial 2-week period was over, the channel offered to extend my internship for six months.

Funny enough, I actually wound up politely declining this offer. (I had bills to pay, after all!). That’s when they called me back and offered me a full-time job!

Climbing the Ranks

So, that’s when I formally started working as a TV makeup artist! In terms of the types of makeup jobs that a brand new, up-and-coming MUA could hope for, that was a pretty great opportunity!

This TV channel was part of a big group. So, even if we were shooting on a low budget, we started having bigger and bigger guests and events. For instance, I had the pleasure to do makeup for the cast of Glee, as well as on celebrities like Robbie Williams and Craig David (my 15-year old-crush). I also had the chance to work on a ton of different French artists.

We had a live TV show every day, so the work environment was always very busy! I remember how one day in particular, I was called to do the makeup of a presenter who worked for the radio channel attached to the TV channel I was under contract with.

When I looked outside, I saw a long queue of people, stretching all the way around the block…

Now, I have to confess, I never watch TV and I barely listen to the radio. But when the crew told me we had a very special guest and dropped her name, I knew it sounded vaguely familiar…

Spoiler alert: it was Lady Gaga. I was about to work with Lady Gaga!

After the interview, we went to a small room to shoot a teaser. There wasn’t much space and I was called to do a touch up, so I did. I realized only afterwards how famous Lady Gaga actually was.

For the record, she was absolutely lovely! ❤️️

The biggest celebrities often come with their own makeup artists. But sometimes, the makeup artist doesn’t come to the studio, or they can’t be granted access into the studio. This may be due to security reasons, or simply a lack of space (as it was in this case).

Leaving the Television Industry

Eventually, I decided to resign in lieu of starting my own freelance makeup business. But for those 8 years, I was privileged to experience many once-in-a-lifetime moments. I was lucky enough to be able to travel across Europe, and even the Dominican Republic. I got to amazing artists, and am still very good friend with the people I met on TV.

For 8 amazing years, I was a dedicated makeup artist for famous French TV hosts, supervisor makeup artist for TV shows, and all sorts of celebrities. I had a busy calendar!

I also started working in fashion. Through the network I had created, I ended up as a supervisor artist for private events hosted by Prada and MiuMiu. So, why did I choose to walk away from the TV industry?

The thing was, as much as I loved working in TV, I realized I was missing something.

I wanted to learn English, and open my career internationally. This is how, at 27-years-old, I packed up everything and came to Australia. When I first got here, I didn’t know anyone!

But from there, the rest is history. I am now between Paris and Australia; expanding my career as an educator for beauty brands and diplomas, as well as working as an editorial makeup artist.

Pros of Being a Makeup Artist in the TV Industry:

  • The people you will meet! This obviously includes celebrities, but most of all, I’m referring to the crew. I met some of my best friends when working for TV. When you shoot on location, it’s not uncommon to travel and work 12-hour days. You need have a strong connection with the people you’re working with, especially when spending all that time together.
  • You learn to work fast! During my first year, I typically had 6 people to do makeup on in just 1.5 hours. With low budgets, I had to do everything. I’m not going to lie – most of the time, it felt like a marathon. But now, I am not afraid of short timelines.
  • You can learn all about the technical side of TV and makeup! I was often questioning the Director of Photography about the lighting, as I loved to observe how the light would change the makeup I did. I have learned a lot from my colleagues! This helped me to understand the requirements of TV makeup, and what it takes to become an in-demand makeup artist.
  • You can have regular work! TV shows are shooting everyday. In many ways, the TV industry is a safe place for you to keep freelancing on the side, while still providing you with regular, reliable work.

Cons of Being a Makeup Artist in the TV Industry:

  • The lack of creativity. This was honestly my biggest frustration. TV makeup is often technical, but rarely creative. I needed to explore other types of makeup jobs in order to understand ALL the aspects of makeup.
  • Long hours. As I said, expect 12 to 14-hour days. I remember one day, I worked 17 hours straight! Not to mention, the day often starts at 4 or 5AM when working for morning shows.
  • The wait. You often do makeup in the morning, or at the beginning of the show. Then you have to wait to do touch-ups. So, you need to stay focused and have to wait – sometimes, for hours at a time.
  • The stress. Most artists I have met were nice to me. This could potentially be because I was very young at the time. I was always the baby in the crew! But it’s also not uncommon to meet some guest artists with a LOT of stipulations. This can be stressful.

My Top Tips If You’re Considering a Career as a TV Makeup Artist:

  • Have an in-depth understanding of color theory, as well as the importance of creating the perfect complexion with a light-to-medium coverage. I have learned how to color correct with precision. This helps me to create a flawless complexion, while avoiding thick foundation (which looks bad when shooting in HD) or needing a lot of touch-ups. This definitely helped me get more work in Paris, as well as in Australia!
  • Be flexible. Things never go as planned! You need to be ready for last-minute changes. This is the case for all areas of the MUA industry, but especially in TV.
  • Learn about celebrities. Once I had the call sheet, I would always research who the artists were. Not only can you get a better idea of what to expect, but it shows your professionalism.
  • Maintain your network. As with any makeup job, networking is KEY! I will never say it enough: you have one reputation, and only one. The wrong move can hinder your ability to book clients, and the wrong attitude can stop others from wanting to work alongside you. Kindness goes a long way, and will always be remembered!

Above all else: do your best, work with a smile, and remember that mistakes can happen. So long as you put in the time, dedication, and effort, you’ll be sure to go far!

Want more tips for booking makeup jobs? Learn how stylized photoshoot can advance your career!

Industry Spotlight: Chantal Mariani

By Featured, From the Experts No Comments

Chantal Mariani has been a professional MUA for many years. Her extensive makeup training and resume are groundbreaking, setting the bar high within the beauty industry. It’s with great pleasure that we welcome Chantal as QC Makeup Academy’s newest expert tutor!

As a part of I.A.T.S.E. LOCAL 798, Chantal has had the pleasure of working on films, daytime dramas, news programs, and talk shows with various New York television stations. In addition to doing print work for models and actors, she’s also enjoyed her time as an instructor for makeup artists and design programs in several of New York City’s leading schools.

Chantal has also chaired the Education Department for the East Coast Union of Film and Television Makeup Artists, I.A.T.S.E Local 798. Among her many responsibilities, she was responsible for creating their curricula, as well as serving on the Membership Committee as an adjudicator for new applicants.

Several celebrity clients include:

  • James Earl Jones
  • Patrick Stewart
  • Ellen Burstyn
  • Vanessa Redgrave
  • Christopher Reeve
  • Sigourney Weaver
  • Susan Sarandon
  • Ray Liotta
  • Gwyneth Paltrow
  • Miranda Richardson
  • Iman
  • John F. Kennedy Jr.
  • Elle McPherson
  • Brooke Shields
  • Jaclyn Smith
  • Cicely Tyson
  • And many more!

Let’s get to know Chantal even more!

What sparked your passion for makeup artistry?

Life literally threw me into makeup artistry! I had graduated from the Fashion Institute of Technology, and started my career as a Fashion Buyer on 7th Avenue. One morning while on the subway, my fellow buyer unexpectedly landed a date, and asked me if I had anything I could use to put some makeup on her for it. So, I did her makeup… and she was delighted!

Another work friend then suggested I take a course and get professional makeup training, so I did. My teacher (who was actually Stevie Nicks’s makeup artist) immediately sent me on jobs that he couldn’t do. He even had me sub for him in class!

Every teacher I studied afterwards with did the same! My passion for makeup started the minute I started my makeup training.

Can you speak more about your affiliation with the I.A.T.S.E. LOCAL 798?

I’ve been a member for around 25 years or so. Over that time span, I’ve grown from an excited media makeup artist, to chairing their Education Department!

That position, among other endeavors, allowed me to create their education curriculum. I also got to travel to the Union’s southern territories, where I educated and brought both existing and new members up to my standard. I brought with me the “Boys at Saturday Night Live” (our top special effects makeup experts) and our Business Agent, and there, I taught my beauty classes.

We all offered them our specialty courses, and they never wanted us to leave! I have had former students as members, and in management in the Union, and I am extremely proud of them!!

What is the most rewarding part of being a makeup educator?

How proud I feel of my students! They have nabbed some of the juiciest positions in the field in my opinion, including:

They’re all over! I can’t walk into a trade show without seeing someone I had the pleasure of teaching. In fact, I usually have to factor in extra time so I can chat with them, catch up, and recall memories.

Also, I feel like beloved family to them, and they to me. I am so very blessed!

What are the 4 secrets to your success that might surprise people?

1. TRANSCENDENCE:

A keen, telepathic assessment of a client’s soul, spirit, and energy before I start working on them. I speak to them first. This helps me establish how and where to go for a uniquely custom-designed look. A person in my chair has always been a soul who is a gift from the Universe. First and foremost, it’s always about my relationship with them.

2. HUMILITY:

This is the chief driving force behind everything I do.

3. SERVICE:

If I cannot be of authentic service, and possess integrity in a situation, it is not worth it for me to be in that situation.

4. STEADFASTNESS:

I have weathered numerous storms of injustice, with the hope that justice would be restored. In my experience, it always was – and often, in an even better way!

What advice would you give to your younger self when you were just starting out?

Have faith in your artistry and path of growth!

Follow your path with love and hope. You will have a “thicker skin” for all your endurance, and confidence for all of your future knowledge. Honor your belief in the power of knowledge and education. Trust in the good in people. Above all else, don’t be afraid.

You can do whatever you set your mind to!

Chantal has worked with the industry’s top professionals, and you can learn how she did it in an exclusive webinar on July 14th. Sign up today!

Skincare Consultant vs. Dermatologist Part Two: What’s a Skincare Consultant?

By Skincare, Your Makeup Career No Comments

In Part One of this two-part series, we took a look at dermatologists: what they do, the education required, and the qualifications needed to do their job. Today, we’ll now focus on skincare consultants, as well as how to distinguish your role with clients!

What is a Skincare Consultant?

As a skincare consultant, it’ll be your job to meet with clients in order for you to assist with their skincare concerns and inquiries. Common issues you’ll see can include:

You’ll draw from your professional training and expertise to offer guidance, regarding which skincare products are optimal for the client’s needs. These needs may be related to an existing skincare issue or condition. They may also pertain to the right type(s) of makeup to use for the client’s skin type, lifestyle, etc.

What does a Skincare Consultant Do?

Skincare consultants primarily assist clients by helping them put together optimal, personalized regimens for their specific skin type and/or condition(s).

Additionally, clients will often come to you with questions about tying skincare with makeup. For instance, they may need professional guidance to help figure out which skincare products would work best alongside their existing makeup routine. Similarly, some clients may have problems with sensitive skin, allergies, etc.

As such, they may be searching for different kinds of makeup products that would be safest to use on their skin, without causing any negative reactions.

Skincare consultants are NOT responsible for prescribing medical treatments or performing surgical procedures. For more extreme skincare cases requiring medical attention, a skincare consultant will likely advise the client to seek the assistance of a licensed dermatologist.

What Schooling/Qualification Does a Skincare Consultant Need?

Technically, you don’t actually need any formal training or licensing to become a skincare consultant. But without these things, how can you ever hope to be a true professional? The health and overall well-being of a person’s skin is important. It shouldn’t be trifled with by placing it in the hands of an unqualified individual.

Luckily, most reputable makeup schools provide some form of skincare education, whether it’s through individualized skincare programs, or as part of their makeup artistry classes.

How to Distinguish Your Role with Clients

Many of your clients might not know exactly what a skincare consultant does. They may mistakenly believe that what you do is the exact same as what a dermatologist does. It’s your responsibility to make sure they understand what you’re qualified to assist them with, and what you’re not.

After all, clients will be coming to you because they trust your industry knowledge and judgement. As such, it’s important that YOU fully understand your job responsibilities. If a client is unsure what sorts of services you can offer them, have an open discussion and answer whatever questions they may have.

You can also preemptively cover this by the measures you take in your marketing strategies! If you have a professional website (and you should), try to be as transparent as possible about the kinds of services you offer clients. Often, being upfront with this information on your website will help answer a bunch of inquiries potential clients will have – before they’ve even had their consultation with you!

It’s also critical that you recognize and honor all of the things that fall outside of your expertise. Never try to take on something you haven’t been adequately trained for, simply because you don’t want to potentially lose a client. Doing so can pose a great risk to your client.

Remember: the client should always be your #1 priority! So long as you always make that clear above everything else, we know you’ll have a long and successful career ahead of you as a skincare consultant! 😊

Want to learn more? In this fun and informative webinar, watch as QC executive MUA, Nathan Johnson, reveals the 5 secret ingredients to completely transforming your skin!

Skincare Consultant vs. Dermatologist Part One: What’s a Dermatologist?

By Skincare, Your Makeup Career 2 Comments

So, you’ve decided that you want to add skincare services to your makeup career. This is great! Not only will it add to your overall skill-set as a beauty expert, but it’s also an awesome business move. Now the question is: how do you get started?

Obviously, the smartest path is to get yourself expert training. Most makeup artist schools will provide students with some type of skincare education and certification. For example, QC Makeup Academy offers an internationally-leading online Skincare Course that will prepare you to become a skincare consultant!

But is this enough?

In the world of skincare, the two most popular career paths are to either become a skincare consultant or a dermatologist. The option best suited for you is entirely dependent on what YOU want to do with your career. But make no mistake: they are VERY different professions, requiring different sets of skills and qualifications!

Let’s start by first examining dermatology. In particular, we’ll look at what dermatologists do, and what kind of certification is needed.

What is a dermatologist?

A dermatologist is a medical professional who specializes in treating skin, hair, and nail issues. Their patients can range anywhere from newborn babies to senior citizens, and everything in between. Due to the extensive schooling and training required for this profession, a dermatologist is actually a type of doctor!

What does a dermatologist do?

The responsibilities of a dermatologist are extensive and incredibly varied. Because each client may come with their own unique issue, a dermatologist must be skilled in many different areas of skincare treatment.

Some of their job duties may involve:

  • Conducting an initial consultation with a client
  • Examining the patient’s skin and diagnosing the issue
  • Recognizing various skincare conditions and afflictions
  • Understanding the proper medical treatment(s) that should be prescribed to a given condition
  • Prescribing said treatments to clients
  • Following up with clients and assisting through the treatment
  • Assisting with hair loss
  • Surgically removing acne, cysts, etc. (Think Pimple Popper!)
  • Surgically removing any suspicious and/or potentially dangerous skin conditions, such as melanoma, carcinoma cells, etc.
  • And much more!

What schooling does a dermatologist need?

Any job that gives you the title of “doctor” is going to require lots of schooling and training! Dermatology is of no exception. After all, dermatologists are the leading experts when it comes to skin, hair, and nail knowledge. In order to get to that level of expertise, you’ve got to be willing to put in the time.

To put this into perspective: if you wished to become a dermatologist, you would first need to do 4 years of post-secondary schooling and receive a bachelor’s degree. After that, you’d be required to do 4 more years in medical school, in order to become a licensed doctor.

Once your education is complete, next comes the hands-on experience. Any doctor needs to have in-field training for a certain period of time before they can successfully branch out on their own. When it comes to dermatology, this often means a year-long internship, followed by three years of residency.

The average dermatologist needs to clock in approximately 12,000 to 16,000 hours of working under the wing of experienced doctors, and getting hands-on experience with treating patients. Yes, this is a lot – we’re not going to try and sugar-coat it. Any aspiring dermatologist will earn their stripes (and then some) during the first few years of their career.

But the process is this rigorous so that once you’re ready to fly solo, there’s NO doubt that you’ll know exactly what you’re doing!

What licensing does a dermatologist need?

After completing their residency period, dermatologists then need to do an additional set of exams. Successful completion of these exams will allow them to become board-certified. Board certification provides clients with the promise that their dermatologist has been trained at the highest possible level.

On the other hand, a dermatologist who is not board-certified is often seen as a red flag. More often than not, this means that they didn’t pass their board exams. For obvious reasons, most clients won’t want to put their skin and/or health concerns in the hands of someone who shows signs of incompetence.

Where one needs to obtain board certification depends on where they’re located. For example, in the United States, board certification would either come from the American Board of Dermatology, or the American Osteopathic Board of Dermatology. In Canada, board certification is done through the Royal College of Physicians and Surgeons of Canada.

If you’re interested in becoming a professional dermatologist, we strongly suggest researching into your country if residence to find out what the board of certification is in your area.

Can a Skincare Consultant Course qualify you to be a dermatologist?

No, it cannot. As we’ve seen, a dermatologist needs post-secondary education, followed by medical school. A Skincare Consultant Course can often be done in as little as 3-6 months. You can also frequently find them offered by reputable makeup artist schools.

So, if you have aspirations of being a licensed dermatologist, know that a Skincare Consultant Course won’t be able to provide you with the thorough training and education that’s needed for this profession.

However, a Skincare Consultant Course provides you with a very different set of skills! In fact, you’ll likely find that these skills are far better suited to your career as a professional makeup artist. This is because they can be incorporated much more effortlessly into your business!

How, you may ask? You’ll just need to wait for Part Two! There, we’ll break down exactly what a Skincare Consultant is, the training required, and the qualifications you’ll receive! 😊

How does one go about finding the right dermatologist for their specific needs? Keep reading to learn the 7 key things to consider when searching for the perfect dermatologist!

Perfecting the “No Makeup” Look Tutorial [video]

By From the Experts, Tutorials & Tips No Comments

Devyn Gregorio is a QC Makeup Academy Student Ambassador and professional makeup artist. You can find her on her YouTube Channel, DevDevGregs, where she makes beauty videos. Today, Devyn walks us through the step-by-step process of her “no makeup” makeup look!

As you learn how to do makeup, know that there’s more to being a makeup artist than mastering the smoky eye, or a dramatic nighttime look.

Sometimes, less is more! Being able to create the perfect “no-makeup” demonstrates to your clients that you truly understand the makeup theory behind your work. By using makeup to bring out a person’s natural features, you’ll create a final result that gives the illusion of wearing little to no makeup at all.

This skill is especially useful if you’re looking to start a career in the TV and film industry! So, whether you wish to give YOURSELF a casual no-makeup look this summer, or you want to prepare yourself for future clients, this tutorial is for you.

Let’s get to it!

Watch Devyn’s video below!

Makeup Products Needed:

Luckily, because the entire purpose is to go for subtlety, you won’t require your entire makeup kit to create this look. Below is the list of specific products that Devyn uses throughout her tutorial. Feel free to use your own makeup products in replacement of hers.

Here’s what Devyn used:

1. Primer. Devyn uses e.l.f. Jelly Pop Dew Primer, but you can use whichever primer you most prefer!

2. Foundation. Use the product and shade of your choosing. Devyn selects NYX’s Bare With Me Tinted Skin Veil, and mixes the shade, True Beige Buff, with Cinnamon Mahogany.

3. Concealer.

4. Bronzer. Devyn selects the Wet n’ Wild MegaGlo Contour Makeup Stick, in the shade, Oaks On You. This product offers a creamy texture for her bronzer. In addition, she also uses a powdered bronzer (MAC’s Give Me Sun! bronzer).

5. Highlighter. In this tutorial, Devyn uses the highlighter product from the Alamar Cosmetics Brighten & Bronze Complexion Trio kit (in Medium/Tan). In addition, she also uses Maybelline’s Master Chrome Metallic Highlighter (in Molten Gold).

6. Brushes. In particular, you’ll want:

  • A large, fluffy brush for your bronzer
  • A contour blender brush
  • A powder brush
  • A highlighter brush
  • A brow brush

7. Loose setting powder. Devyn’s loose setting powder of choice is Juvia’s Place I Am Magic Setting Powder, in the shade, White Sands.

8. Blush. Devyn’s chosen blush is ColourPop’s Fresh n’ Peachy.

9. Brow pencil. Devyn uses NYX’s Micro Brow Pencil in the shade, Brunette.

10. Setting spray. As with the rest of this list of products, feel free to use whichever setting spray you want! Devyn selects Wet n’ Wild’s PhotoFocus 3-in-1 Primer Water.

11. Mascara. In this tutorial, Devyn uses Benefit Cosmetics’ BADgal BANG! Volumizing Mascara.

12. A lip product of your choosing, such as lip balm, a clear gloss, etc. Devyn chooses e.l.f.’s Sheer Slick Lipstick in the tone, Cherry Slush.

Let’s Recap!

Before diving into any of the steps, Devyn first reiterates the most important thing to remember when creating a natural makeup look: use a LIGHT hand!

After all, it’s always easier to build up a look’s intensity. It’s a lot harder to take away from a look if you go in with a heavy hand, right from the get-go. So long as you apply your makeup in thin, sheen layers, you’ll quickly discover that you can still use ALL of your regular products – even for this laid-back “no makeup” look!

Now, let’s move onto the look itself…

Step 1: Prime Your Skin.

Even though the name suggests no makeup, you know that you’re still going to be putting makeup on your face. As such, it’s important to properly prime your skin first. Not only will it make your skin feel its best, it’ll help protect your pores from getting clogged!

Step 2: Apply Foundation.

Next, Devyn applies a lightweight foundation to her skin. Because she currently has a bit of a tan, she chooses to mix two shades together, in order to match as closely as she can with her skin tone. Notice how she first uses her finger to apply the foundation to her skin, before blending it in afterwards with a blending sponge.

Because our hands have a natural tendency to warm up our makeup product, don’t hesitate to do the same when applying your foundation. Just make sure that your hands are cleaned and sanitized with soap first!

As you can see, Devyn’s skin looks a lot more evened out after applying her foundation. However, it’s not full coverage, as the aim of this look is still to appear natural.

Step 3: Apply Concealer.

Once again, you’re aiming for the “no makeup” illusion. So, here’s where keeping that light hand in mind is key! Here, Devyn applies a small dot of her concealer below each eye, before using her finger to pat it in and blend it out.

The final result should brighten and cover the skin beneath your eyes, while still looking breathable!

If you wish to take this a step further, you can add some brightness to your forehead and chin by applying the same small amount of concealer to these areas as well. Should any areas of your face require some spot concealing, feel free to tend to that, too.

Step 4: Time to Contour!

Rather than apply the bronzer directly to her face, Devyn instead uses her e.l.f. Precision Airbrush Stipple brush to apply the product. This allows for lighter coverage, in keeping with a more natural, organic look.

She applies her bronzer right onto her brush, before gently tapping it over the typical areas where she would bronze, such as her:

  • Cheekbones
  • Outer area of her forehead (near the hairline)
  • Around the jawline, blended downward into the neck

Next, Devyn moves onto powdered concealer and contour products. Using her Alamar Cosmetics trio palette, she takes a contour blender brush to first gather some of the highlight shade. She then gently presses it onto her under-eye areas.

Step 5: Set with Powder.

Now it’s time to set the rest of your face with some loose powder! Using a fluffy powder brush, press the powder throughout your face. This will help set both the liquid and cream products you’ve previously applied.

At this point, if you wish to go back over your bronzer with a powdered bronzer, you can do so for an added little POP!

Step 6: Additional Highlighting.

If you aren’t a fan of highlighting your skin, feel free to skip this step.

Here, Devyn relies on a highlighter she typically uses in her everyday makeup look. Once again, the secret here is to use a light hand! This can create a whole new affect on your skin.

After tapping a highlighter brush two times against her product, she swipes the brush head along her cheekbones and temples, using a feathery-light pressure. Keeping a loose grip on your brush handle will help you achieve these dainty strokes.

Since you’re trying to make it look as though you’re wearing little to no makeup, the goal with your highlighter is to make it appear as though you’re organically catching the light in certain angles. You DON’T want your highlights to be too obvious!

Step 7: Add Blush.

This is Devyn’s final step to finishing off your complexion. Lightly tap and press your blush into apples of your cheeks. This will bring a bit of a natural redness back to your skin, in the places you want it most!

Step 8: Define Your Eyebrows.

Time to move onto your brows! Taking her micro brow pencil, Devyn aims to perfect her existing brows – rather than completely fill them in or reshape them. Start by combing them up. This will allow you to see where their natural shape is. This is the shape you want to honor in this “no makeup” look!

Then, whenever you see spare areas, fill them in with fine, hair-like strokes. Start at the bottom of your eyebrows, and work your way up. Once finished, use your brow brush again to help blend everything together.

Step 9: Apply Eyeshadow…

…Just kidding! This is a “no makeup” look, after all!

Actual Step 9: Apply Setting Spray!

Devyn’s now ready to move onto her eyes. But before she does that, she prefers to apply her setting spray. Right before the spray is completely dried, Devyn takes a little more of her powdered highlighter and applies it to her eyelids.

Step 10: Put on Mascara.

If you wish to curl your eyelashes first, go ahead! If you don’t feel like doing this, though, that’s okay, too. Using your mascara of choice, apply it to your upper and lower lashes. Depending on how intense you want the final result to be, feel free to go back in and add another coat of mascara.

Step 11: Finish with Your Lips!

The final stage to Devyn’s process is to apply some sort of lip color/product. The beauty of the “no makeup” look is that there are a LOT of options for what you can choose to wear! The most important tip to remember is that dry lips will not complete any look.

Even though you’re going for a natural illusion, even just a thin layer of Chapstick can add a little extra shine to your beautiful pout!

If you’d prefer to add a bit of color, stick to soft, natural shades. Pink and peach colors are awesome choices! If you choose a product with a stronger pigment, gingerly tap it onto your lips so as not to get too bold of an application. You’ll be able to add some nice color and hydration, without overdoing it and ruining the “no makeup” mirage.

And with that, your “no makeup” look is complete!

Did you follow along with Devyn, and give this look a try? If so, let us know how it turned out in the comments below!

Want to learn how to do makeup professionally? Enroll today in QC’s internationally-leading Master Makeup Artistry Course, and become a professional makeup artist in as little as 3-6 months!

Special Effects Makeup: Sliced Face Tutorial [video]

By From the Experts, Tutorials & Tips No Comments

Gabrielle Rivera is a QC Makeup Academy graduate and professional makeup artist. To see more of her work, visit her Instagram here.

Part of being a special effects makeup artist – or even just an MUA in general – is about keeping up with popular trends! One such trend that’s been gaining more and more popularity is the sliced faced SFX look, originally created by the “Queen of Illusion Makeup”, Mimi Choi.

Want to learn how to master this look? Gabrielle’s here to break down each step, from start to finish!

Watch her video below!

Makeup Products Needed:

For such an elaborate special effects makeup look, there are surprisingly very few products you need when following along with Gabrielle’s special effects makeup tutorial! Keep in mind that you’re more than welcome to use any of your own products, in place of the ones Gabrielle is using.

Below is the list of makeup products she used to create the sliced face look on herself:

1) A brown eyeliner pencil.

Gabrielle recommends using a color that’s close to your complexion! Because you want the final product to appear realistic, don’t use a black eyeliner pencil. The color will be too harsh, and will give you trouble when trying to blend it into your natural skin tone.

2) Body paints.

Gabrielle uses some of the Paradise Paints by Mehron. Specifically, she chooses the white, black, and red colors. If you don’t have access to body paints, Gabrielle suggests using everyday makeup items in their place, such as:

  • Red lipstick
  • Eyeshadows
  • Eyeliners

Basically, use whatever you have at your disposal!

3) Brushes.

Because you’ll need to be precise in certain parts of this look, arm yourself with some smaller brushes! This will help you have the most control over your product, especially when coloring in between tighter lines. A reliable shader brush will also come in handy, too!

4) Eyeshadows.

Try to match the shades you use with the paint hues you select for this look. For example, Gabrielle sticks to red, black, and brown eyeshadows.

Let’s Recap!

Notice how Gabrielle has already created a bright, purple smoky eye before starting her tutorial. You can feel free to do this look with a bare face, if you’d prefer. However, if you’d like to spice it up with a bit of a glamorous twist, you can first create a smoky eye of your choosing.

Now, let’s start breaking down this special effects makeup look!

Step 1: Creating the Outline

Gabrielle begins by taking her brown eyeliner pencil and lightly outlining her face. From there, she begins creating additional lines and loops on the main parts of her face (i.e. nose, cheeks, jaw, forehead, etc.).

Many of her lines connect with each other, and add dimensional depth. This step is creating the overall design of your sliced face look.

Remember: As you follow along with Gabrielle, leave spaces between the lines, wherever she advises you to! These gaps will be filled in with a different color later.

Note: You can play around and have fun with the way you outline your face! You don’t need to follow the exact design that Gabrielle is doing. Just remember that asymmetry is key to this look! You don’t want everything to be perfectly balanced on both sides of your face. After all, you’re trying to create the illusion that your face has been slashed!

Step 2: Filling in With Red Paint

Now that Gabrielle has finished the initial outline, it’s time to go in with her red SFX paint! This is going to really help define each of the sections she’s drawn, and make them pop.

Since her paints are water-activated, she sprays a bit of water onto the lid, before wetting her brush and dipping it into the paint.

Then it’s time to apply the paint onto her face! Notice the way Gabrielle carefully follows the outline when filling in her desired sections. For those tighter sections between the lines, use a thin brush.

Step 3: Shading with Black Paint

Once Gabrielle has finished with the red paint, it’s time to fill in the larger sections with black. You’ll notice how these black sections are strategically placed around the outer part of Gabrielle’s face, such as her jawline, temples, and upper forehead. This is so that Gabrielle’s face is framed, and made to appear smaller.

Step 4: Adding Depth to the Red Paint

Using a flat shader brush, Gabrielle then uses a burgundy shade to add definition to the red paint from Step 2. Using a light hand, she pats on this darker red just along the upper lines, right below where her natural skin tone starts.

With a small, flat-headed brush, Gabrielle then grabs some black and adds it to all the high points of her red sections. Once you’ve created the initial outline, use your brush to lightly drag the black down into the red. This will help blend the black in, and add even more depth!

Step 5: Incorporating Some Shading

Gabrielle prefers using her flat shader brush (specifically, the Morphe m167) for this step. However, feel free to use your own blending brush of choice!

She then refers to her Morphe Dare to Create Palette, selecting the Stroke (matte warm tan) and Mass (matte chocolate mousse).  Don’t forget to tap off any excess product from your brush, before applying it to your face!

Following along all the lines and curves Gabrielle has already painted on her face, she makes sure to leave a bit of room between the paint and the eyeshadow she’s applying now. For this step, a lighter hand is your best friend! Apply thin, sheen layers, and blend them inward. If you need to add more intensity, do so by adding more of these sheer layers.

The finished result will look like natural shading across your face!

Step 6: Adding More Depth

Taking a slightly darker brown than what Gabrielle used in the previous step, she then goes back in and adds the tiniest bit of depth to the brown shading. To achieve this, she pays close attention to keeping her brush strokes contained to the very outer corners.

Step 7: Creating a Fake Bottom Lip

This step is a lot less dramatic than the subtitle implies, don’t worry. All Gabrielle does here is apply some soft pink liquid lipstick. (Again, feel free to use whichever lip color you want!) When applying this product to the left-hand side of her bottom lip, she extends the coverage a bit further downward.

This creates the appearance of that side of her bottom lip being larger than it actually is.

Step 8: Highlight with White Accents

Here, you can use white eyeliner, white paint, a lightly-toned concealer, or whatever you most prefer! Just ensure that it’s a light shade, in order to best create the highlighting effect.

With a thin, fine detail brush, Gabrielle uses white body paint to draw thin accent lines throughout her design. Lastly, Gabrielle stipples tiny white flecks into the red section, before blending them with her finger.

The purpose of this final step is to make all those red and black sections really stand out. It also gives the overall look an extra level of profundity!

And just like that, you’re done!

Did you enjoy this special effects makeup tutorial? If so, check out Gabrielle’s other tutorial, where she demonstrates how to create a bejeweled skull!

Tried this tutorial on yourself? Let us know how it turned out in the comments below!

Want to become an SFX pro? Enroll today in QC’s leading online Special FX Makeup Course, and earn your International Special FX Makeup Professional certificate within 3-6 months!

How to Find the Right Dermatologist for YOU!

By Skincare No Comments

Fun fact: I’ve been dealing with acne since I first hit puberty. The first few years were pretty horrible. As I entered high school, it at least tapered down enough that I no longer appeared perpetually shiny.

Growing up, I clung to the precious belief that one day, once I was older, my skin would finally start cooperating. But now that I’m nearing 30, I’ve realized that “perfect” skin doesn’t magically come to all of us with age. Many of us require additional, professional assistance.

This is where a dermatologist can come in!

Let me start by making the following very clear: if you experience skin issues, there’s nothing wrong with you. You’re still beautiful, just as you are! And hey, don’t feel like making any changes. Nothing wrong with that at all!

But if you are someone who wants a little extra help, this article is for you. Together, let’s take a look at 7 things you should consider when searching for your ideal dermatologist.

Finding the Right Dermatologist in 7 Easy Steps

1. Determine Your Skincare Needs

If you’re considering the aid of a licensed dermatologist, it’s likely because your skincare concerns exceed the qualifications of a certified skincare consultant. That being said, not all dermatologists can help you with the same things.

So, it’s important to narrow down what exactly it is you’d like help with. This will allow you to narrow down the type of dermatologists you should research.

For example, any of the following skin conditions would require medical assistance from a dermatologist:

  • Severe acne (i.e. Nodulocystic acne, acne conglobata, acne fulminans, Gram negative folliculitis, etc.)
  • Rosacea
  • Psoriasis
  • Actinic keratosis
  • Aggressive skin allergies and/or sensitivity
  • Eczema
  • Melasma
  • Contact dermatitis
  • Vitiligo
  • And much more

In the case of medical dermatological assistance, you may be prescribed some type of topical or oral treatment to help your condition. Creams, peels, and medicated ointments may be the recommended ministration.

On the other hand, any of the following would indicate the need for surgical assistance:

  • Benign growths
  • Impetigo
  • Melanoma
  • Squamous cell carcinoma
  • Basal cell carcinoma
  • And much more

Narrowing down the type of dermatologist you need will help you find your perfect match a lot faster. Your primary care physician should help by recommending dermatologists in your area.

2. Do TONS of Research

It probably goes without saying that your skin is a vital part of your body. The way it gets treated can have a direct affect on your overall well-being. With this in mind, you don’t want just anybody messing with your skin, right?

When searching for the perfect dermatologist, make sure you don’t skimp on your research! When you find a professional that catches your interest, go full detective and gather as much info as you possibly can.

Scour their business website and social media. Importantly, ensure to read their reviews! What past clients have to say about their professionalism and conduct will be critical in helping you decide if this dermatologist is worth your consideration.

Note: Don’t just read the reviews listed on their website. After all, no business is going to purposely market themselves in a negative way. As such, the reviews you see on their website may not always be telling the full picture. Search on more objective platforms for other reviews. Google, Facebook, and Yelp are great examples. Glassdoor offers an easy way to see what past employees have said about the business as well.

Here are some red flags to watch out for when reading reviews:

  • Rude and unpleasant staff
  • Hidden fees
  • Poor bedside manner
  • Unsatisfactory results
  • Lack of professionalism
  • Unrealistic promises
  • Suspicious pricing structures

Some doctors and dermatologists can be known to discriminate based on gender, sexuality, race, etc. They may dismiss some individuals’ concerns as being ‘exaggerated’ or ‘hysterical’. It’s worth carefully paying close attention to reviews, in order to find a medical professional who’s willing to take ALL patients seriously!

3. Make Sure They Have Experience with ALL Skin Tones and Types

Not all dermatologists are thoroughly familiar with wide varieties of skin colors and/or types. If you have a specific skin type, or a medium to dark skin tone, this can have an impact on your dermatology needs.

As part of your research, take extra care to find a professional who has plenty of experience dealing with such issues as:

  • Hyperpigmentation
  • Excessive scarring
  • Keloids
  • Different skin types (i.e. dry skin, oily skin, combination skin, etc.)
  • Different skin tones (i.e. light skin to darker skin tones, etc.)

If your dermatologist isn’t equipped to handle your unique needs, the results could potentially be disastrous. The last thing you want is for your issues to get worse, thanks to a misinformed skincare expert.

4. They Should Factor in Your Medical History

Most skin conditions are not isolated in nature. That is to say, there are often additional medical factors that need to be considered as well.

For instance, what is your diet like? Do you get enough sunlight, or drink enough water? Do you smoke, or drink excessively? Are you currently on any medications that could be contributing to the state of your skin? Do you have a history of disease or hormonal imbalance to consider?

If a dermatologist doesn’t seem to care about your medical history or general lifestyle, this is a BIG red flag! These are all major components in skincare. A proper expert will know this.

5. Check their Qualifications

A professional skincare consultant will most often have either a cosmetology license, or a reputable certification (such as from an online makeup school). Similarly, you want to make sure that you ONLY work with a dermatologist who has the proper credentials.

Most skincare experts will publicly list their qualifications right on their website. Of course, there are other ways you can double-check their credentials. The simplest option is to check into your country’s dermatology association or board. This will allow you to verify their certification(s), as well as the legitimacy of their expertise.

6. Schedule a Consultation

If it’s possible to safely meet with a dermatologist for an in-person consultation, this is always a smart move. However, if social distancing rules are still in effect, or you’re not yet comfortable making this kind of in-person appointment, check to see what other options they offer.

For instance, virtual consultations can be extremely effective, too. In the midst of a pandemic, they allow you the opportunity to speak directly with your dermatologist of choice – all from the comfort of your own home!

Consultations are important for a number of reasons. They give you the chance to tell the dermatologist about you and your skincare needs, as well as ask any questions you wish to have answered. The purpose of this consultation is for you to get a proper feel for one another.

Can this dermatologist successfully address and assist with your specific needs? Do you get a good vibe from them? Do you feel you can trust them to provide you with satisfactory service?

These are all questions that a consultation will help answer. If, after your meeting, your gut is telling you that this ISN’T the right dermatologist for you, don’t hesitate to listen to it! It’s better to take your time and find the right match, than to rush it and be disappointed with the outcome.

7. Take a Skincare Course

Another excellent way to know whether a potential dermatologist is the right fit for you is to gain some professional skincare knowledge yourself! Many accredited online makeup schools and beauty academies will offer extensive skincare training. This way, you can earn your own certification, and become well-versed in matters such as skin types, conditions, and various different treatment options.

No, you won’t have the exact same understanding of skincare as an expert dermatologist, but it’s definitely a start. Plus, having a foundation in skincare training will ABSOLUTELY help you better select the ideal expert, who can best tend to your personal needs!

So, what are you waiting for? Check out QC’s leading online Skincare Course and get started today!

Graduate Feature: Brenda Waters

By Graduate Feature No Comments

Tell us a little bit about yourself!

My name is Brenda Waters. I have a loving, supportive husband, and am the proud mother of two doctors. I also have five beautiful grand-babies!

I was born on the beautiful island of Barbados, and migrated with my family to New York City at twelve years of age. In 1990, after earning my baccalaureate degree in nursing, I commissioned into the United States Air Force.

From there, I left New York City and started exploring the world!

Why did you decide to earn your makeup artist certification and become a professional MUA?

As a child, I possessed compassion, as well as a desire to provide comfort and encouragement. This is why my original career choice was to become a nurse. As a nurse, I fulfilled my calling by caring for people, and helping them improve their lives.

As of this summer, I’m proud to say that I’m completing a successful, 30-year career as a military nurse. I decided that from there, I will embark on a new journey! I’ll enhance the lives of others by becoming a professional makeup artist.

This path will allow me to fully evolve, and walk on the path that God has set for me.

I look forward to blending my military nursing experience with my vast knowledge of skincare and cosmetics. My goal is to showcase my clients’ natural radiance, so that they may present their “best” for any opportunity or occasion!

What’s the meaning behind your business’s name, KQBawi?

My goal is for EVERYONE I touch to feel like Kings and Queens! This is where the first two initials (KQ) in my business name are from.

“Bawi” stands for Brenda, Adrion Waters Inc. These are my husband’s and my initials. I combined all the letters together to create an exotic, elegant, and classy name.

Ultimately, these are the ways I want my clients to feel.

How would you describe your makeup style? Do you have a particular niche?

I am an educator. I teach clients how to enhance their natural beauty for a professional look, suited for work or social events.

However, I love to add an extra spark or “shine”, too. This can transform that everyday look into red carpet glamour; perfect for an evening out with friends, or any sort of special occasion!

As you mentioned, you’ve served as a military officer and nurse for the past 30 years. From the bottom of our hearts, we thank you for your service! What practices, values, and work ethics would you say you’ve taken from your military experience and incorporated into your makeup career?

I have extensive experience caring for people, as well as organizing both formal and informal ceremonies. Moreover, I’ve applied and provided makeup education to VIPs and business associates.

I also have an excellent track record of customer service. This is evident by repeat customers, who return not just for my artistic skills alone, but also for tips to expand their use of cosmetic products.

I have lived in multiple countries, thus creating a vast pool of contacts, both nationally and internationally. Europe, Canada, Asia, and the Caribbean are just a few examples!

I intend to devote myself as faithfully to my clients as I did when in the military!

Your business specializes in working with battered women and underprivileged girls. This is truly inspirational; thank you for giving back the way you do! Why did you choose to devote your makeup career to this cause, and what type of work does this typically entail?

As a nurse, I found joy in healing wounds and restoring health to people in need. Moreover, I once was a battered woman myself. Before that, I was an underprivileged teen.

During those periods of my life, I wished that I had someone to make me feel good about myself, and teach me I matter. So, I have made it one of my life’s goals to make EVERY effort to do what I wish someone had done for me.

I relished the opportunity to rebuild self-esteem and confidence in these young ladies!

By teaching them the benefits of makeup, it reveals their outer and inner beauty. This can start the rehabilitation process, and provide strength for them to overcome their situations.

It’s so rewarding to witness these ladies’ attitudes and confidence transform exponentially. Plus, it was also a wonderful outlet for me to give back to my community!

KQBawi also offers organic skincare products for purchase. What is your holy grail skincare product, and why?

After traveling around the world and trying many different products, I ultimately chose Soielle’s natural, organic skincare products. The Soielle products are incredible at cleaning, soothing, and brightening my skin!

My husband and I also use them to treat multiple skin conditions. For example, my husband used Soielle’s black soap and mango butter to relieve his inflammation and discomfort from razor bumps. He also used mango butter to reduce the appearance of fine facial lines.

As for me, I use the black soap and castor oil to remove my makeup and clean my makeup brushes. Soielle’s natural butters (Shea and mango butter) are the best for:

  • Moisturizing
  • Anti-aging components
  • Anti-inflammatory treatments
  • Regenerating skin cells
  • Protecting natural products
  • And so much more!

I find that these skincare products best protect my skin from UV sunlight and harsh climates. For example, the Shea butter is a natural ingredient already existing in everyday body, hair, lip balm, and lotion products. I utilize all these items, and I am always looking for different manners to employ them.

If I didn’t truly believe in Soielle’s products, I would not offer them on my website!

The services you offer clients are very eclectic; ranging from full face applications to bridal makeup, to airbrush makeup, to makeup specifically for men, and so much more! Of all the types of makeup and beauty services you offer, is there a particular favorite you most enjoy doing?

I aim to be all-inclusive. I love providing all of these services!

However, my favorite specialty is creating the evening or special occasion look. This isn’t a quick, everyday look, nor is it the extensive bridal makeup service. Rather, it falls somewhere between the two.

In my experience, this is the look most of my clients prefer. My clients often request something a little more than their everyday professional/work makeup, but not too much as what they’d wear for a formal event.

You graduated from QC’s Master Makeup Artistry Course back in 2015. Since graduating, how has your training and makeup artist certification helped you in your professional career?

I loved my training from QC Makeup Academy! I refer to it all the time!

If I receive a request that I have not performed in a while, I actually refer back to my QC Academy books as part of my research. As I work to initiate and further my business now, I’ve even been implementing the QC Academy Business Plan template!

What ONE piece of advice would you give aspiring makeup artists who want to one day launch their own business?

Conduct your research on what, where, when, and how your business will provide services. Then complete all the administrative paperwork, such as a business plan, business registration, website, etc.

By doing all of this, it’ll free your mind. You’ll have more room to create your artistic work, and start working towards what you envision your business to be!

What made you want to earn your makeup artist certification online, and why did you ultimately choose QC Makeup Academy?

I always loved makeup, and often applied it to my family and friends. But I wanted to learn more! I wanted to develop and incorporate more techniques, along with different looks and styles. I also wanted to properly learn how to work with colors.

I originally went to the makeup stores like Sephora, MAC, and Ulta, and applied for jobs. But I couldn’t find employment. I even offered to work as an assistant to other makeup artists for free, but that didn’t work out.

Determined not to give up, I attended a bunch of free makeup classes on various topics. I just wanted to learn!

So, one day I was doing some extensive research on the internet, looking for makeup schools. In doing so, I came across QC Makeup Academy! They offered the courses I wanted,. Best of all, I didn’t have to take extracurricular classes, like I would’ve needed to in cosmetology schools.

I called QC and spoke with a very nice lady, who assured me that I would only be enrolled in makeup classes (with no hidden gimmicks). From there, my adventure began!

What’s in store for KQBawi in the next year?

KQBawi is a freelance makeup business, strategically located in the DC, Maryland, and Virginia area. My aim is to provide clients with professional and/or casual looks for ALL occasions.

I’m looking to attract as many customers to my business in the first year as possible. So, I am working to build a solid business structure. This way, I can achieve my desired goals and objectives.

My biggest goal being: meeting and exceeding the expectations of my clients!

Inspired by Brenda’s story? Write your very own! Enroll today in QC’s Master Makeup Artistry course today, and get certified in as little as 3-6 months!

Why Other Makeup Artists Are Your Friends, Not Enemies!

By From the Experts, Your Makeup Career One Comment

Australian MUA, Charlotte Ravet, is the proud owner of her very own hair and makeup business. From bridal, to editorial, to film and television, and everything in-between – Charlotte provides a wide variety of services that cater to all types of clientele!

Her extensive resume includes working for Prada, L’Oreal, and even the cast of the hit show, Glee! A developer of educational programs, Charlotte has even been awarded Best Makeup Educator of the Year by the Australian Industry Makeup Awards.

Here, she explores the many reasons why your fellow makeup artists are some of your best allies within this industry!

“It’s a small industry!”

If you’re a beauty lover who’s currently learning makeup, and who has dreams of becoming a pro MUA, be ready to hear this sentence every day!

Yes, it’s a small industry. This much can’t be denied. But as an international makeup artist myself, I can testify that there are no borders. In reality, it’s a WORLDWIDE industry! As makeup artists, the level of passion we have for our craft is ultimately what brings us together, and makes the industry seem small by comparison.

So, why does this matter? After all, isn’t it great to work in an industry where people get to know each other so quickly? Yes, of course it is!

But there is one thing you’ll need to be ready to deal with: competition.

The fact is, there will always be someone you’ll envy within this line of work. Whether it’s because of her resume, her success, her connections, or her skills. The real question is: is it bad to be a bit jealous?

No, it is not. I’m personally not jealous by nature. But I am giving myself career goals, in order to reach the same level as the artists I admire. Once I decided to approach my career with this positive mindset, I quickly discovered the importance of networking and sharing.

Even more importantly, I realized just how supportive the makeup artist community can be towards others! Just because other MUAs are technically your ‘competition’, it doesn’t mean they’re your enemies. The two don’t need to be synonymous!

In fact, one of the most valuable things you can possibly be taught when learning makeup is that your competition are actually your FRIENDS!

Why You Should Make Friends with Your Competition

Honestly, there are too many reasons to name. If I tried, we’d be here all day! But I can definitely come up with a few of the most important ones.

Here are a just some examples of how you can support – and get support from – this wonderful community:

1. Other Artists Can Become Part of Your Network

Ever since the early days of my professional career, I’ve always valued my network. I was lucky to have a successful start in TV makeup, right after I finished learning makeup and earning my certification. When I was booked for other jobs afterwards, I always recommended other artists.

The TV productions appreciated that I didn’t let them down. In the same breath, other artists would recommend me for work whenever they could. A good rule of thumb to abide by is this: always recommend someone you know will be the best for the job.

Don’t be scared that the artist could steal your clients! Remember: self-confidence is key!

My network works in the same way that my private relationships do. Just because you have a close friendship with one person, it doesn’t have to mean that any other friendships mean any less, or will suffer.

The same can be said about your clientele. If you know you’re always doing your best for your client, always make a great impression, and have a secure work relationship with them, why would they try to book someone else?

In this industry, people provide excellent word-of-mouth, and often help each other out. There will always be more potential clients! Plus, professional makeup artists will rarely try to actively seek out and steal your faithful clientele.

If you know someone in your network would be the best fit for a potential job, don’t worry that recommending them will somehow hurt your own career. In reality, this other makeup artist WILL remember your kind recommendation, and they’ll be likely to recommend YOU when a similar opportunity arises on their end.

In the worst-case scenario: if it just so happens that another MUA does steal your contact, well, it was not worth it! All you can do is live and learn. Simply refrain from recommending this makeup artist again in the future.

2. Other Artists Can Help You to Continue Learning

I always strive to continue learning. After that, I plan to learn again, and then again! You get the idea. There’s always something new to discover. Importantly, you often can – and should – learn from others.

I’m an educator, and have taught classes to other makeup artists. Some of them even had 30+ years of experience! Still, that doesn’t stop them from coming to me, and seeing what new and exciting things I can teach them.

Similarly, I always jump at the chance to learn from other skilled experts within the industry. As artists, we should ALWAYS continue in our quest for more knowledge!

There’s no shame to ask for advice. Reaching out to others for help is not a sign of weakness. If anything, it signifies your love of the craft and your dedication to always self-improve. One thing I recommend is involving yourself in online communities! Personally, I love being a part of Facebook groups.

I’m always happy to share some tips, and likewise, learn a lot from the community myself.

3. Your Relationship with Other Artists Strengthens Your Reputation

We have one reputation… and ONLY one!

You can be the best in your game, but if you don’t have support from your industry, this often won’t be enough. Being kind and helpful with others doesn’t cost anything, but it absolutely goes a long way! How you treat others will play a major role in how others perceive you and your business.

You’ll quickly learn that makeup artists who speak badly about others are not the most talented ones. Putting other artists down won’t make you shine. Gossiping about other artists – whether it be to your network or your clients – will only make you look extremely unprofessional.

If you want to build a positive reputation, make yourself known for all the RIGHT reasons. Be kind. Be fair. Have a strong work ethic. These are the best strategies to making a strong, pleasant impression!

4. Other Artists Can Provide Encouragement

Working as a makeup artist can be exhausting! We don’t always fully understand this when learning makeup, but we quickly do once we begin working in the field.

Sometimes, the best people to lift you up when you’re feeling down are the ones who actually understand what it is you’re going through. When I’m feeling frustrated or overwhelmed, I need my “makeup family” to remind me why I’m doing this job. Their support can help ground me, and bring me back to my roots.

They can help remind me why I love this industry so much!

We ALL have our rough days. It’s important to know that it’s okay to not always be okay. In regular life, you need your friends. If you’re struggling, you rely on those who understand you best.

In your professional career as an MUA, this is provided to you in the form of your makeup artists friends!

How to Start Making Friends in the Industry

First, create your network while you are learning makeup. Look around and ask yourself:

  • Are there other artists around you who are sharing your passion?
  • Are you coming into contact with fellow MUAs who inspire you?
  • Are there other artists who seem genuinely happy for you when you succeed?

The nature of your friendship with other industry pros can be as similar (or as different) from a regular, everyday friendship as you want it to be. Remember: not everyone in your professional network will be your new BFF. That’s okay!

Many of the relationships you forge in your career will be of a professional nature. They will help build your network and establish your reputation. With this in mind, you want to make sure that you always give your best, most professional image.

Above all else, present yourself as reliable, organized, and committed to your work!

Another option is to join specialized groups! Here are just a few examples of wonderful Facebook groups that welcome all professional makeup artists:

If you’re a QC Makeup Academy student, graduate, or are simply figuring out if you want to be learning makeup from an online school, I also recommend the QC Makeup Academy Virtual Classroom. This is a fantastic place for you to meet other aspiring MUAs!

Online groups and forums give you the chance to learn from other artists, as well as the opportunity to ask questions. I’ve met a few of my current industry friends through these groups, before we met in real life. They’re an excellent, convenient way to stay connected with the industry, and exchange tips and advice.

Another suggestion is to start assisting professional artists. Assisting is an excellent way to build a relationship with an experienced artist, while also refining your own skill-set. You’ll learn a lot, and have the opportunity to observe and connect with the professional industry!

Food for Thought

These past few months have shown us just how vital respect and kindness are towards others. You don’t need to announce when you are helping someone, or passing on work to another artist, or encouraging someone, or sharing a makeup technique…Acts of kindness will always be able to say more than words ever could.

Competition is real in the makeup industry. But the only rule to remember is that your competition should only push you to be YOUR very best! Competition is not about spending energy to put others down.

We shouldn’t be afraid to sometimes ask for help, whether it be to find work or to improve upon our skills. And if someone judges you? Well, that just means that person isn’t worth being a part of your “makeup fam”!

Your success starts today! So, start being the person – and the artist – you want to be!

Want to start learning makeup, so you can get your career started? Enroll today in QC’s leading international Master Makeup Artistry Course!